BIG GLARING WARNING: IF YOU ARE INSTALLING INCUS ON AN EXISTING HOST, MAKE SURE THAT DOCKER IS NOT AND NEVER HAS BEEN INSTALLED AT THE HOST LEVEL BECAUSE IT WILL CONFLICT WITH THE NETWORK.
Incus is an open source fork of LXD Containers which is supported on linuxcontainers.org. The LXD project will be a Cononical project moving forward. I have a tutorial and a YouTube video entitled LXD Step by Step which covers much of the same content, except for LXD.
In this tutorial we are installing an Ubuntu 22.04 server which we will dedicate to an Incus server. My recommendation is that this be a physical machine or a virtual machine with no less than 4 CPU cores and 16GB of memory. This base recommended configuration should be able to support 10 Incus containers depending on their size.
Realize that the configuration of the zfs storage pool discussed herein needs enough space to host all of your containers.
Download an ISO of Ubuntu Server 22.04 LTS from here.
Balena Etcher can be used to image the Ubuntu Server image to a USB thumb drive of at least 4GB. Get Etcher from here. Your thumb drive will then be bootable to install Ubuntu Server on your hardware.
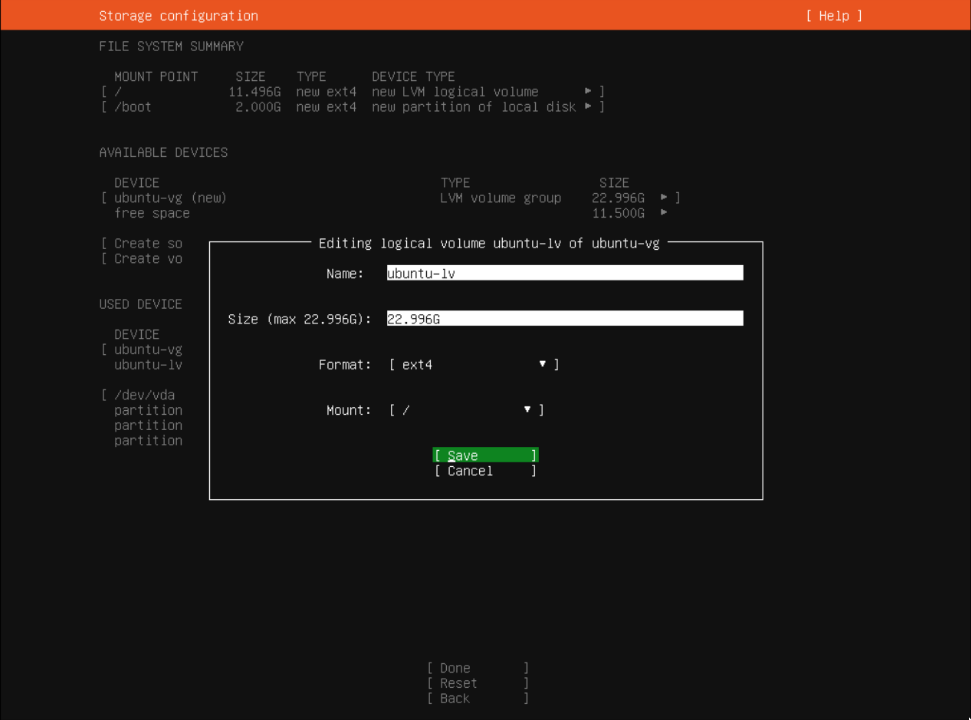
During your installation of Ubuntu 22.04 Server , be sure to expand your root file system to use the entire disk as shown in the video.
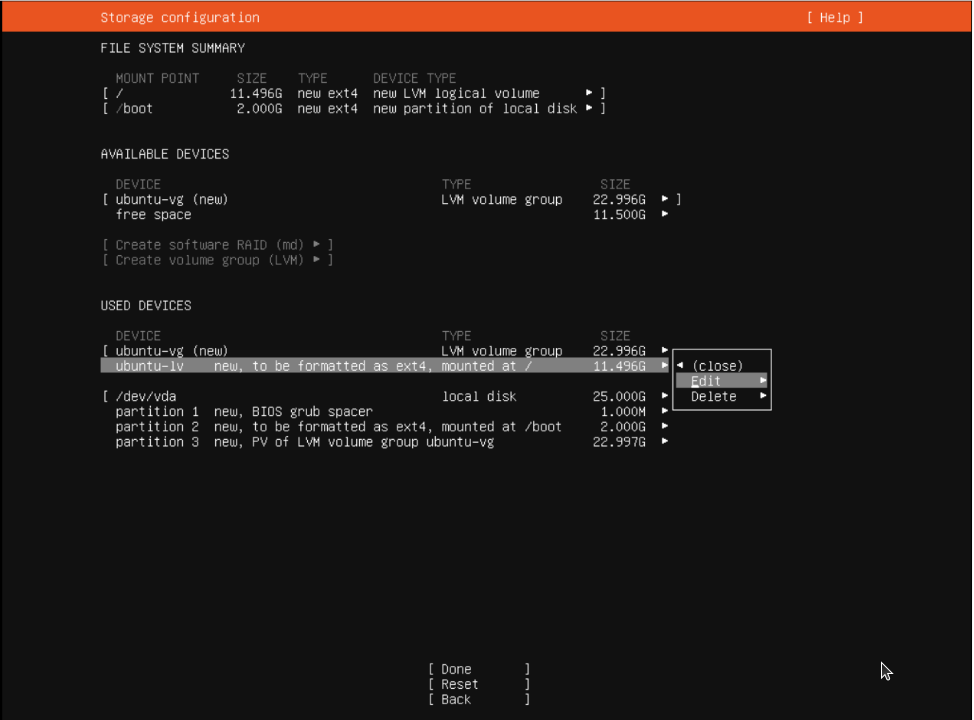
Set the Size of your root (/) volume to whatever the indicated max size is.
Log into your new server via ssh after installation is complete as shown in the video.
ssh 192.168.1.x
We are going to create a software bridge which is sometimes referred to as a virtual switch. Move over to the Netplan folder.
cd /etc/netplan
You can safely delete all of the files in this folder or rename them to *.sav if you like.
Create a yaml file to create the bridge as discussed in the video.
sudo nano 00-installer-config.yaml
Put the following template in the editor session.
network:
  version: 2

  ethernets:
    enp1s0:
      dhcp4: false
      dhcp6: false

  bridges:
    bridge0:
      interfaces: [enp1s0]
      addresses: [172.16.1.91/16]
      routes:
         - to: default
           via: 172.16.0.1
      nameservers:
        addresses:
          - 1.1.1.1
          - 1.0.0.1
      parameters:
        stp: true
        forward-delay: 4
      dhcp4: no
In the above file, change enp1s0 to be the name of your Ethernet device (ip a) in the two locations shown. Change the 172.16.91 address to be your current address and subnet mask (ip a).
BIG GLARING NOTE: Some Linux systems use device eno1 which stands for Embedded Network Onboard. The “o” is a letter and not a Zero “0”. So, the device is “eno1” and not “en01”.
Another Note: your subnet mask will probably be /24 instead of my /16.
Change the via: 172.16.0.1 to be the address of your router and select any name servers that you want to use.
Save the file with CTRL O and Enter and CTRL X to exit the nano editor.
IMPORTANT: Next, install the virtual switch component in Ubuntu Server with the following command:
sudo apt install -y openvswitch-switch
Apply the new network configuration:
sudo netplan apply
If you receive a privilege error from netplan, you may need to change the permissions as in the command below and then try the netplan command again afterwards.
sudo chmod 600 /etc/netplan/00-installer-config.yaml
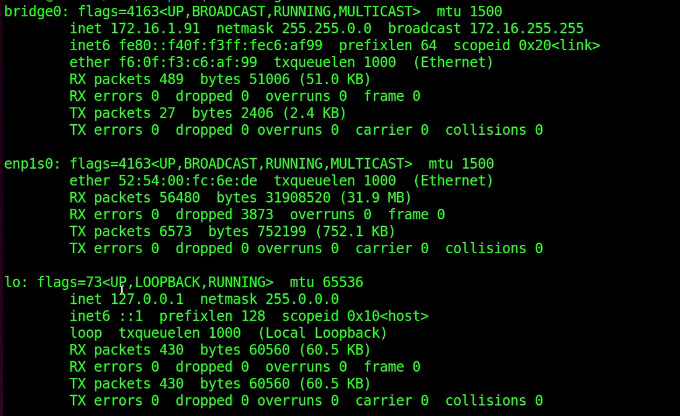
If all worked well, your physical Ethernet adapter (enp1s0 in my example) should no longer have an IP address and you should have a bridge0 device that has your IP address. Be sure to make a DHCP address reservation for this address on your router to prevent it from being reused. Note that this varies in how this is done according to your router model.
Move back to your home folder and change to the root user.
cd
sudo su
Create a folder to store the Incus keys:
mkdir -p /etc/apt/keyrings/
Download the keys to the folder we created:
curl -fsSL https://pkgs.zabbly.com/key.asc -o /etc/apt/keyrings/zabbly.asc
Add the repository for Incus using the keys. Cut and paste the entire code segment into your terminal and press enter.
sh -c 'cat <<EOF > /etc/apt/sources.list.d/zabbly-incus-stable.sources
Enabled: yes
Types: deb
URIs: https://pkgs.zabbly.com/incus/stable
Suites: $(. /etc/os-release && echo ${VERSION_CODENAME})
Components: main
Architectures: $(dpkg --print-architecture)
Signed-By: /etc/apt/keyrings/zabbly.asc

EOF'
Update the repositories.
apt update
Exit out of root back to your account on the server.
exit
Install incus:
sudo apt install incus -y
To support the GUI for Incus Virtual Machines, you will also need to install the viewer:
sudo apt install virt-viewer
Put your user into the incus admin group and verify:
sudo usermod -aG incus-admin scott
newgrp incus-admin
groups
Install zfs support to your server.
sudo apt install -y zfsutils-linux
Reboot your server before continuing.
sudo reboot now
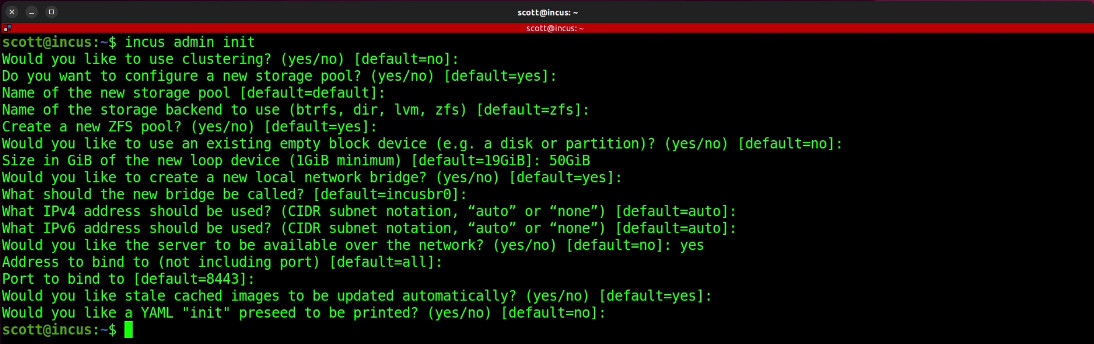
Log back into the server and setup incus for first time use. Watch the video for details:
incus admin init
You can list containers with:
incus list
At this point the list is empty because we have not created any containers.
To list all of the images available from which containers can be created:
incus image list images:
To create a container:
incus launch images:ubuntu/22.04 first
The above container is on an internal NAT and has outbound access through “incusbr0”, however it cannot be reached from your LAN because the address is private to the incus server.
To create a container with an address on the main LAN, you must create a profile that uses our bridge0 virtual switch we created using netplan earlier.
incus profile create bridgeprofile
incus profile device add bridgeprofile eth0 nic nictype=bridged parent=bridge0
We can now use the bridgeprofile to create a new container with an address on your LAN:
incus launch images:ubuntu/22.04 second --profile default --profile bridgeprofile
My main LAN DHCP range is on 172.16.1.x.
incus list

You can stop an incus container:
incus stop first
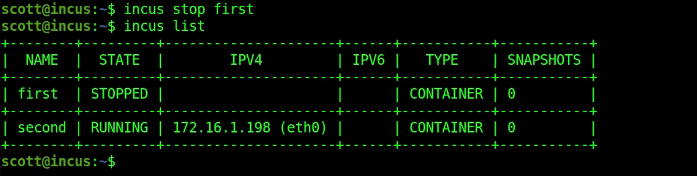
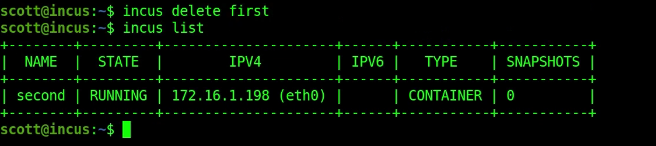
You can also delete an incus container:
incus delete first
You can connect to an incus container to interact with it.
incus shell second
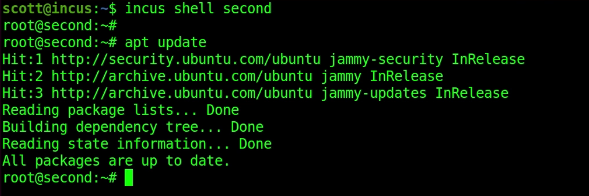
Incus containers are functionally equivalent to any operating system container and they provide a lean and efficient virtual environment in which to host applications.