Incus containers and Incus Virtual Machines store their data in the default storage pool that is created when you installed Incus. You can use storage pools in other ways and even create supplemental storage pools.
In December of 2023, I presented a video tutorial entitled LXD Storage Pools & Volumes. This tutorial is a follow-on to that one, however this time we focus on Storage Pools in Incus.
The initial storage pool for incus is named “default” by default and is created when you perform “incus admin init” which I covered in Incus Containers Step by Step.
You can list the storage pools on your incus server with the following command.
incus storage list

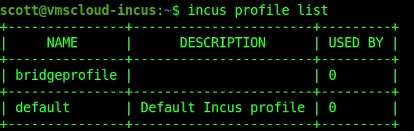
Profiles are also stored in the storage pool and you can list your profiles.
incus profile list
Volumes are created to store the data for a container or virtual machine. You can also create volumes to store other data and volumes are stored in the storage pool. To list the volumes in the default storage pool:
incus storage volume list default

When you create a container for the first time, it will download the image required for that container from linuxcontainers.org. For example, the following command will download the image for an Ubuntu 22.04 container and that image will be stored in the default storage pool and can be used to create future containers.
incus launch images:ubuntu/22.04 container1
Note that the image will still be stored in the storage pool even if the container is deleted. This allows for future containers that use the same image to be created without the need for a download of the image.
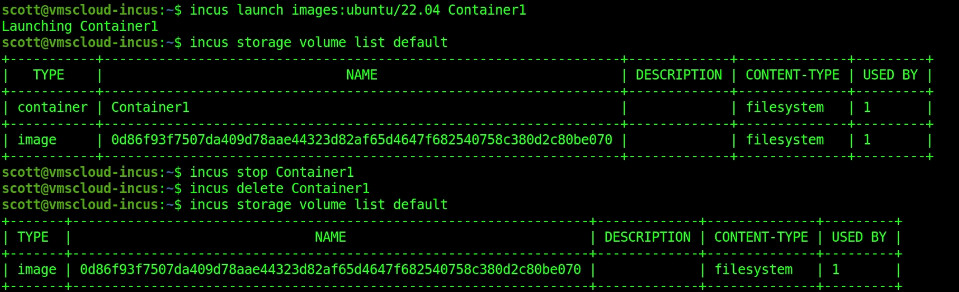
In the video, I recreated “Container1” to point out how fast the container is created since the image is already local. Next, I created an incus virtual machine:
incus launch images:ubuntu/22.04 test-vm --vm
List the current containers.
incus list

Containers download images from linuxcontainers.org that are filesystems and these are stored in the storage pool. A container creates a file system to store its data. Incus virtual machines download an image that is instead a block oriented data structure and an incus virtual machine stores its data in a block oriented “volume”.
List the volumes in the default storage pool:
incus storage volume list default

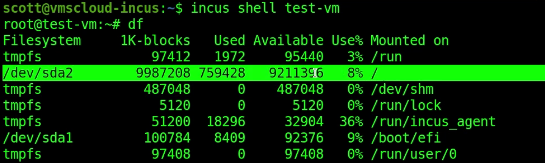
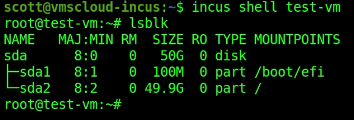
By default, when you create an Incus Virtual Machine, the default block oriented file system is 10GB. We can see this by listing the size inside of the virtual machine.
We can enlarge this volume with the command:
incus config device override test-vm root size=50GiB
To realize the new enlarged space, restart the VM:
incus restart test-vm
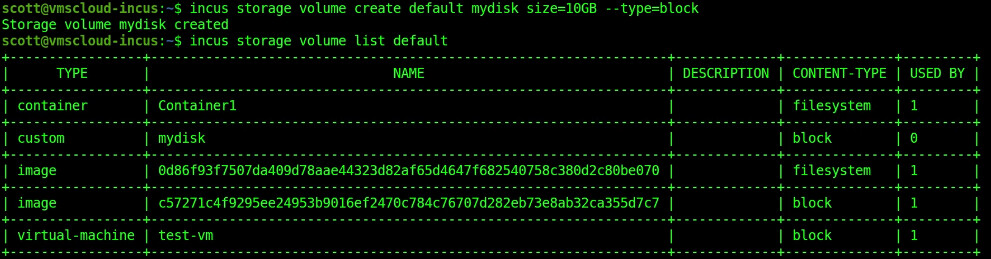
We can create additional storage volumes in the default storage pool. For example:
incus storage volume create default mydisk size=10GB --type=block
Examine the block storage inside of our test-vm.
incus shell test-vm
Exit back to the incus server.
exit
Attach the new volume to the test-vm.
incus storage volume attach default mydisk test-vm
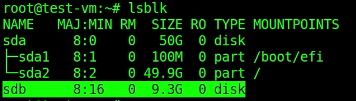
Go back into the container and list the block oriented storage.
incus shell test-vm
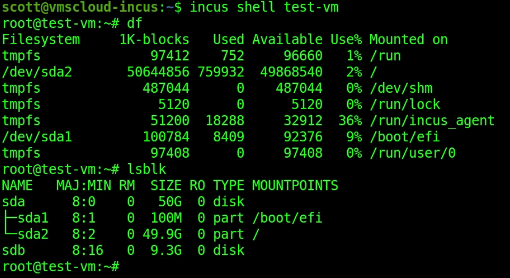
The new volume is “sdb”.
I have a tutorial entitled Linux Disk Drives which goes into setting up a drive.
To set up my new disk drive I need the partition management tool.
apt install parted
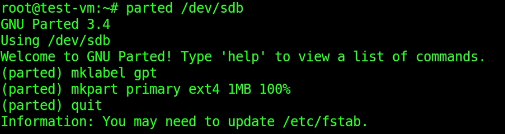
Run parted to manage the new “sdb” device.
parted /dev/sdb
Create a GUID partition table.
mklabel gpt
Create a primary partition to use the entire space on the new volume and quit out of parted.
mkpart primary ext4 1MB 100%
quit
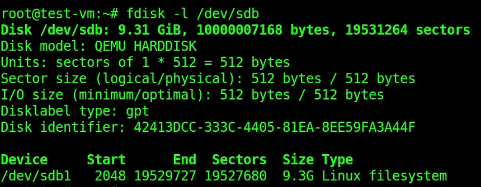
To list the new partition.
fdisk -l /dev/sdb
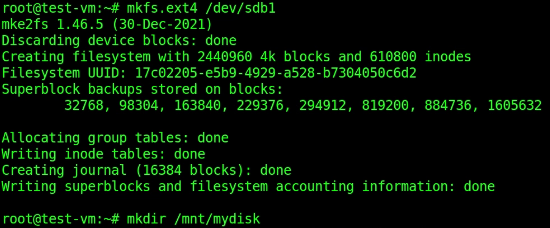
Format a file system on the new partition.
mkfs.ext4 /dev/sdb1
Create a mount point folder for the location in which to mount the new filesystem.
mkdir /mnt/mydisk
Mount the partition.
mount -t auto /dev/sdb1 /mnt/mydisk
![]()
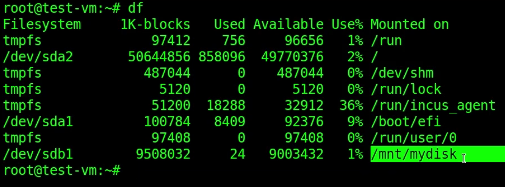
Examine the mounted file systems to see that “sdb1” is mounted.
df
Exit the VM back to the incus server.
exit
You can detach the storage volume from the VM with the command:
incus storage volume detach default mydisk test-vm
It is possible to attach this storage volume to one or more incus virtual machines at any time. Just note that any file locking is the responsibility of the applications using the data.
The data is a storage volume is retained and not lost when it is detached from an incus VM because the volume exists in the storage pool.
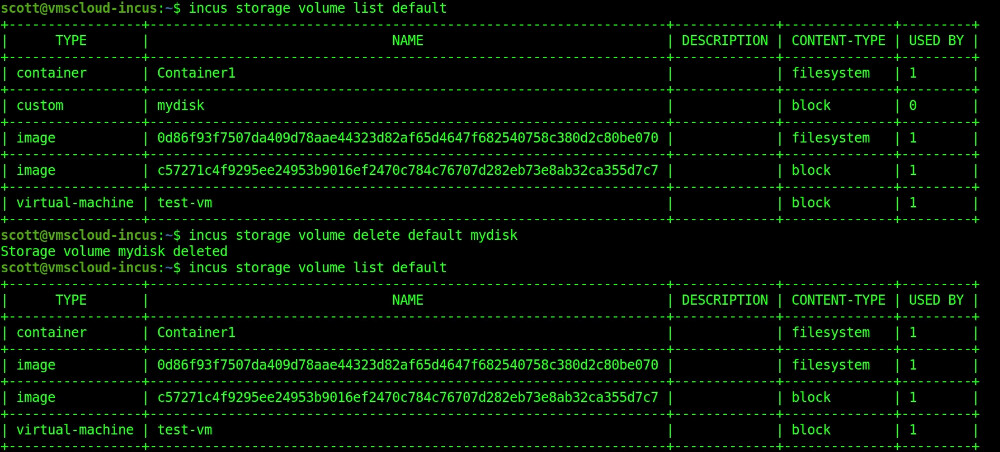
You can delete a volume as long as it has been detached from all VMs using it. If you delete a volume, all data in it is lost.
incus storage volume delete default mydisk
When you are dealing with incus containers (as opposed to VMs) and you want to share storage outside of the container, the method is somewhat like how docker does this.
Recall that I still have “Container1” running. Let’s connect to Container1 and create a user account inside of it.
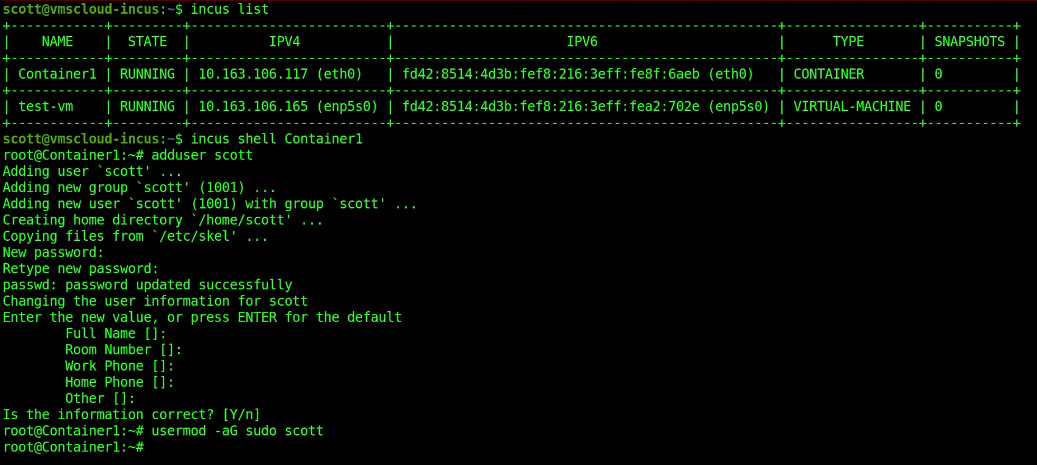
Inside of the container, move over to your new user account.
su - scott
Create a folder on the home directory for the user.
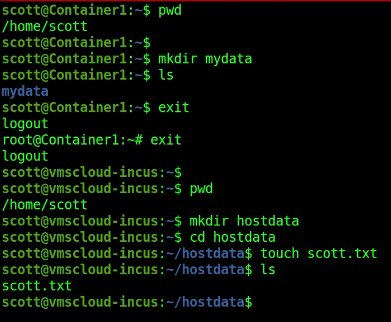
mkdir mydata
Exit completely out of the container back to the incus server.
exit
exit
You should be on the home folder of your incus server (not the container, because we exited it). Create a folder called “mydata” and create a file in it.
mkdir hostdata
cd hostdata
touch scott.txt
Connect the folder inside of the container to the folder on the incus host. Be sure to use the entire path as shown:
incus config device add Container1 mydata disk source=/home/scott/hostdata path=/home/scott/mydata
Let’s add a second file to the host folder on the incus server side.
touch example.txt

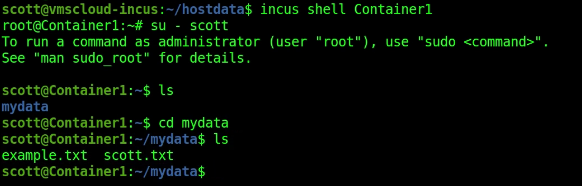
Connect to the container, move to the account, move into the mydata folder and list the files:
incus shell Container1
su - scott
cd mydata
ls
![]()
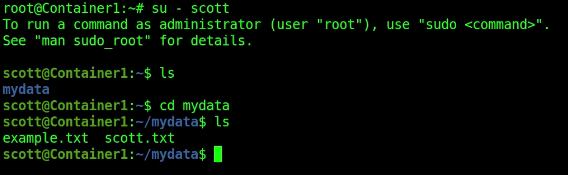
This is great for accessing host data from inside of the container. However, at this point the data is readonly from the container side. You cannot create files from the container.

Exit the container back to the incus host.
exit
exit
To make our “shared” folder read/write we need to make some changes to the subordinate GID table. List the table:
cat /etc/subgid

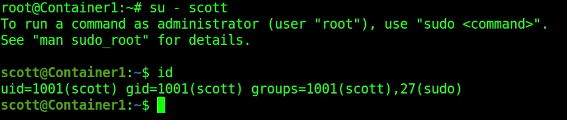
Find out what your GID/UID is on the incus host.
id

Add your GID to the subordinate GID table with a command like the following:
echo "root:1000:1" | sudo tee -a /etc/subuid /etc/subgid

When you create a container, it is created with an “ubuntu” account that has no password. When you create your first user account, it is created with UID/GID 1001.
![]()
Still on the incus server level (not in the container) we now need to map GID 1001 inside the container to GID 1000 outside of the container for “Container1”. Here’s the command:
incus config set Container1 raw.idmap "both 1000 1001"
To make the mapping active, restart the container.
incus restart Container1
Connect back to the container, move to the user account and into the mydata folder:
incus shell Container1
su - scott
cd mydata
You can now create and delete files from the container because you have write access.
touch scott2.txt
rm example.txt
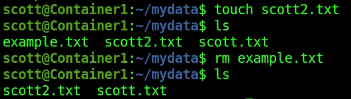
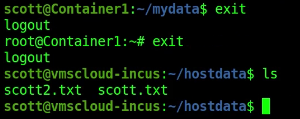
Exit out of the container back to the incus host and list the files.
exit
exit
ls
To show the “mapped folder associations” use the following command:
incus config device show Container1

To disconnect the file mapping for the mydata folder back to the host, use this command:
incus config device rm Container1 mydata

You can also connect USB devices like thumb drives or USB disk drives to incus containers.
In my example, I am listing all my USB devices on an Incus host and one of them is an external USB disk drive. I am going to associate a USB external disk to an Incus VM named “Desktop”.
lsusb
Note the vendor ID and the product ID of the drive which I have highlighted.
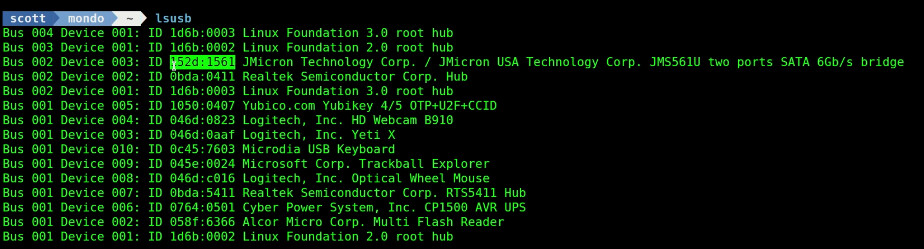
To associate this USB device with my incus vm called “Desktop”, I used the following command and I gave my USB device the arbitrary name of “external-disk”:
incus config device add Desktop external-disk usb vendorid=152d productid=1561
NOTE: Had I wanted to associate the USB disk drive to a container and not a VM, I would have mounted the USB device to the incus host and used the previous technique I demonstrated.
Connect to my incus VM through the GUI:
incus start Desktop --console=vga
The USB device (which is a “Sabrent” branded device interface) shows up.
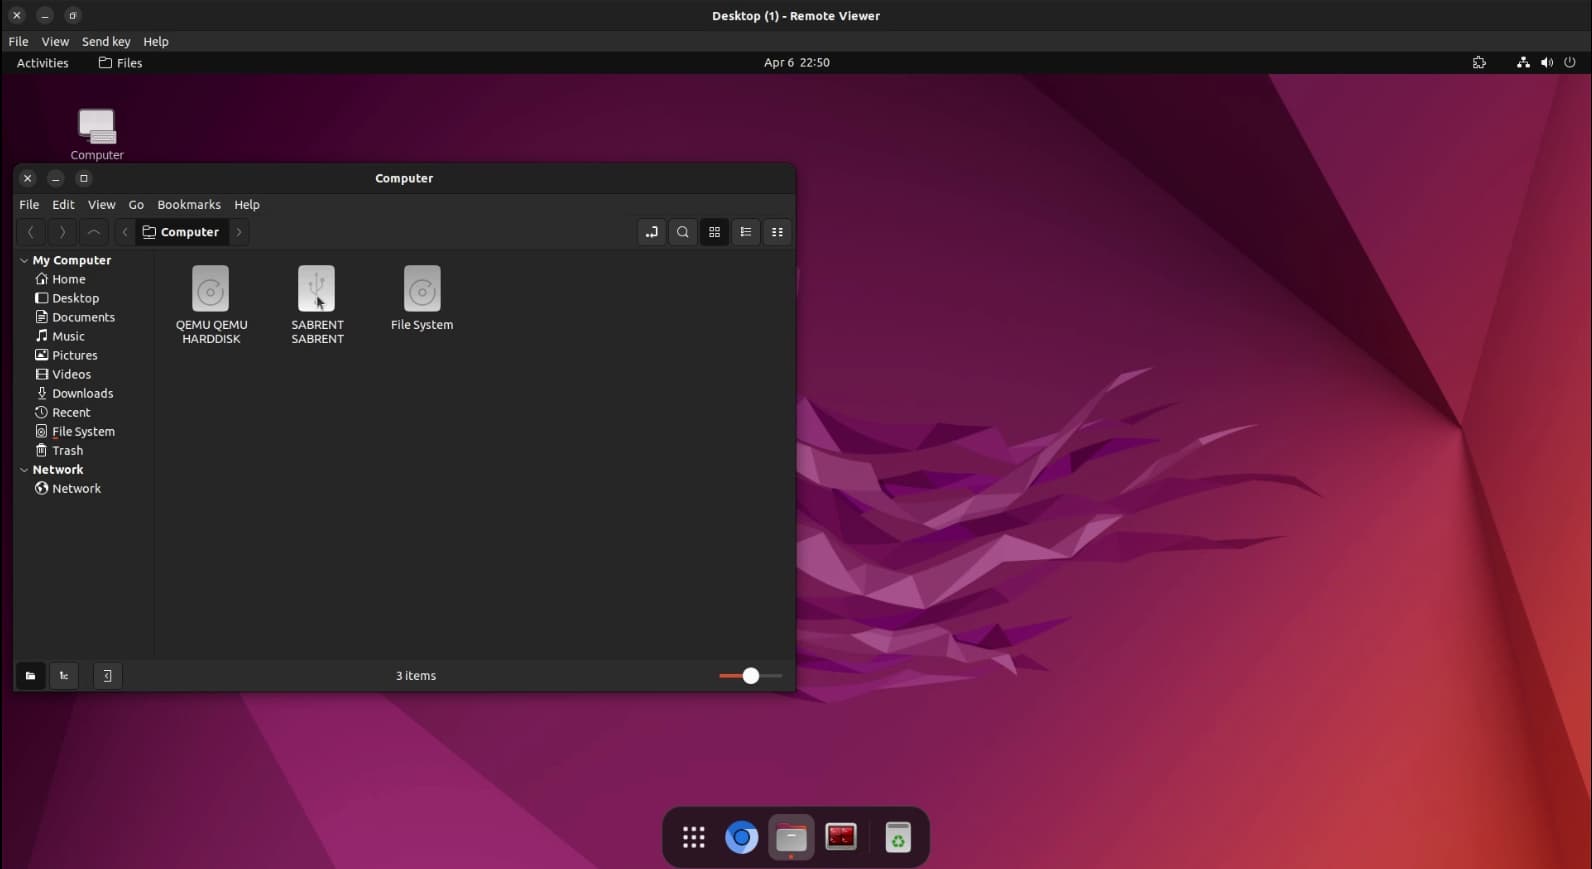
This external USB disk drive has never been formatted and does not even have a partition table.
An “lsblk” command reveals that the drive is showing up in the incus VM named “Desktop”.
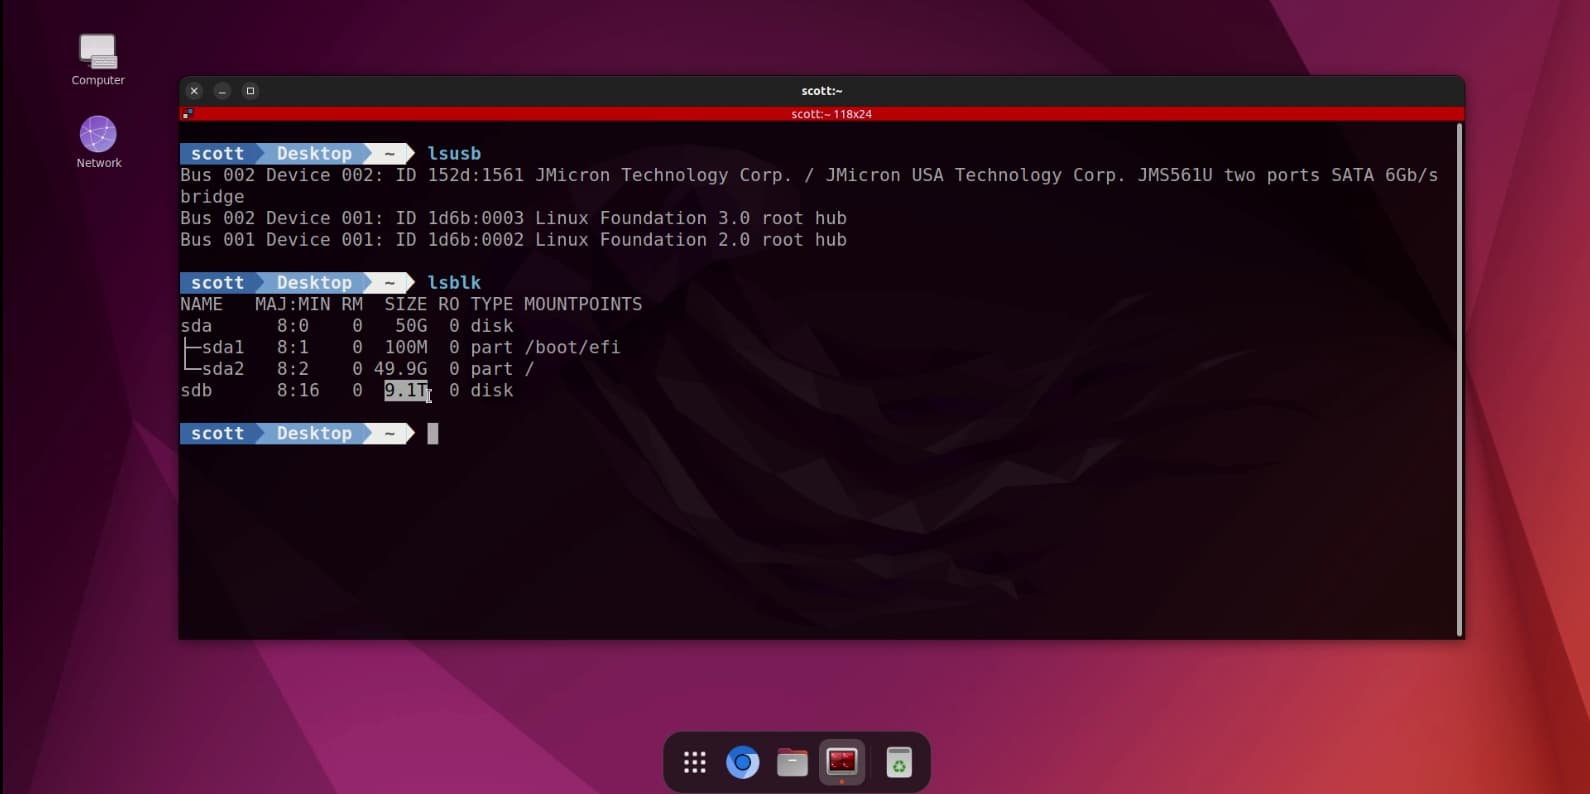
The new device is “sdb”.
Create a mount point as you would for any drive:
sudo mkdir /mnt/external
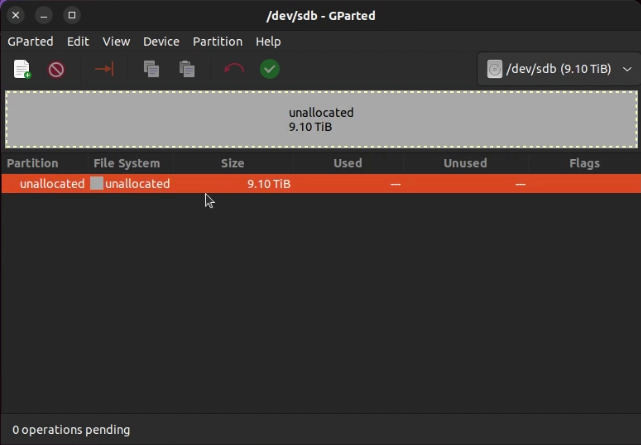
We need to create a partition table, a primary partition and a file system on the partition before we can mount the media since its a new drive. Rather than using “parted” to do this, we will use the graphical program “gparted” since we have a GUI interface in the VM.
Launch “gparted” from the app drawer and select “sdb” from the gparted pull down menu in the upper right. You will see that the drive is unallocated.
Go to the partition menu and select “New” to create a new partition table.
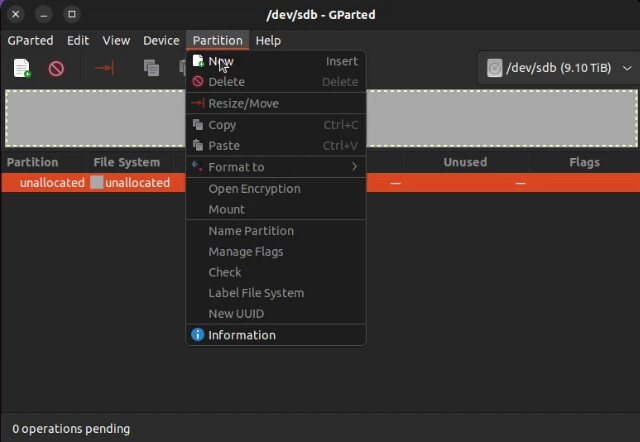
This will default to creating a primary partition table that uses all the drive space and that’s good. Click “Add”.

Click the Green check mark to commit the changes to the disk.
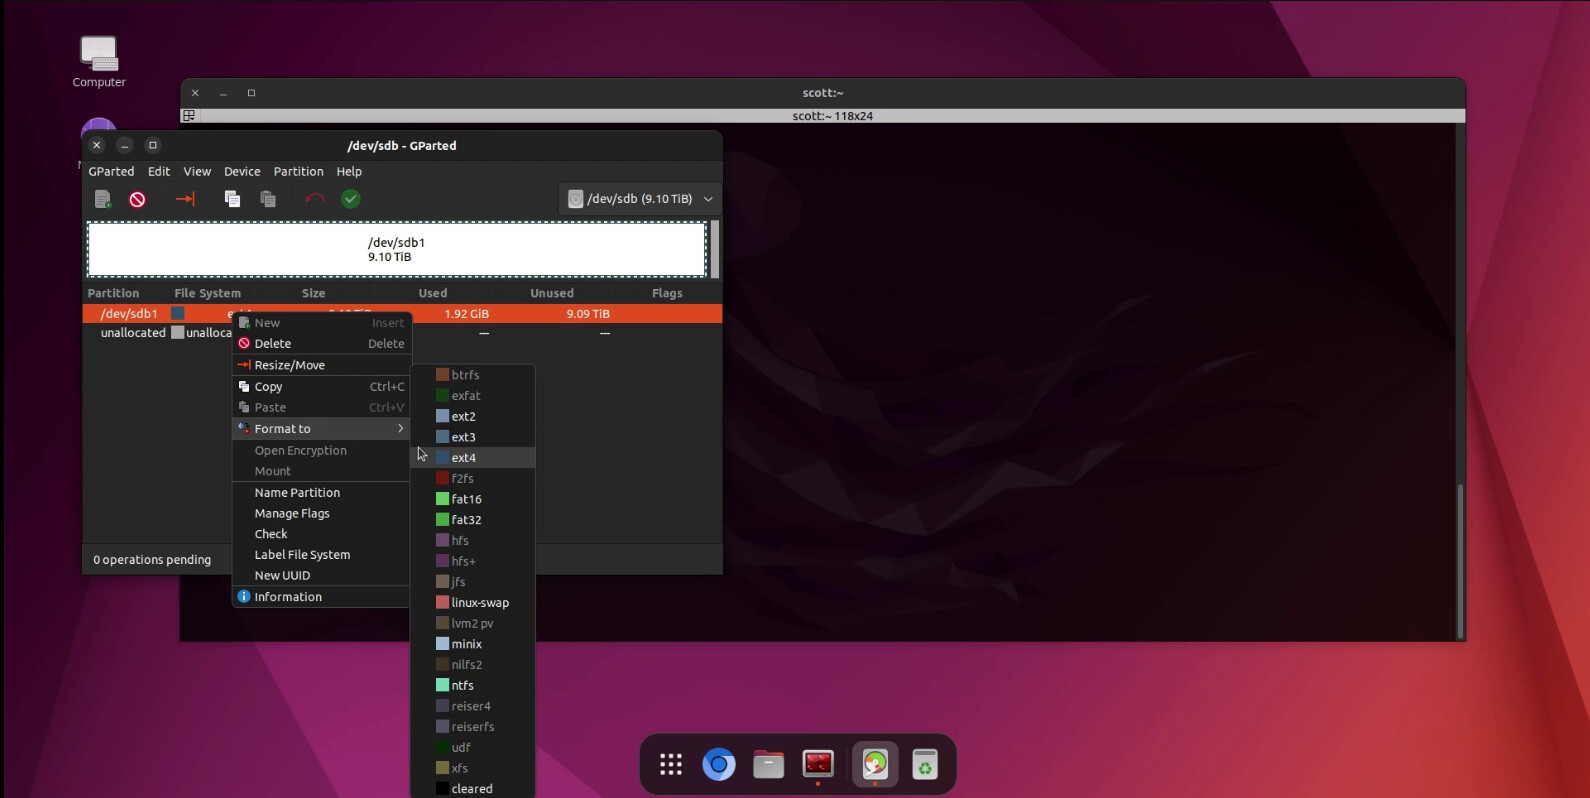
Right click the new /dev/sdb1 partition and format it to the ext4 format.
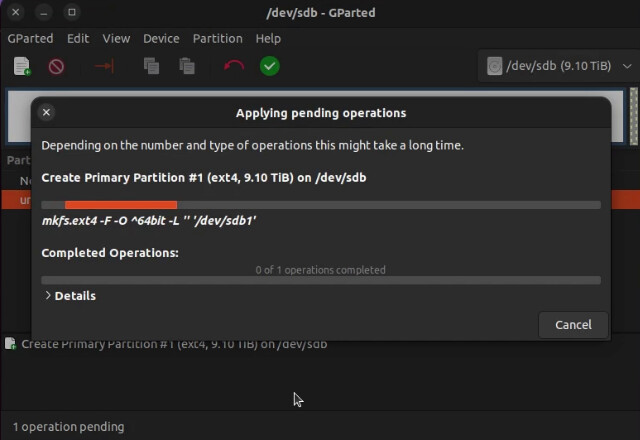
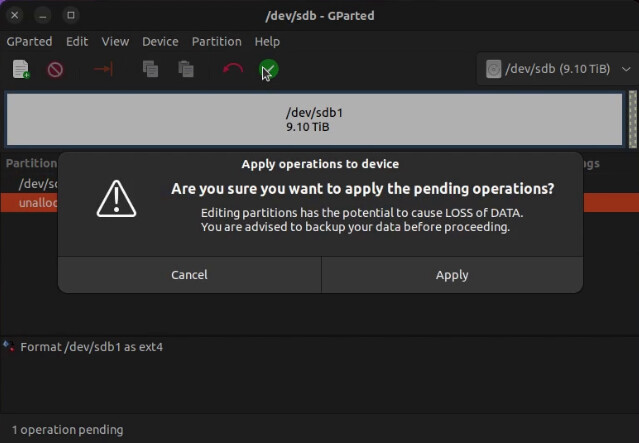
Click the Green check mark again to make it happen and choose “Apply” on the pop up.
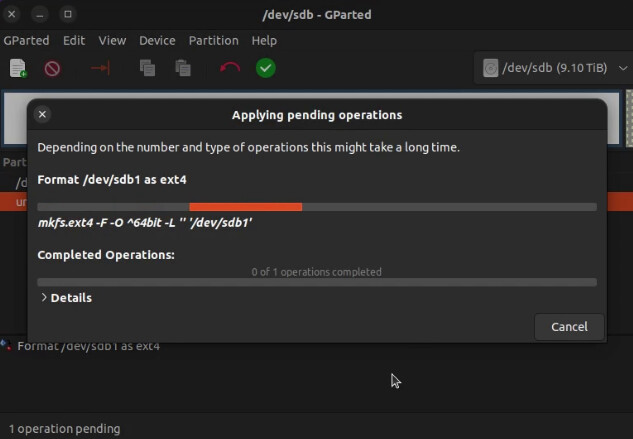
The file system on the new partition will be formatted.
Once the formatting is completed, you can exit gparted and go back to the terminal in the virtual machine and mount the disk through the folder we created earlier.
sudo mount /dev/sdb1 /mnt/external
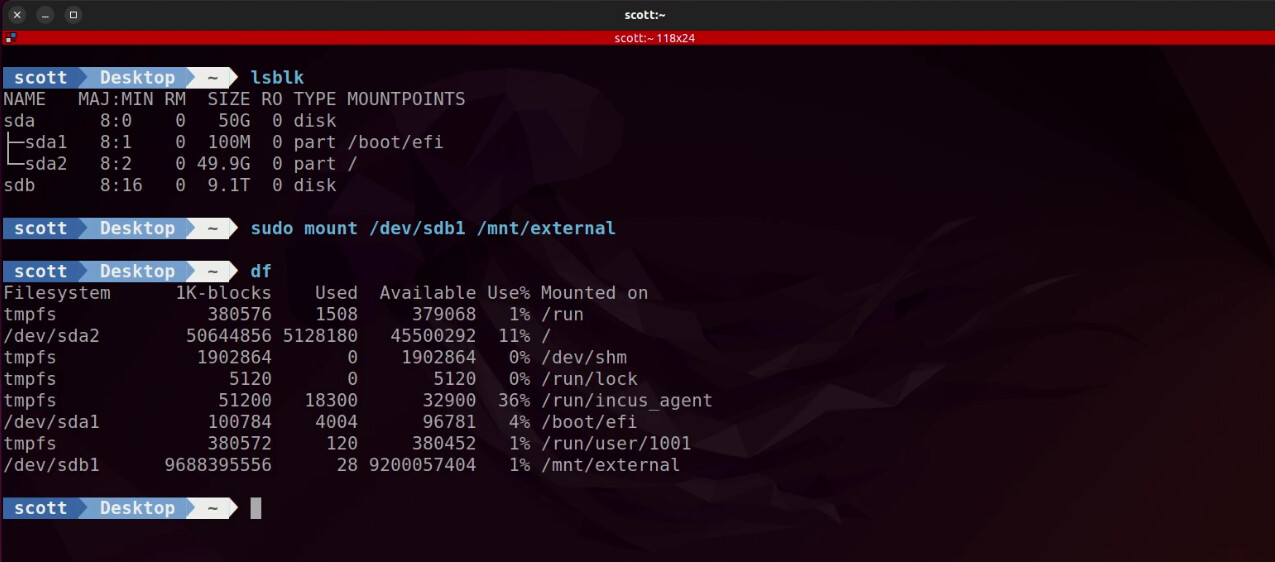
Note the mounted disk in the “df” command.
Since I know I am the only user of this disk drive and this VM, I grant full access through the mount point. Your security requirements will differ! This is only a demonstration.
sudo chmod 777 /mnt/external
As an example, I open my nemo file manager (I replaced nautilus) to display the new drive.
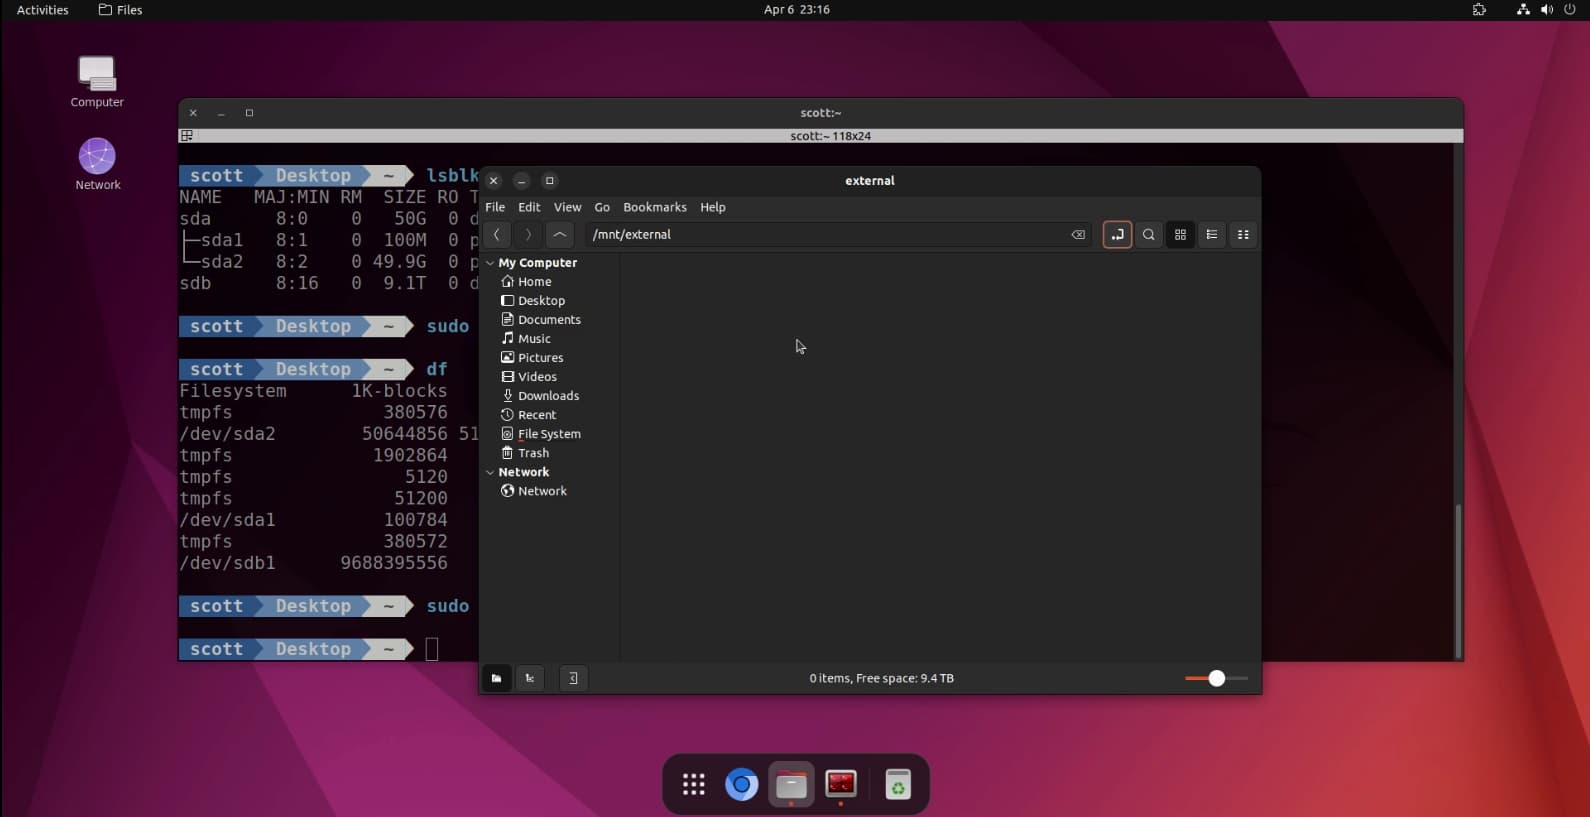
At this mount, you can use this external disk as you would any directly connected disk drive even though the drive is physically connected to your incus host server and virtually connected to this incus virtual machine.
Know that when this incus VM reboots, the disk will no longer be mounted because the “mount” command in Linux is not persistent through reboots. Follow my Linux Disk Drives tutorial to learn how to mount the drive in fstab if you want the drive to mount when the VM starts.
If you want to disconnect the drive from your Virtual Machine, its a good practice to dismount the drive from the VM:
sudo dismount /mnt/external
Go back to your incus server host. To disconnect the drive from the incus VM:
incus config device rm Desktop external-disk

These are the fundamental ways to share storage between incus containers/VMs and the incus host. We also covered how to create additional storage pool volumes you can attach to your incus VMs.