My LXD tutorials are normally targeted towards Linux desktop users. Windows users use an “ssh” terminal session to manage their LXD server(s). In this video, I discuss the installation and configuration of the Canonical LXD client management tools for Windows.
Start a Windows Powershell with Admin privilege as shown in the video.
Get your current Windows Powershell execution policy context.
Get-ExecutionPolicy

We need to install the Chocolately package manager which requires the “Bypass” execution policy. Copy the following code segment and paste it into your Powershell window and hit enter to execute it.
Set-ExecutionPolicy Bypass -Scope Process -Force; [System.Net.ServicePointManager]::SecurityProtocol = [System.Net.ServicePointManager]::SecurityProtocol -bor 3072; iex ((New-Object System.Net.WebClient).DownloadString('https://community.chocolatey.org/install.ps1'))
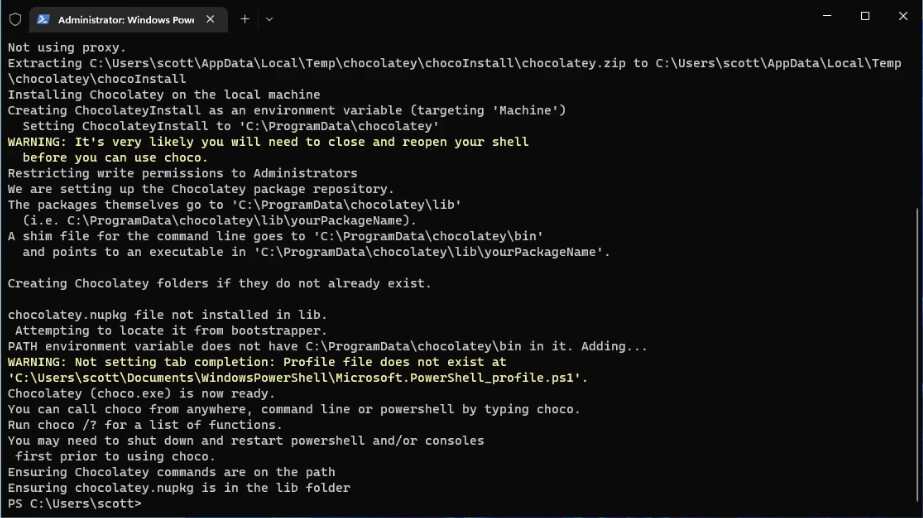
Exit your Powershell window and restart a new Powershell with admin privilege again. Now we need to install the lxc client tool and the virt-viewer tool for Windows with the following command:
choco install lxc virt-viewer

My tutorial entited LXD Custom Images Revisted discusses many of the commands we discuss here.
In the LXD Step by Step video, we performed a “lxd init” and one of the questions was if we wanted our LXD server accessible over the network. We answered “yes” to that question and we use that capability to enable the remote management of the LXD server with these tools from Windows.
In order to authorize our Windows desktop to manage the remote LXD server, we need to generate a secure certificate token.
To do this, open an “ssh” terminal to your LXD server and enter the command:
lxc config trust add
This will prompt for a name for your client. I called my desktop client “Windows”. This command will display a token on the screen which is a long string of characters as shown in the video. Select and copy that into your cut buffer.

Now go back to the Powershell in Windows and issue a command like the following providing the name and IP address of your LXD server:
lxc remote add mondo 172.16.1.225
Answer “y” to accept the certificate fingerprint and then paste the token when asked for the password:

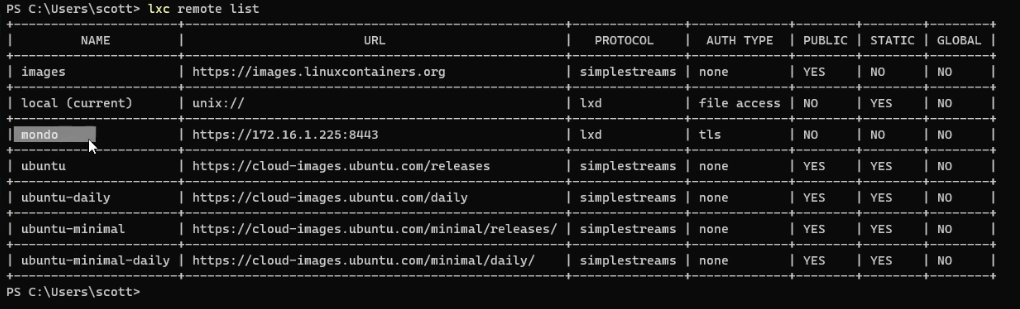
The “lxc remote list” command should now list your server as one of the remote servers that you can manage:
To change your management context to your LXD server use a command like the following with your server name.
lxc remote switch mondo
You can now perform “lxc” commands in the context of that server. Your Windows machine local context does not host any containers since it is only a client and so use this technique to manage your remote LXD Server(s):

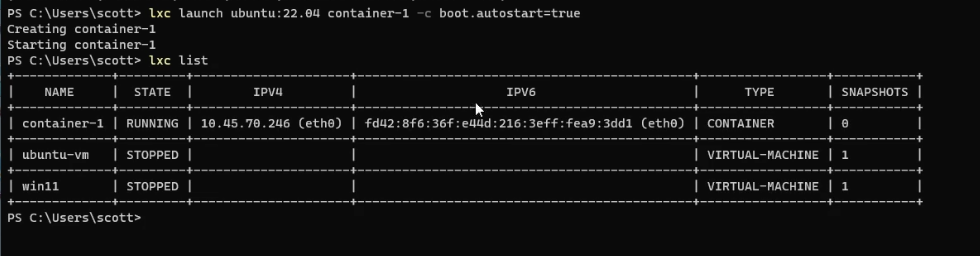
In my example, I created a lxd container named “container-1” on Mondo with the following command:
lxc launch ubuntu:22.04 container-1 -c boot.autostart=true
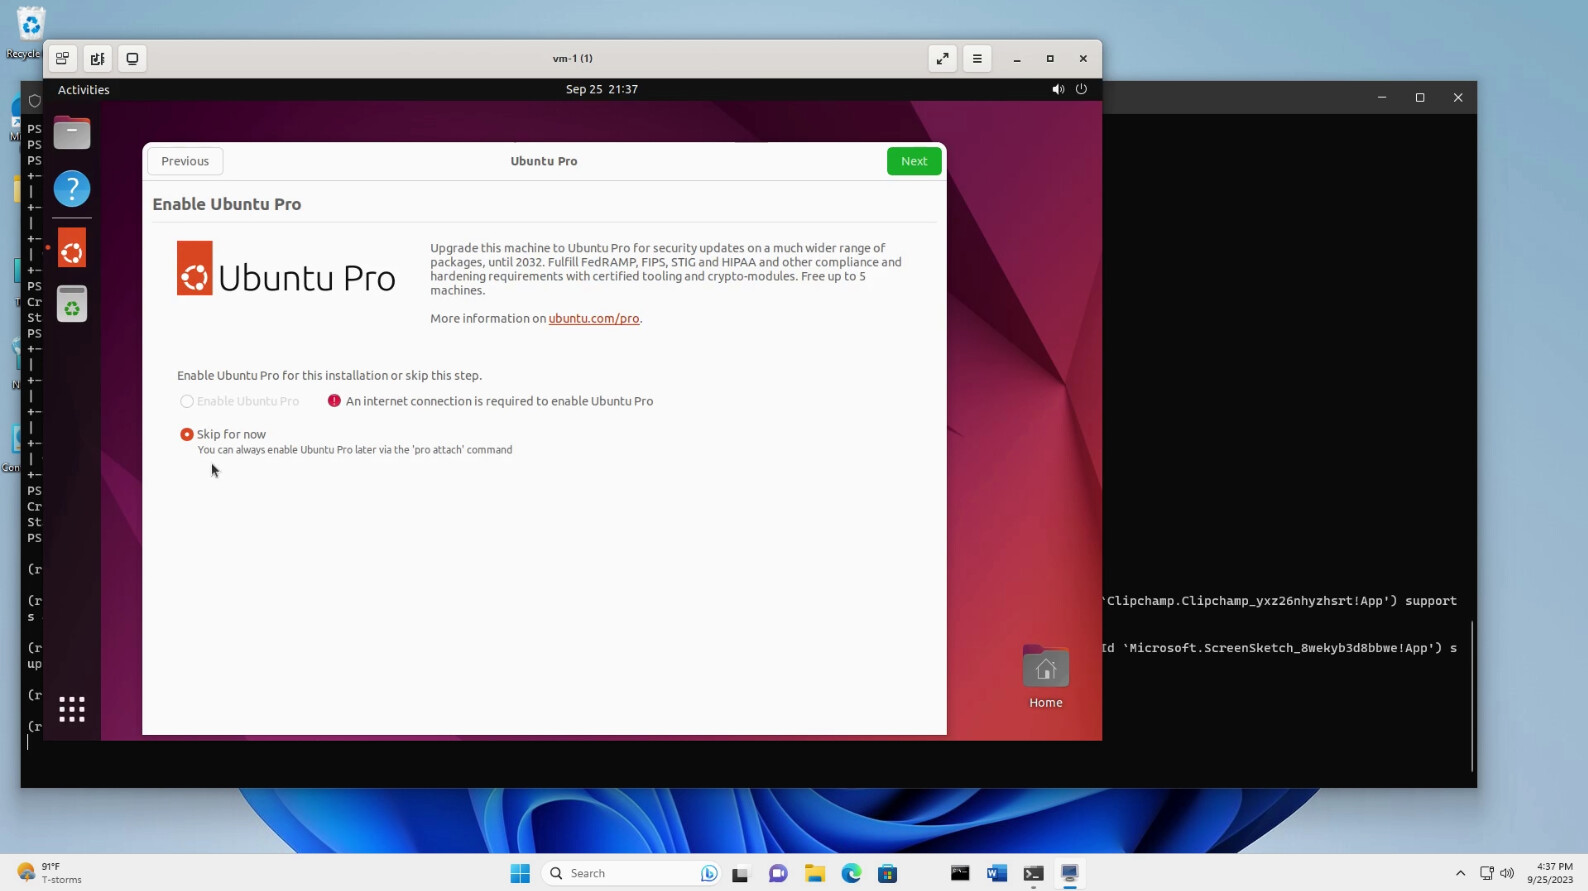
I can also launch a LXD Virtual Machine.
lxc launch images:ubuntu/22.04/desktop vm-1 --vm -c limits.cpu=4 -c limits.memory=4GiB -c boot.autostart=true
Since we installed the virt-viewer in chocolately, we can use it to display the GUI of the LXD VM that I created called “vm-1”:
lxc console vm-1 --type=vga
If you are new to LXD, be sure to watch my tutorials entitled “LXD Step by Step” and “LXD Configured Now What?” If you want a web GUI to manage LXD, be sure to watch “LXDWare LXD Dashboard”. I have over 75 videos on various features of LXD so be sure to browse the channel.