I created a tutorial entitled LXConsole Web Interface for Incus in March 2024 where I showed the installation and configuration of LXConsole which is a docker application that provides a Web based GUI to manage Incus and/or LXD servers, but I nested the application inside of an Incus container.
In July of 2024 I also presented Incus Open Container Initiative (OCI) Docker Containers which covers the introduction of Incus OCI containers beginning in Incus 6.3. OCI containers are also referred to as application containers in Incus.
Many of you have asked, why do I choose to nest docker applications inside of incus containers rather than using Incus OCI containers? This presentation demonstrates installing LXConsole as an OCI container to see the differences.
As a reminder, the docker-compose file I presented for nesting the LXConsole docker in an incus container looks like this:
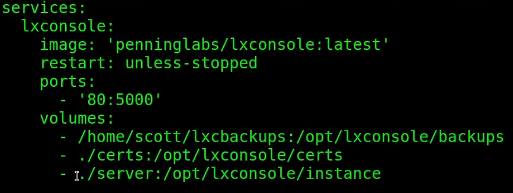
Rather than mapping the persistent volume mappings you see above back to folders on your Incus server, I am going to show how to store the persistent data in an incus custom volume in your Incus default storage pool. This provides a neater/cleaner way to store the application data.
My reasons for nesting a docker application inside of an incus container are:
- The overall power and simplicity of docker-compose.
- Applications that have more than one service (container) can be kept in one location.
- By backing up the single incus container, I have the entire application and all of its data in one place.
- Docker compose makes port remapping, volume mapping, and other attributes easy.
- Incus OCI containers cannot easily be bridged to your main LAN because docker/OCI containers normally lack components like DHCP and the macvlan described herein has limits described at the end of this document.
The reasons why you might want to use an OCI container are:
- They are super efficient and take less memory.
- You will save around 250MB of memory savings on average with an OCI container as opposed to nesting.
- Single container applications are mostly easy to host in OCI containers.
- If you use incus custom volumes for your persistent data, they can be separately backed up.
- The OCI container itself stores no persistent data and can be recreated easily.
I chose LXConsole as my OCI use case because it is only a single container. If you have docker applications which use multiple docker containers then you would need an OCI container for each and that can make container management less straight forward on your server.
By default, the docker repository is not added to your incus repositories. If you have never used an OCI container, you will need to add the repository:
incus remote add docker https://docker.io --protocol=oci
To list all of your repositories:
incus remote list

Since you have watched my Incus Containers Step by Step tutorial prior to now, you will have a “bridge0” device on your incus server. If not, stop and follow that guide now.
To make the networking easier for our OCI application container, we are creating a new network.
incus network create OCI --type=macvlan parent=bridge0
Let’s create our LXConsole OCI container without starting it.
incus init docker:penninglabs/lxconsole:latest LXConsole -c boot.autostart=true --network OCI
Create a custom storage volume in the default storage pool to store the persistent data for LXConsole.
incus storage volume create default LXCStorage
Make the volume writable.
incus storage volume set default LXCStorage security.shifted=true
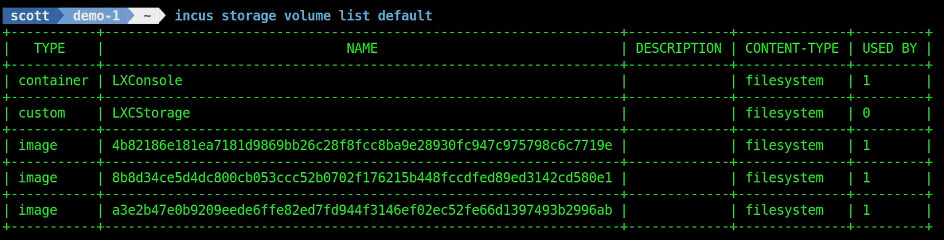
List the volumes in your default storage pool. Containers have volumes too and there are also images that are used to create containers, so your contents will differ from mine.
incus storage volume list default
Before I can connect my custom storage volume to my LXConsole OCI container, i need to create some folders inside of it. To do so, i am creating a temporary container.
incus launch images:alpine/3.18 tmp-helper -c security.privileged=true
Attach the storage volume to this temporary container.
incus storage volume attach default LXCStorage tmp-helper /mnt
Move inside of the temporary container.
incus shell tmp-helper
Create the three folders for the persistent mappings.
mkdir -p /mnt/backups /mnt/certs /mnt/instance
Exit the container.
exit
Stop and then delete the temporary container since we no longer need it. The custom storage volume is unaffected.
incus stop tmp-helper
incus delete tmp-helper
Connect the custom volume to the LXConsole OCI container.
incus config device add LXConsole LXStorage disk pool=default source=LXCStorage path=/data/lxconsole
Now we can start the LXConsole OCI container.
incus start LXConsole
We can list the container.
incus list

The (APP) in the type field describes this as an application or OCI container type.
Go to your web browser and enter the address of the container with a “:5000” on the end for port 5000 which is the port at which LXConsole is running.
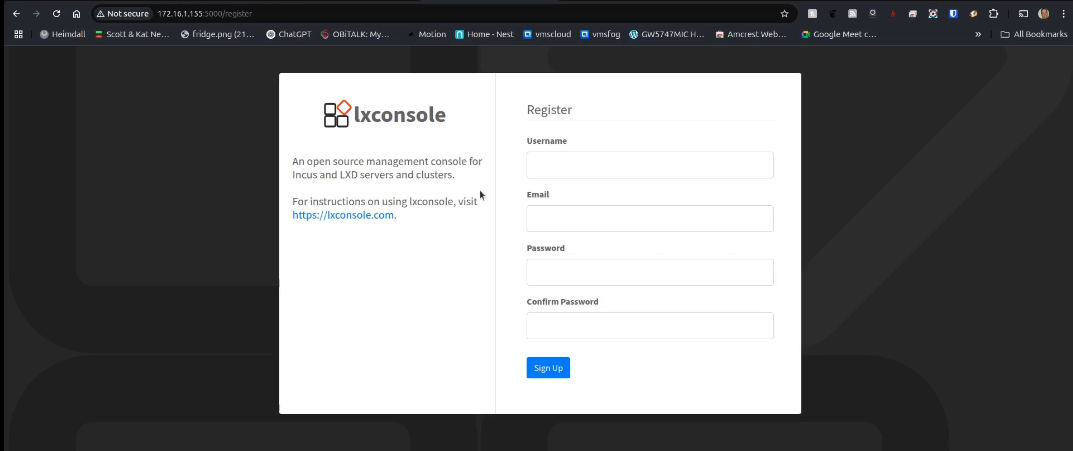
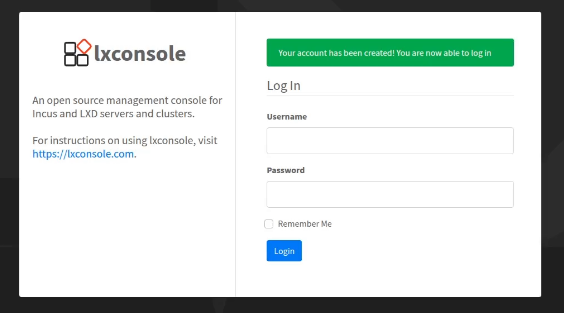
Enter your registration information in the screen above and click “Sign Up” as shown in the video.
Once you have done this you will be taken to the sign in screen.
Once you have logged in you will see a screen like this:
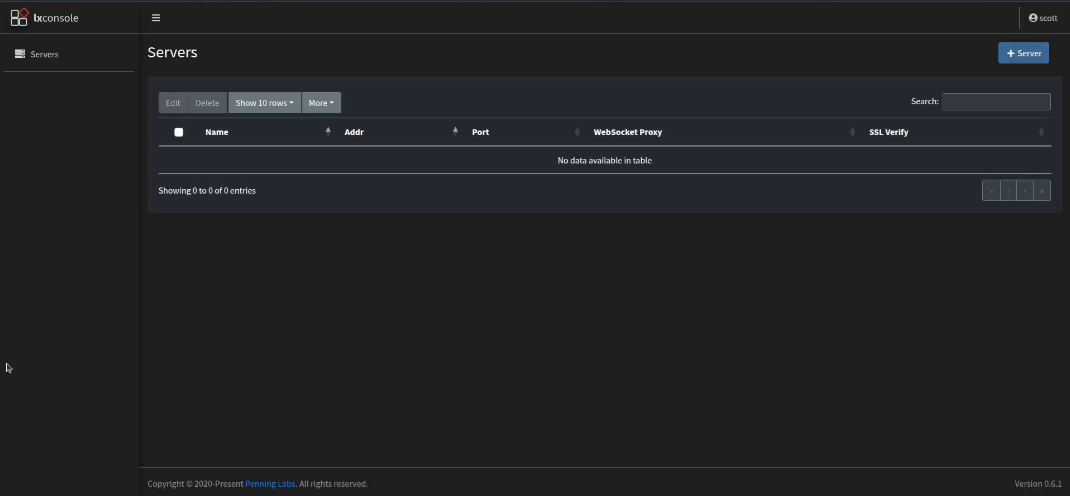
Press the “+ Server” to add the Incus server that you want to manage,
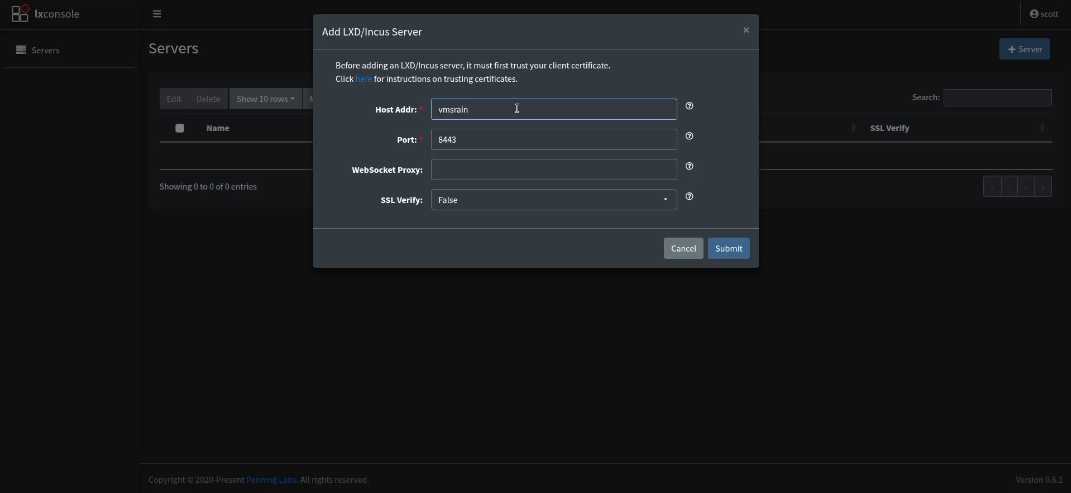
Click the “here” for instructions which should be highlighted in blue.
Copy the Certificate listed on the screen including the start and end headers and footers.
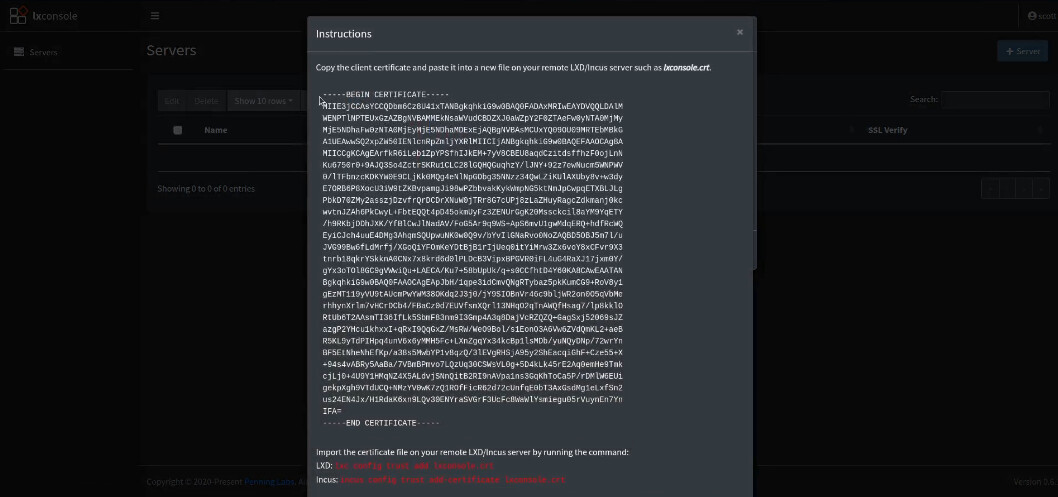
Log into your Incus server and create a file:
nano lxconsole.crt
Paste the contents into this file and save it with CTRL O and enter and then CTRL X to exit the nano editor.
Add the certificate to your incus server.
incus config trust add-certificate lxconsole.crt
Also add a definition for the management port.
incus config set core.https_address=[::]:8443
Back at the web page, you can “X” out of the instructions.
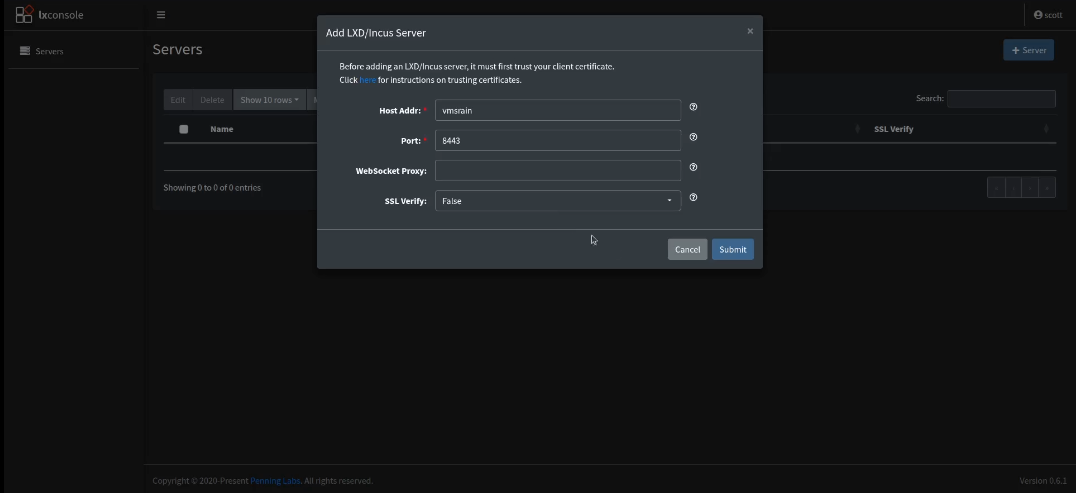
Now click “Submit” on the screen shown below to add your Incus server to LXConsole.
If everything is done correctly, you will see a screen like the one that follows. If you don’t have local DNS on your network you will need to put the actual IP address on the screen above before your incus server can be added.
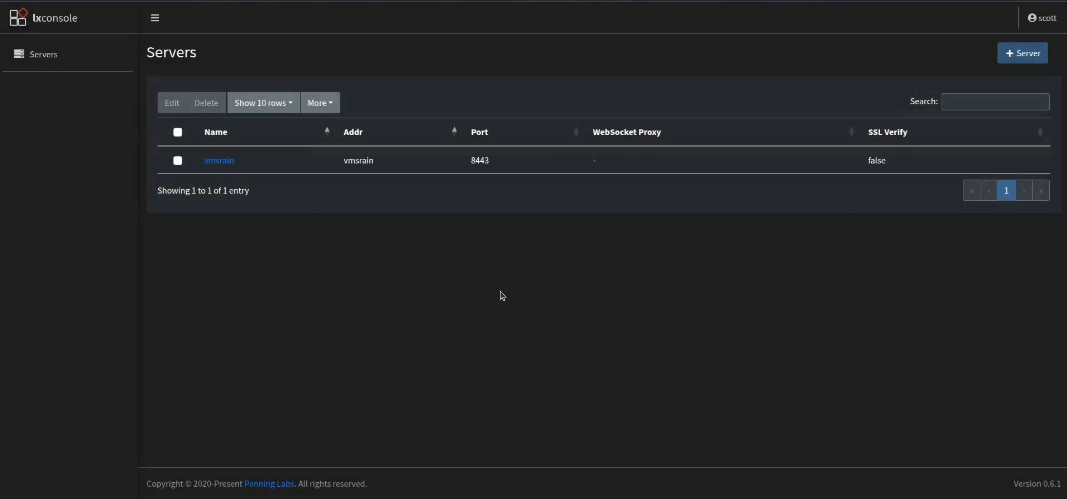
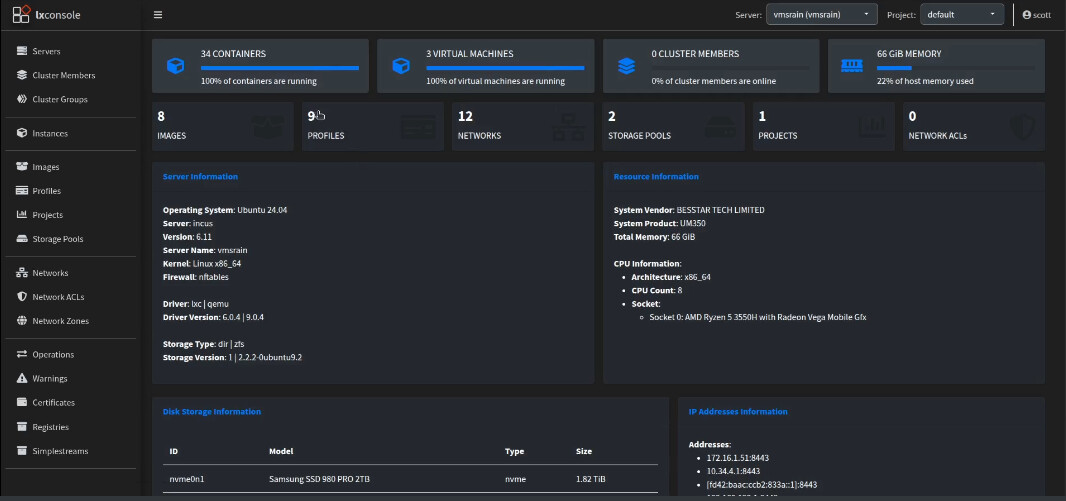
When I click on the server name that I just added, you will be taken into the LXConsole management interface for that Incus server.
If there is a new version of LXConsole that is released, it is super simple to upgrade the container to the latest version with the following command. Just sign on to your Incus server and issue this command:
incus rebuild docker:penninglabs/lxconsole:latest LXConsole
HUGE CAVEAT:
One of my subscribers noted that he had issues trying to connect his LXConsole OCI container to his Incus server. In my tutorial, my Incus server vmsrain, is a different Incus server than my demo-1 Incus server. The limitation is that a macvlan node cannot communicate to any other node on the same server. That’s a limitation of macvlan.
If you really want an OCI container for LXConsole as I described, you will need to not host it via macvlan. The alternative is to follow my tutorial LXConsole Web Interface for Incus which nests LXConsole inside an incus container which is bridged via the bridgeprofile. Bridged containers don’t have the limitation that macvlan does.
Normally OCI containers using macvlan work just fine because users don’t access them from the same server where they are hosted. The limitation here is that if your Incus server is hosted on the same server where you want to host your Lxconsole container and it uses macvlan, it won’t work.
Bridging an OCI container can be problematic and that’s why I didn’t cover that. Specifically, Docker/OCI containers are super lean and don’t have components like DHCP clients. You can experiment with alternative ways to network your Incus containers. My main objective was to show how to implement an application inside of an OCI container.
If you wanted to delete this application from your incus server, you have to delete the container before the custom volume. Assuming you wanted to delete all that we created:
incus stop LXConsole
incus delete LXConsole
incus storage volume delete default LXCStorage
incus network rm OCI
incus storage volume list default