Cloudflare Zero Trust Tunnels are an alternative to a reverse proxy, a dynamic DNS A-Record for your domain name, and Let’s Encrypt Self-Signed Certificates for your self hosted applications. Cloudflare Zero Trust makes a secure VPN tunnel connection from a server inside your network to a Cloudflare server.
Cloudflare Zero Trust is also a solution that will work for self-hosted environments that use CGNAT (Double NAT) like T-Mobile Home Internet which do not have a dedicated WAN address. In effect, the Cloudflare Zero Trust Tunnel provides you a dedicated Cloudflare WAN address.
In this tutorial, we show how to create a use a Cloudflare Zero Trust VPN tunnel to make your self-hosted applications accessible from the Internet.
Head over to Cloudflare and sign up for a free account at:
https://www.cloudflare.com/
Although the Cloudflare Zero Trust Tunnel is a free service, you will be asked to include a form of payment on file since other Cloudflare services do have fees. Be sure to enable two factor authentication on your Cloudflare account to protect access to your network.
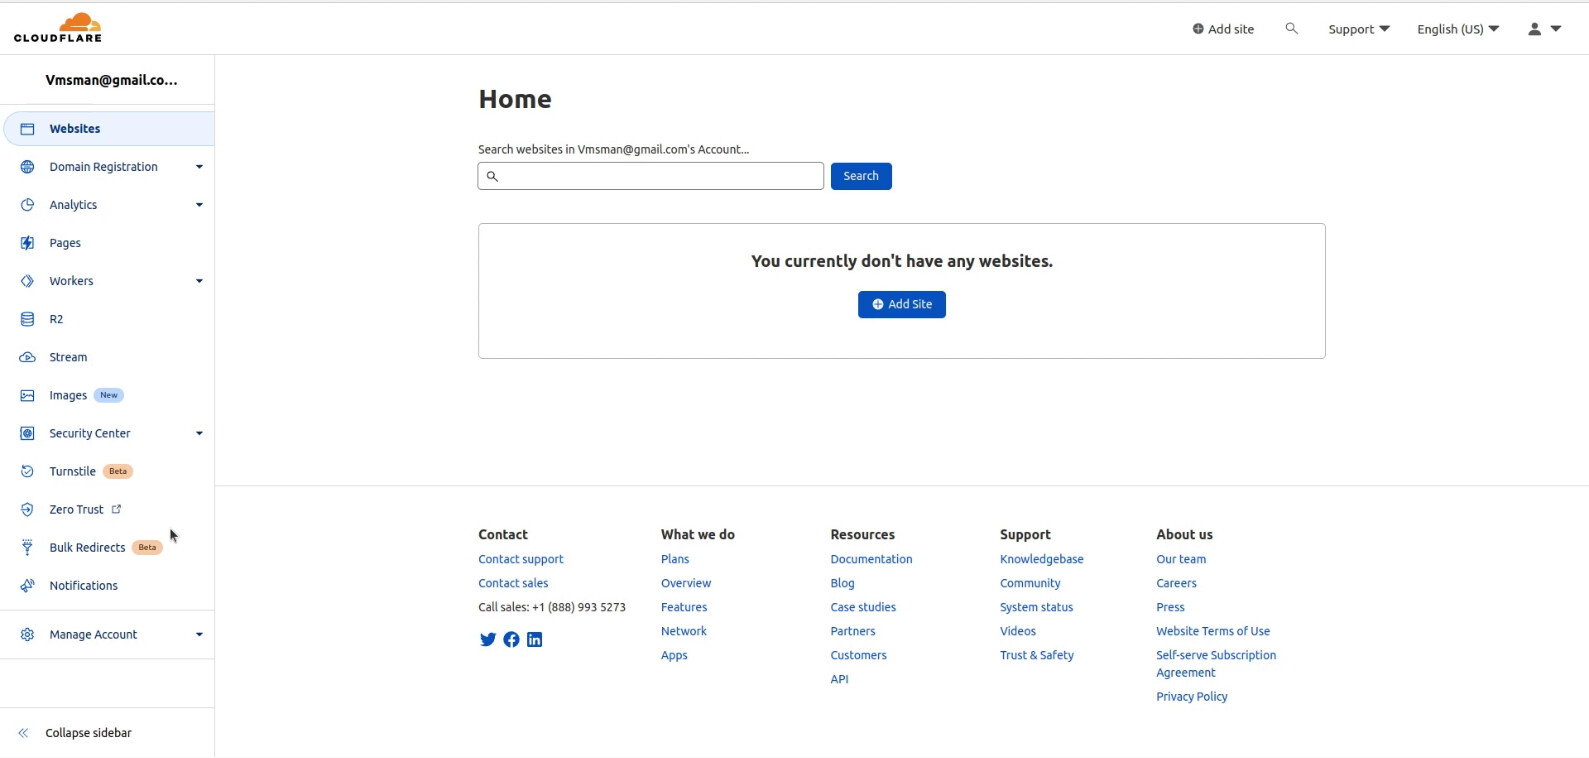
Once you sign on, you will be presented with this page:
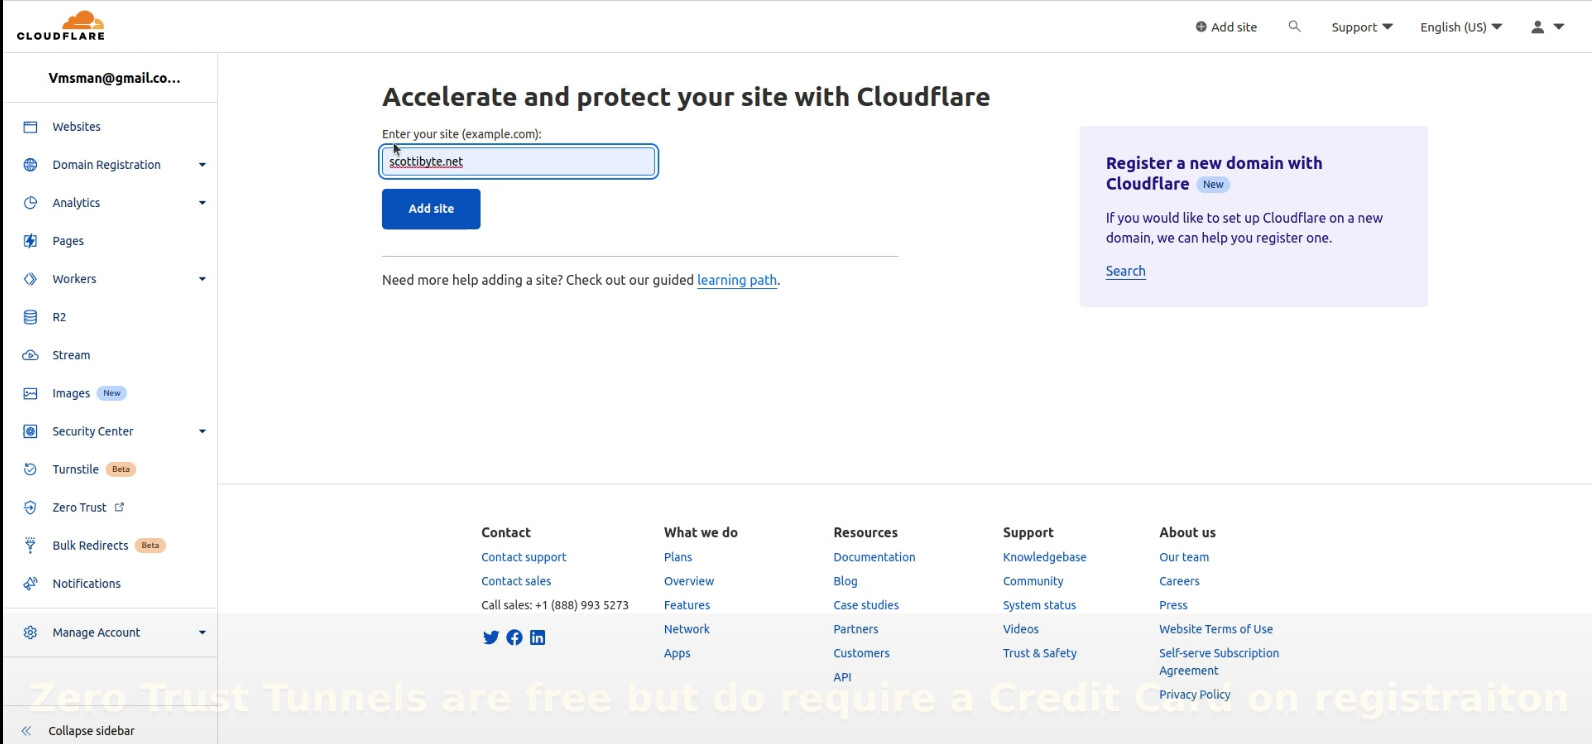
Click on the add site button and then type in the name of the domain name that you own.
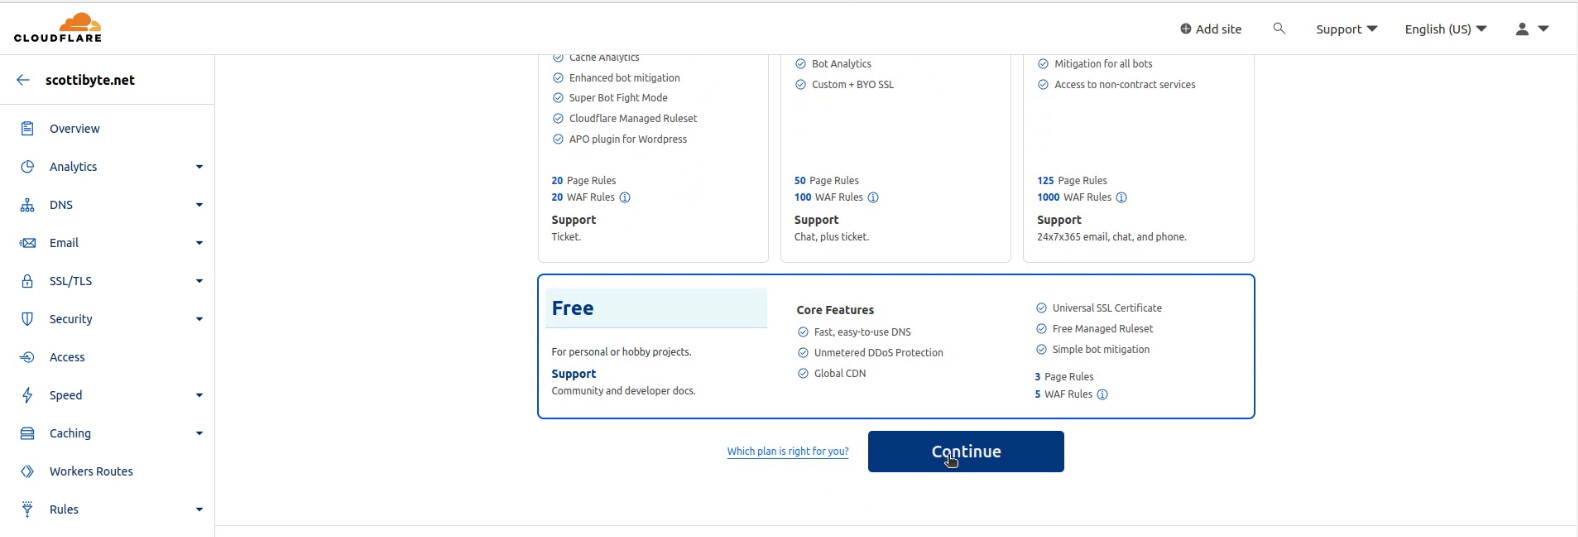
On the next page you are presented with the options for paid services.

Scroll to the bottom of the page and you will see the option for the FREE plan which you should select and then click on the “Continue” button.
The next screen will look like this:

Scroll down on the screen above and press the “Continue” button and you will be presented with this page.
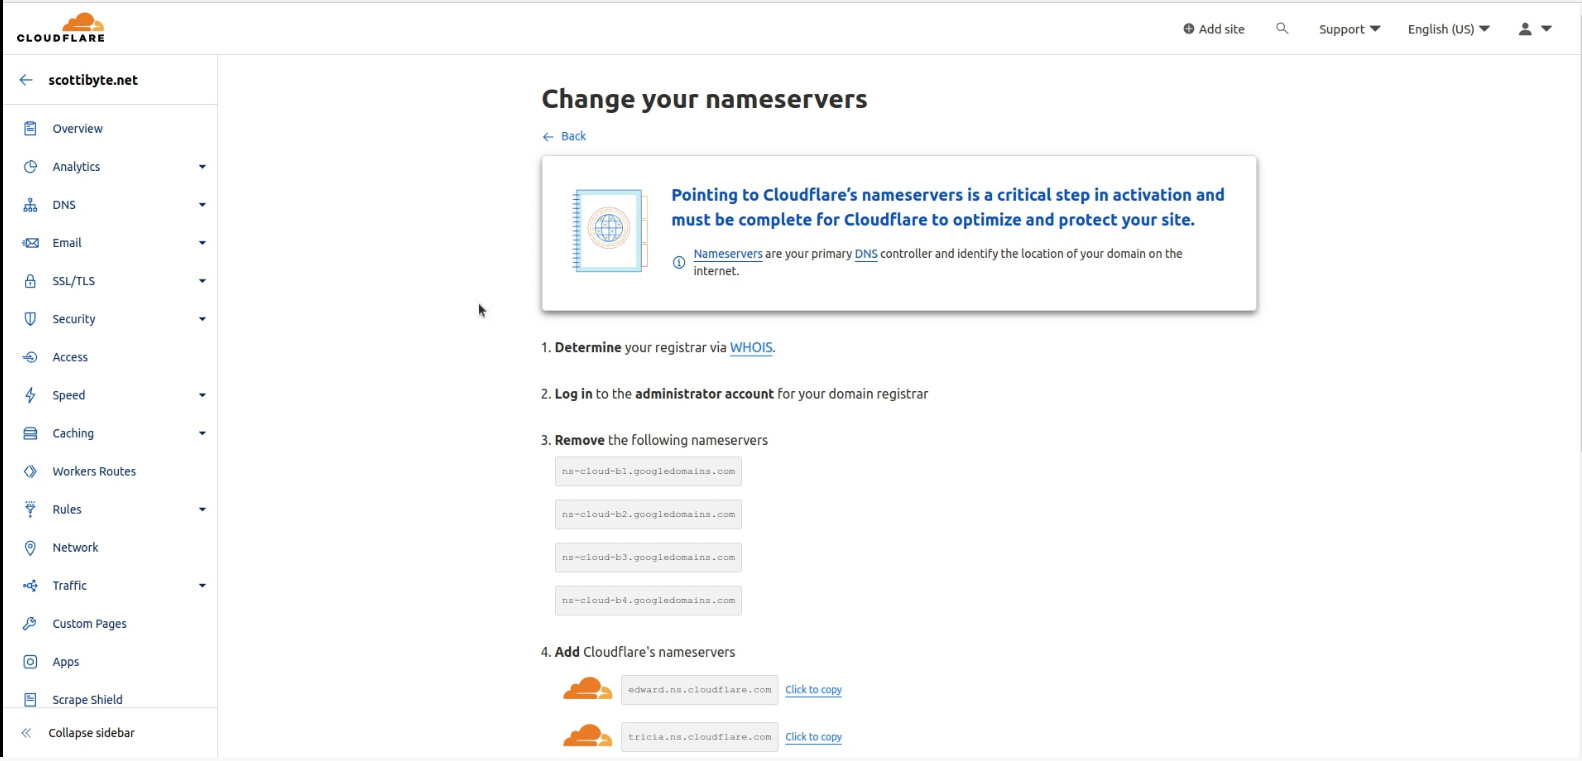
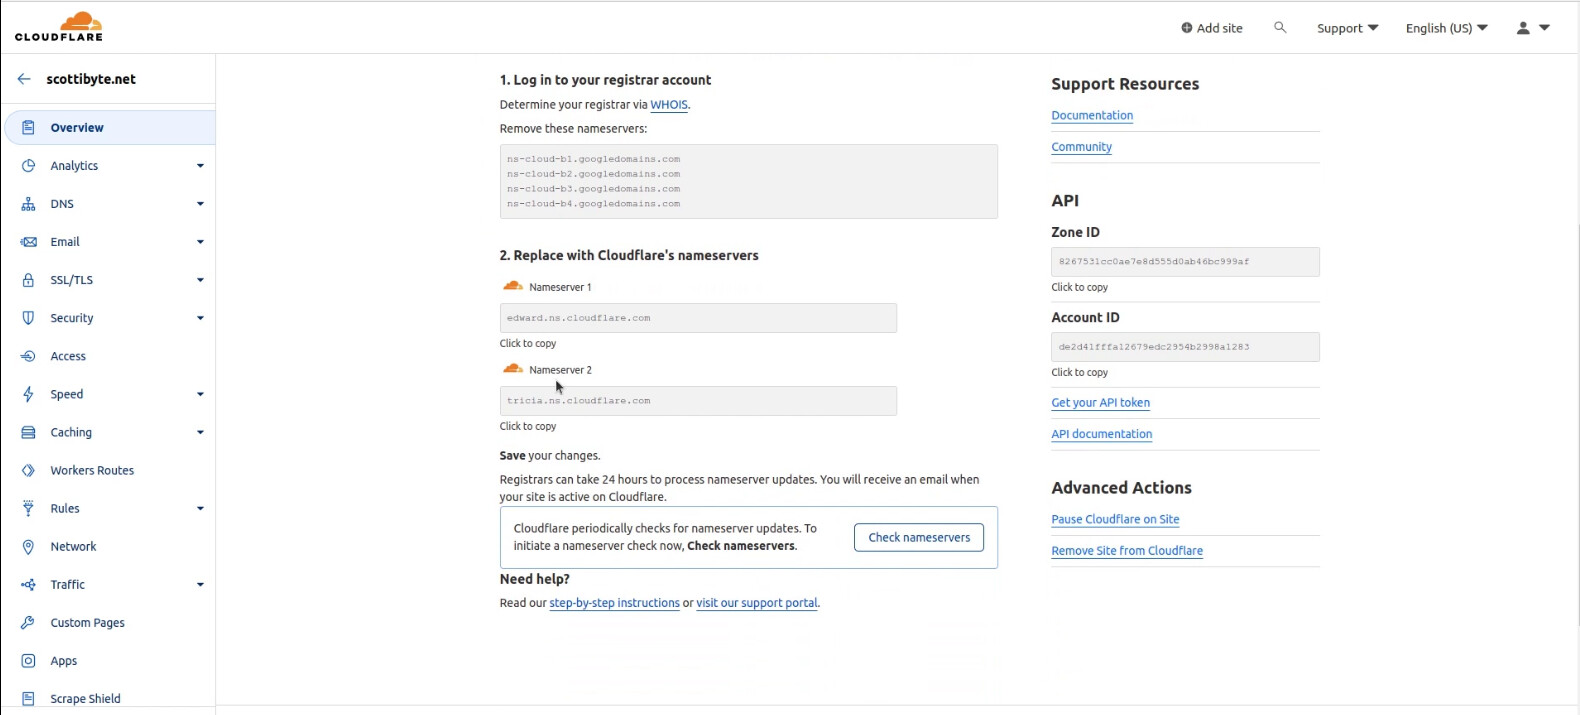
Scroll to the buttom of that page and you should see the area for the two Cloudflare DNS servers that you will need to copy and put in on your Domain Name Provider site. In my case, My DNS Provider is Google Domains.
I copy the first server name and I head over to my Google Domains DNS admin page.
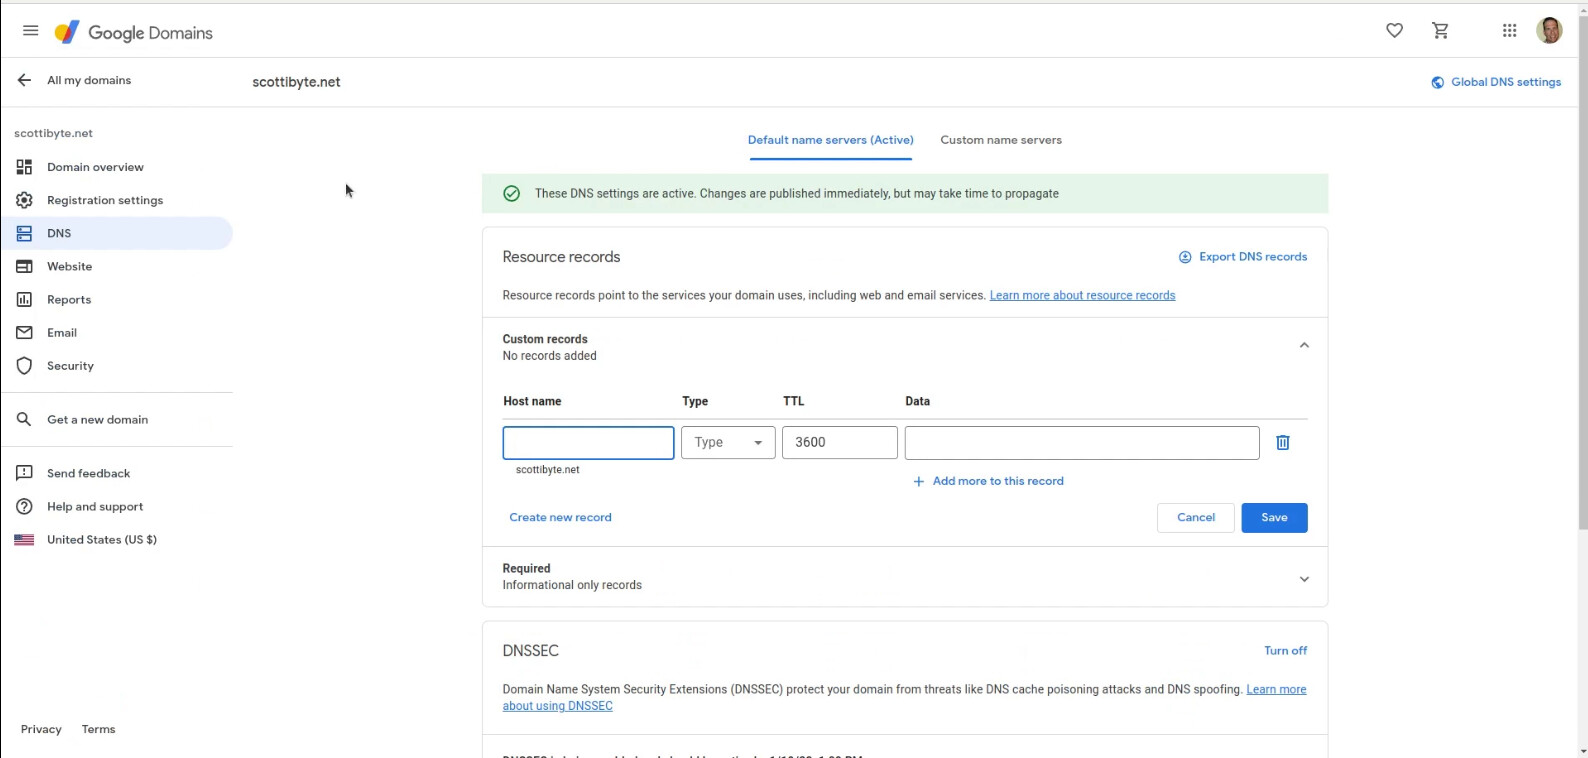
On the page above, I click on “Custom name servers” and the page looks like this.
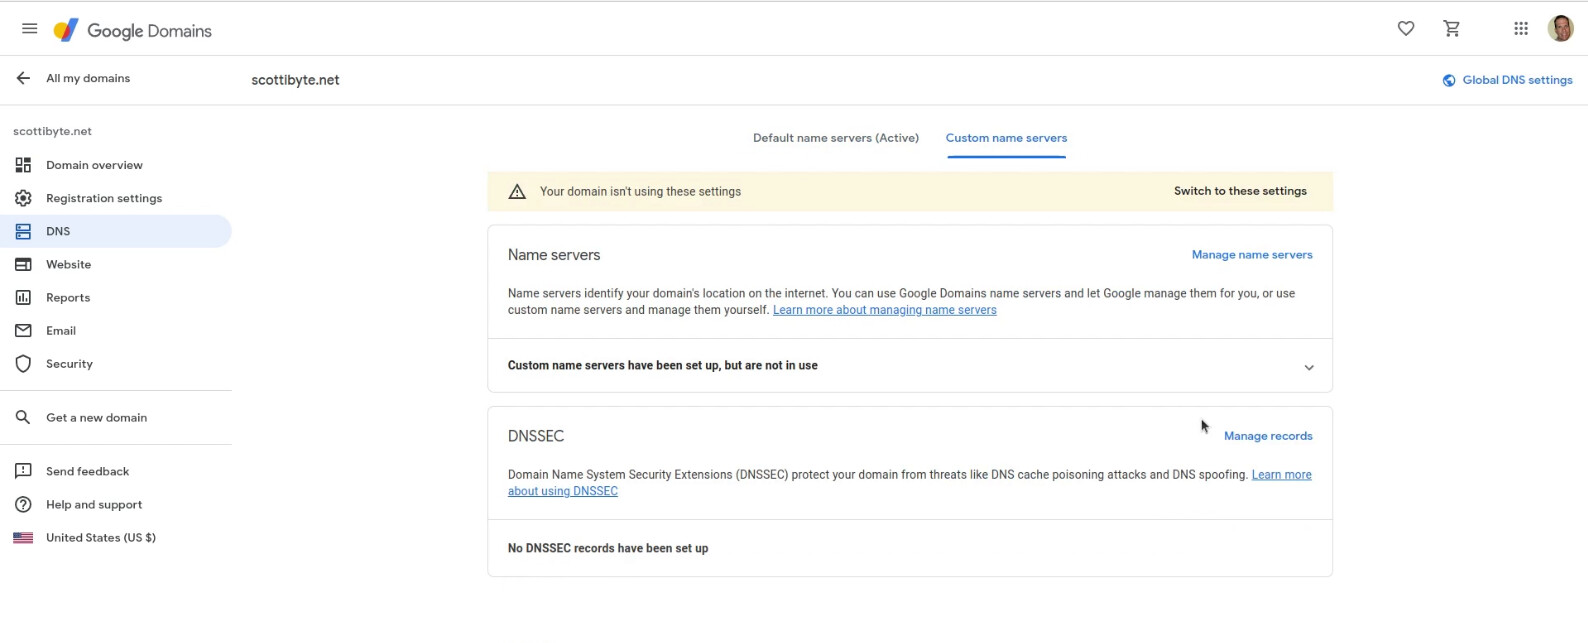
Next, I click on “Manage name servers” and I entered both name servers that I was provided at the Cloudflare site. Afterwards, I click “Save” and the two custom name servers are added at Google Domains. When you click “Save” you will get a screen saying that your domain isn’t using these settings with an option that says “Switch to these settings”.

Click on the option to “Switch to these settings” and the screen will update as follows.
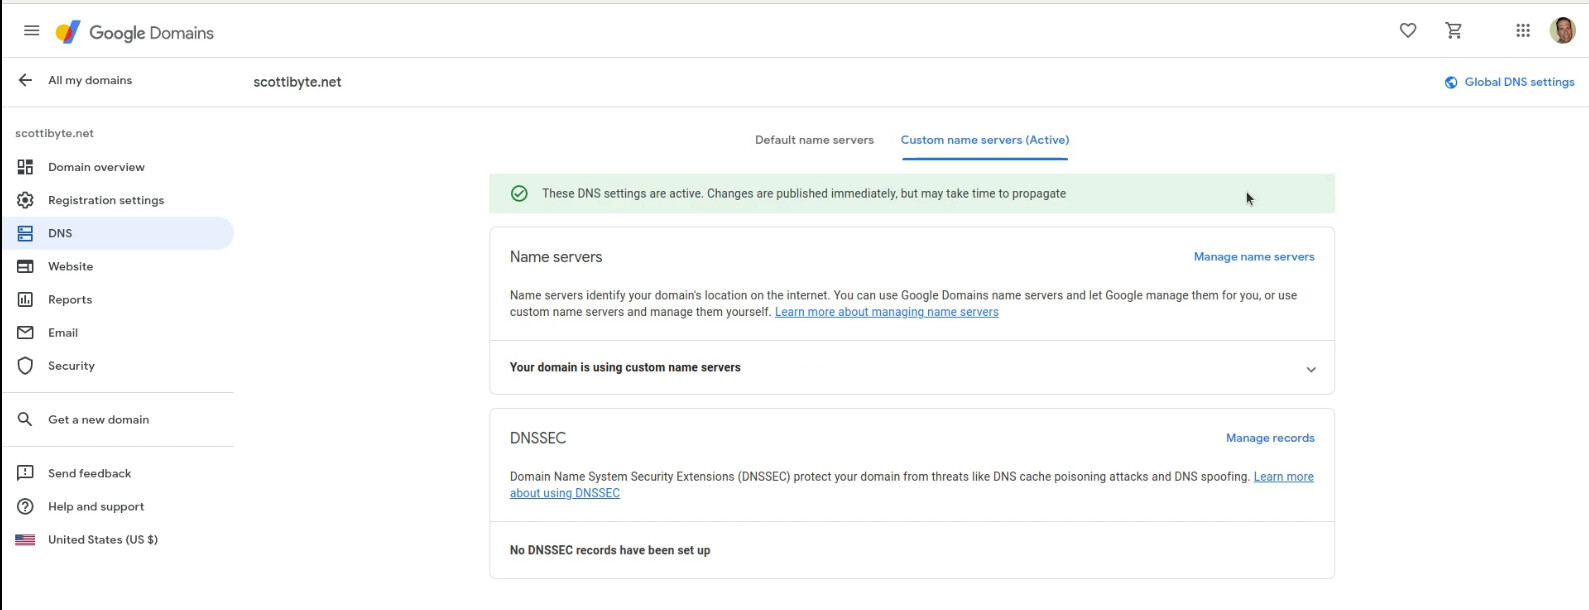
That’s all we need to do at “Google Domains” and so I move back to my Cloudflare screen.

On the screen above, click “Done, check nameservers” and the following screen will display.
Click “Finish later” on the screen above. Scroll to the bottom of the next screen and it will look like this:
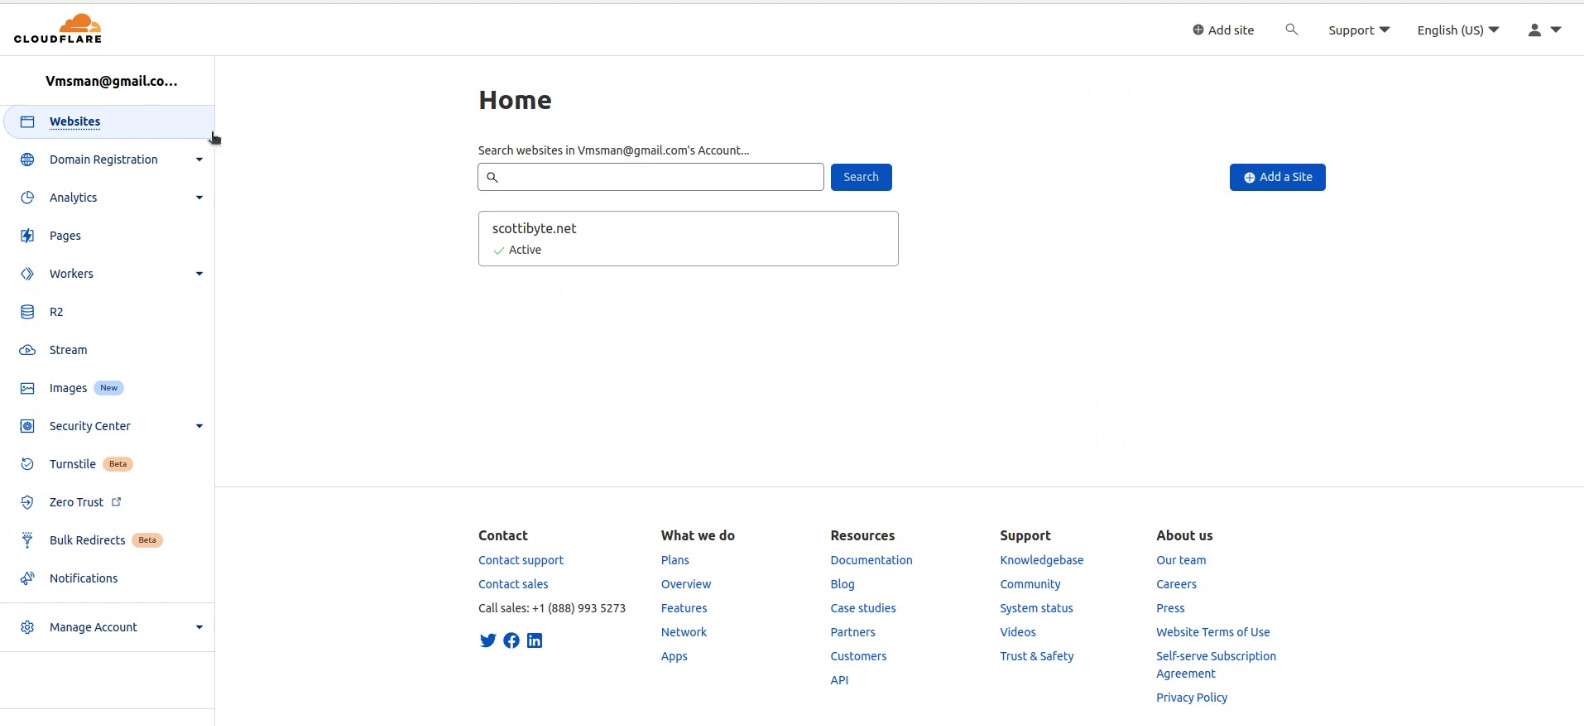
Next, go to the top of the screen and click the left arrow at your domain name and you should see that your domain is active. If not, then just wait or recheck the previous steps.
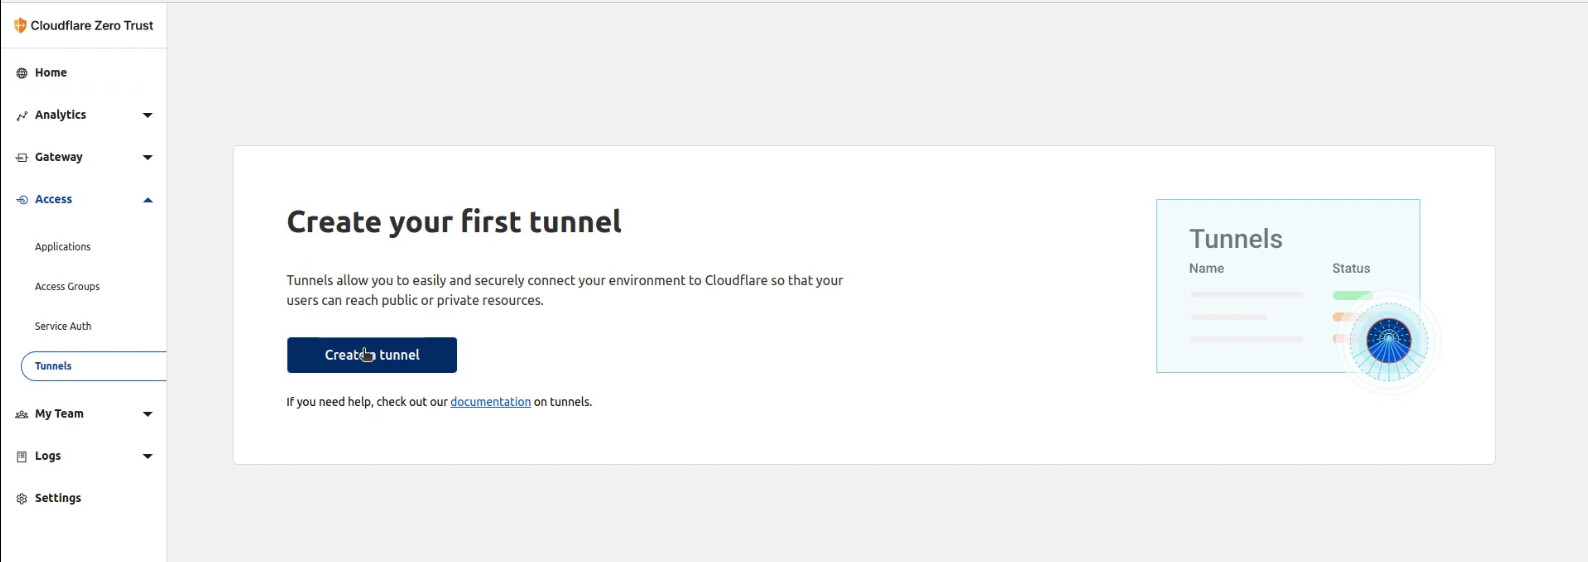
Next click on the "Zero Trust " option in the left menu and you should see the following screen.

Now Click on “Access” in the left menu and then “Tunnels” under that.

On the next screen, click on “Create Tunnel”.
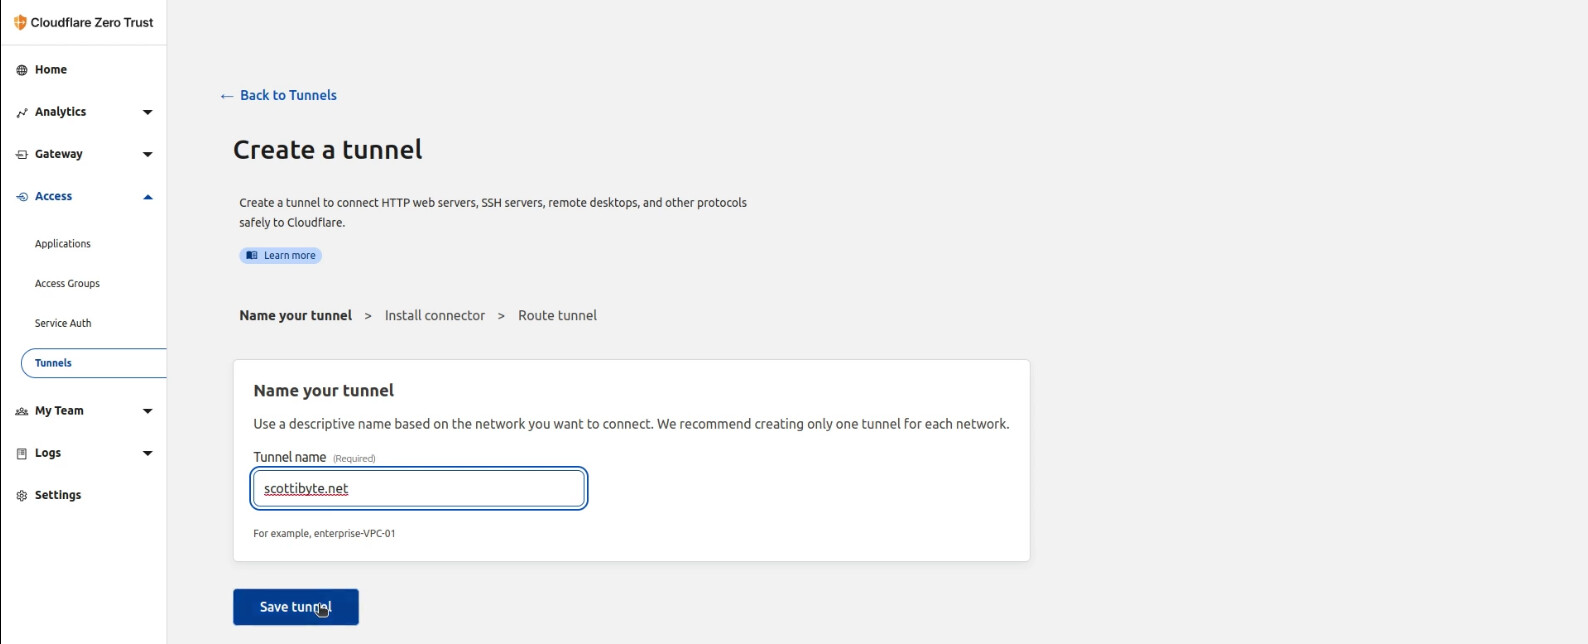
I gave my tunnel the same name as my domain and then I clicked “Save tunnel” as in the following screen.
The next screen brings you to the step where you are presented the instructions to install the “Cloudflare Zero Trust Connector”.
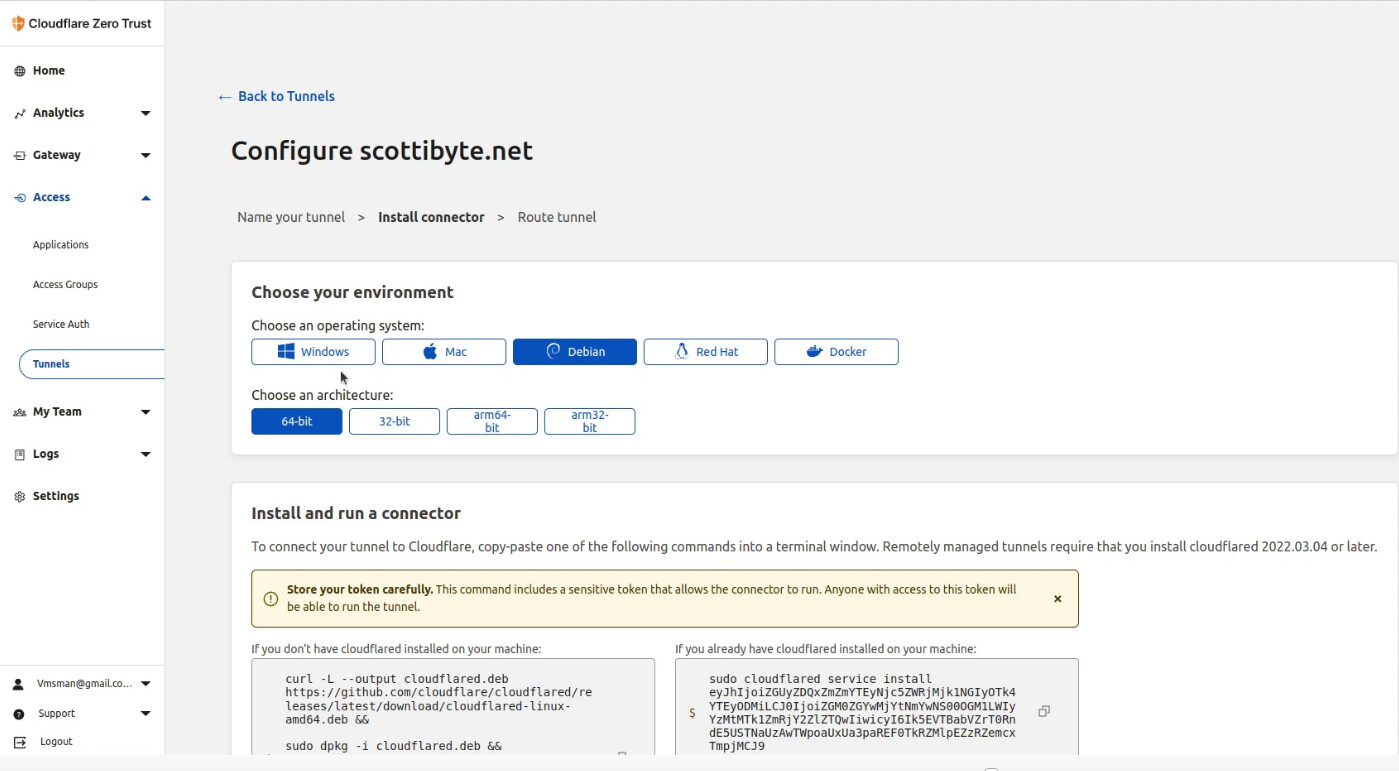
I chose the docker environment in my video tutorial and I was presented with the docker command to install the connector on my docker host. Protect this token, because it allows connection to your network and should not be shared. My example here was an example only and your token will be different.
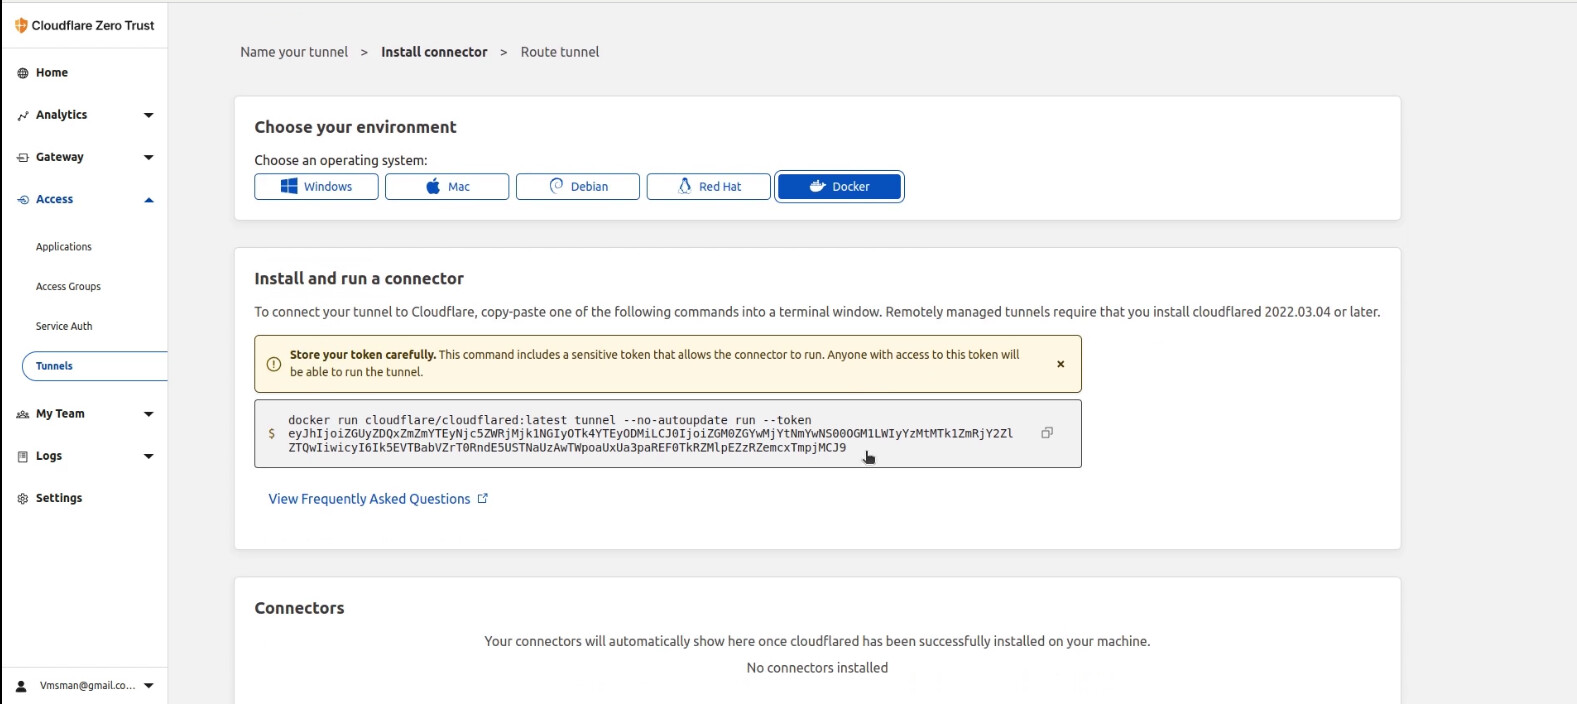
I created a LXD container and installed docker inside of it. If you watch the channel frequently, you know how to create a LXD container that can nest docker. Any host on your network will do.
Its important to point out the you should include the “-d” and the “–restart” switches to be sure your docker container starts when your docker host reboots:
docker run -d --restart unless-stopped cloudflare/cloudflared:latest tunnel --no-autoupdate run --token BIGLONGTOKEN
Go back to the Cloudflare screen and click “Next” at the bottom of the current screen and your next screen will look like this.
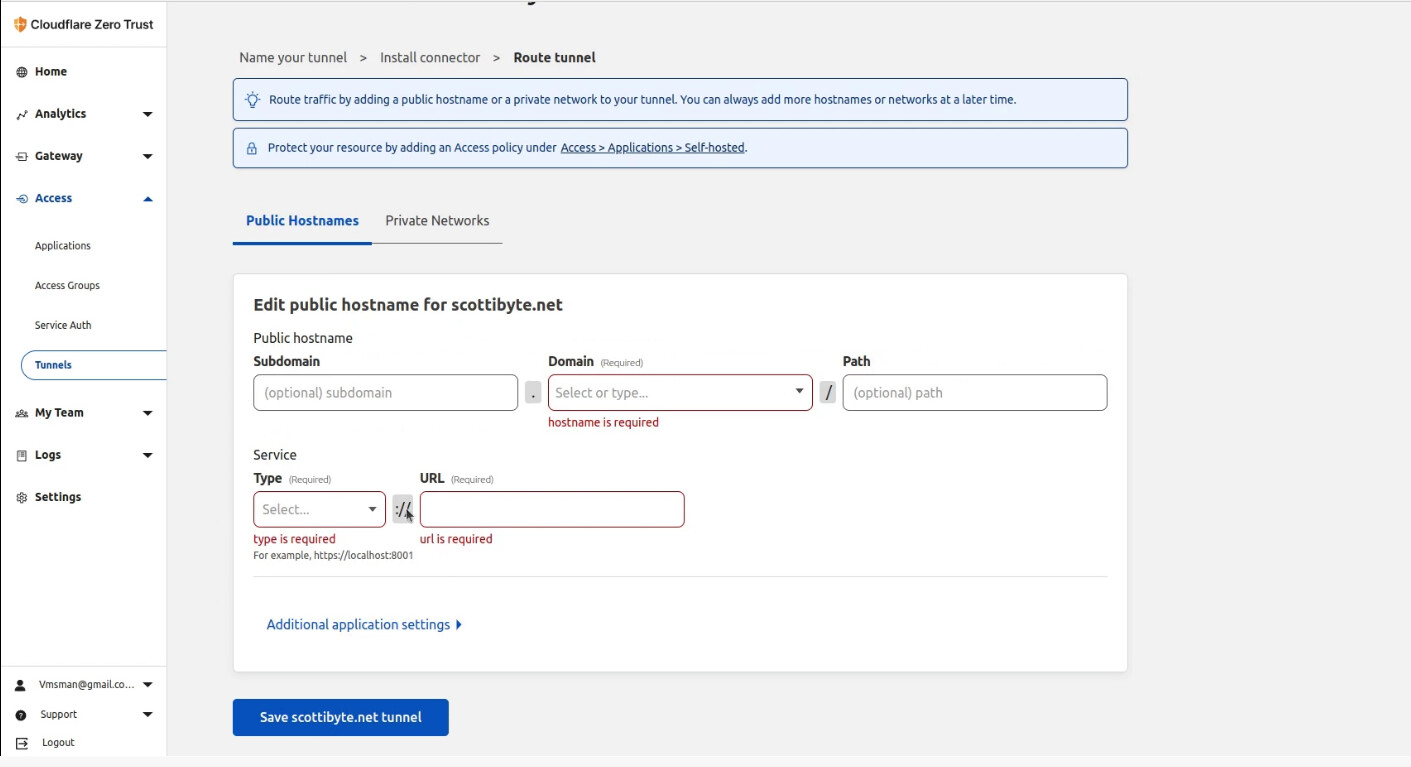
I had a locally hosted “Whiteboard” application on my network and so I filled in the data for it.
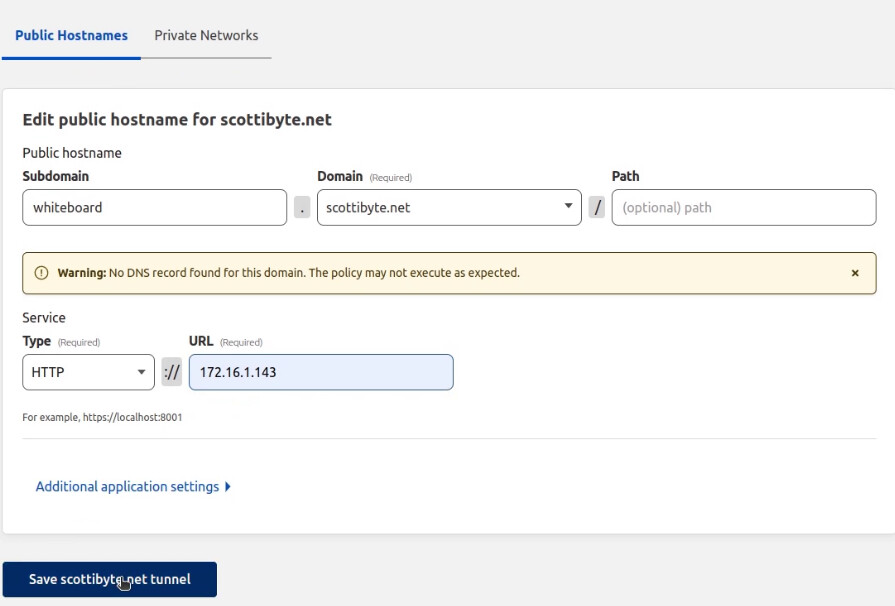
Finally, I pressed the button to save the tunnel settings above.
The next screen shows your public host names and your local network address for them.
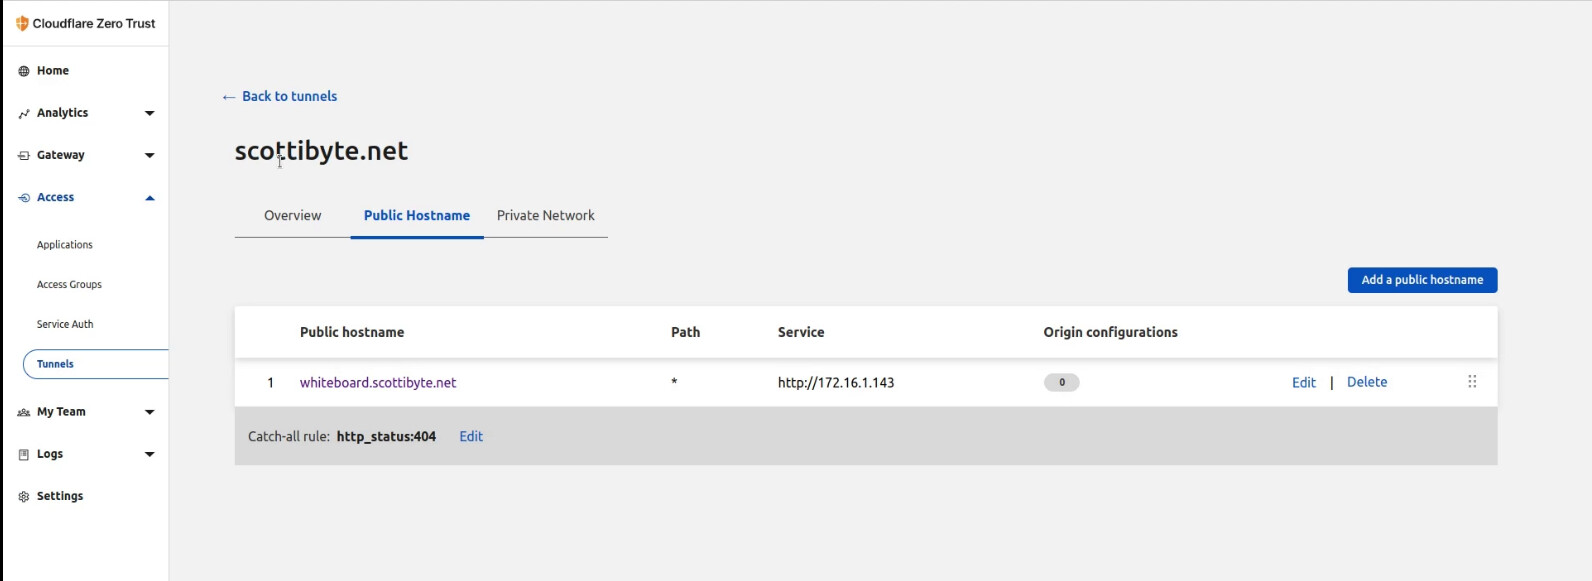
You can add as many public hostname/service entries in the screen above for the applications you have installed on your local network. If a target host expects https, you will have to disable TLS checking in the options to allow it to function.
After this is completed, your services for which you enter records are reachable through your new sub-domain names and they are served securely with SSL.