In this tutorial, we learn how to configure VLAN Adapters in Windows 11, Ubuntu 24.04, and in Incus containers. Although I have covered parts of this topic before, I have had many questions lately on the subject and thought it would be good to combine all of the details into a single presentation.
Virtual LANs (VLANs) are a means of boosting network efficiency by dividing network traffic between different network ranges. VLANs can also improve security if used in conjunction with firewall policies and rules.
For the use of all VLAN features, you will need to be using a managed router with managed switches and managed access points. Retail routers or ISP provided routers are normally not managed devices.
A managed router will support creating a VLAN with a unique address range different from your main LAN address range and one of the most common functions that the managed router will have is a DHCP server specifically offering addresses in the scope of the VLAN address range. VLANs also have a gateway address in the VLAN address range that provide a means for users on the VLAN access other VLANs or the Internet.
I have many VLANs on my Home Lab for different purposes in addition to my Main LAN (untagged LAN) hosted on my Ubiquiti UDM Pro.
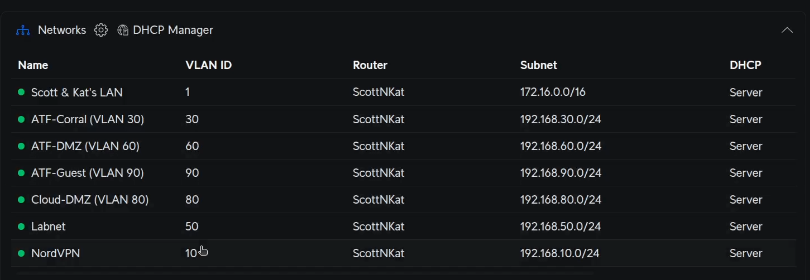
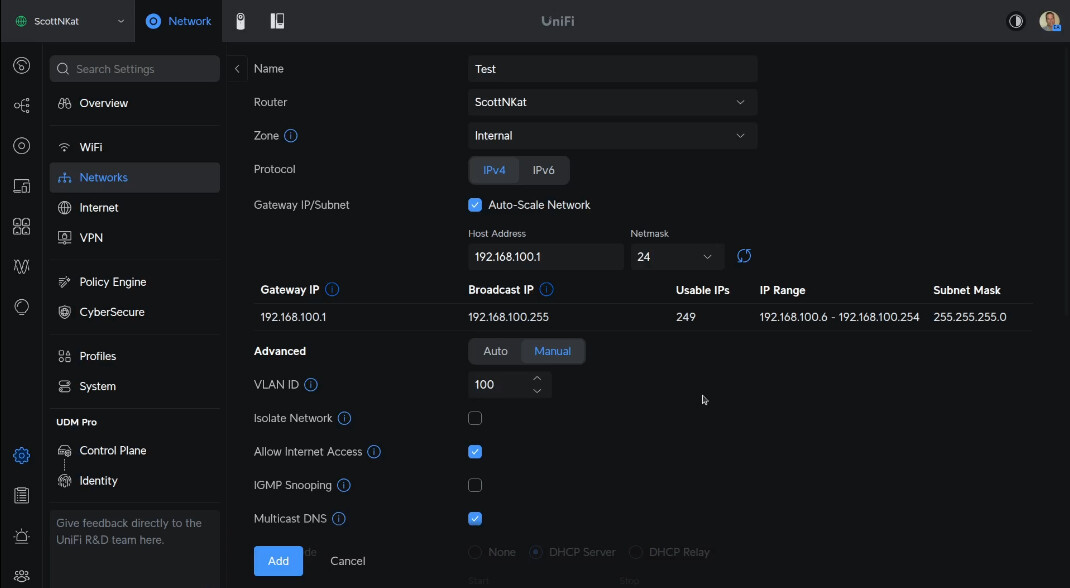
For demonstration purposes in this tutorial, I created a VLAN 100. My personal preference is the match the third octet of the IPv4 address of the VLAN to the VLAN number. That only works for the lower numbers since VLANs can range from 0 - 4095.
By default, Ubiquiti gateways do not have policies restricting access from one VLAN to another and so you would need to create network policies to achieve that. That topic is out of scope for this video and specific to the manufcturer of your gateway/router device.
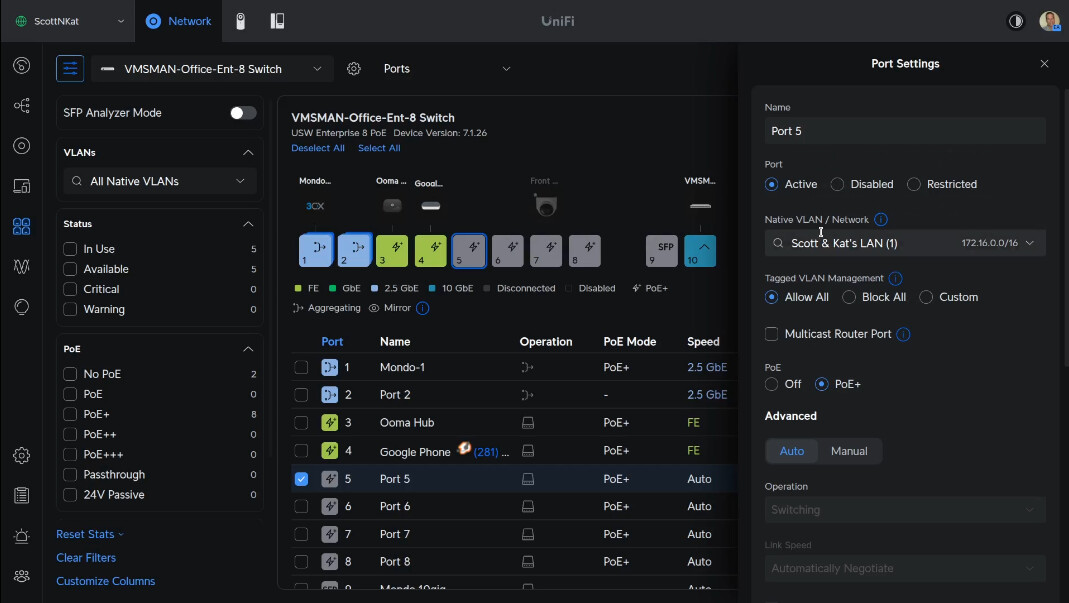
On Unifi switches, the default port profile allows client computers to connect to any VLAN. That can be limited by restricting the port profile for a switch port. Also the “Native VLAN/Network” shown in the following screenshot can be set to control what VLAN a connected device gets an address from by default. As an example, all of my cameras are on my IoT VLAN and so my switch ports where cameras are connected are all set to VLAN 30 (my IoT VLAN).
Setting a default VLAN for a switch port is the primary way that companies control the network that employee computers are connected to. The remainder of this tutorial takes a very different approach to the use of VLANs. We are going to look at how computers connected to an unrestricted port profile can use a single Ethernet adapter to create multiple VLAN adapters. This allows a computer to have applications that can selectively communicate through any VLAN directly.
The easier way to do this is with router/gateway policies/rules. However, the point of this tutorial is to teach you about VLANs and networks. The capability to create VLAN adapters means that one computer can have many network devices on different VLANs that use only one single physical ethernet controller and a single cable connected to it. That means that the VLAN network adapters are “virtual” and all use one piece of hardware but each VLAN adapter has a unique address on the VLAN on which it communicates. That’s total traffic isolation/security and the real power of VLANs.
In the first section of the tutorial we learn how to work with VLANs in Windows 11. I started with a Windows machine on my main LAN.
The easiest way to connect Windows 11 to a VLAN is to go into Device Manager and find your network adapter.
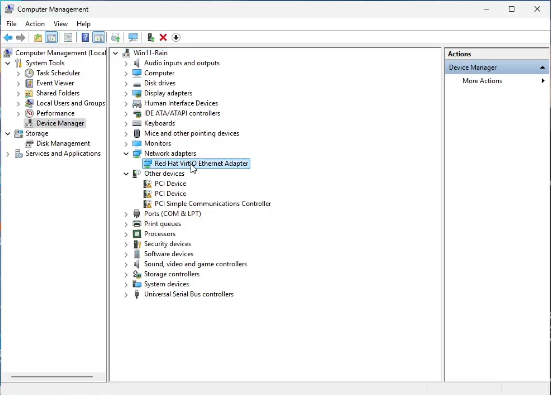
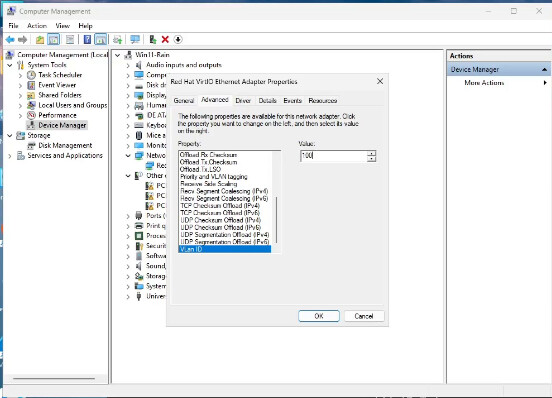
Right click on your adapter, go to properties and then advanced. Scroll to the bottom of the “advanced” list and select “VLAN ID”. In my example, I changed to VLAN 100, which I created earlier.
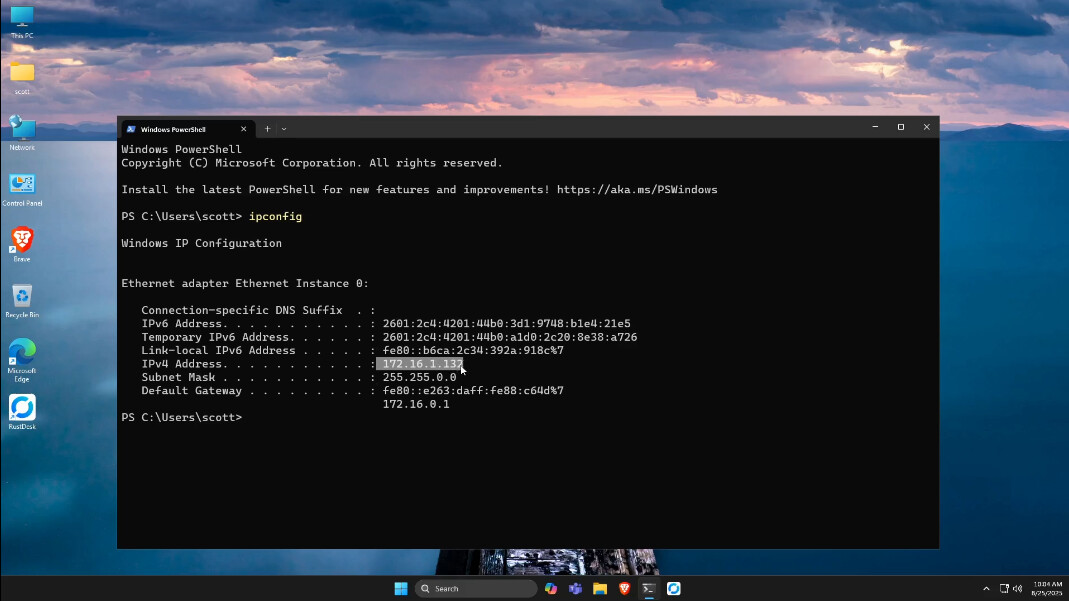
I then headed back to the Powershell and execute the command to renew the adapter address.
ipconfig /renew
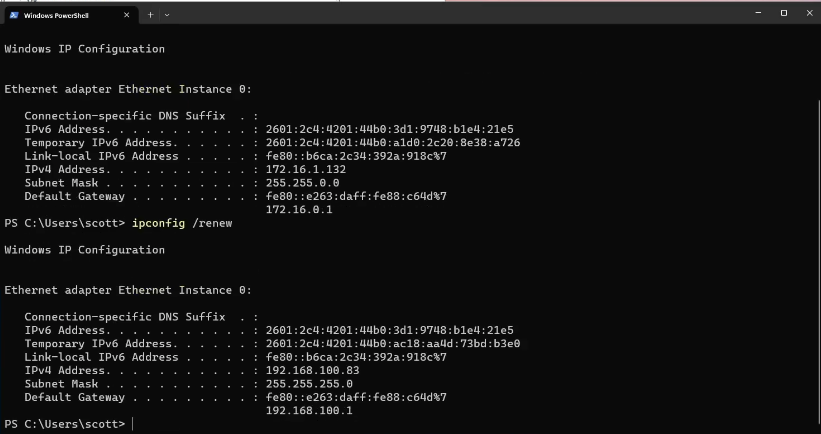
Note above how the address of the adapter and the gateway has changed. In the tutorial, I changed the VLAN ID back to zero and renewed the address again to switch back.
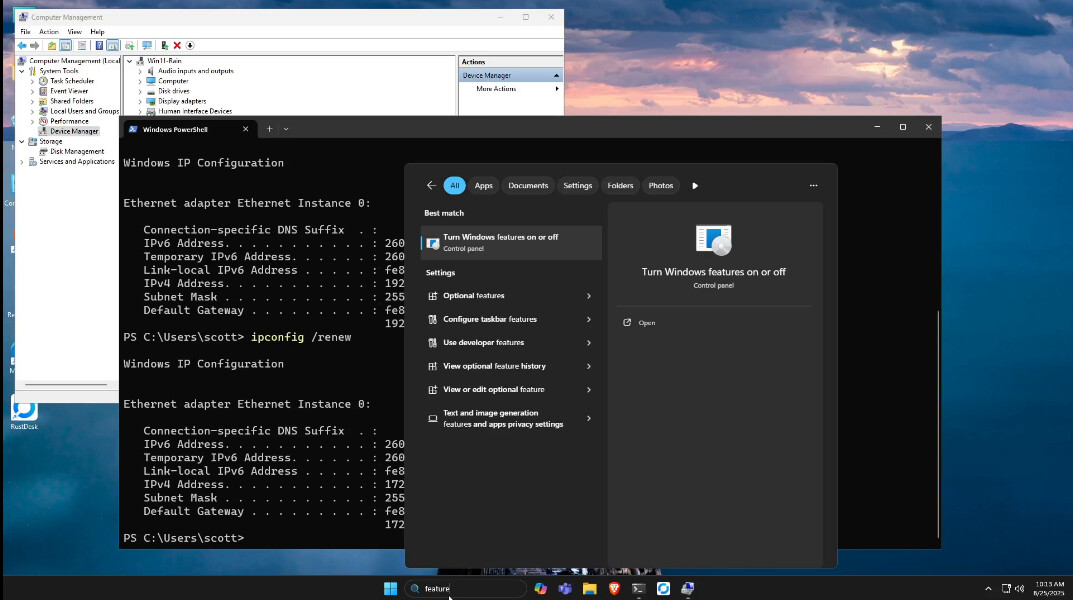
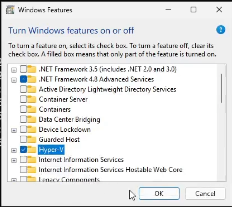
Next we are going to create more than one virtual network adapter in Windows to connect to more than one VLAN. To do this we require Hyper-V virtual switch support which might not be a capability in Windows Home, but is in Windows Professional. Go to the start menu and type “features” and choose the option to turn windows features on or off.
In the Windows Features screen, put a check mark in the Hyper-V box and click Ok. The system will need to reboot to enable Hyper-V.
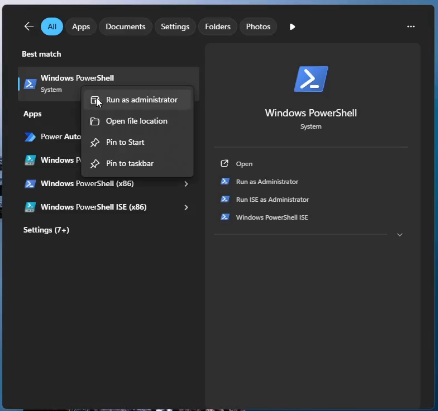
When Windows restarts, launch a PowerShell with the “Run as Administrator” option.
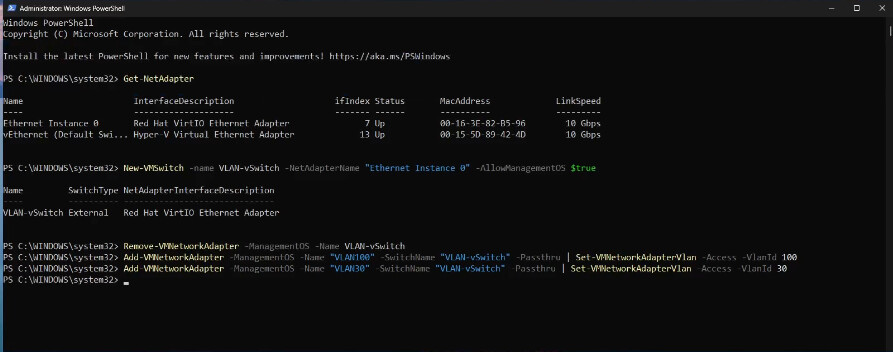
In the Powershell Window, find out the name of your network adapter.
Get-NetAdapter
Create a new virtual switch using the network adapter name you just found.
New-VMSwitch -name VLAN-vSwitch -NetAdapterName "Ethernet Instance 0" -AllowManagementOS $true
Remove the Hyper-V switch created when Hyper-V was installed since we are not using it.
Remove-VMNetworkAdapter -ManagementOS -Name VLAN-vSwitch
Add virtual adapters for VLAN100 and VLAN30 (assuming they exist on your network).
Add-VMNetworkAdapter -ManagementOS -Name "VLAN100" -SwitchName "VLAN-vSwitch" -Passthru | Set-VMNetworkAdapterVlan -Access -VlanId 100
Add-VMNetworkAdapter -ManagementOS -Name "VLAN30" -SwitchName "VLAN-vSwitch" -Passthru | Set-VMNetworkAdapterVlan -Access -VlanId 30
We can also create a device for our main untagged VLAN 0 which I named “MainLAN”:
Add-VMNetworkAdapter -ManagementOS -Name "MainLAN" -SwitchName "VLAN-vSwitch" -Passthru | Set-VMNetworkAdapterVlan -Access -VlanId 0
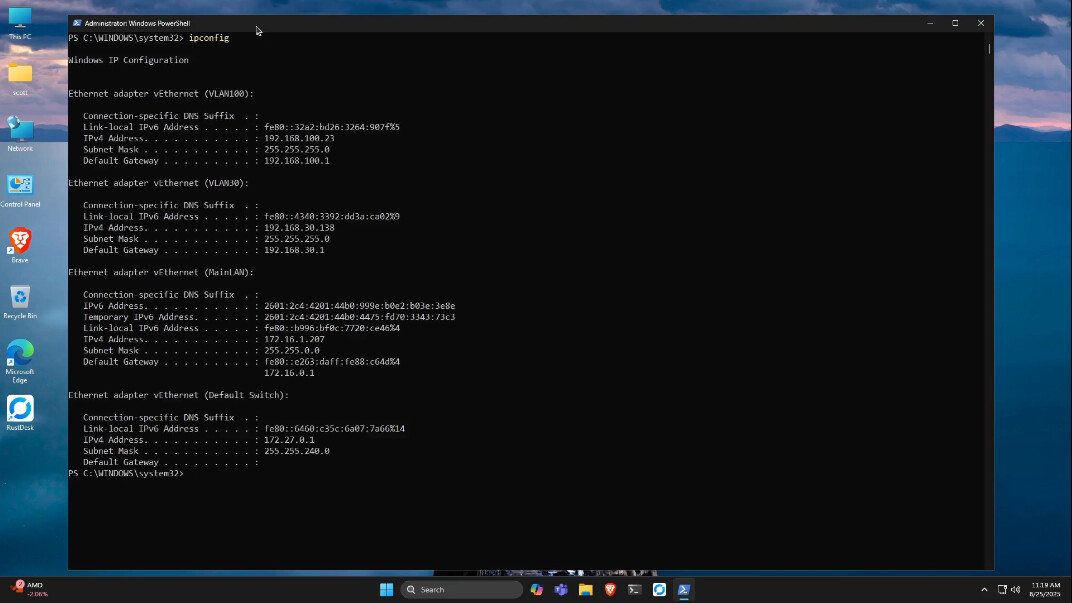
Normally all you would have to do is renew the addresses. However, we had to reboot Windows probably due to the addition of the new virtual switch. After the reboot, you can see all three adapters with the correct addresses.
We can remove the VLAN adapters with these commands:
Remove-VMNetworkAdapter -ManagementOS -Name VLAN100
Remove-VMNetworkAdapter -ManagementOS -Name VLAN30
Ubuntu Virtual Adapters
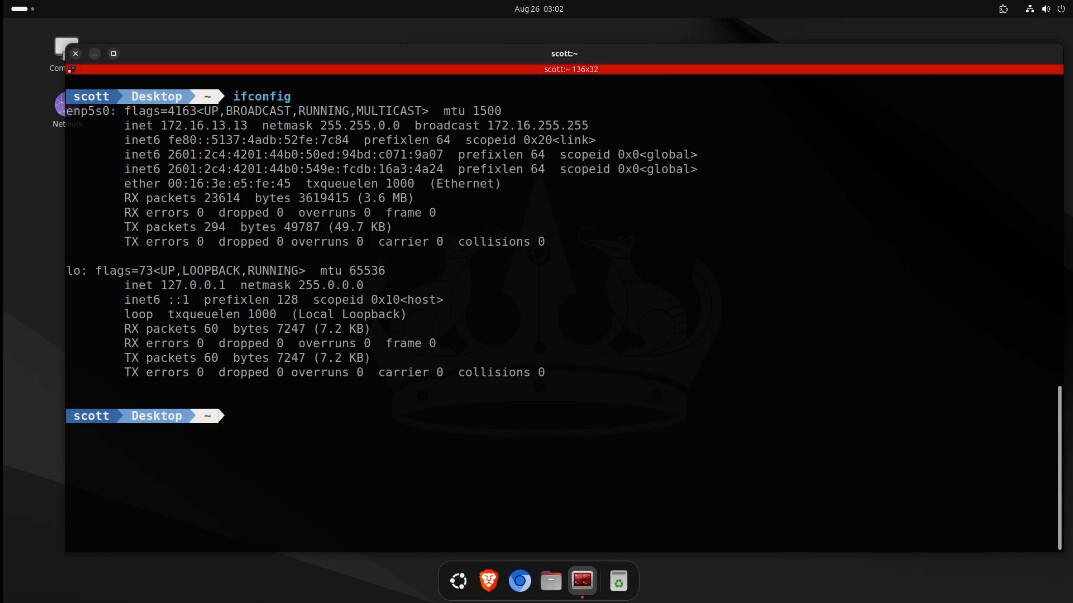
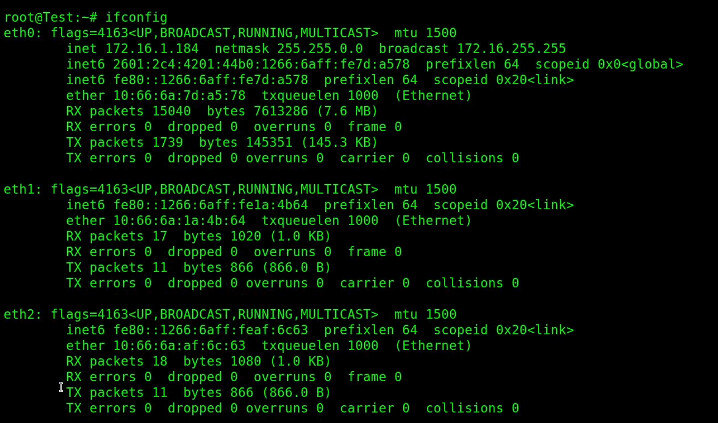
On my Ubuntu 24.04 desktop, I can examine my default network interface.
ifconfig
I am going to use Netplan in Ubuntu to add VLAN adapters.
cd /etc/netplan
I edited my netplan file and the name of your netplan file may differ
sudo nano 10-lxc.yaml
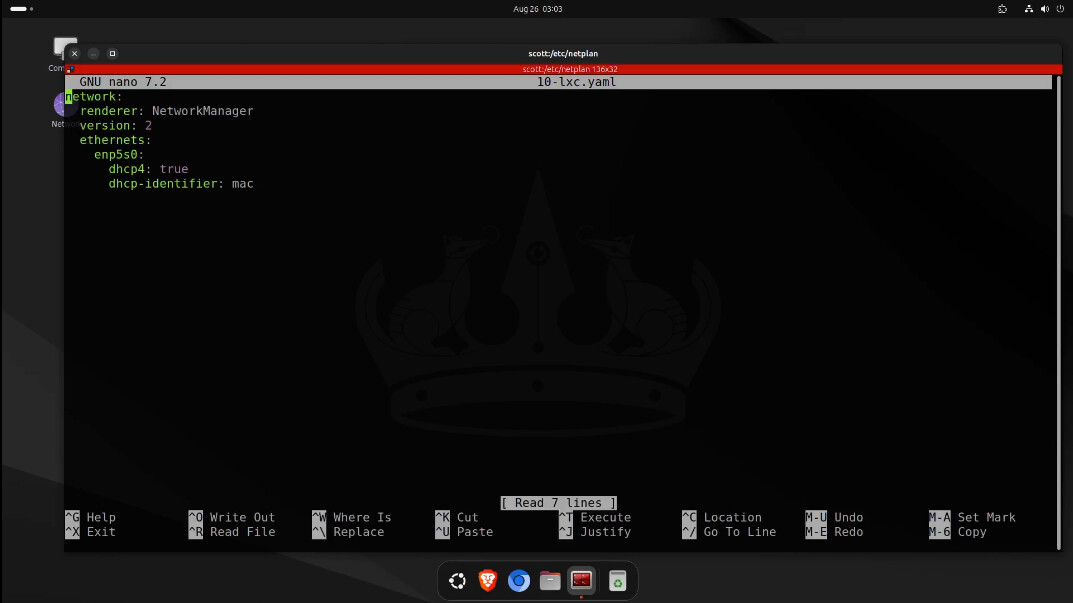
I use a series of CTRL K’s to delete the contents of the file. I replaced it with:
network:
  version: 2
  renderer: networkd
  ethernets:
    enp5s0:
      dhcp4: true
  vlans:
    vlan100:
      id: 100
      link: enp5s0
      dhcp4: true
    vlan200:
      id: 200
      link: enp5s0
      dhcp4: true
I did a CTRL O and enter to save the file and a CTRL X to exit the nano editor. I had gone back and created a VLAN200 on my UDM Pro since this desktop is a virtual machine and I had host conflicts with VLAN30 used in the previous Windows example.
To make this new configuration take effect.
sudo netplan apply
Let’s see the results.
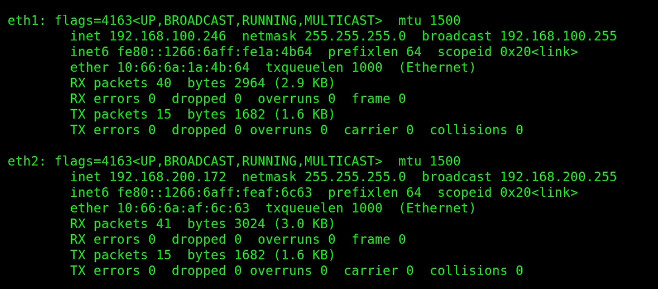
ifconfig
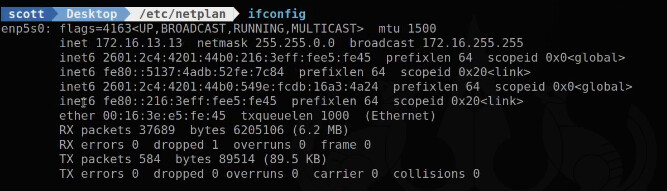
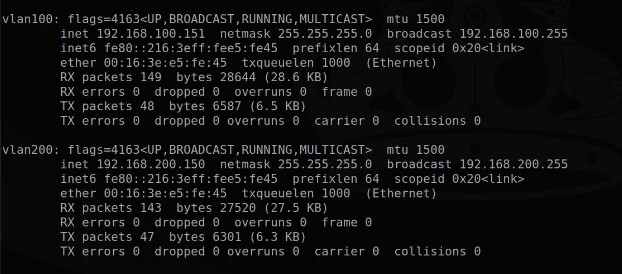
Note that we now have a vlan100 and a vlan200 device and they both have appropriate addresses.
Creating VLAN Adapters in Incus Containers
Lets create a new Incus profile.
incus profile create multi-net
Let’s edit that profile which is only a template at this point. So, just delete all of the lines in the file.
incus profile edit multi-net
Paste the following into the editing session.
config: {}
description: Multiple VLAN Connections
devices:
  eth0:
    nictype: bridged
    parent: bridge0
    type: nic
  eth1:
    nictype: macvlan
    parent: bridge0
    type: nic
    vlan: "100"
  eth2:
    nictype: macvlan
    parent: bridge0
    type: nic
    vlan: "200"
name: multi-net
The eth0 device above does what “bridgeprofile” from my “Incus Containers Step by Step” tutorial does by simply bridging eth0 to the main LAN using our bridge0 device also created in that same tutorial. The eth1 and eth2 adapters are new and they connect to vlan100 and vlan200. Do a CTRL O and enter to save the file and a CTRL X to exit the nano editor.
Create an Incus container using the new profile.
incus launch images:ubuntu/24.04 Test -p default -p multi-net -c boot.autostart=true
Move inside the container.
incus shell Test
Accept the updates.
apt update && apt upgrade -y
Install some dependencies.
apt install net-tools nano
Look at the network configuration.
ifconfig
Notice that both eth1 and eth2, although existing, have no addresses.
Move over to the netplan folder.
cd /etc/netplan
Edit the netplan file.
nano 10-lxc.yaml
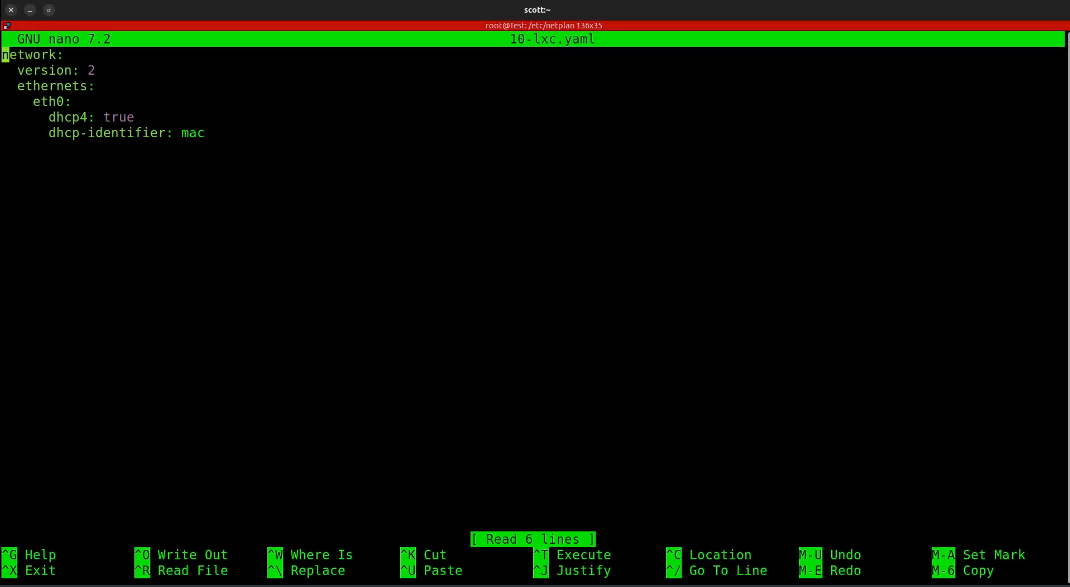
The lack of configuration above for eth1 and eth2 explains why they have no addresses. Replace the configuration with the following:
network:
  version: 2
  ethernets:
    eth0:
      dhcp4: true
      dhcp6: true
    eth1:
      dhcp4: true
      dhcp6: true
    eth2:
      dhcp4: true
      dhcp6: true
Save the file with a CTRL O and enter and a CTRL X to exit the nano editor.
Execute the new configuration.
netplan apply
After this, an ifconfig will show they both have addresses now.
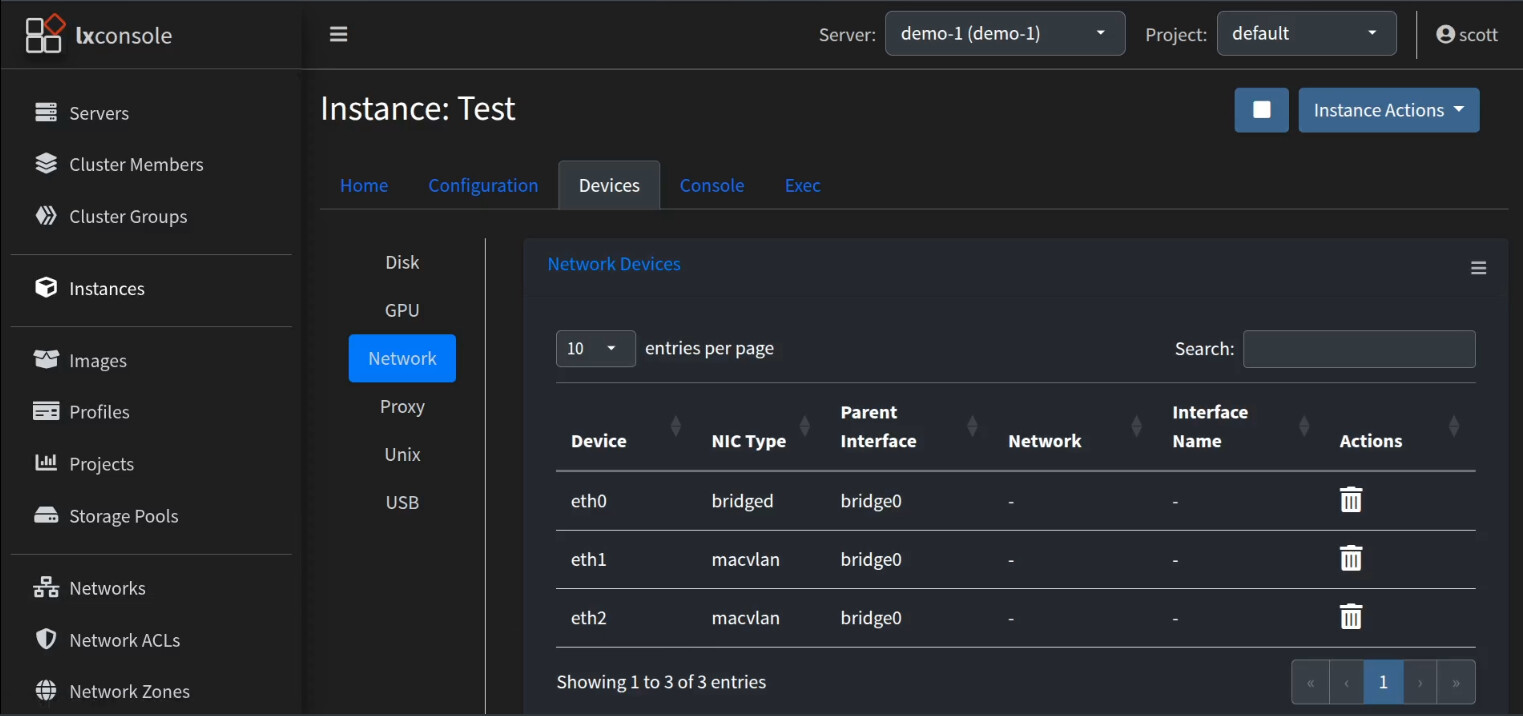
If I go into my LXConsole Web interface, I can easily see the addresses also.

LXConsole also provides a perspective on the devices themselves.
Obviously it might be easier to perform VLAN access with gateway/router policies and rules. However, there are instances where using the techniques shown in this tutorial can be leveraged to your advantage. Understanding how this all works is critical to understanding network VLAN Infrastructure.