This tutorial shows how to use LXD Dashboard to configure and use a LXD container to communicate on more than one VLAN. This assumes that you have created LXD Profiles for your other VLANs on your network. I have several videos that talk about how to create VLAN Profiles in LXD.
Here’s an example of adding a VLAN profile in LXD using the CLI assuming that your parent device bridge0 exists (bridge0 creation discussed in my LXD Containers 101 tutorial):
lxc profile create vlan300
lxc profile device add vlan300 eth0 nic nictype=macvlan parent=bridge0 vlan=300
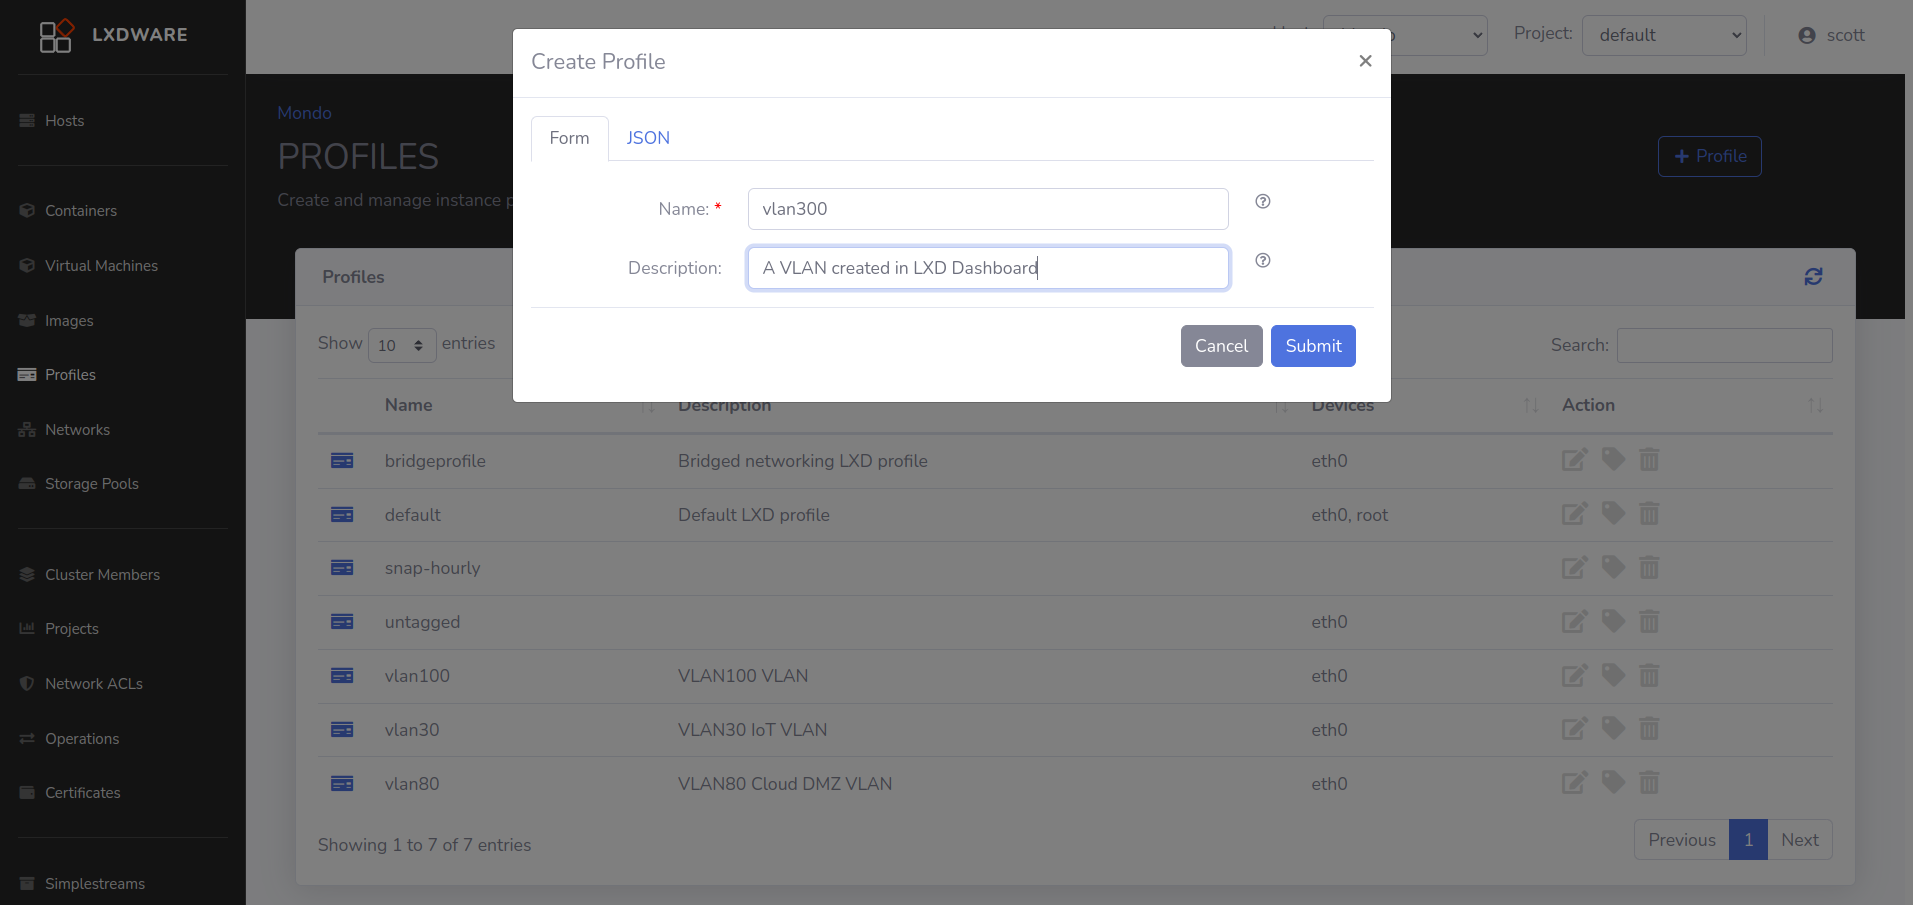
The same VLAN created in LXD Dashboard:
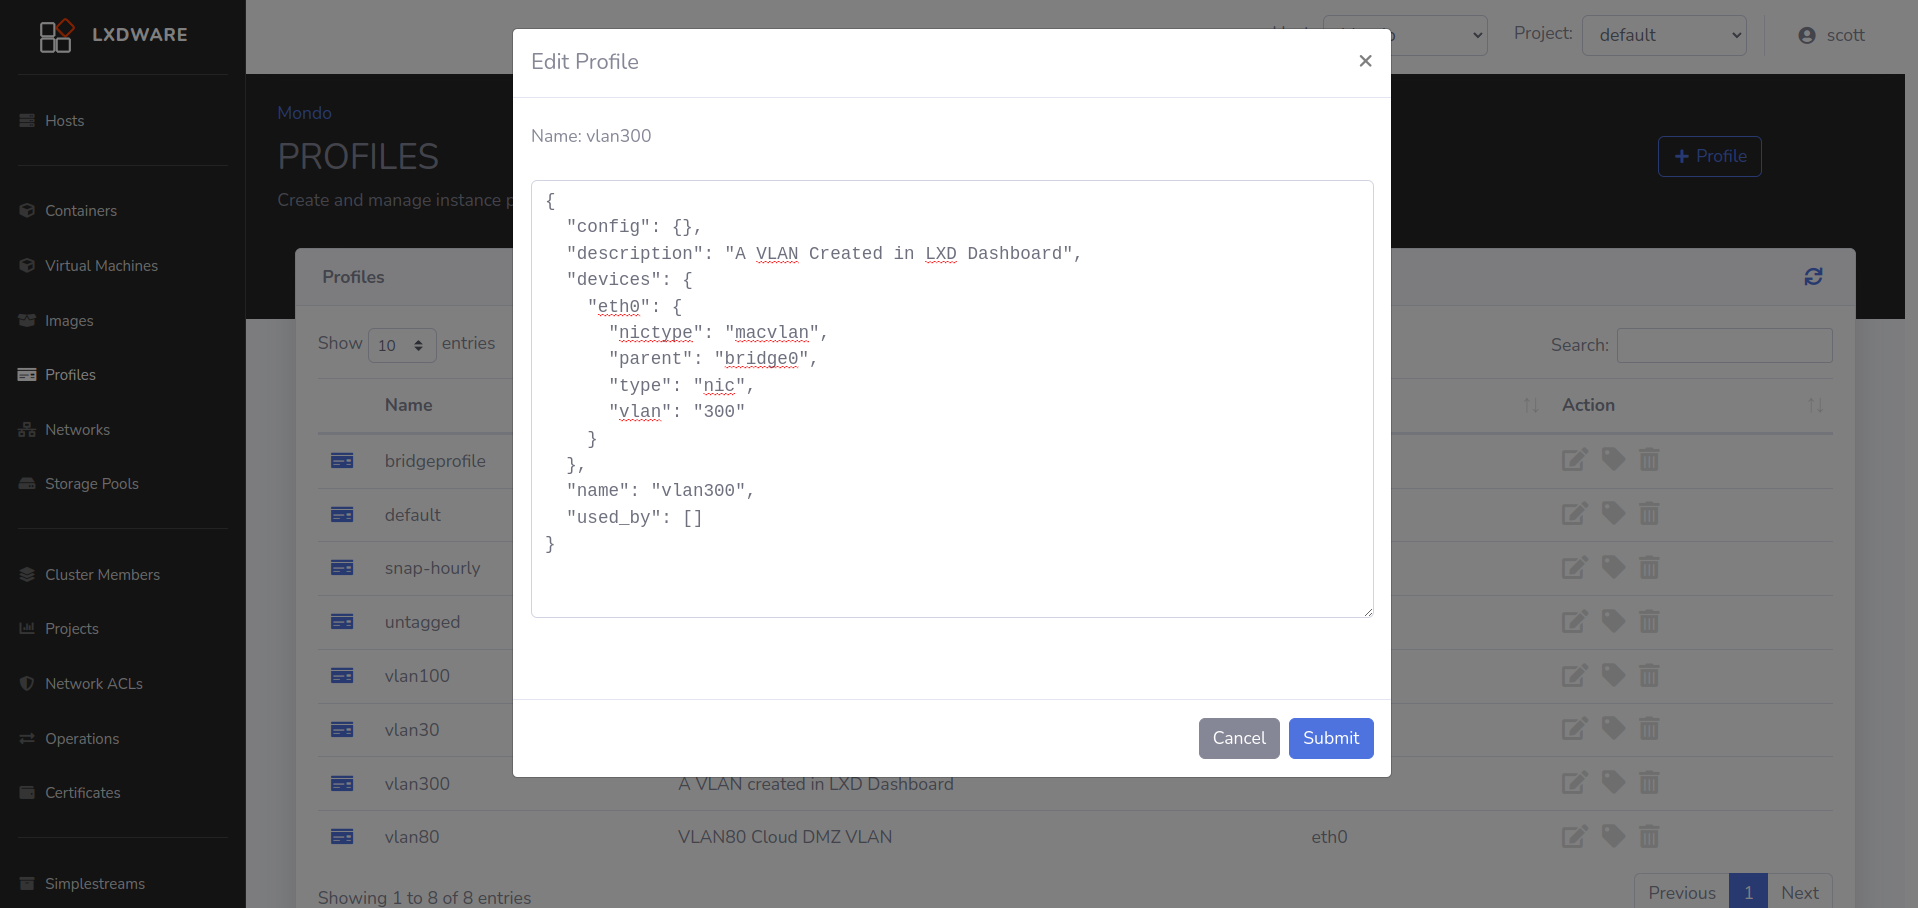
Then we edit the VLAN profile as follows:
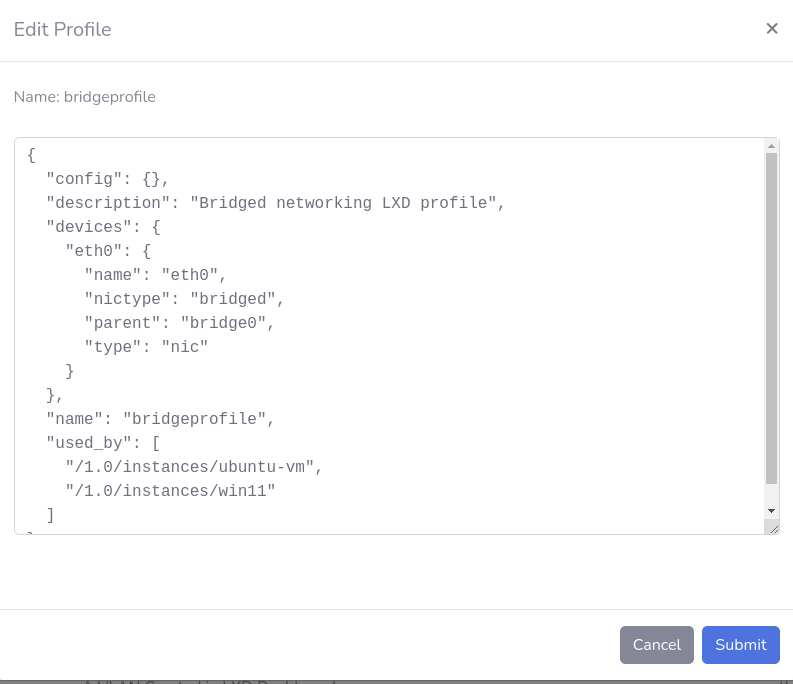
You will want to create a Profile to “bridge” to your main LAN and that requires that you have created a network bridge for your LXD host. I create “bridgeprofile” in several other videos. Assuming you have a Netplan Bridge on your LXD host as described in my other videos, your LXD “bridgeprofile” profile looks like this:
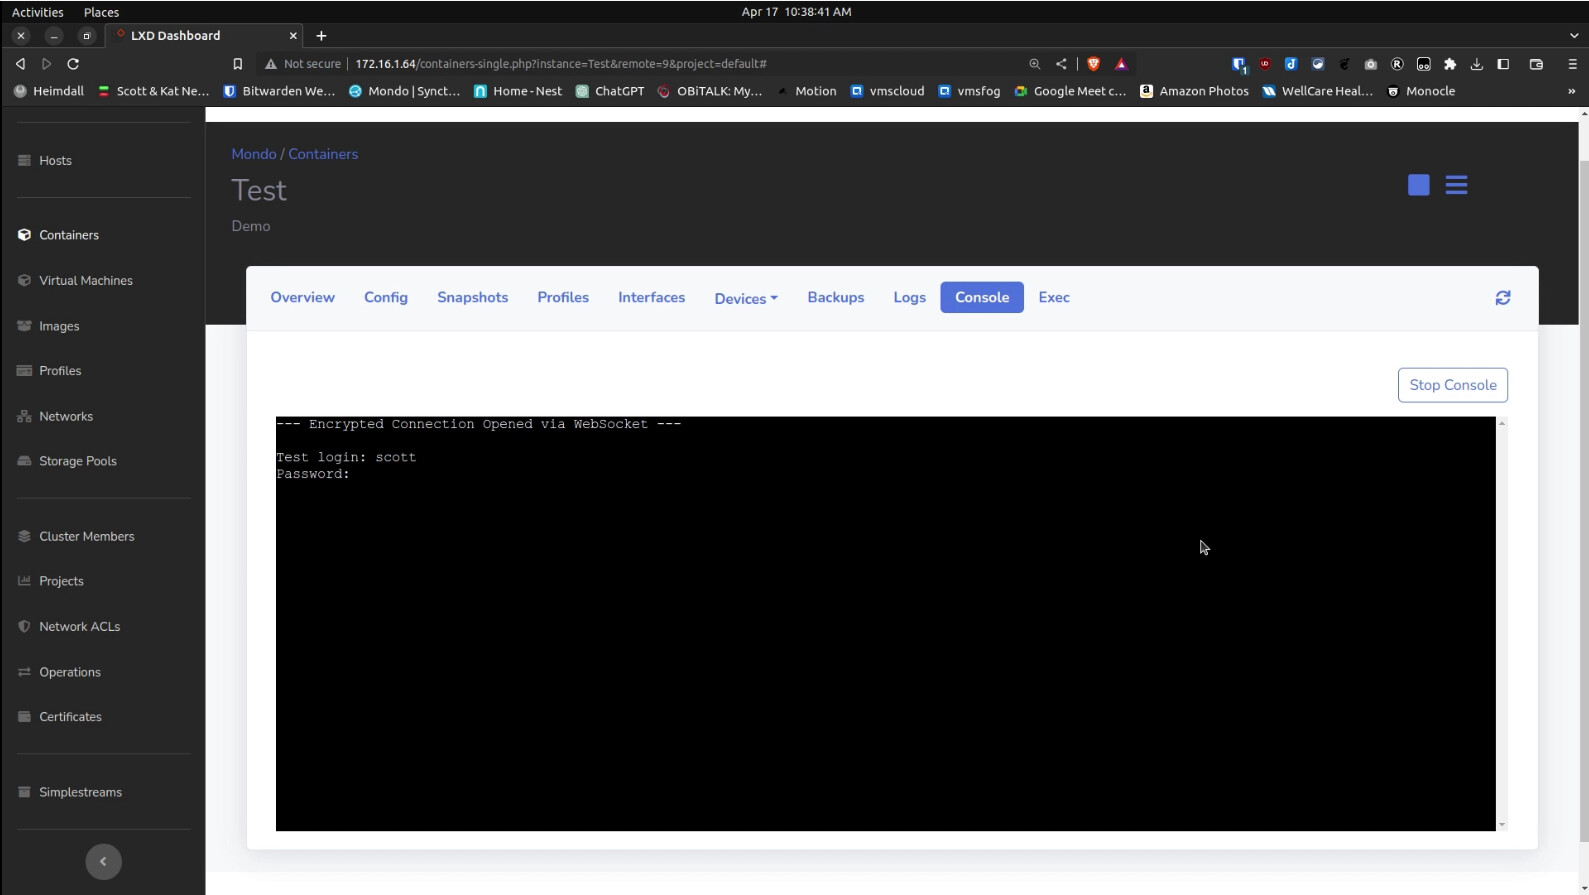
In the video I create a container called Test with LXD Dashboard which I also connect to the MAIN LAN with my “bridgeprofile”. I then connect to the “Exec” interface and I update the container and install docker:
apt update && apt upgrade -y
curl -sSL https://get.docker.com | sh
apt install docker-compose
I added a user account and put it in both the sudo and the docker groups:
adduser scott
usermod -aG sudo scott
usermod -aG docker scott
For convenience, I installed net-tools:
apt install net-tools
I exited the “Exec” screen, moved over to the "Console screen and logged into my new user account.
Next I create a folder to install the docker application Watch Your LAN (wyl) inside our LXD container.
mkdir wyl
cd wyl
Next edit a docker-compose file:
nano docker-compose.yml
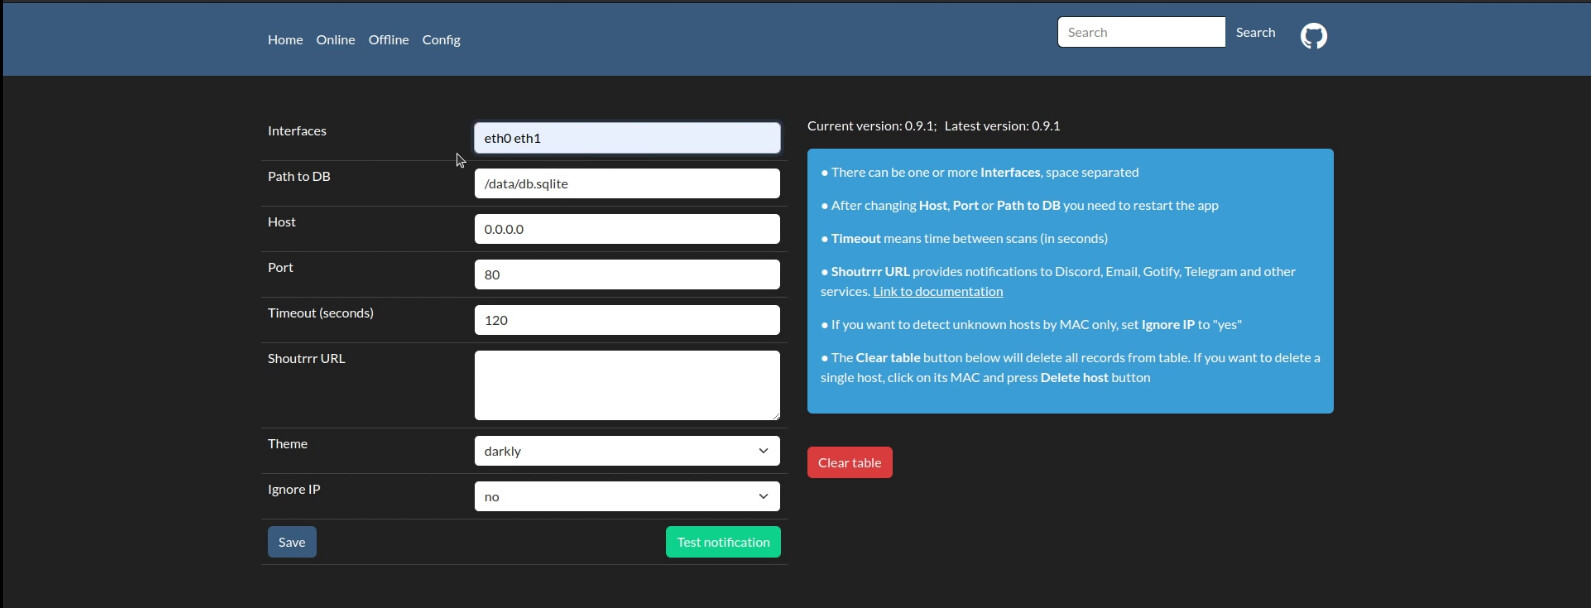
Paste the following contents into the file and modify your timezone accordingly:
version: "3"
services:
wyl:
image: aceberg/watchyourlan
network_mode: "host"
restart: unless-stopped
volumes:
- ~/.dockerdata/wyl:/data
environment:
TZ: America/Chicago # required: needs your TZ for correct time
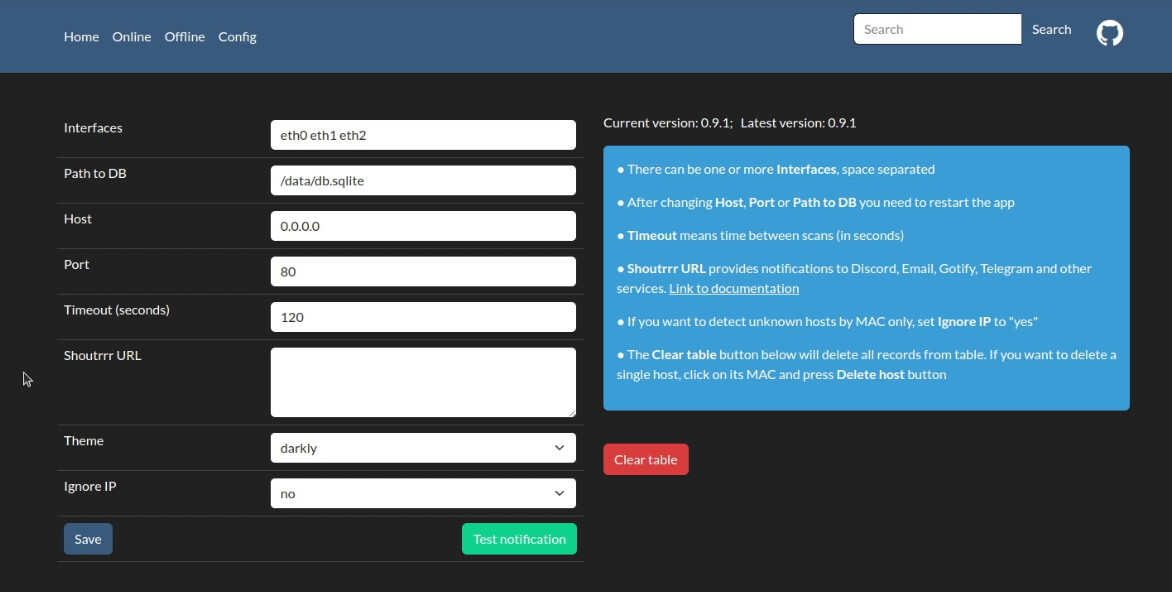
IFACE: "virbr-bw wlxf4ec3892dd51" # required: 1 or more interface
DBPATH: "/data/db.sqlite" # optional, default: /data/db.sqlite
GUIIP: "0.0.0.0" # optional, default: localhost
GUIPORT: "80" # optional, default: 8840
TIMEOUT: "120" # optional, time in seconds, default: 60
SHOUTRRR_URL: "" # optional, set url to notify
THEME: "darkly" # optional
IGNOREIP: "no" # optional
Save the file with a CTRL O and Enter and then a CTRL X to exit the editor.
Launch Watch Your LAN:
docker compose up -d
Go to your web browser at the address of the LXD container we created to enter the “wyl” interface.
NOTE: If your LXD container is NOT bridged to your Main LAN, you will not see the devices on your LAN.
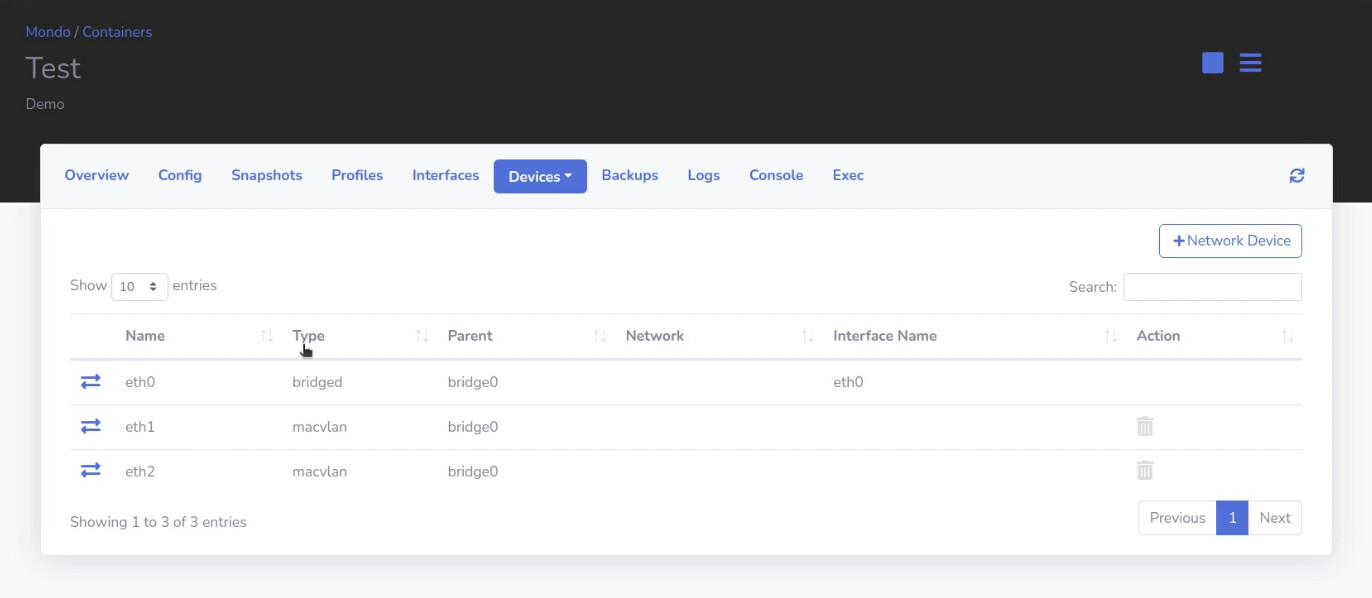
Later in the video, I add device eth1 to point to one of my vlans and later device eth2 to point to another vlan. THIS ASSUMES THE VLAN EXISTS ON YOUR NETWORK. First I go to Devices:
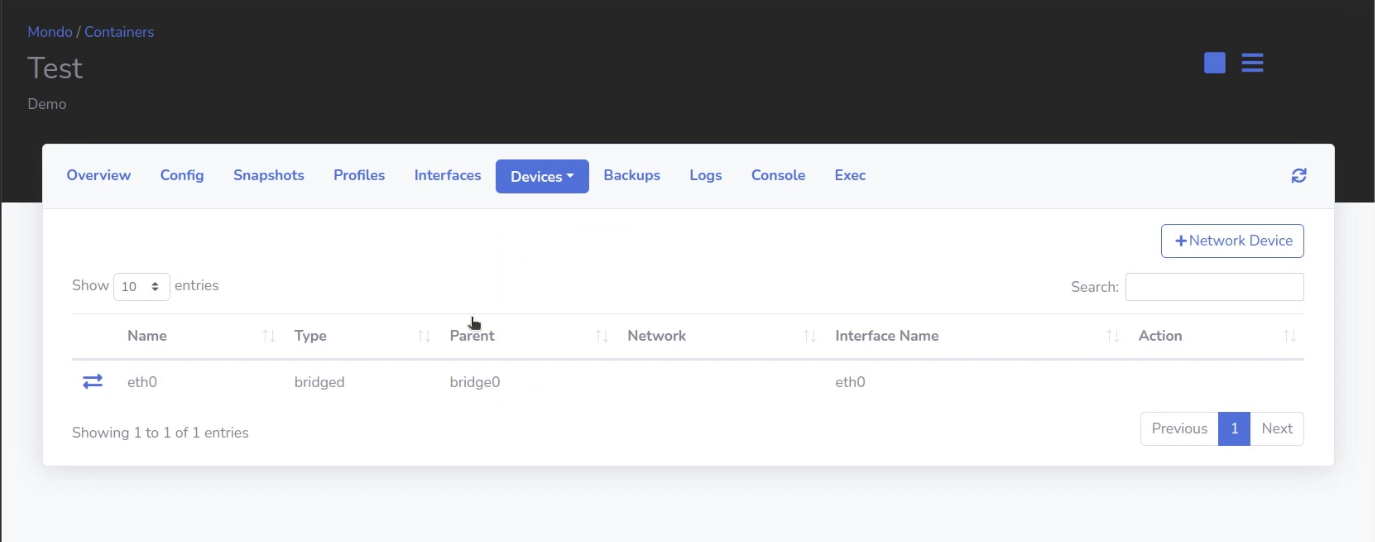
Then I click add network and I add an eth1 device and point it to vlan 30.

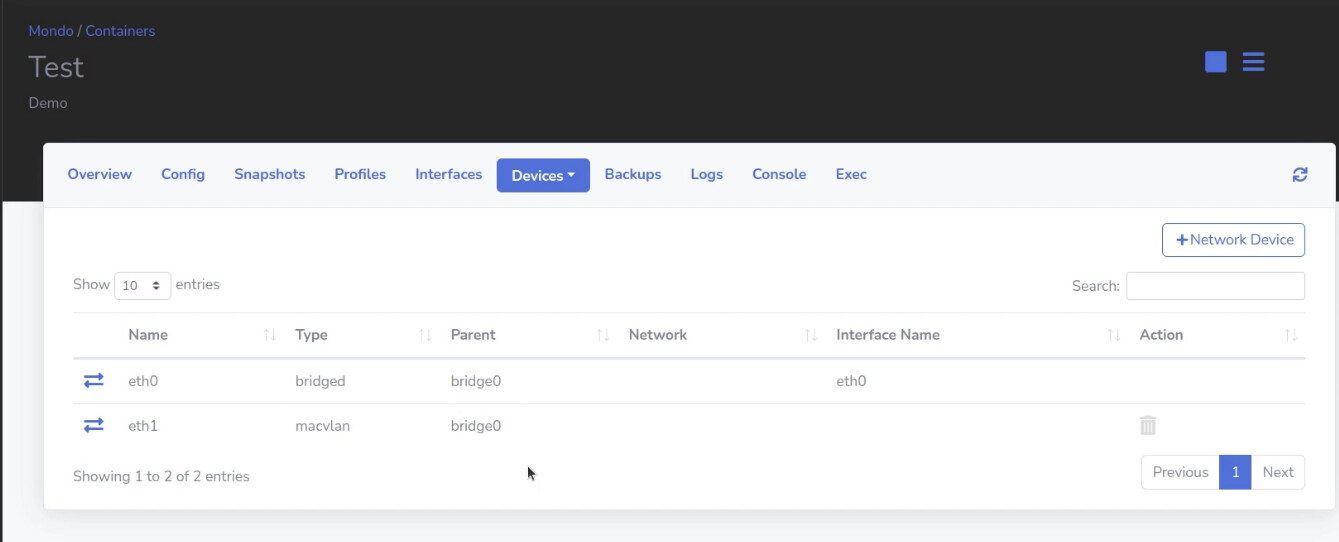
The new macvlan device should look like this:
To allow the new device eth1 to get an address on the vlan, we must go edit the netplan file in the LXD container.
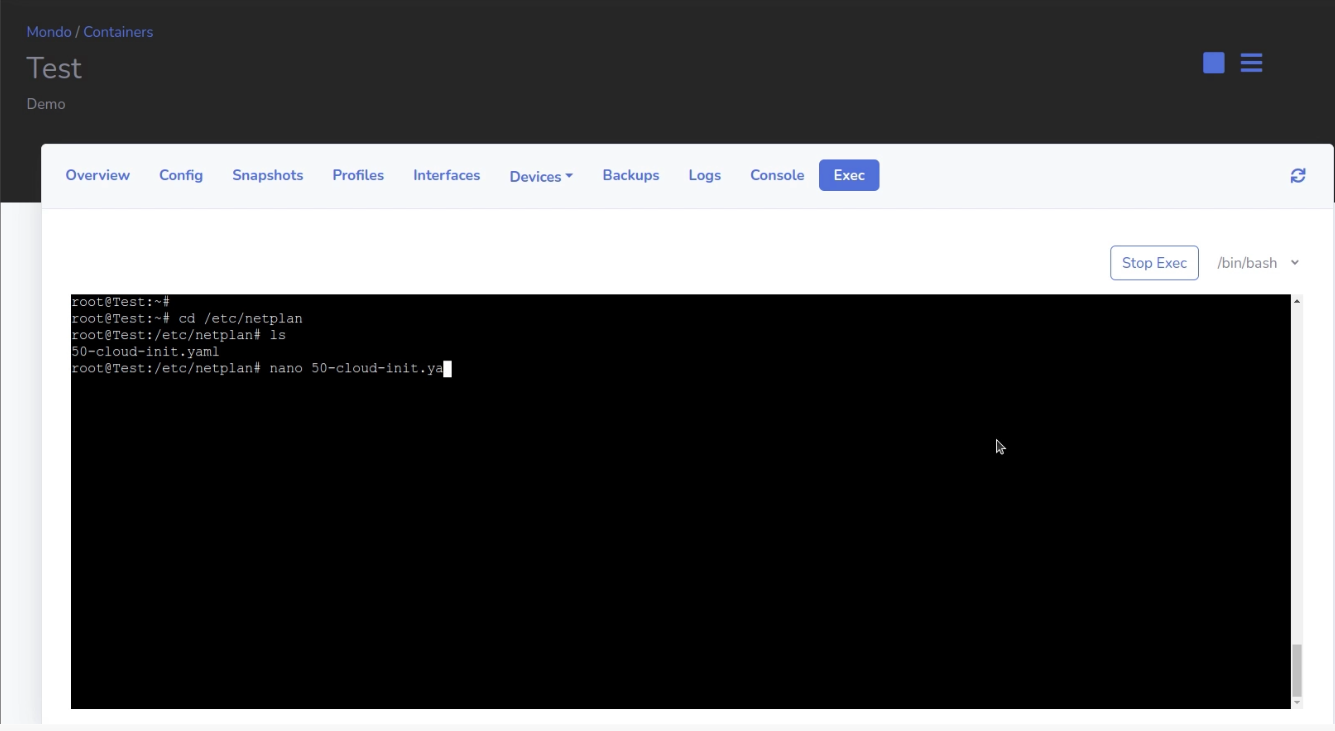
Edit the Netplan YML file as follows:
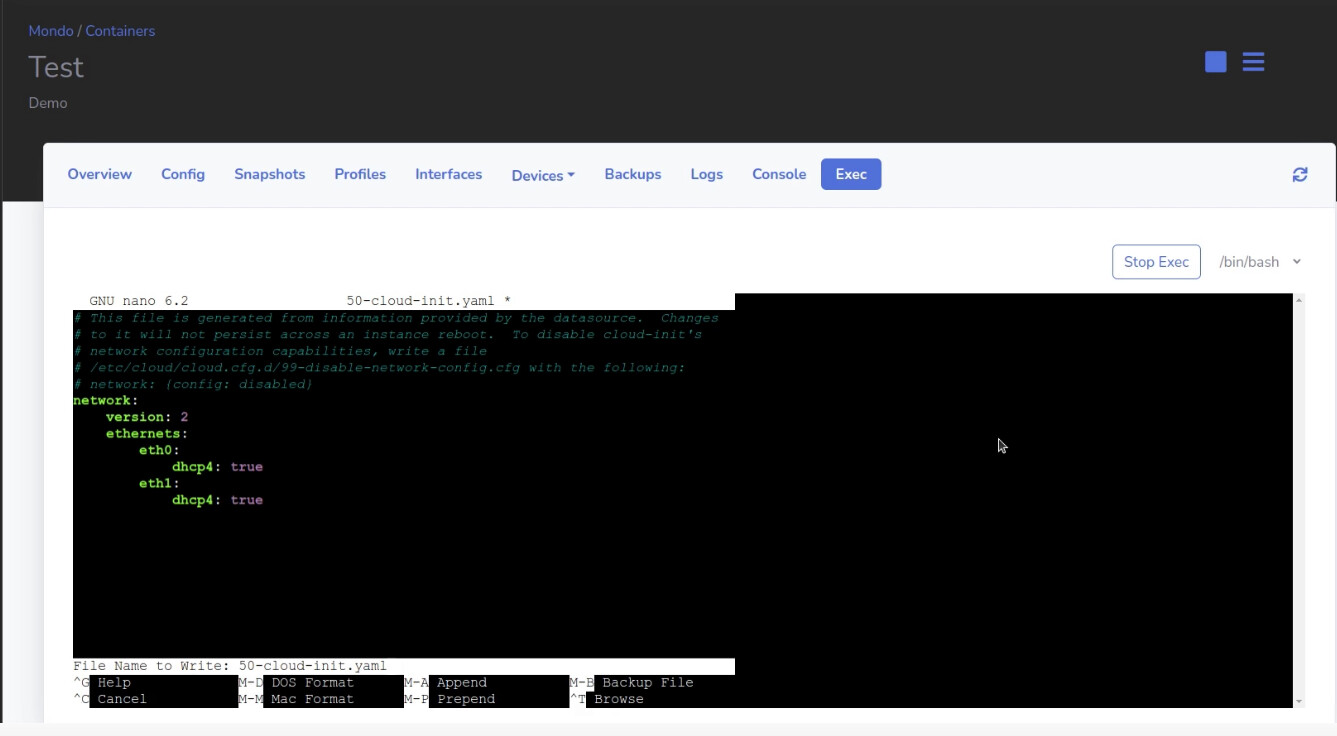
Apply the Netplan file:
netplan apply
If everything worked, you should see the addresses for eth0 and eth1 in the Interfaces screen of LXD-Dashboard:

In the Watch Your LAN application config screen, make sure and not skip the step to add the new eth1 device like I did in the video.
Later in the video, I followed the previous steps and also added another device named eth2 that pointed to vlan 80:
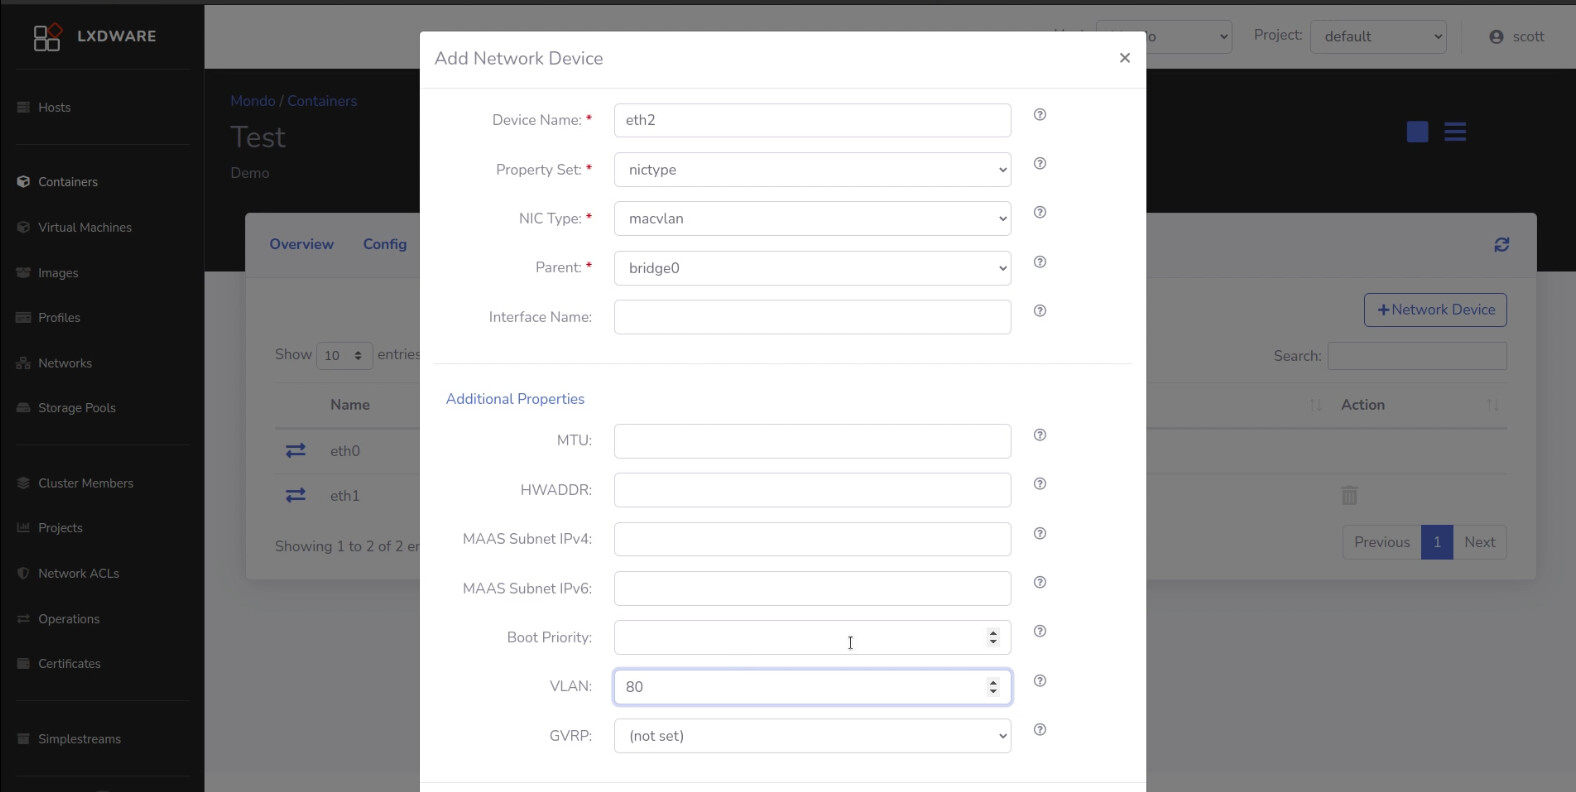
Don’t forget to edit and update the netplan file on the LXD container to include eth2 also:
Finally, apply the updated netplan file:
netplan apply
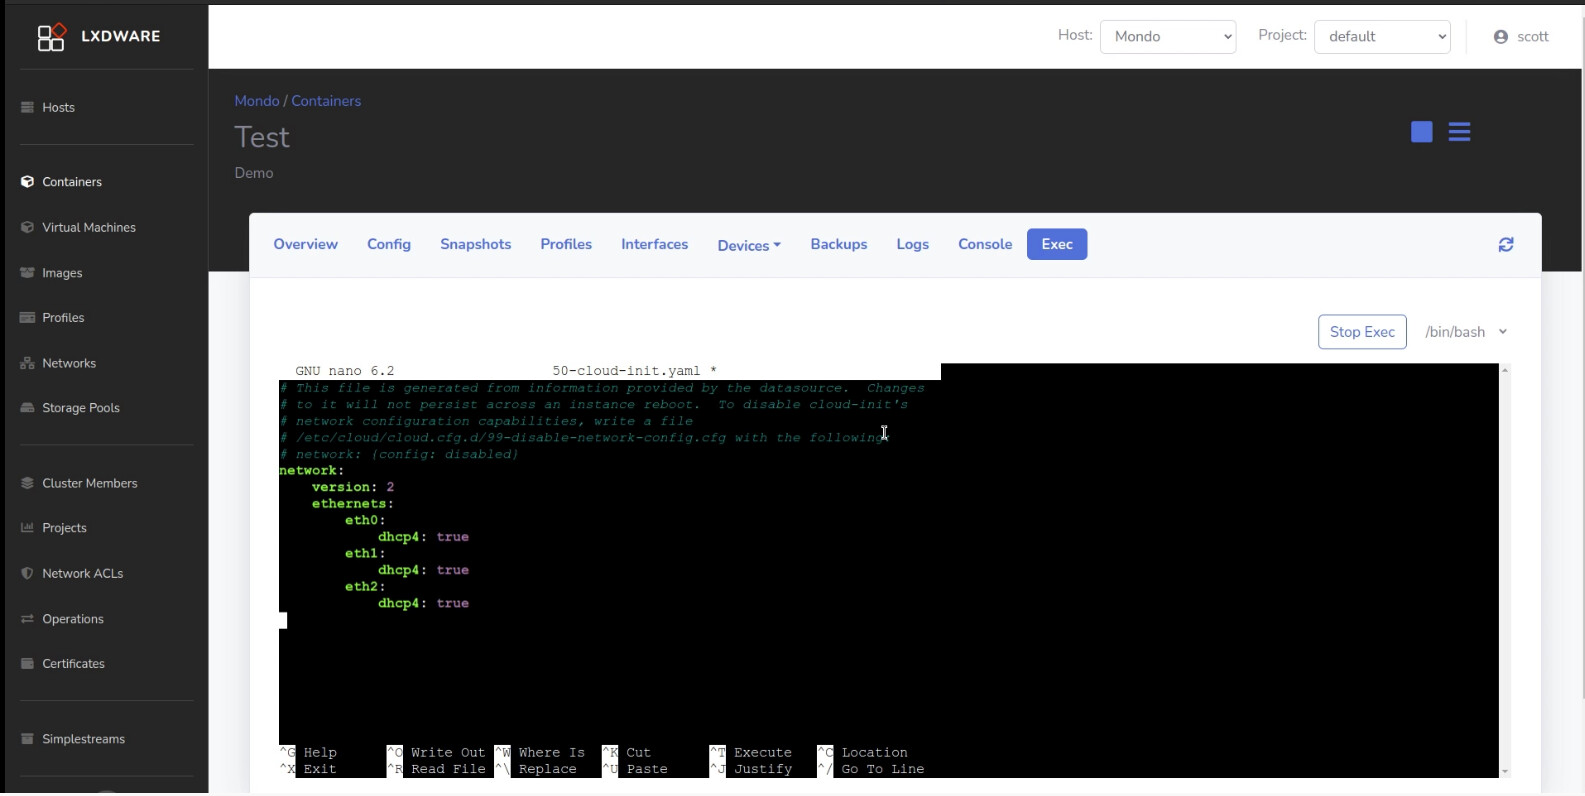
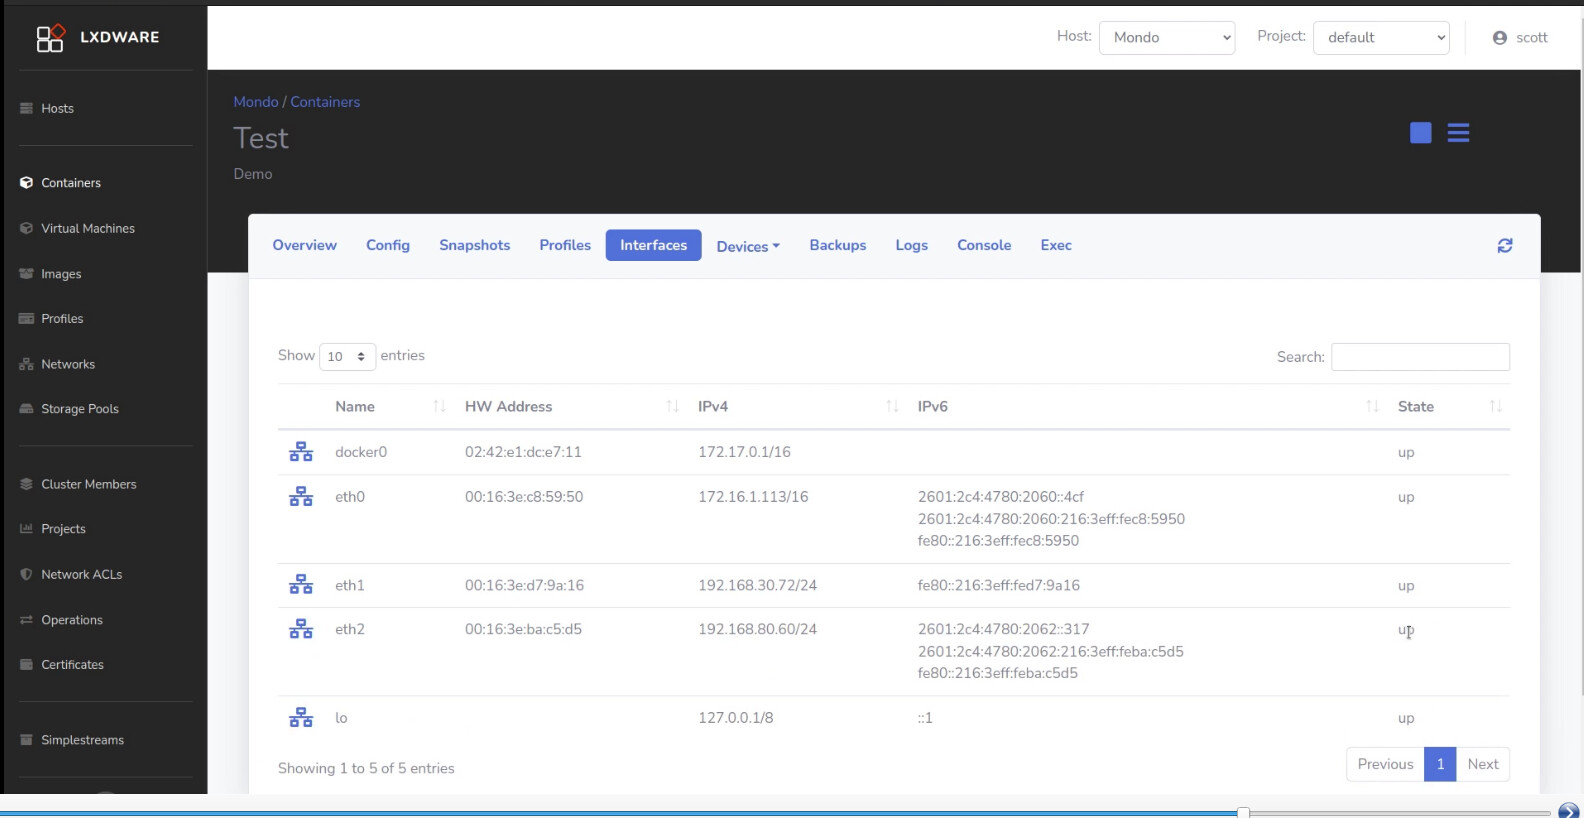
So, now I have three Ethernet interfaces on my LXD container.
Don’t forget to add eth2 to the Watch Your LAN config screen.
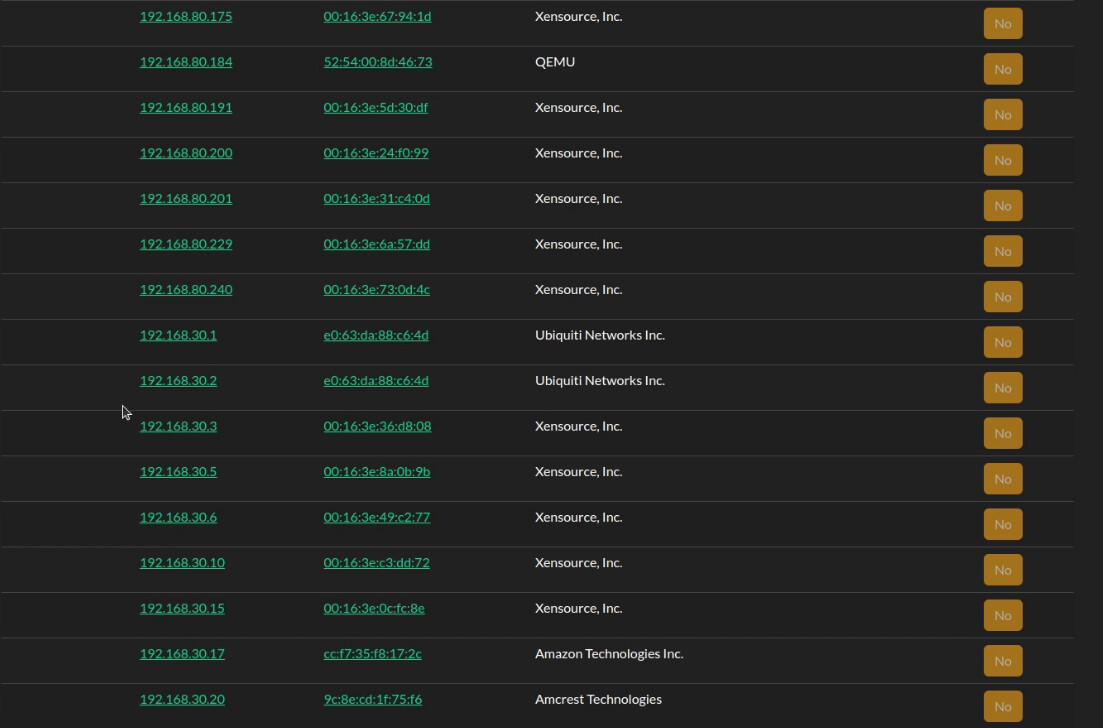
After a couple minutes, Watch Your LAN will display addresses from all the configured VLANs we added to the container:
The completed configuration with all three devices shows in LXD Dashboard: