This presentation focuses on how to perform nested virtualization. The initial intent was to explain to Windows 10/11 users how they might be able to create an Ubuntu Server VM in Windows using Hyper-V and have it present an address on the main LAN.
From there, the idea is to configure LXD on the Ubuntu VM and and have it capable of bridging its LXD containers to unique LAN addresses. This effort requires nested virtual switches. Virtual switches are also called bridges and nesting virtual switches as well as virtual containers requires some understanding. I will explain all of this here.
In this video, I am running a Windows 11 Virtual Machine on my Ubuntu 22.04 desktop via Kvm Virt-Manager. I am running an Ubuntu 22.04 Server Virtual Machine inside of the Windows 11 VM via Microsoft Hyper-V.
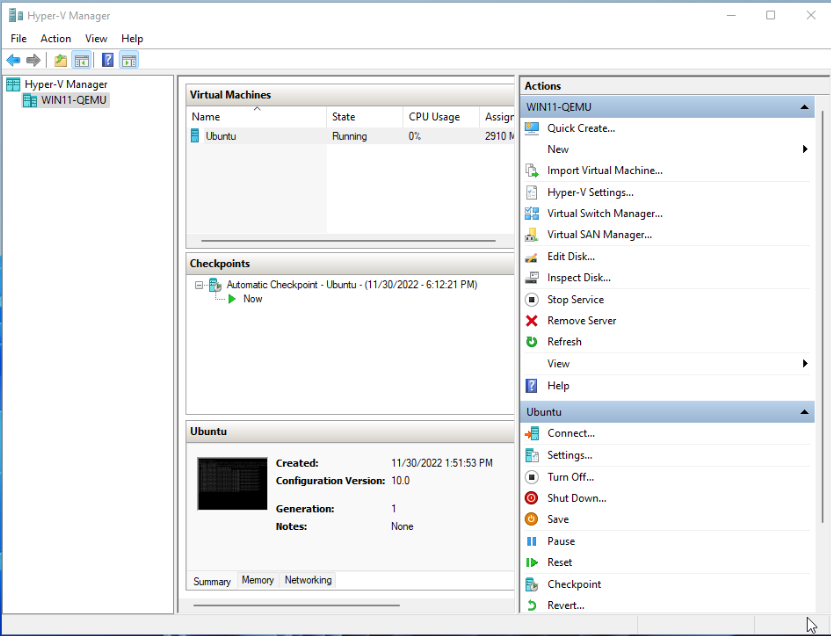
Inside of the Ubuntu Server, I configure LXD. Then I created LXD containers that bridge to the Main LAN providing each LXD container its own IP address from the LAN.
Furthermore, I installed Docker inside of one LXD container and installed the Docker Whiteboard project inside of it and accessed the Whiteboard from a web browser elsewhere on the network. The beauty of this is that the docker application has its own dedicated IP address.
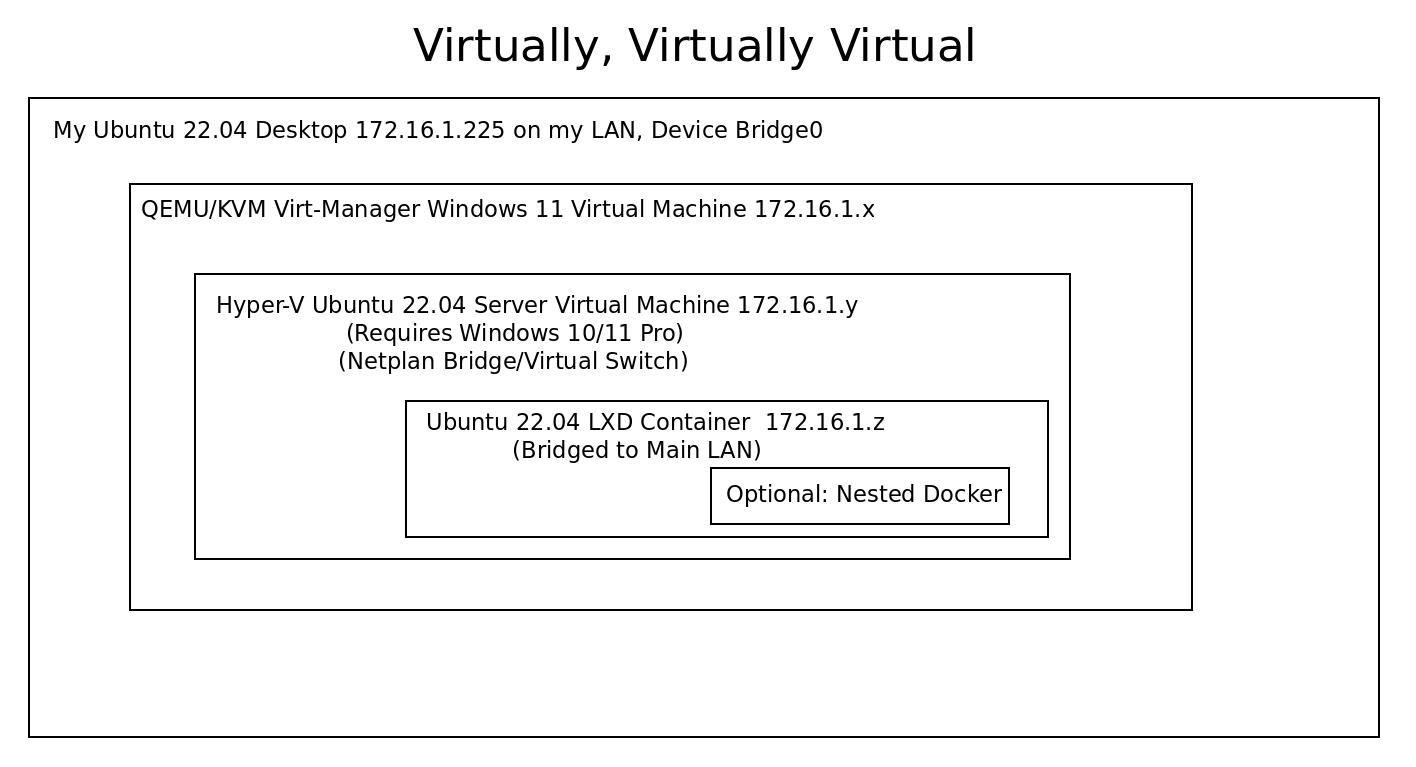
Conceptually, here’s how this all looks.
Note that this video uses Microsoft Hyper-V which is an optional component of Windows 10/11 and is only available in Windows 10/11 Pro, Enterprise or Educational editions and it not an option in Windows Home Edition. We use Hyper-V as opposed to VirtualBox because of better performance and low level intergration with Windows virtualization.
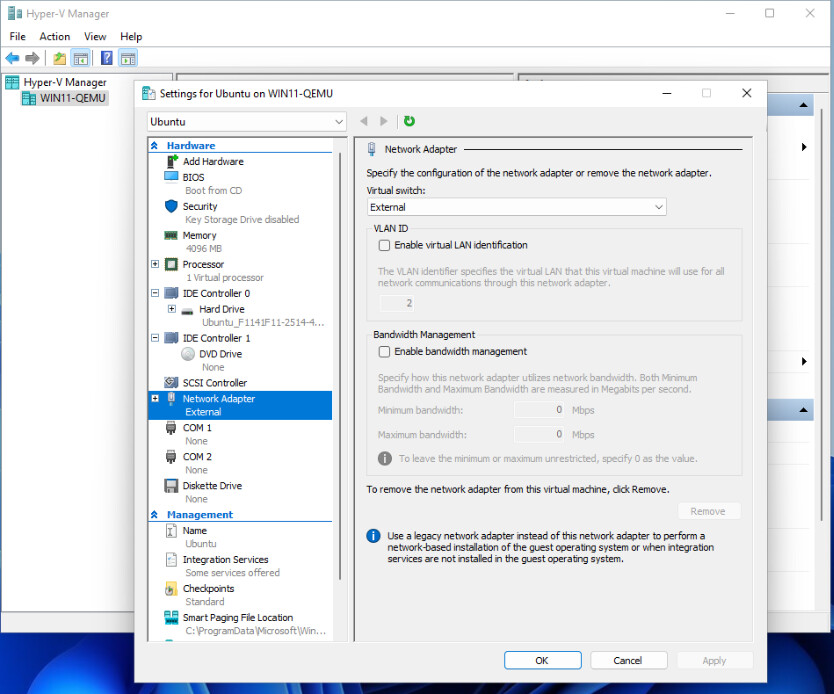
If you follow the tutorial and create the Ubuntu Server VM, you will need to create a virtual switch of type “external” in the Windows 10/11 Hyper-V Switch Manager that connects to the ethernet adapter on your Windows machine. I actually called my switch “External”.
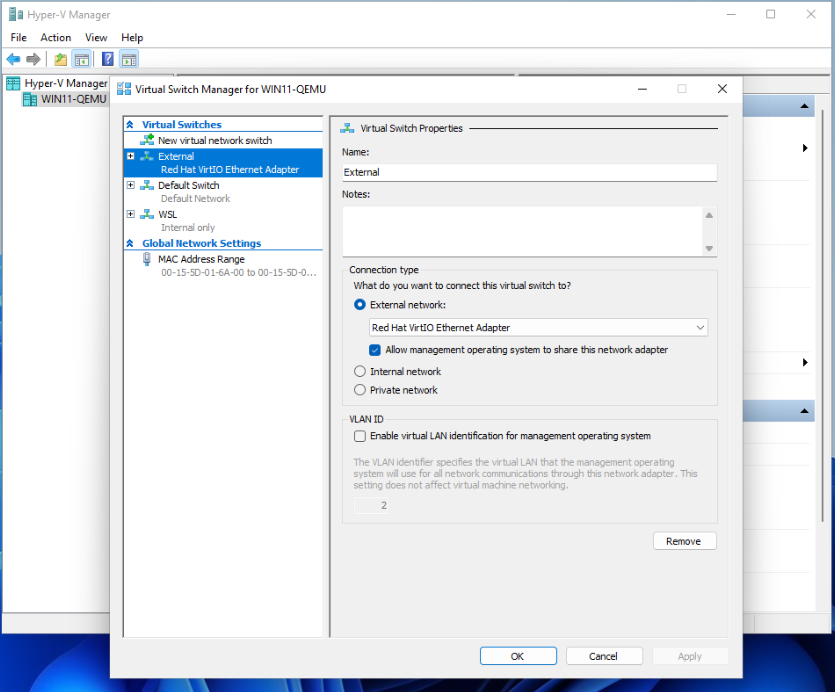
My external device name is “Redhat VirtIO Ethernet Adapter” only because my Windows 11 is a virtual machine also and so its Ethernet adapter is virtual.
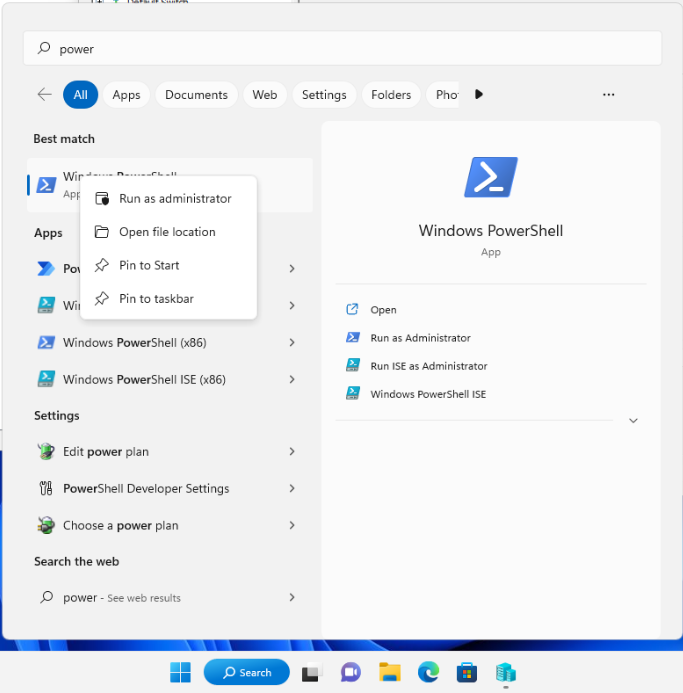
The next step you need to do is shutdown your Ubuntu Server VM and open a powershell instance with administrator privilege.
Issue the following command in the Powershell assuming that your VM name is “Ubuntu”:
Get-VMNetworkAdapter -VMName Ubuntu | Set-VMNetworkAdapter -MacAddressSpoofing On
Now we need to modify your network device for your Hyper-V Ubuntu VM to be “External”:
Now you can reboot your Ubuntu Virtual Machine and you will find that it can communicate with your LAN and you can “ssh” to it from your LAN. Note: You may need to uninstall and reinstall the ssh server to make this work:
sudo apt remove --purge openssh-server
sudo apt install openssh-server
Once you ssh into your Ubuntu server, initialize LXD as shown in the video with the following command:
sudo lxd init
We now need to change the networking on the Ubuntu Server VM so that it uses a Bridge.
cd /etc/netplan
sudo 00-installer-config.yaml
In the editor, paste the following adjusting the address, route, and name servers for your case:
network:
  version: 2
  ethernets:
    eth0:
      dhcp4: false
      dhcp6: false
  bridges:
    bridge0:
      interfaces: [eth0]
      addresses: [172.16.1.224/16]
      routes:
         - to: default
           via: 172.16.0.1
      nameservers:
        addresses:
          - 1.1.1.1
          - 1.0.0.1
Once you complete editing, do a CTRL X, acknowledge the save with “Y” and hit enter to exit the editor.
To apply the new network configuration:
sudo netplan apply
Install net-tools:
sudo apt install net-tools
Next, do an “ifconfig” and you should see that “bridge0” has the address you have chosen.
ifconfig
Your “eth0” device no longer has an IP address, but your bridge0 has the ip address you selected.
As an example:
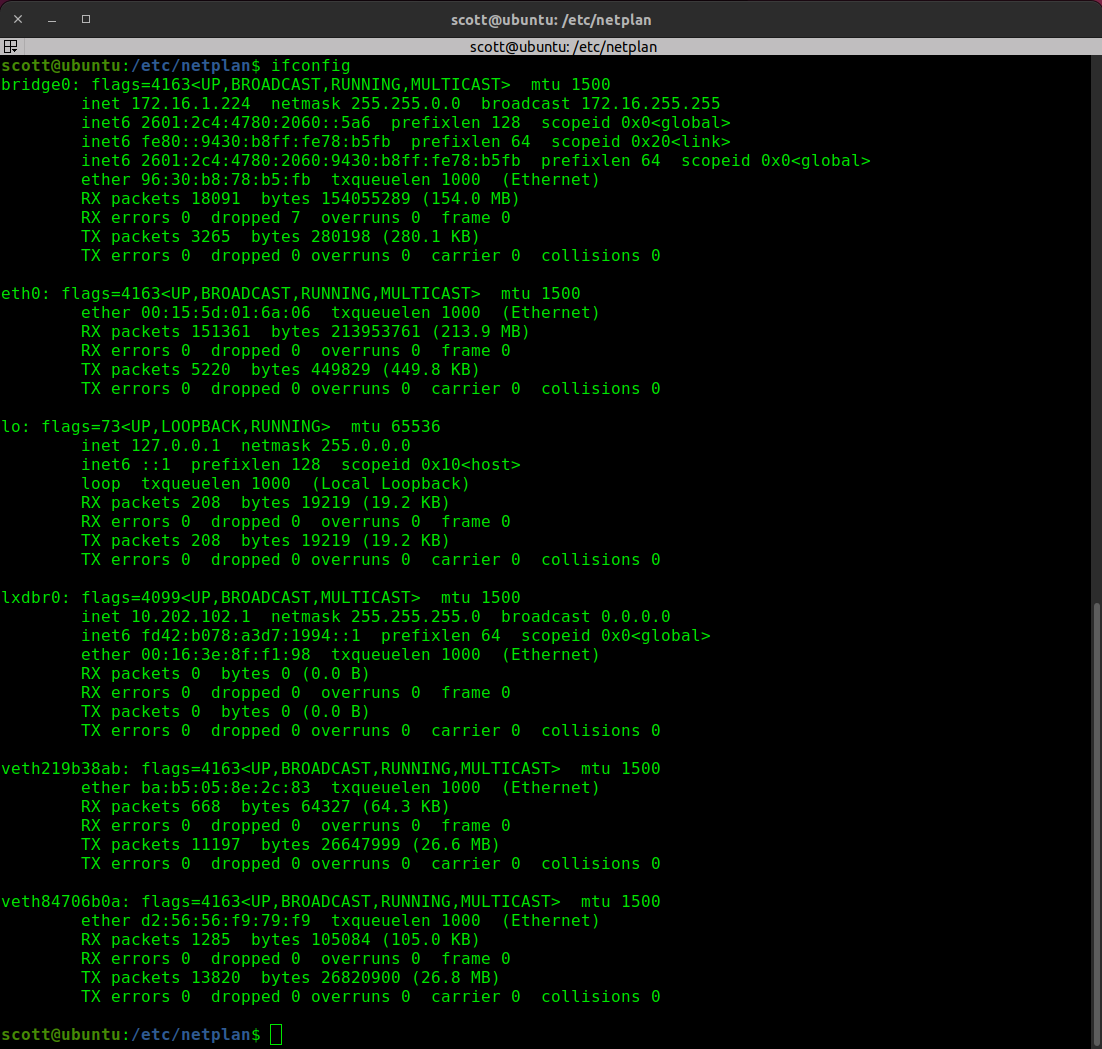
You should be able to ping nodes on the LAN and your server should still be reachable from the lan via ssh.
The next step is to create a LXD profile so that LXD containers can use the bridge to get an address on your LAN.
From the terminal prompt in your Ubuntu Server ssh session:
lxc profile create mainlan
Modify the profile by copying the following into the terminal and hit enter.
cat <<EOF | lxc profile edit mainlan
description: Bridged networking LXD profile
devices:
  eth0:
    name: eth0
    nictype: bridged
    parent: bridge0
    type: nic
EOF
Give yourself privilege to use lxd without sudo (substitute your username for “scott”):
sudo usermod -aG lxd scott
newgrp lxd
groups
Create a container:
lxc launch ubuntu:22.04 Test2 --profile default --profile mainlan -c boot.autostart=true
Create a container that supports nesting for Docker:
lxc launch ubuntu:22.04 Whiteboard --profile default --profile mainlan -c boot.autostart=true -c security.nesting=true
View your containers:
lxc list
They should look something like the following, but with addresses for your LAN.

Connect to the console of the whiteboard LXD container.
lxc exec Whiteboard bash
Install docker in the container:
curl -sSL https://get.docker.com | sh
Install docker-compose if needed:
sudo apt install docker-compose
Create a user account and grant it privilege
adduser scott
usermod -aG sudo scott
usermod -aG docker scott
Move to the user account:
su - scott
Run a docker container for “Whiteboard”:
docker run -d --name=Whiteboard -p 80:8080 rofl256/whiteboard
You should now be able to go to a web browser on any machine on your network and go to the address of the LXD Whiteboard container and the Whiteboard should come up.