Virtual disks which are disks emulated inside of a file can be created/mounted in both Windows and Ubuntu. Today, I show how to create virtual disks in both Windows and Ubuntu and move them between OS’s.
When we think of .vhd or .vhdx files we think of virtual machine virtual disk files. These files, which emulate a complete disk drive inside of a single file can be used not only by virtual machines, but they can be created and used by your main OS. This is true of both Windows and Ubuntu.
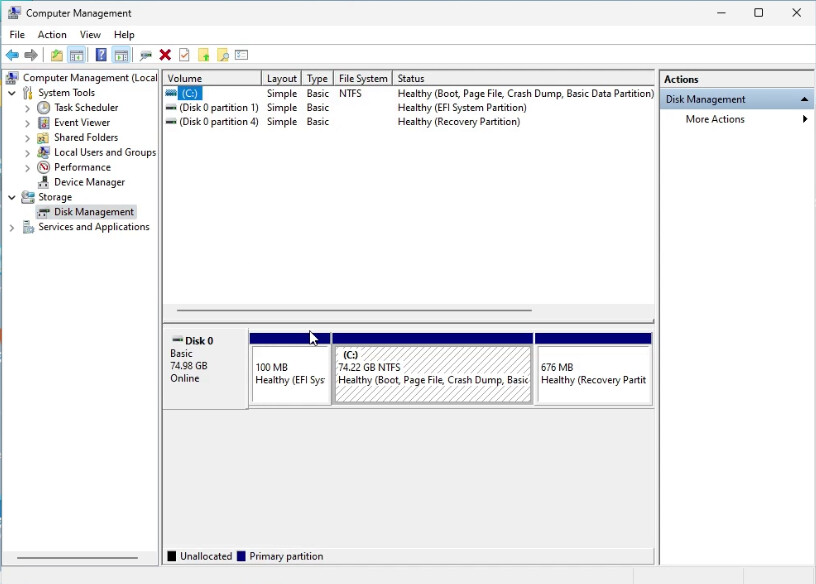
“diskpart” is the Windows command line tool to configure disk partition tables and partitions on a disk. The GUI tool to do the same thing in Windows is “disk management” in the computer management utility.
To use “diskpart”, right click on the windows button and and select an admin instance of the terminal.
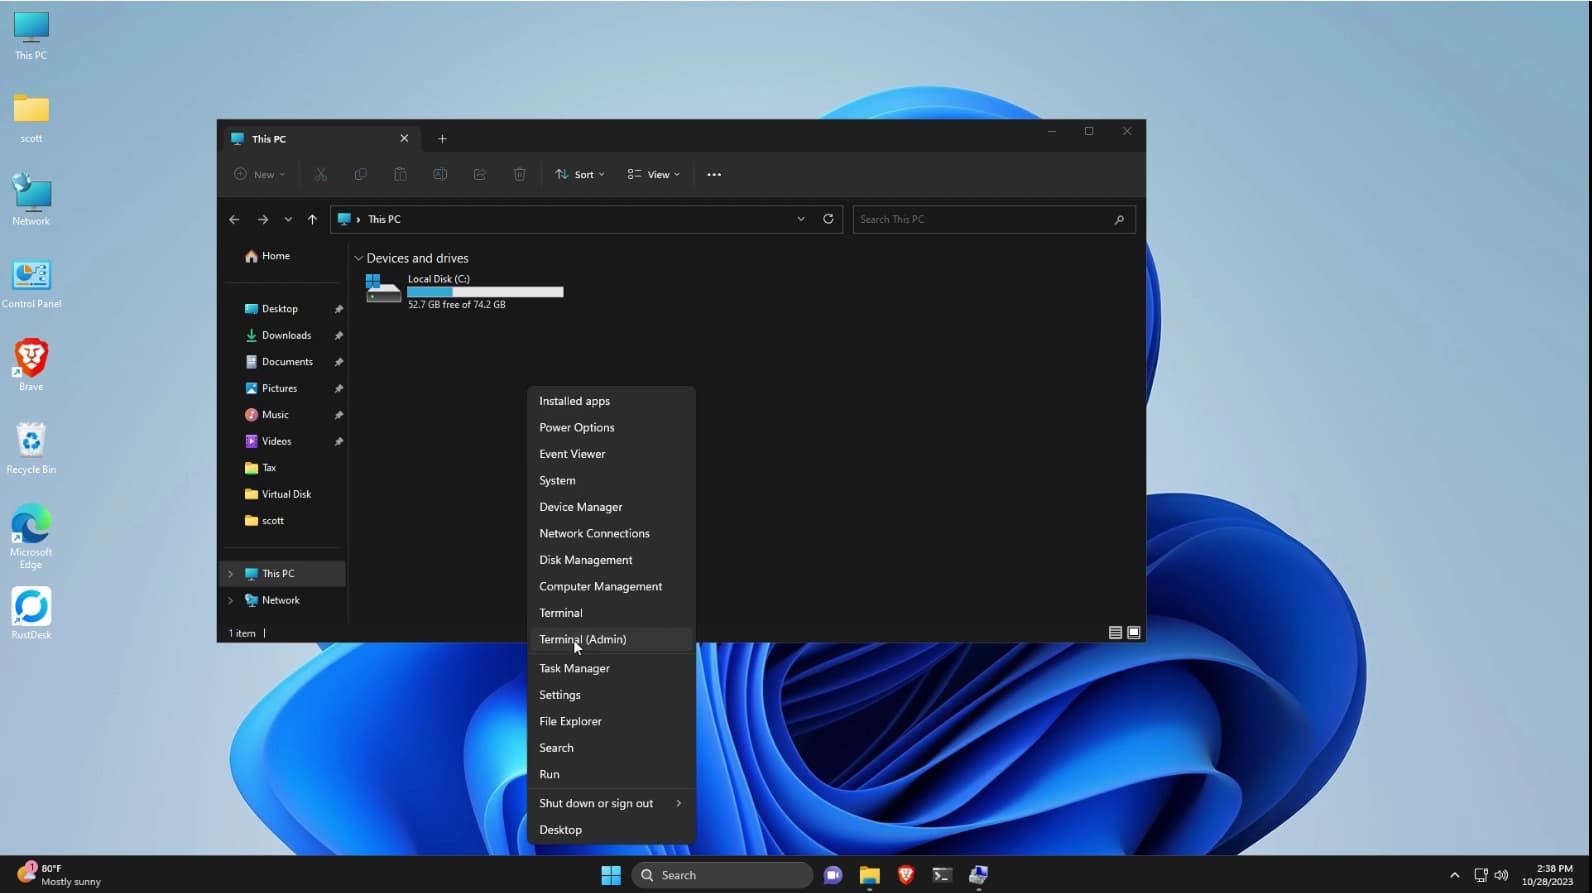
Accept the user account control (UAC) prompt with the “yes” button.
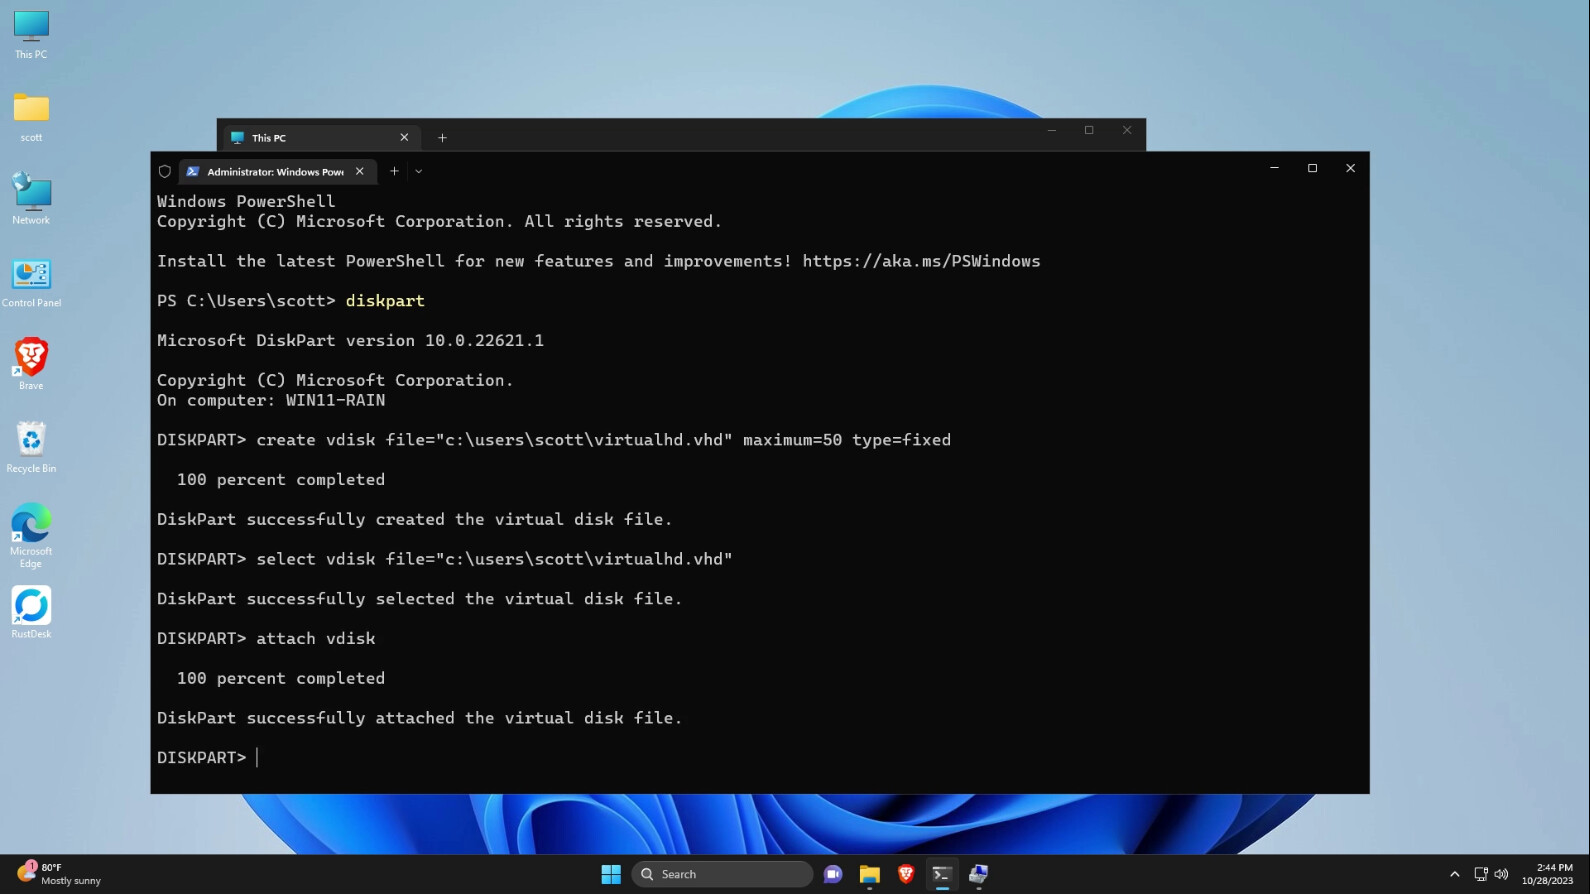
In my example, I create a 50MB virtual disk using diskpart.
diskpart
You must specify the complete path to where the virtual disk is to be stored:
create vdisk file="c:\users\scott\virtualhd.vhd" maximum=50 type=fixed
To work with our newly created disk, we must select it:
select vdisk file="c:\users\scott\virtualhd.vhd"
Attach to the virtual disk to manage the disk layout:
attach vdisk
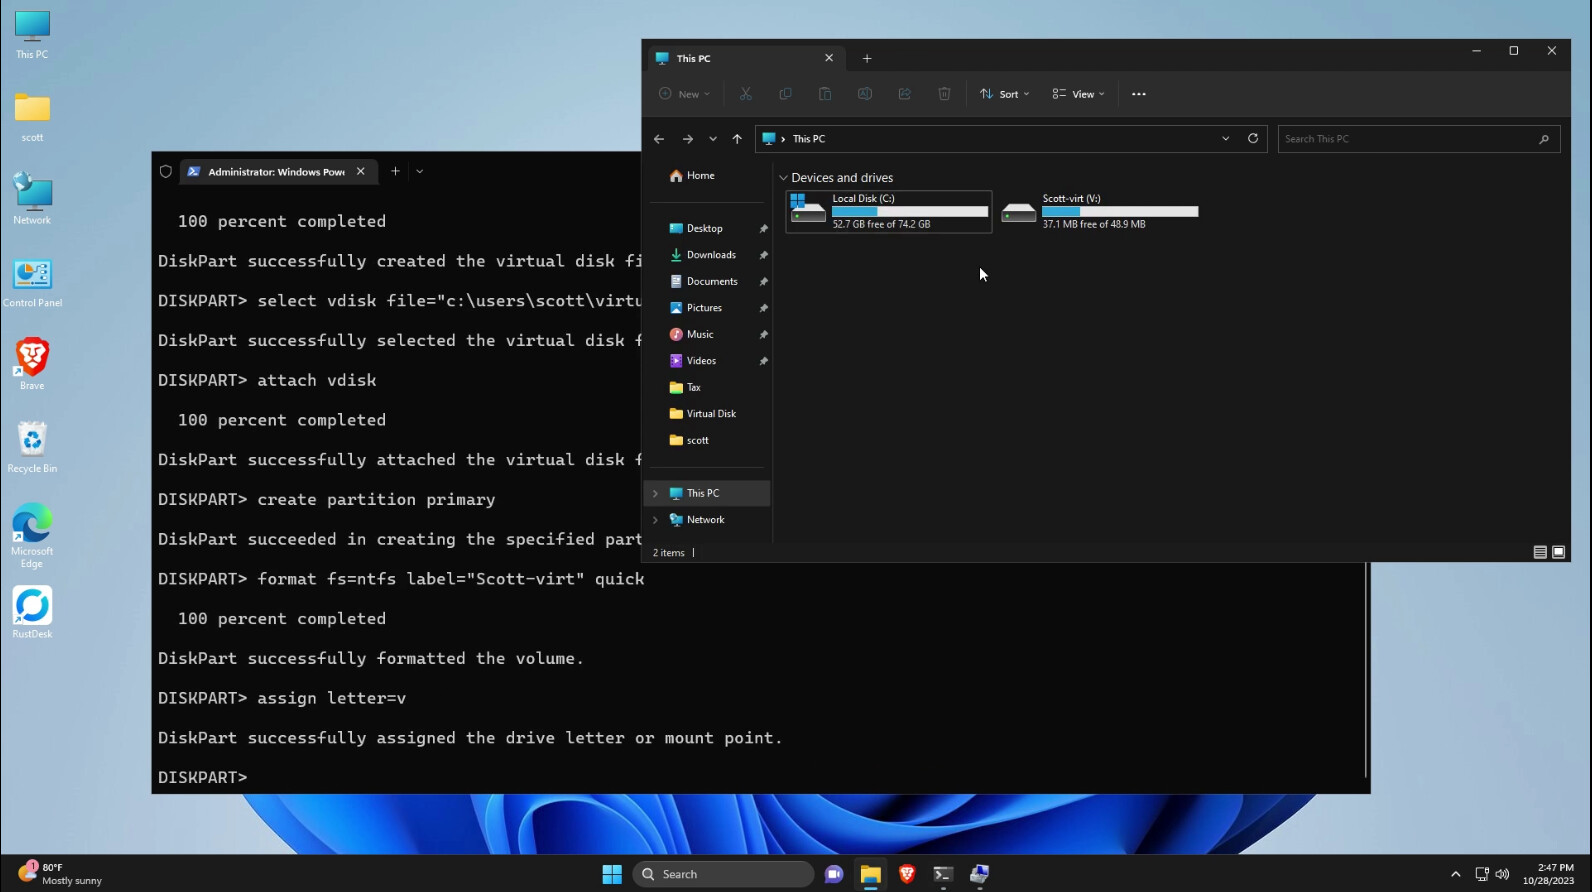
Create a “primary” partition on the drive:
create partition primary
Format the partition with an NTFS file format:
format fs=ntfs label="Scott-virt" quick
Assign a drive letter to the drive in order to have it appear in the Windows file manager:
assign letter=v
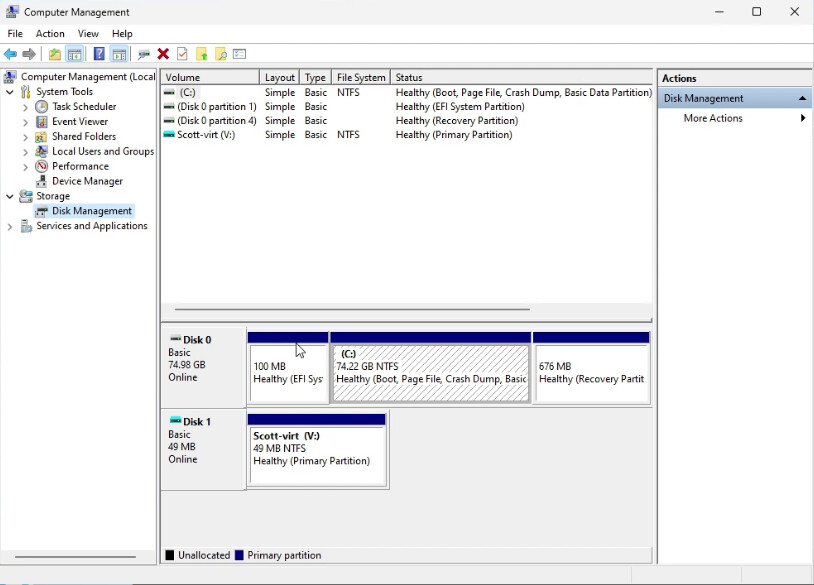
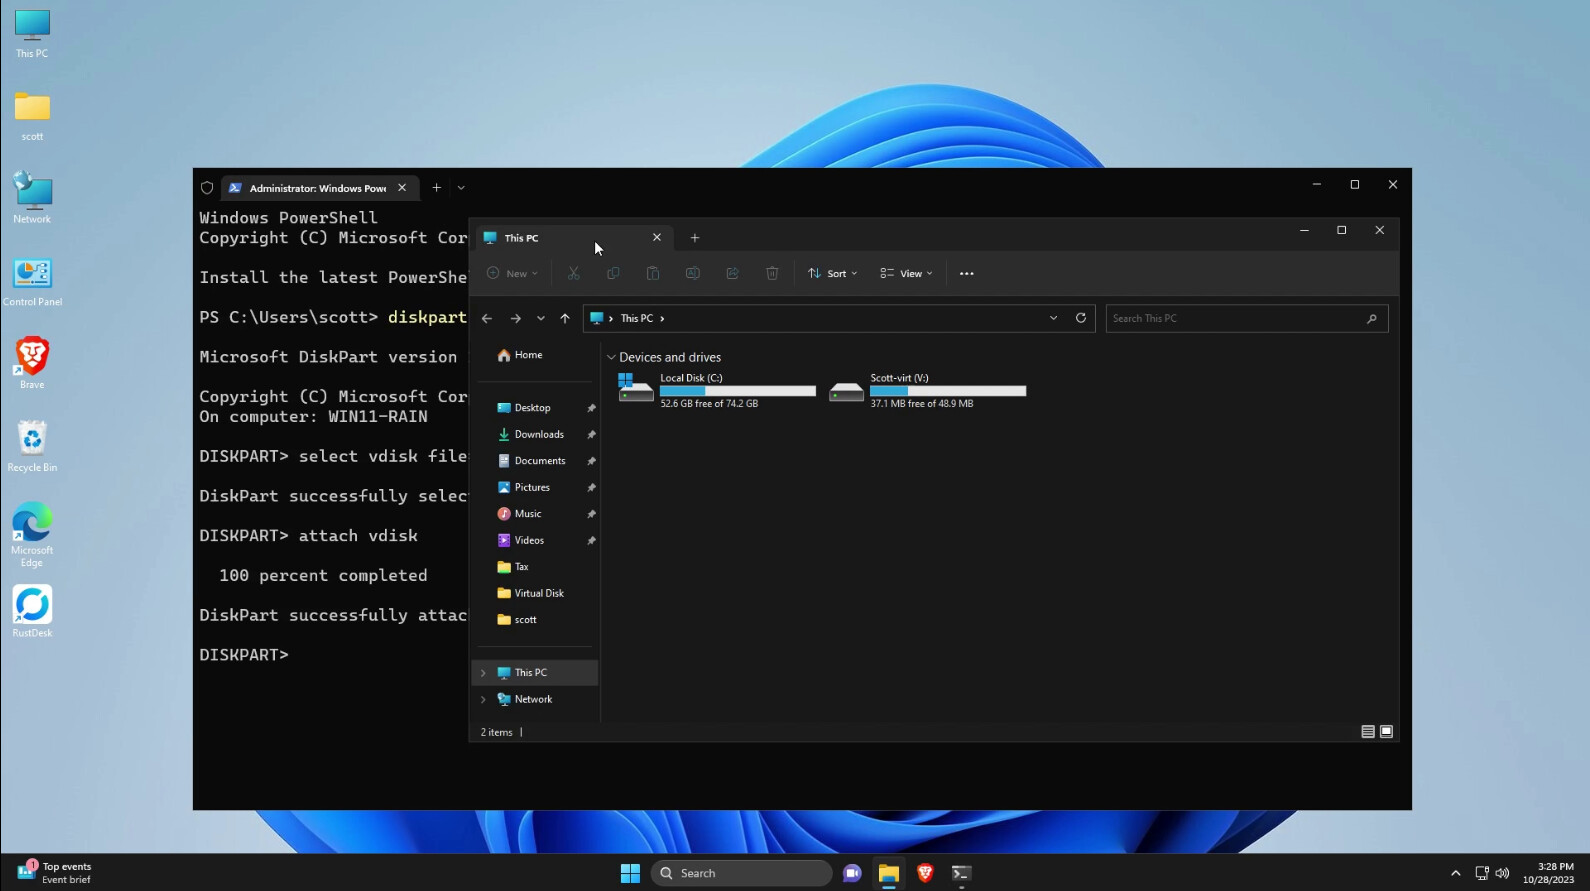
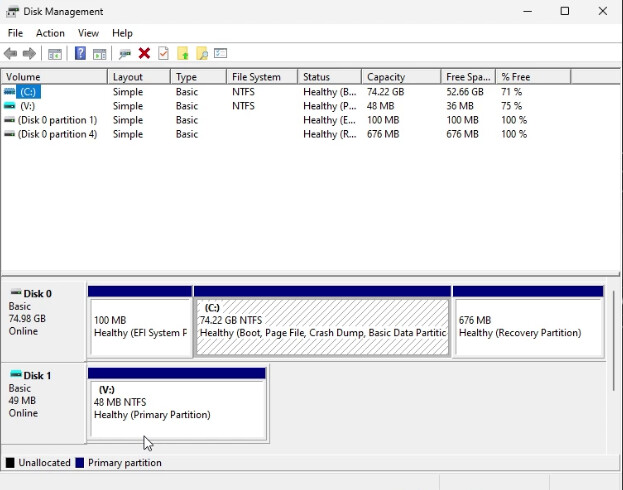
Disk management can now see the mounted virtual disk and it looks like any other drive.
You can list your virtual disk. (The asterisk denotes the currently selected entity):
list vdisk

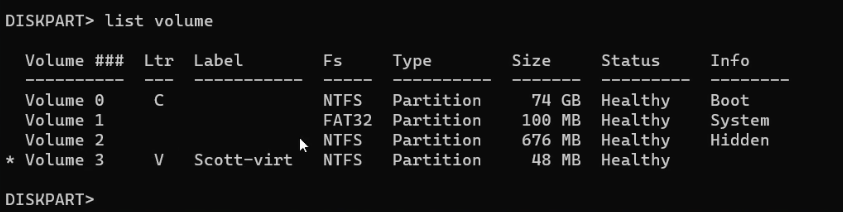
You can list your partitions (volumes) on your disks:
list volume
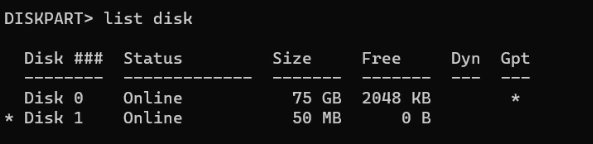
There is also a command to list your disks. Notice that the main disk has a GUID (gpt) partition table. Our virtual disk was created with a FAT partition table for simplicity. The File Allocation Table (FAT) disk structure was created in 1977. Because of its limitations, using the default cluster size of 4kb, the maximum NTFS volume size is 16TB. However, because master boot record (MBR) disks only support partitions up to 2TB, Windows has the concept of dynamic volumes.
These days, most partition tables are formatted as a globally unique identifier structure known as GUID (gpt). GUID supports a partition table of up to 264 sectors of 512 byte blocks. In theory, that means that a disk could be up to 18 exabytes in size.
I formatted our virtual disk with a FAT partition table only because it is simpler and most portable devices like USB thumb drives are formatted FAT. Since I regard virtual disks as something that can be moved and easily attached to other systems and since I don’t anticipate the need for a virtual disk larger than 16TB, that’s why I selected a FAT partition table for my NTFS partition.
So, here’s a listing of our disks:
list disk
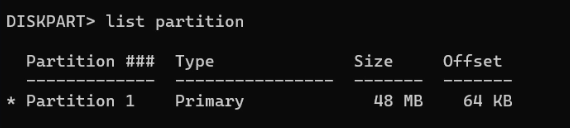
We can also list the partitions on our currently selected disk which would list the partition we created on our virtual disk.
list partition
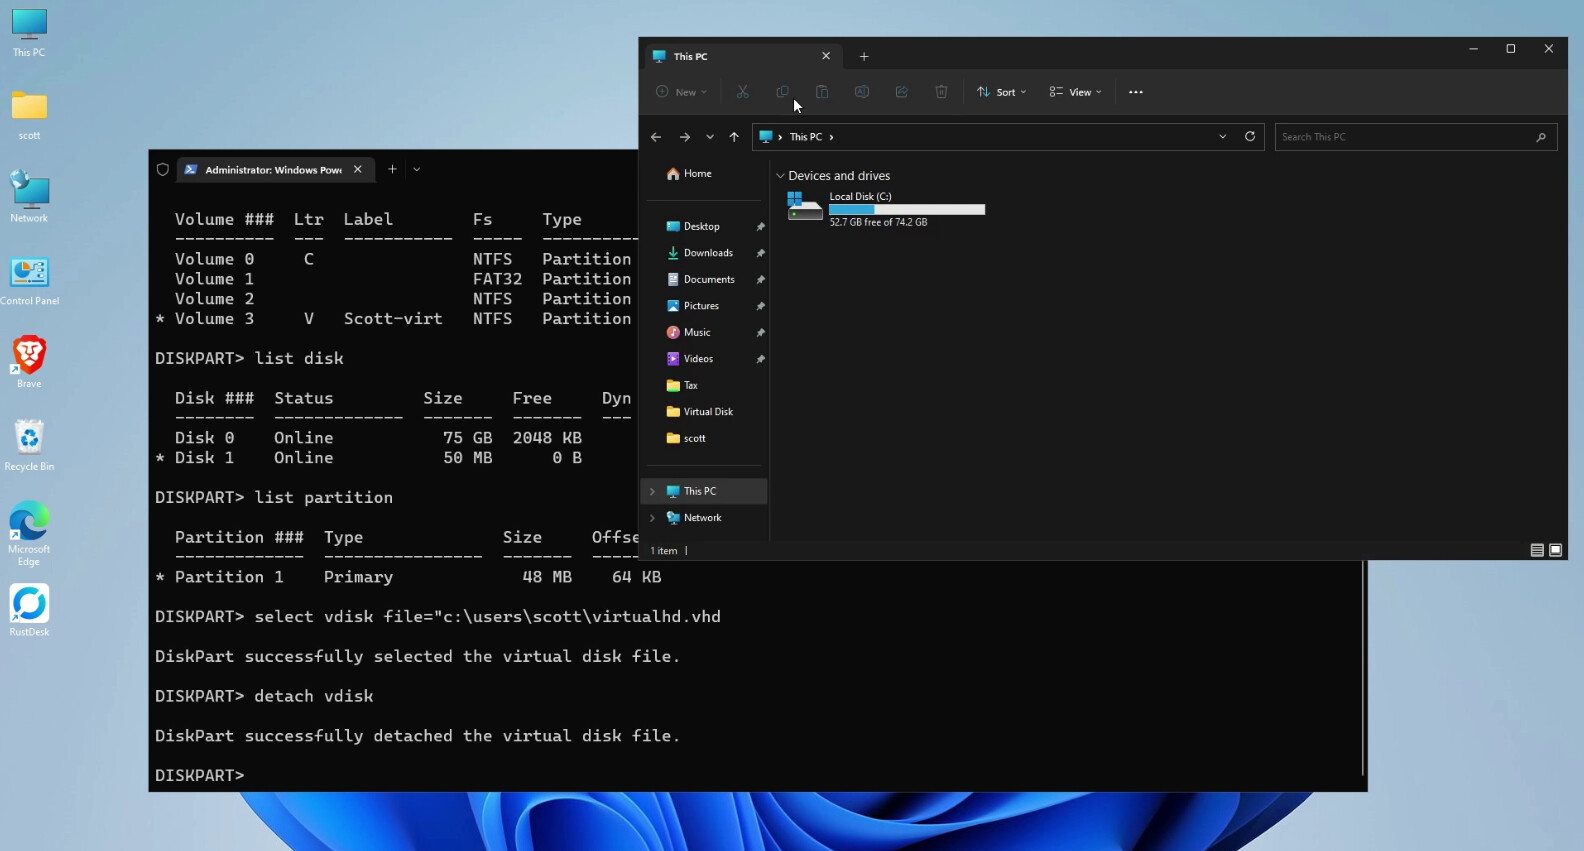
Now we want to move our virtual disk over to Ubuntu. Before we can do that, we need to dismount it from Windows. When you enter diskpart, you need to select your disk and then you can detach it:
select vdisk file="c:\users\scott\virtualhd.vhd
detach vdisk
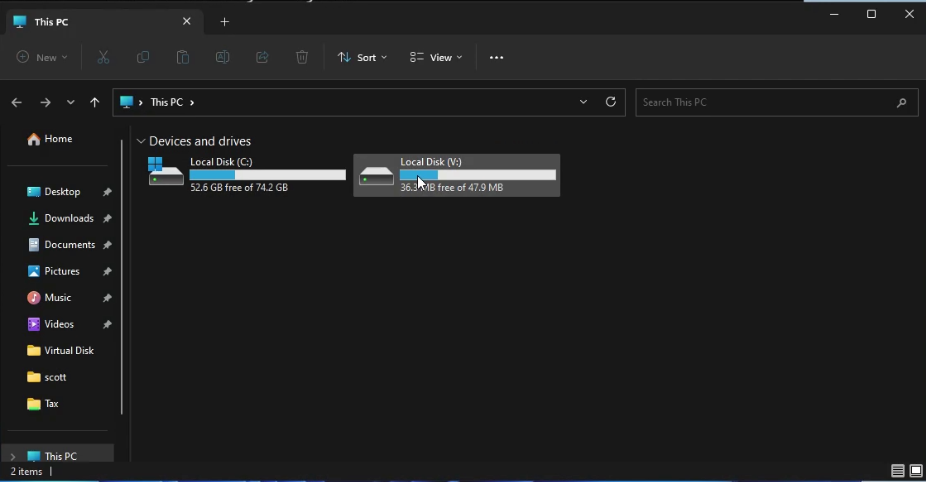
Below notice that drive V is no longer in “This PC”.
In the video, I copied my virtualhd.vhd virtual disk file over to my NAS and then I downloaded it to my Ubuntu desktop. There are several ways to copy the file. Choose whichever way you find easiest.
UBUNTU:
In Ubuntu, we need to be able to access the NFTS file system we created in Windows. Install the guest file system tools in Ubuntu. Start a terminal with CTRL ALT T and issue the following command.
sudo apt install libguestfs-tools
In Linux, we don’t use drive letters to access a drive. Instead, we create a folder (directory) that we use as a mount point for mounted drives. A mount point can be anywhere, but is most commonly placed in /mnt or /mount.
sudo mkdir /mnt/vdisk
Move over to where you placed your virtual disk image file. Mine is in a folder I created for this demo.

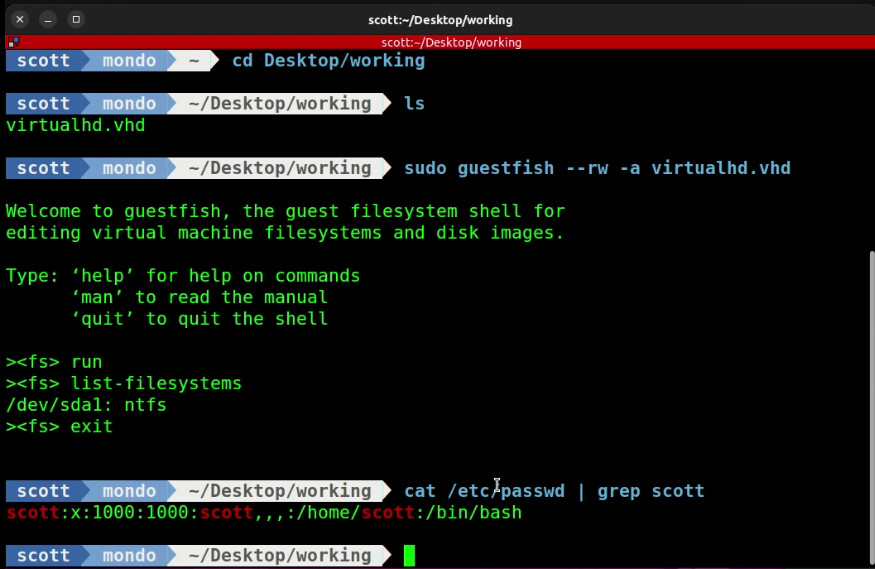
Run guestfish which is one of the guest file system utilities we installed above:
sudo guestfish --rw -a virtualhd.vhd
Issue the following commands to guestfish to determine the virtual drive internal mount point:
run
list-filesystems
exit
Determine the group and member ID’s of your Linux user account:
cat /etc/passwd | grep scott
Now we can mount the disk with the information obtained above:
sudo guestmount --add virtualhd.vhd -o uid=1000 -o gid=1000 -o allow_other --rw /mnt/vdisk -m /dev/sda1
The above command makes sure that we have read/write access to the NTFS virtual disk.
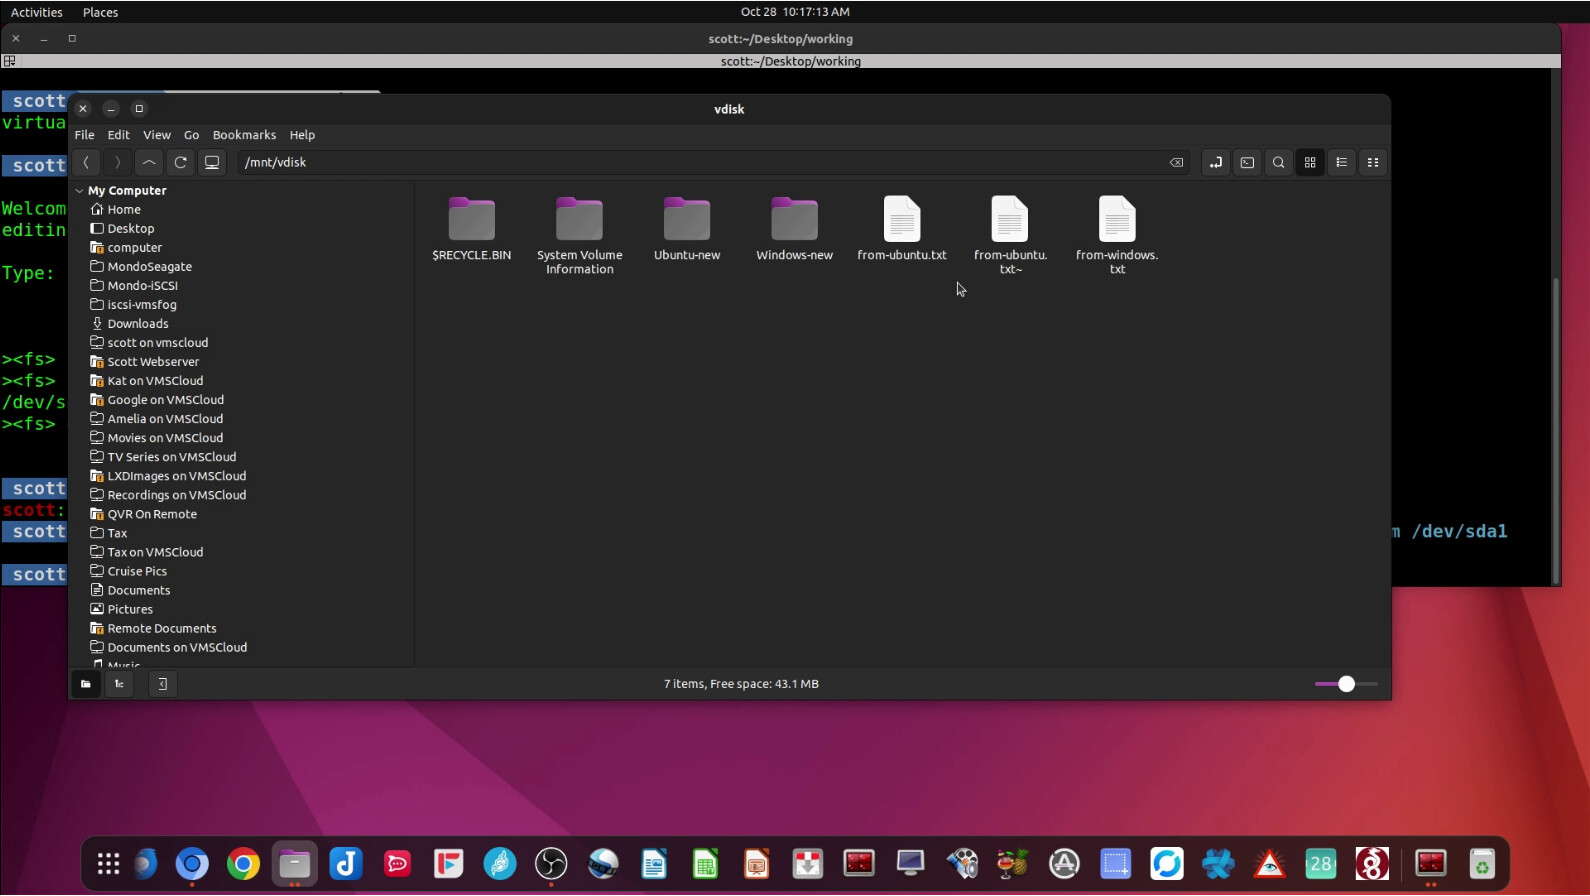
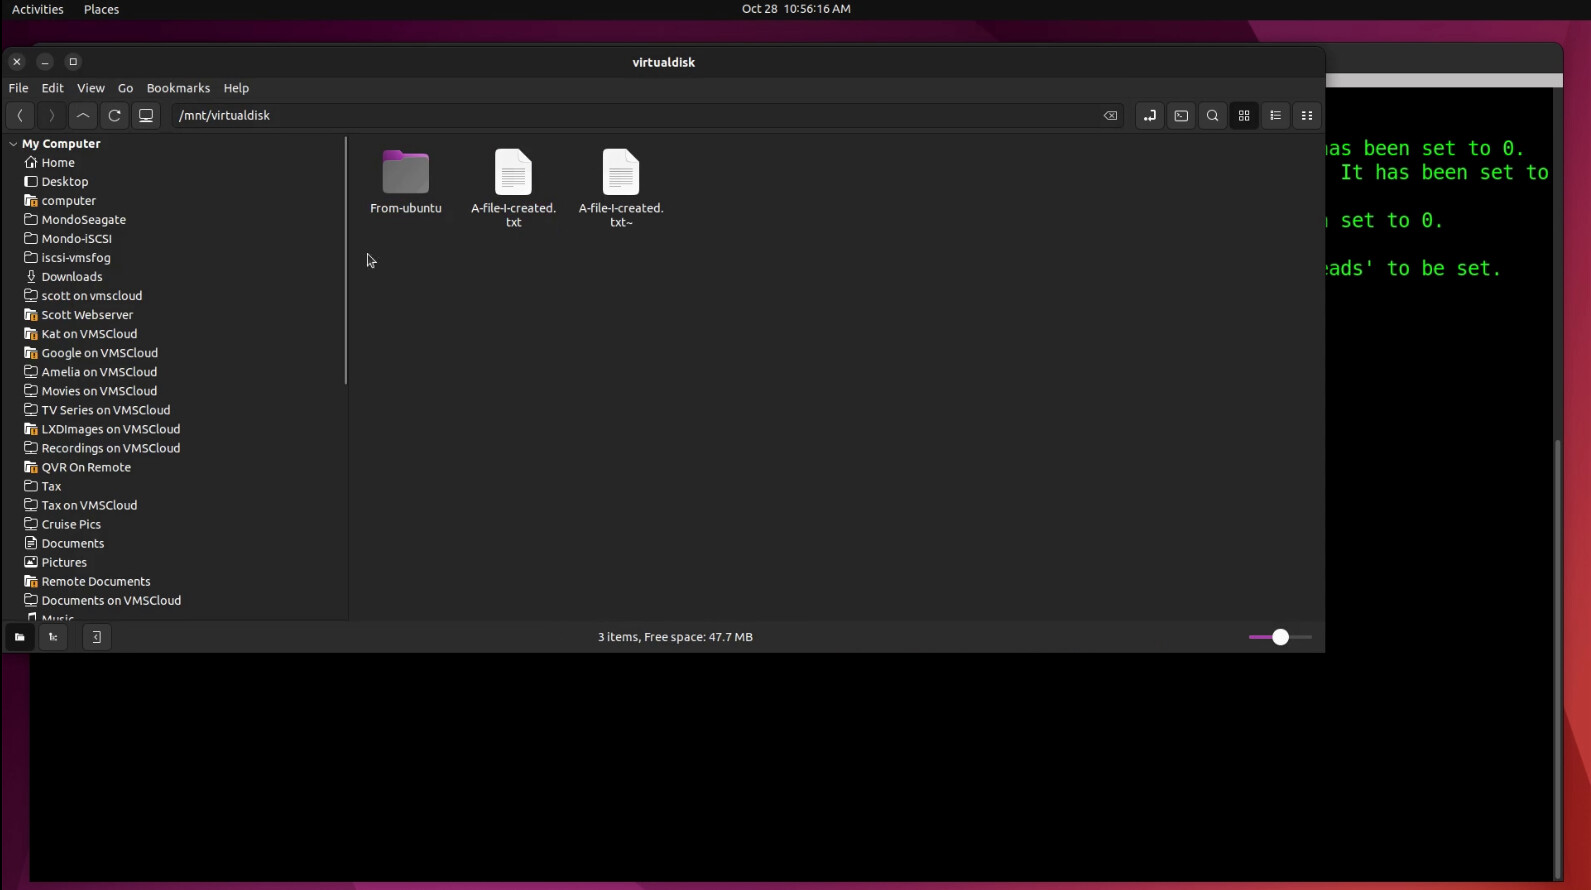
I move over to /mnt/vdisk in my Ubuntu file manager and we can see and access all of the files that we originally created on the Windows side.
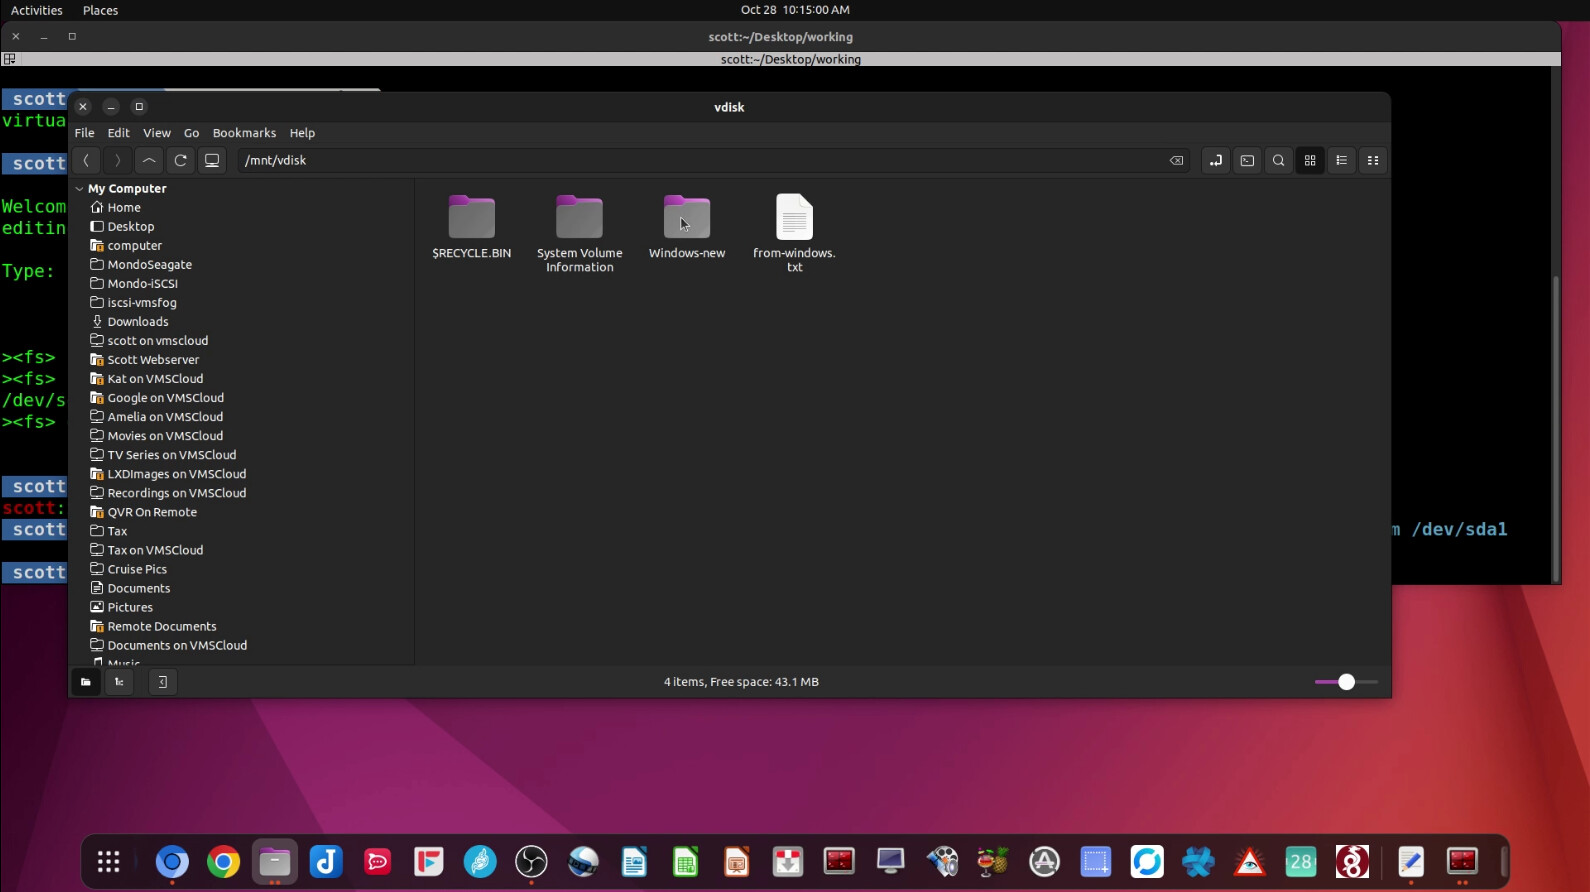
We can create/edit any files on this disk. I created a new folder on the disk and a couple new files.
When you are done with the disk, it can be dismounted:
sudo umount /mnt/vdisk
Next, I copied virtualhd.vhd back to the NAS and subsequently back to Windows 11. Use whatever method you did to move the file back now.
BACK IN WINDOWS:
Launch an admin terminal via right click on the Windows button and acknowledge the UAC prompt as before. Enter diskpart from the terminal.
diskpart
Select and attach the virtual disk:
select vdisk file="c:\users\scott\virtualhd.vhd"
attach vdisk
The disk is now available as drive V.
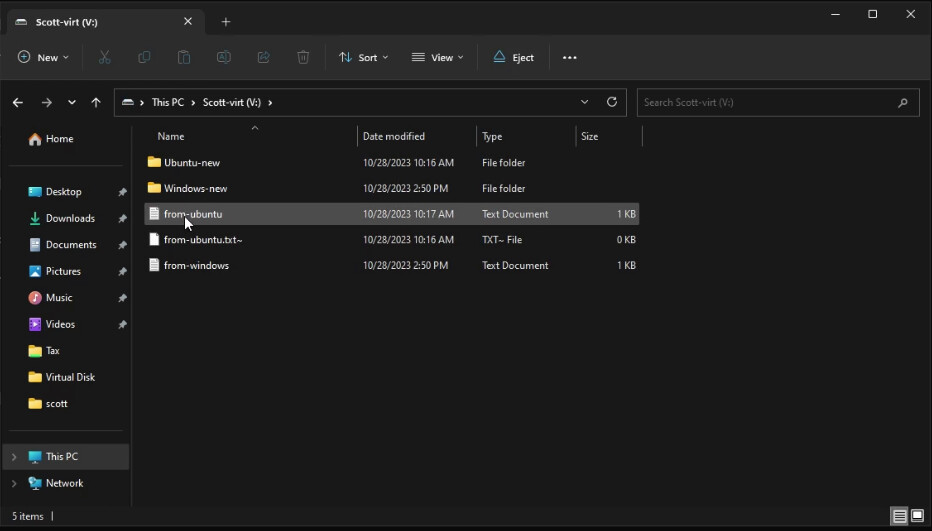
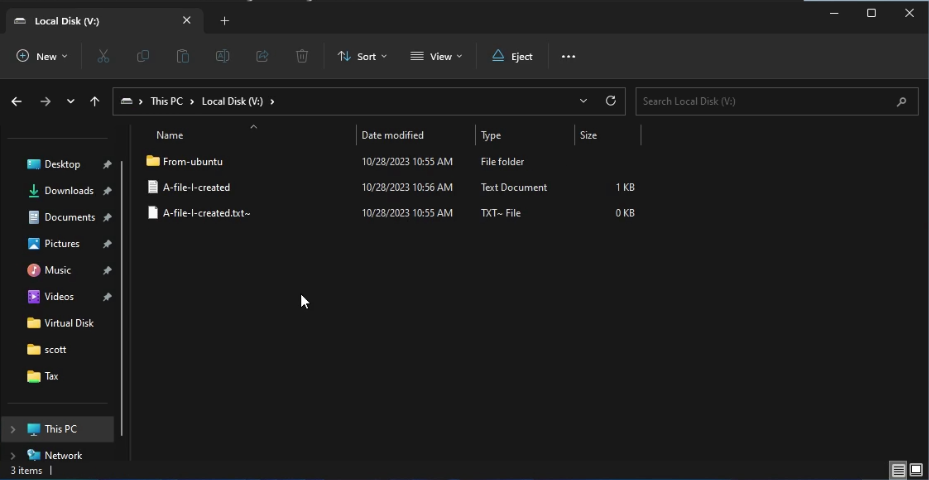
When we move inside of drive V, you can see the files we created on the Ubuntu side.
Now detach the virtual disk from Windows:
diskpart
select vdisk file="c:\users\scott\virtualhd.vhd
detach vdisk
exit
At this point, I was completed done with the virtualhd.vhd virtual disk and so I deleted it in preparation for the next part of the tutorial.
BACK IN UBUNTU:
In this section, I created an NTFS virtual disk from scratch in Ubuntu. This is a bit different because NTFS is not the native file system in Ubuntu.
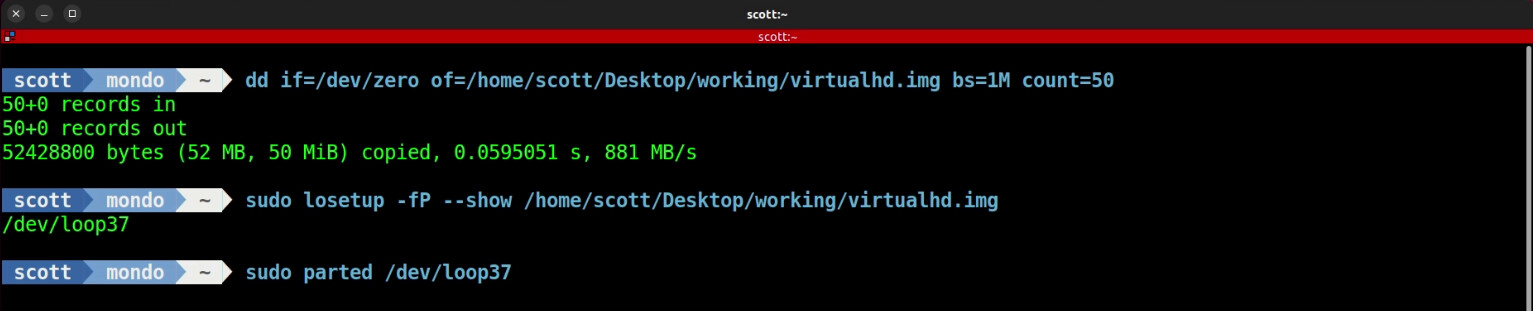
I use the disk duplicator command to create a 50 megabyte raw file. I do this by copying zeros into the file virtualhd.img with 50 one megabyte blocks. This creates the 50 megabyte file:
dd if=/dev/zero of=/home/scott/Desktop/working/virtualhd.img bs=1M count=50
Virtual disks are mounted in Ubuntu with a “loop” device. Loop devices are used to mount virtual disks such as ISO files to mount a CD/DVD image. So, we set up a loop device for our virtual hard disk:
sudo losetup -fP --show /home/scott/Desktop/working/virtualhd.img
Take note of the loop device assigned because it is used in the following commands. My loop device is loop37 in this example. Now I enter “parted” which is the equivalent of “diskpart” in windows:
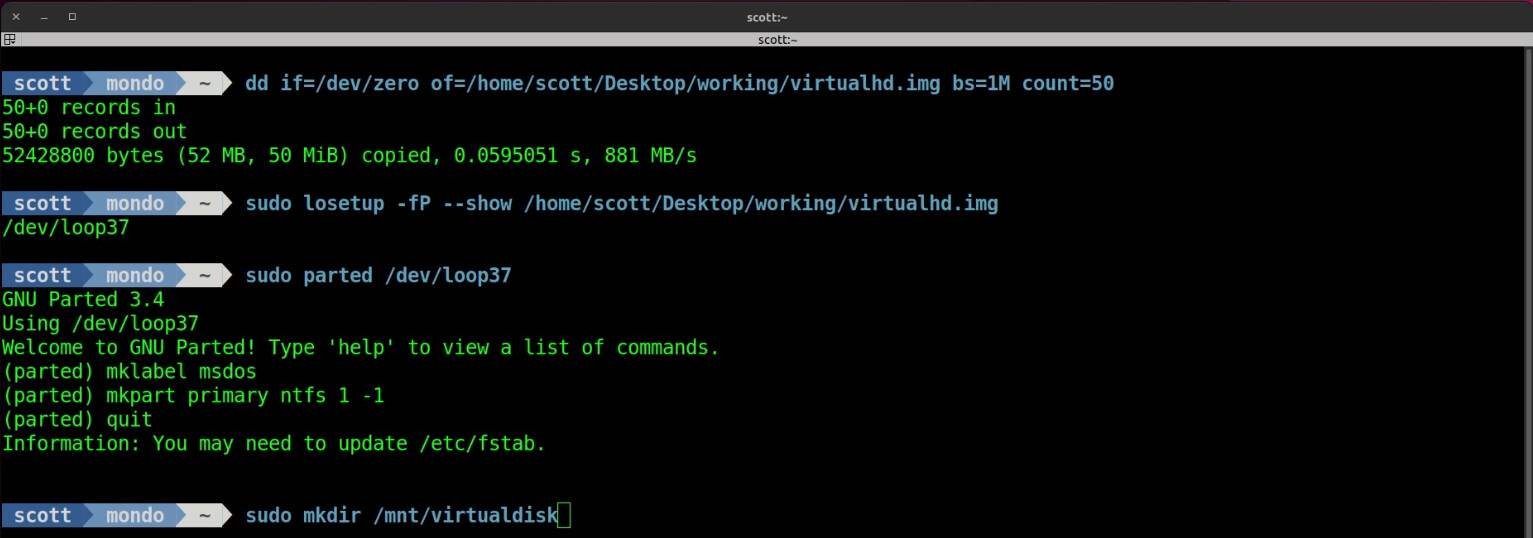
sudo parted /dev/loop37
Create an MSDOS partition table (also known as FAT partition table):
mklabel msdos
Create an NTFS as a primary partition on the disk:
mkpart primary ntfs 1 -1
Quite the “parted” utility:
quit
Create a mount point for our drive:
sudo mkdir /mnt/virtualdisk
Format a file system on the partition we created in “parted”. Note the “loop37p1”. The “p1” designates the first (and in this case only) partition on the drive. The error is informational only and not a problem.
sudo mkntfs -f /dev/loop37p1
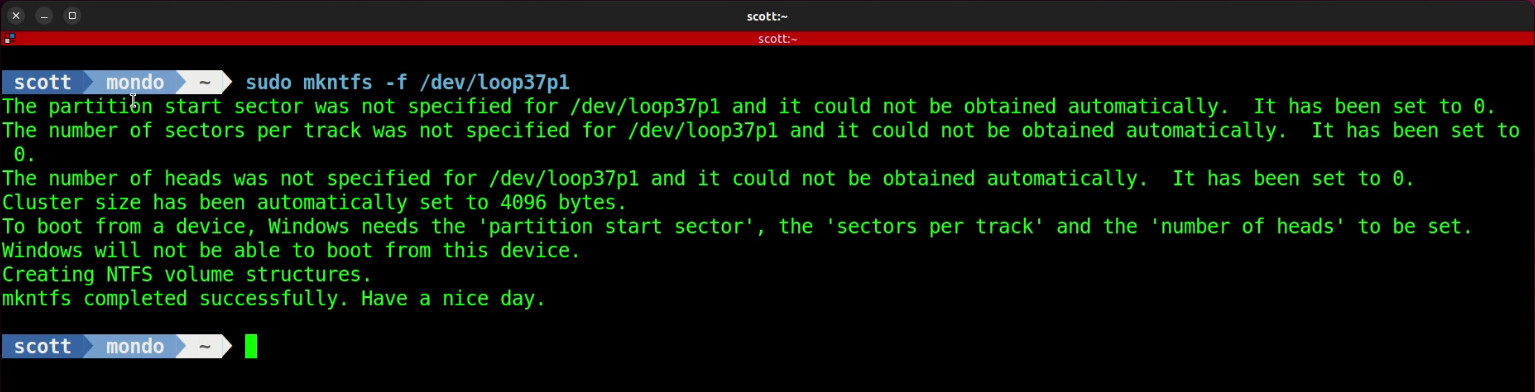
You have to appreciate an OS that tells you to have a nice day. Right?
Mount your new disk:
sudo mount /dev/loop37p1 /mnt/virtualdisk
I moved over to /mnt/virtualdisk and created some files:
Dismount the virtual disk:
sudo umount /mnt/virtualdisk
Delete the loop device as part of good maintenance:
sudo losetup -d /dev/loop37
Recall that this virtual disk file is an NTFS disk image, but it is a RAW image. Windows cannot deal with RAW images and so we need to convert the raw .img file to a .vhd that Windows is expecting/
Install the qemu virtual machine hypervisor utilities which has this converter:
sudo apt install qemu-utils
Move to the folder where your virtual disk image is located and run the converter:
qemu-img convert -f raw -O vpc virtualhd.img virtualhd.vhd
Now you can copy the virtualhd.vhd file back to your Windows machine.
BACK IN WINDOWS AGAIN:
Right click on your Windows button and choose an admin version of the command terminal and respond to the UAC prompt. Once in the terminal, launch diskpart and mount the drive.
diskpart
select vdisk file="c:\users\scott\virtualhd.vhd"
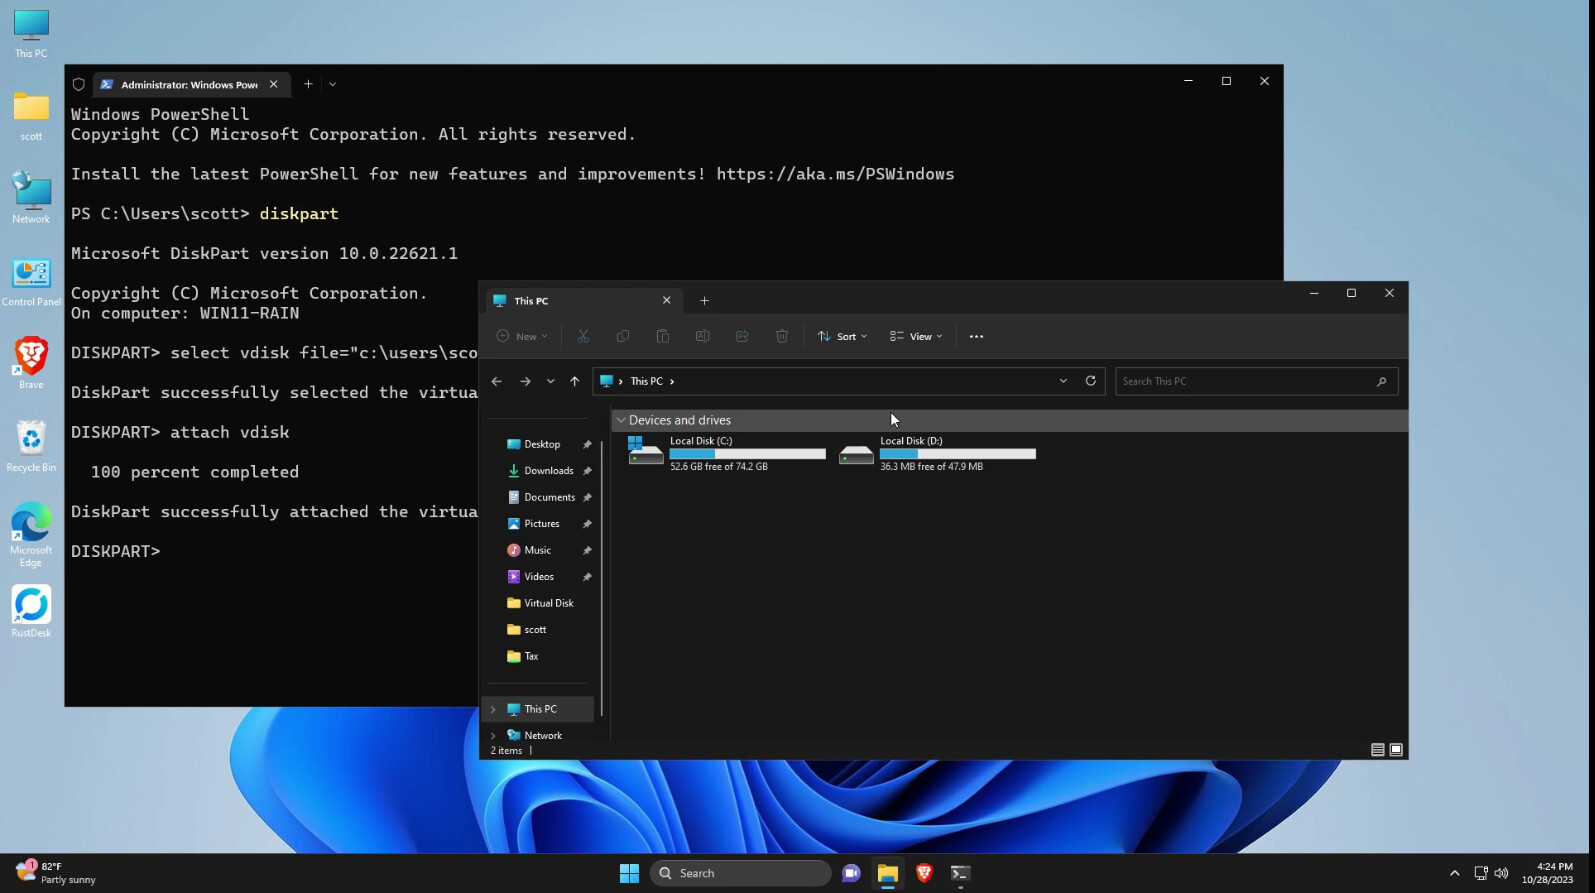
attach vdisk
When your drive we created on Ubuntu is first attached, it will use the next available drive letter which in my case was drive D.
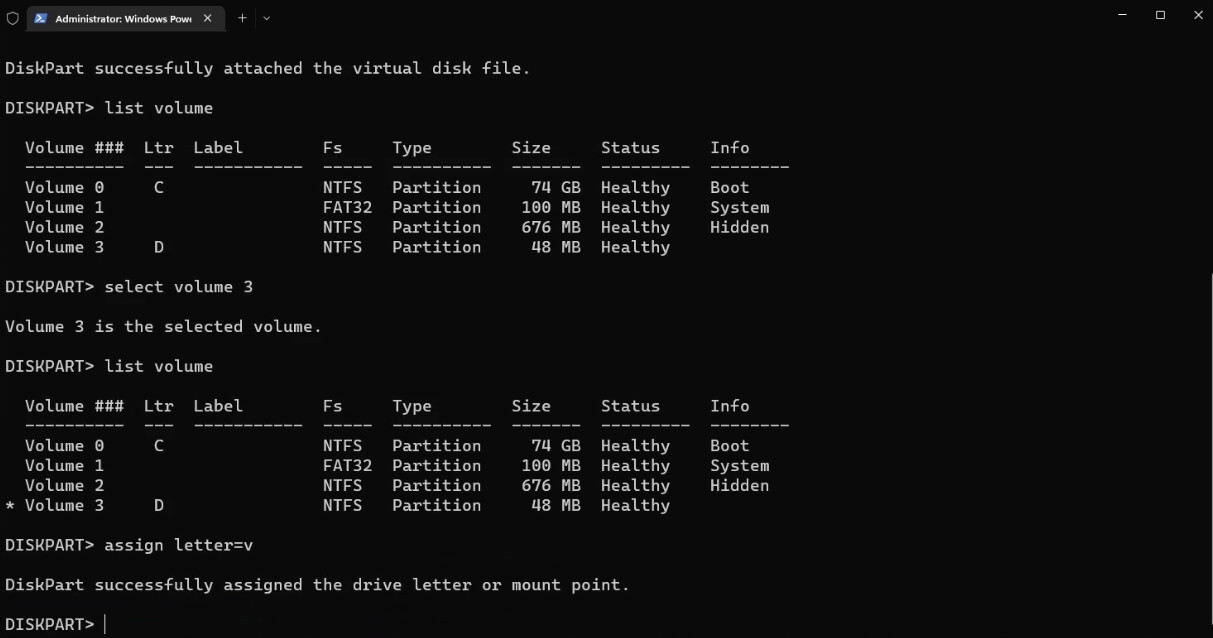
To change the disk letter, go into diskpart and perform the following commands. In my example, my virtual disk is volume 3 and so you have to select your volume before you can assign a letter.
diskpart
select vdisk file="c:\users\scott\virtualhd.vhd"
attach vdisk
list volume
select volume 3
assign letter=v
On my system, it looks like this:
So, now we have disk V:
I go into disk V and the files we created on the Ubuntu side are present.
Here is the disk in the Windows Disk Manager:
These virtual disks can also be mounted in virtual machines on Windows and Ubuntu using the techniques in this video.