Your Incus server is normally hosted on your main LAN. This tutorial shows how to host containers on your incus server, but presented on different VLANs.
I started by creating a demonstration VLAN. A VLAN has an address range different from the address range used by your default network. A “managed” router is required to add and configure the services for VLANs. You can create VLANs on a unmanaged router, but management is messy. For example, my gateway offers a DHCP server on my VLAN address scopes.
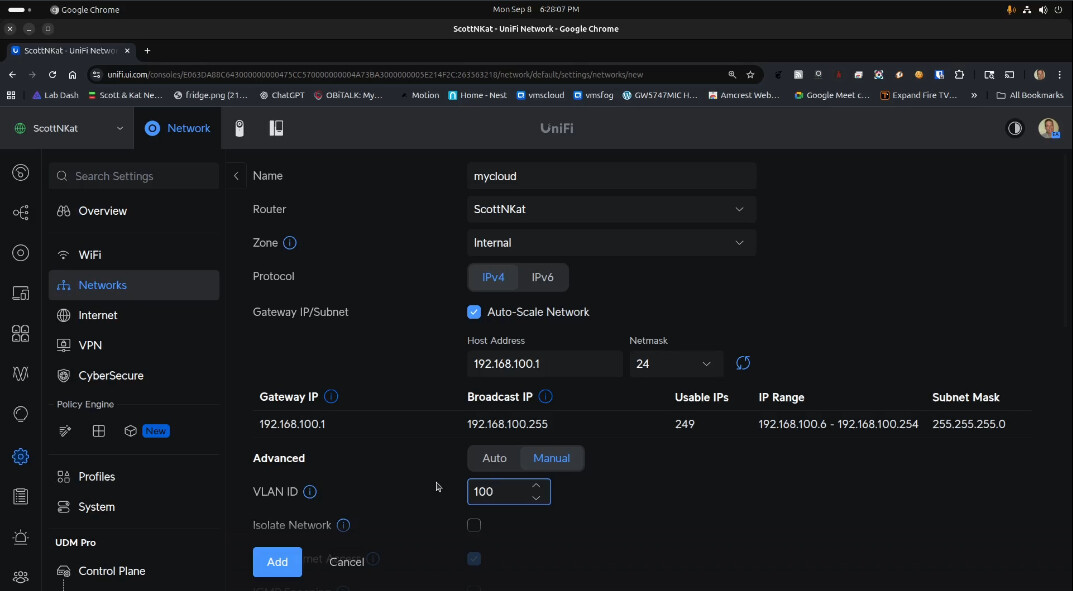
Every managed router/gateway device does this differently. I use a Ubiquiti UDM Pro and so the screenshot below shows creating a VLAN 100 network with the address range of 192.168.100.0/24. The gateway address for this network is 192.168.100.1. The gateway address tells devices on that network how to reach other networks and the Internet.
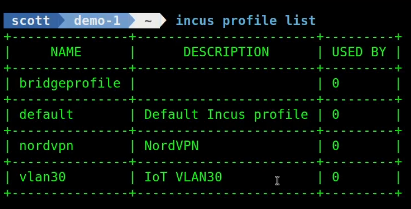
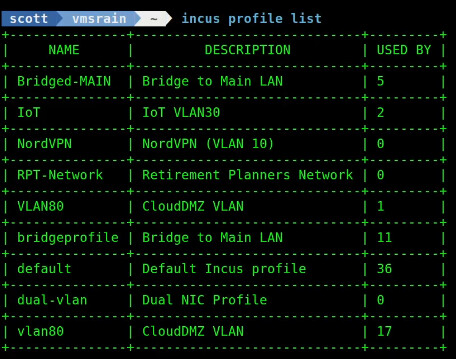
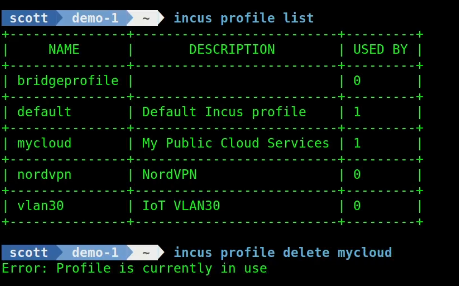
To list the profiles on your Incus server:
incus profile list
In my Incus Containers Step by Step tutorial we create both a software bridge named bridge0 on your server and we create a profile named “bridgeprofile” that offers containers with addresses on your main LAN address range.
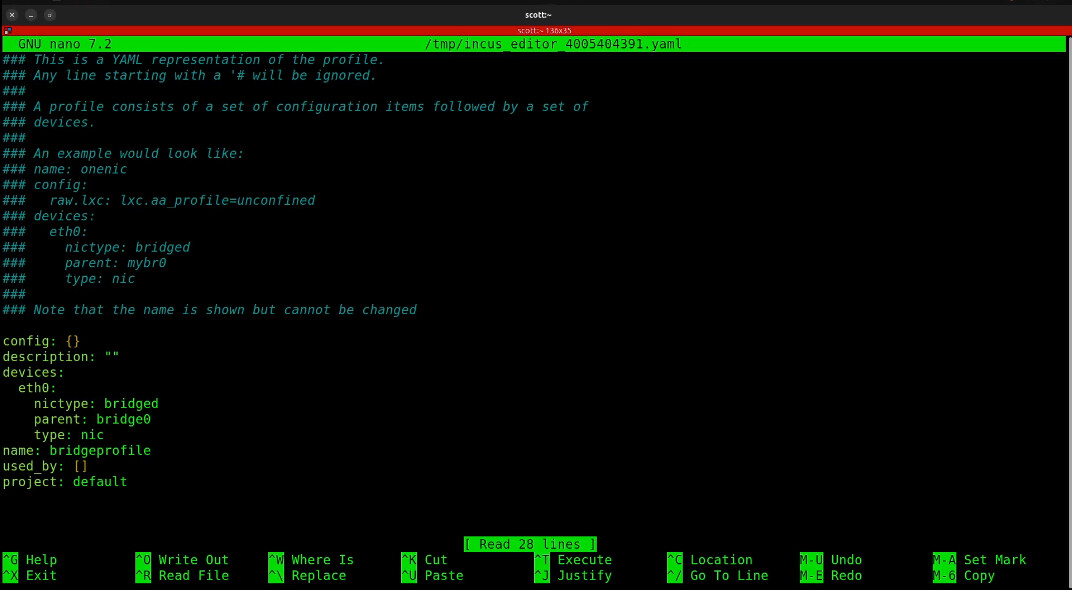
As a reminder, we can examine the bridgeprofile which very simply bridges the eth0 interface inside of a container to your main LAN.
incus profile edit bridgeprofile
In almost every tutorial I create an incus container using the bridgeprofile.
incus launch images:ubuntu/24.04 Test -p default -p bridgeprofile
Notice that this “Test” container also includes the “default” profile. The default profile normally bridges a container to the Internet NAT network, unless it is overridden with something like the bridgeprofile.
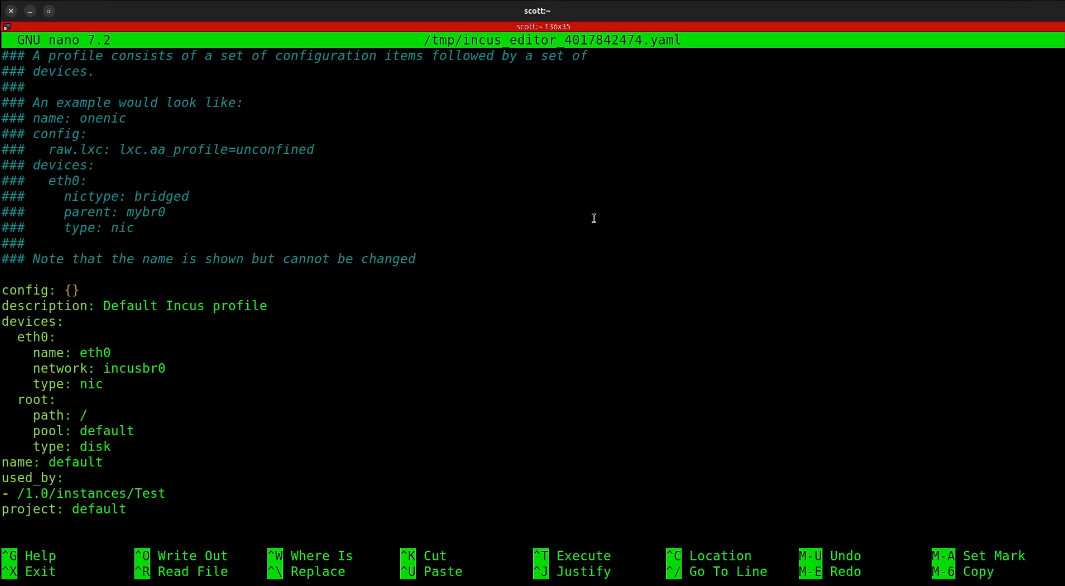
The default profile has an important secondary function to provide the root file system and in which storage pool the root file system is located which you can see below.
incus profile edit default
We created the “Test” container above using the bridgeprofile and that means that the container will have an address on my main LAN which is 172.16.0.0/16.

What if I want my Test container to have an address on our new VLAN100? I start by creating a profile.
incus profile create mycloud
Then I edit the new profile.
incus profile edit mycloud
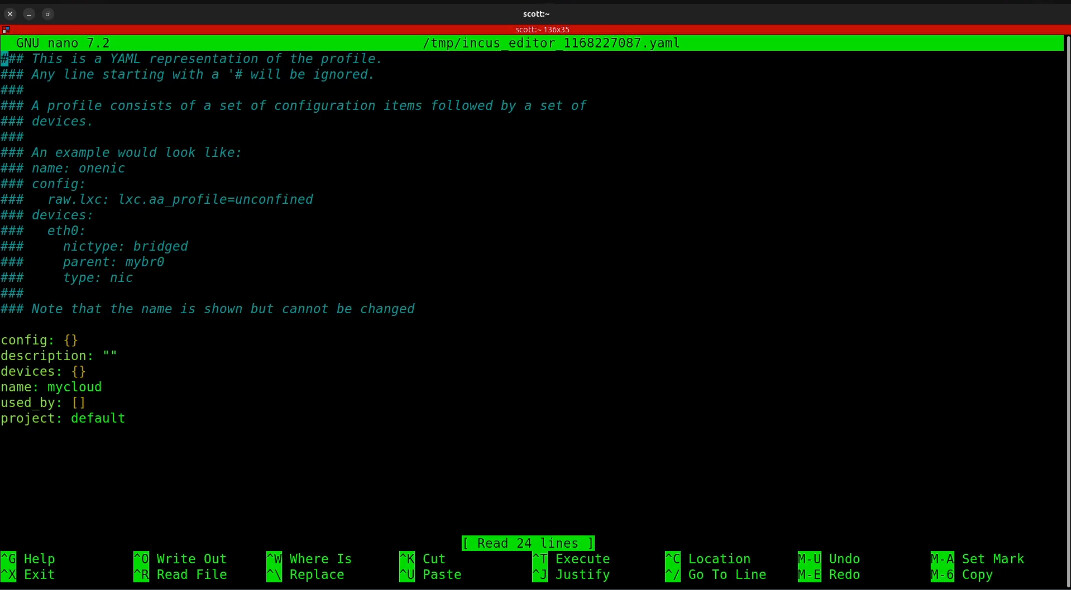
Assuming you are positioned on line one of the file in the screenshot above, do a CTRL ^ to mark the start of the file and a CTRL End (the end key on the keyboard) and then press CTRL K to delete everything. In lieu of that, a whole mess of CTRL K’s suffices.
Now insert the following in the editor.
config: {}
description: My Public Cloud Services
devices:
  eth0:
    nictype: macvlan
    parent: bridge0
    type: nic
    vlan: "100"
name: mycloud
Now press CTRL O and Enter to write the file out and a CTRL X to exit the nano editor and your new “mycloud” profile is completed.
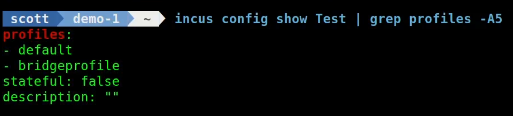
I can examine which profiles that the “Test” container is using with the following command.
incus config show Test | grep profiles -A5
Let’s remove the “bridgeprofile” from the “Test” container.
incus profile remove Test bridgeprofile

Let’s add the “mycloud” profile to the container.
incus profile add Test mycloud

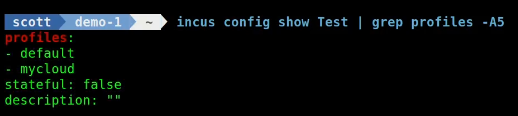
We can now example the profiles on the container.
incus config show Test | grep profiles -A5
If I list the container, it now has an address on the 100 VLAN.
incus list

Listing your profiles gives you a good idea of how many containers are using each profile.
Should you want to delete a profile, you must either remove the profile from the containers using it or delete the containers using it.
In the tutorial, I stopped and deleted the one and only container using the “mycloud” profile so I could then delete the profile.

Incus profiles can be used for a lot of use cases. VLANs are just one typical use.