Each Incus container is a separate OS instance and sometimes that is easy to forget. I have containers that started as lxc, migrated to lxd and are now incus. Some of the OS instances in these containers are as old as Ubuntu 18.04. This tutorial shows how to upgrade the OS instance in your incus containers.
As OS versions age, they may not get regular updates or may be susceptible to security issues because the OS is out of date. Before you initiate an update to a container, consider the application that you are hosting inside of it.
Some applications may have dependencies on older software components not supported in a newer OS variant. At that point, you will have to consider whether the application is important enough to retain or if there is not an alternate choice which can be supported under a current OS.
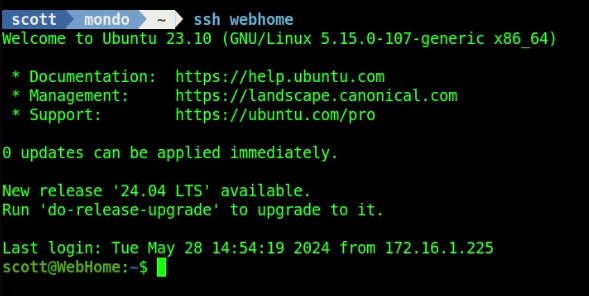
The target of my container OS upgrade for this tutorial is my Webserver instance which was initially a lxc container around five years ago and was migrated to lxd and is an incus container presently. Moreover, about two years ago I updated its OS from Ubuntu 18.04 to 20.04.
Lets get started.
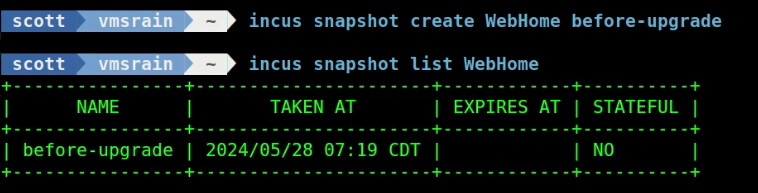
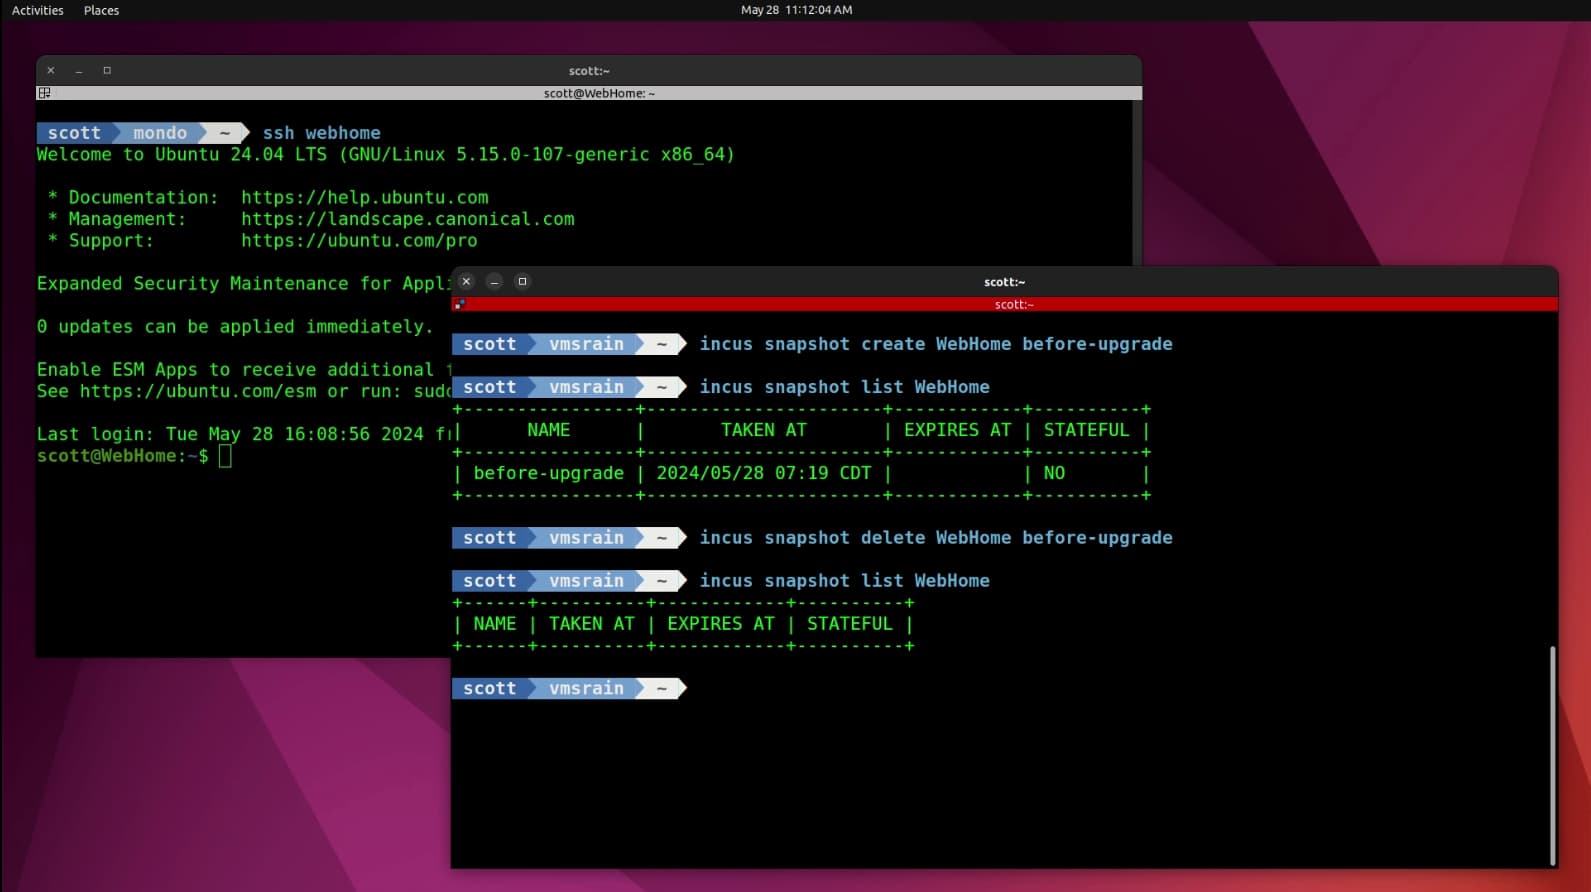
The first thing that you want to do before initiating an OS upgrade to a container is to take a snapshot of it in case something goes horribly wrong. That way you have a fall-back position to try again.
incus snapshot create WebHome before-upgrade
I want to upgrade to the latest OS version which is Ubuntu 24.04 Noble Numbat.
Since the container is currently Ubuntu 20.04, I will need to perform an upgrade to 22.04 first. When Ubuntu 24.04-1 is released in August of 2024 it will be possible to upgrade from Ubuntu 22.04 directly to Ubuntu 24.04. However for now, we need to then go from Ubuntu 22.04 to Ubuntu 23.10 and then finally to Ubuntu 24.04.
Be aware that when the OS is upgraded, so are many of the underlying application components which may affect the primary application that you are hosting in your container.
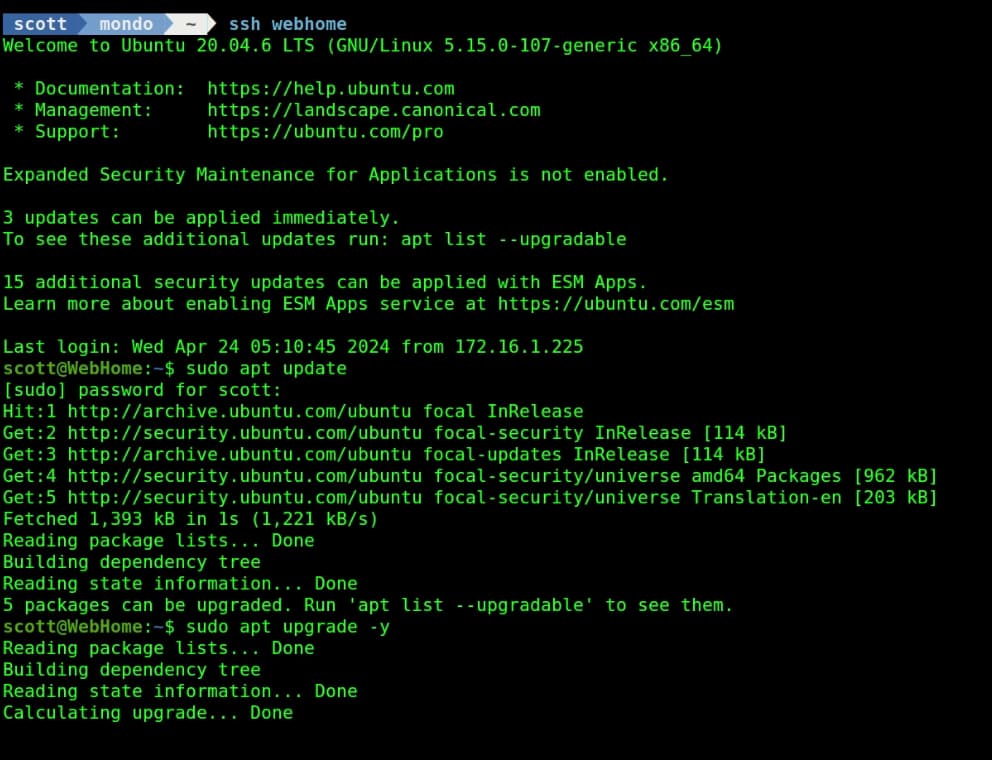
Before you initiate the first OS upgrade, take all of the updates to the current OS.
sudo apt update && sudo apt upgrade -y
Containers are normally very lightweight and have fewer components installed which contributes to their efficiency. For that reason, you may need to install the component to support updating the container OS:
sudo apt install ubuntu-release-upgrader-core
Now you should be ready to update from Ubuntu 20.04 to Ubuntu 22.04:
sudo do-release-upgrade
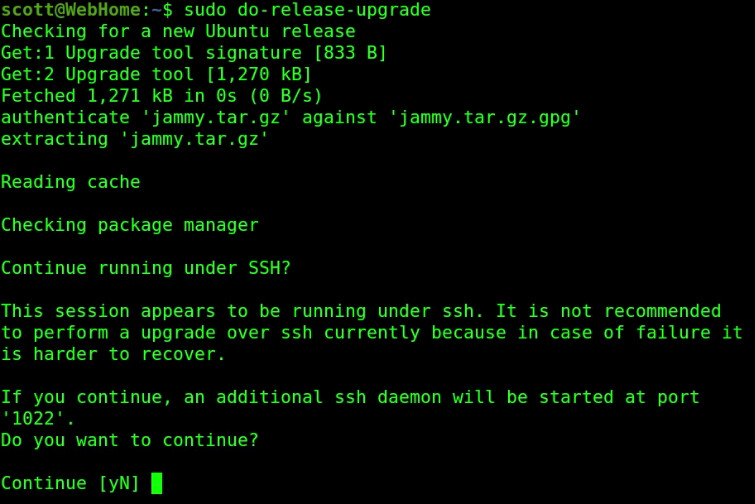
Notice in the screenshot that the “jammy” release has been located and that is Ubuntu 22.04.
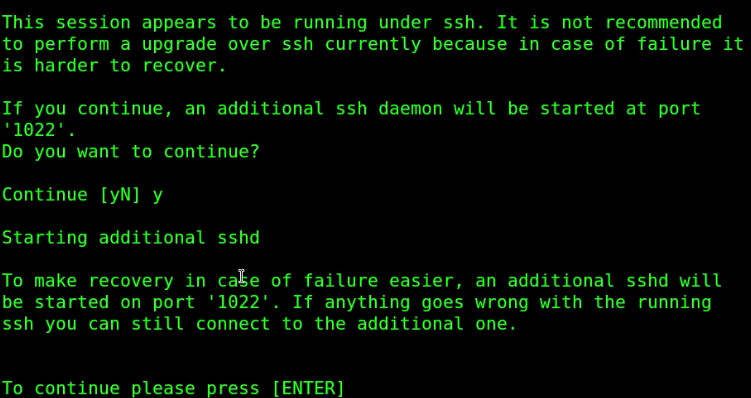
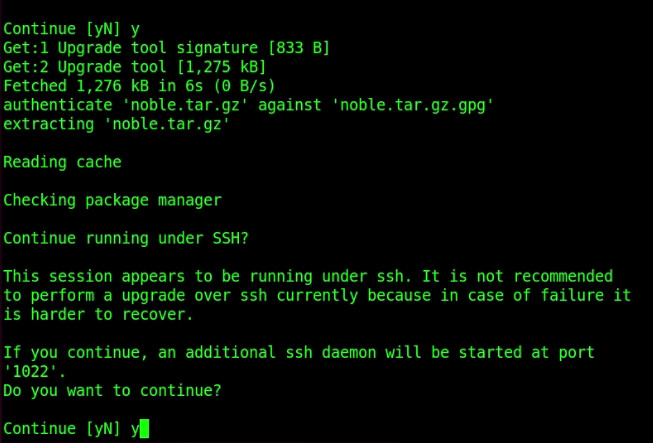
Press “y” to continue. Next, you will see a disclaimer about another sshd daemon being started on port 1022 in the event of a failure. This is because I am running my upgrade from an ssh session. I have never seen such a failure occur and I have been upgrading versions of Ubuntu since 2007.
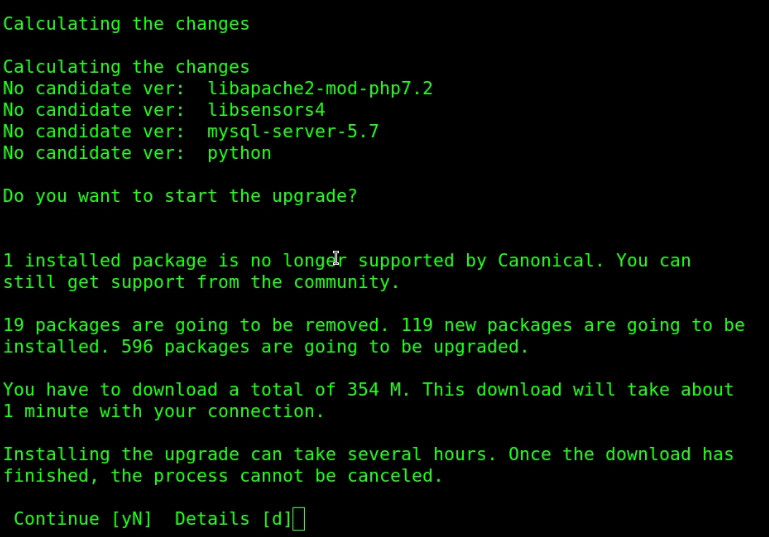
After a few minutes you will see an upgrade summary that explains what will be upgraded. Here’s an example:
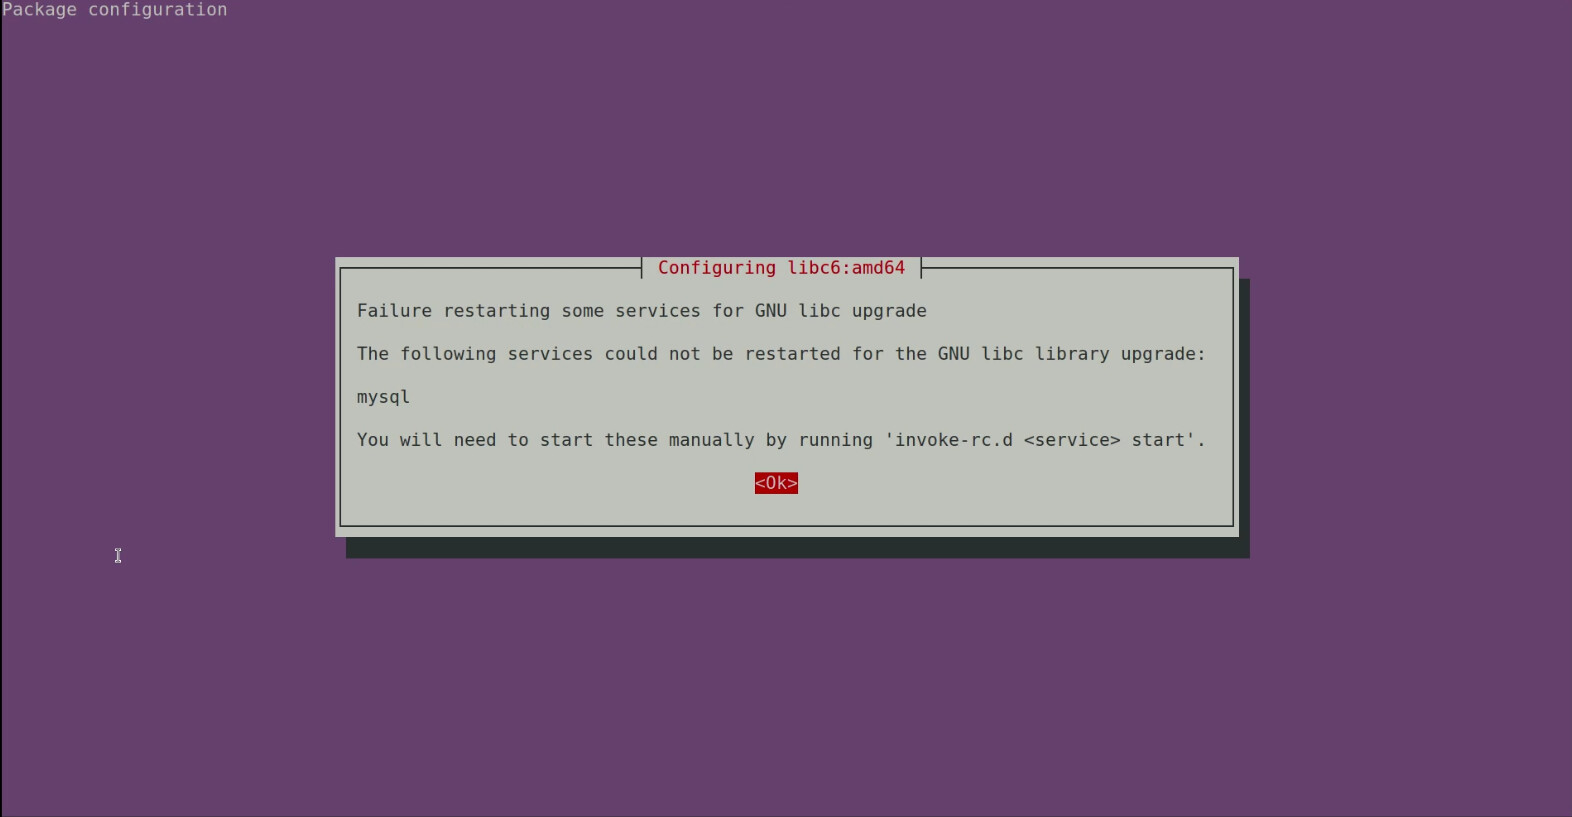
During the process of the upgrade you may receive some messages indicating certain services cannot be restarted. This is a normal occurrence during an upgrade and all should be well once the upgrade completes and the container reboots. Here’s one such message calling out “mysql” which is a component of my website that I developed with Wordpress.
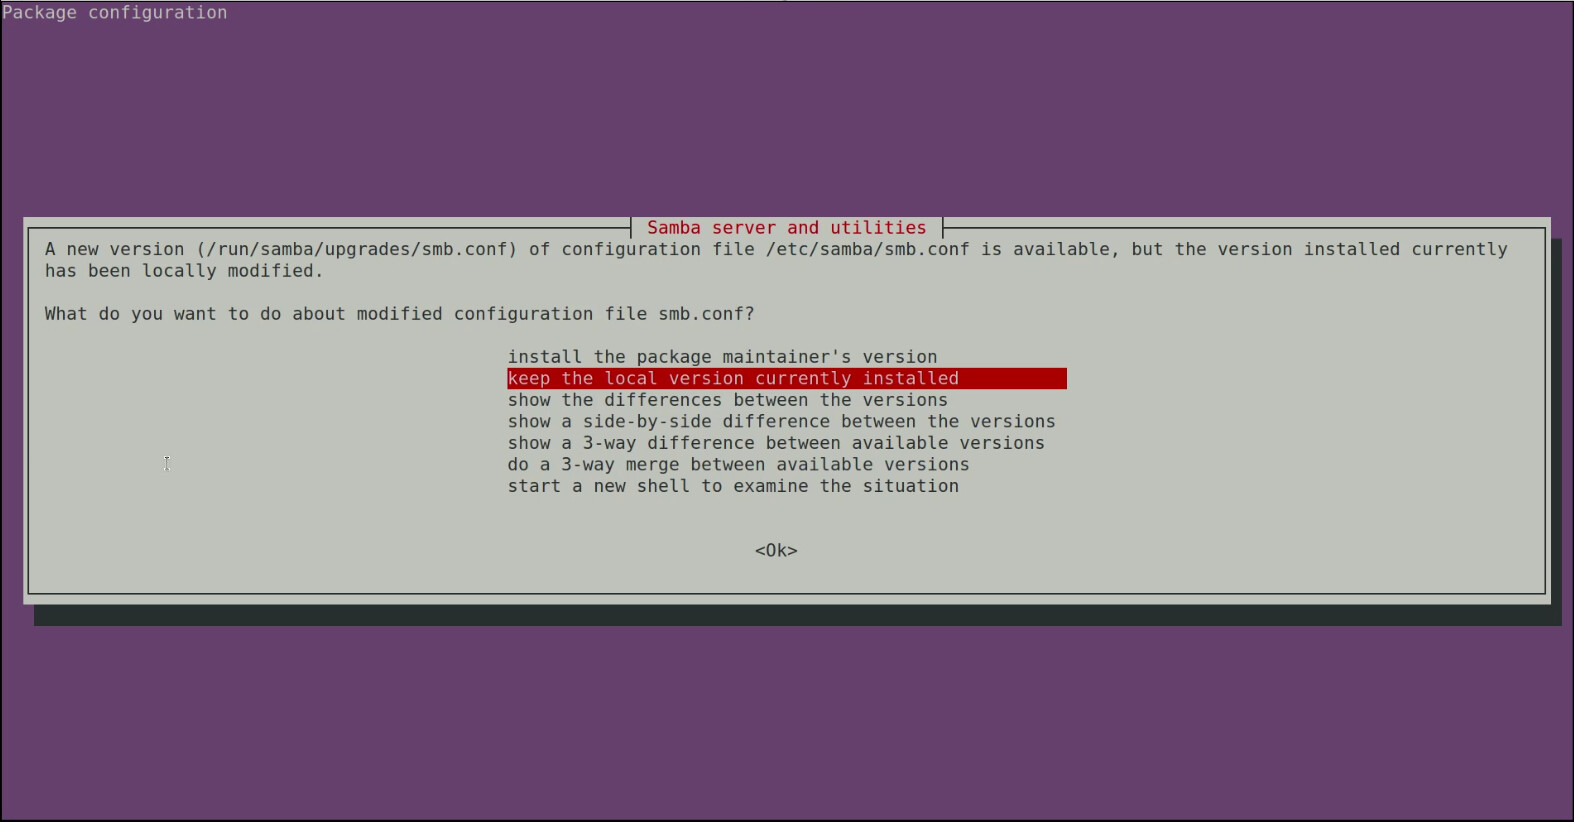
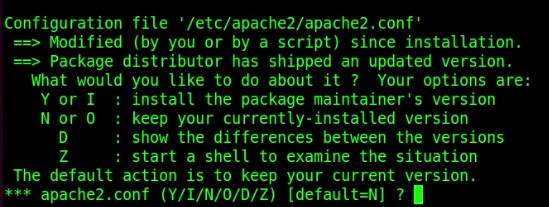
The other type of notification that you are likely to receive during the process of an OS upgrade are messages asking if you want to replace “.conf” files for various services.
The installed services are being upgraded as a part of the upgrade, but you also have the option to replace the configuration files (.conf) for each service that is upgraded. In general, you will want to keep the version that you have installed because it more than likely contains customizations that you or one of the programs you have installed has made. If you opt to replace the configuration file with the package maintainers version, you risk losing your settings.
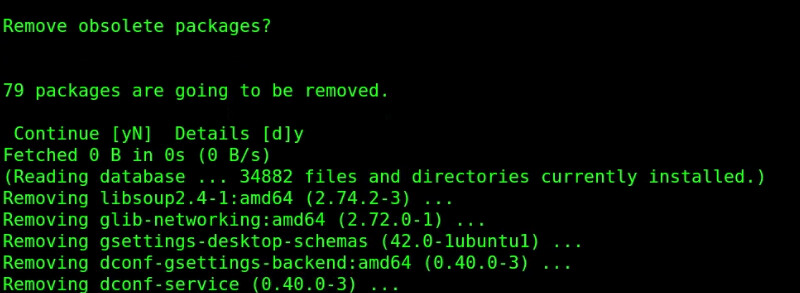
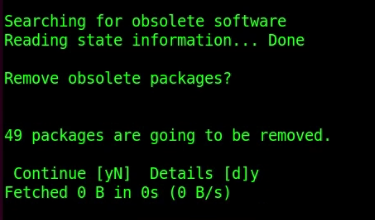
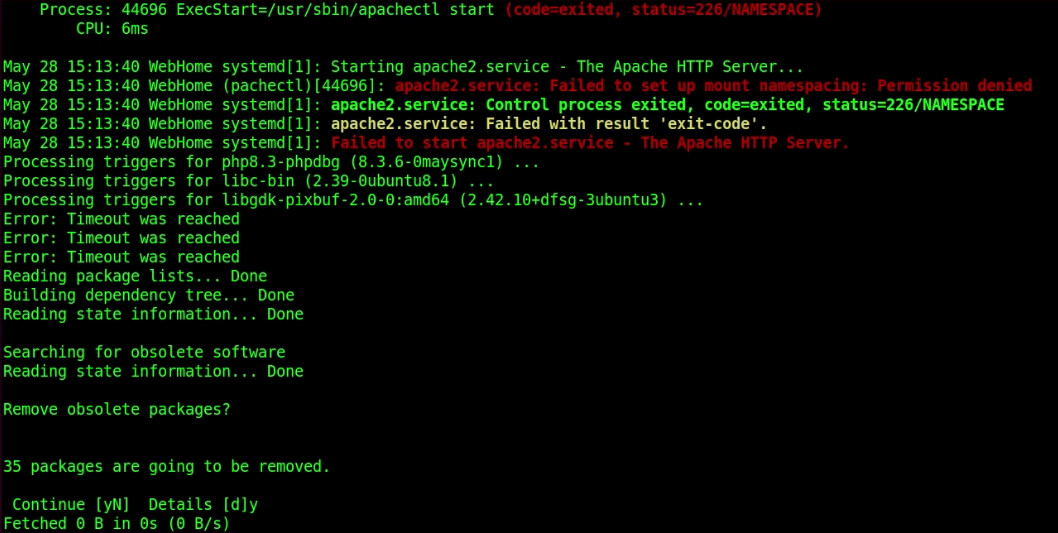
Next you will be asked if you want to remove obsolete packages. Since there is no reason to keep them, answer yes.
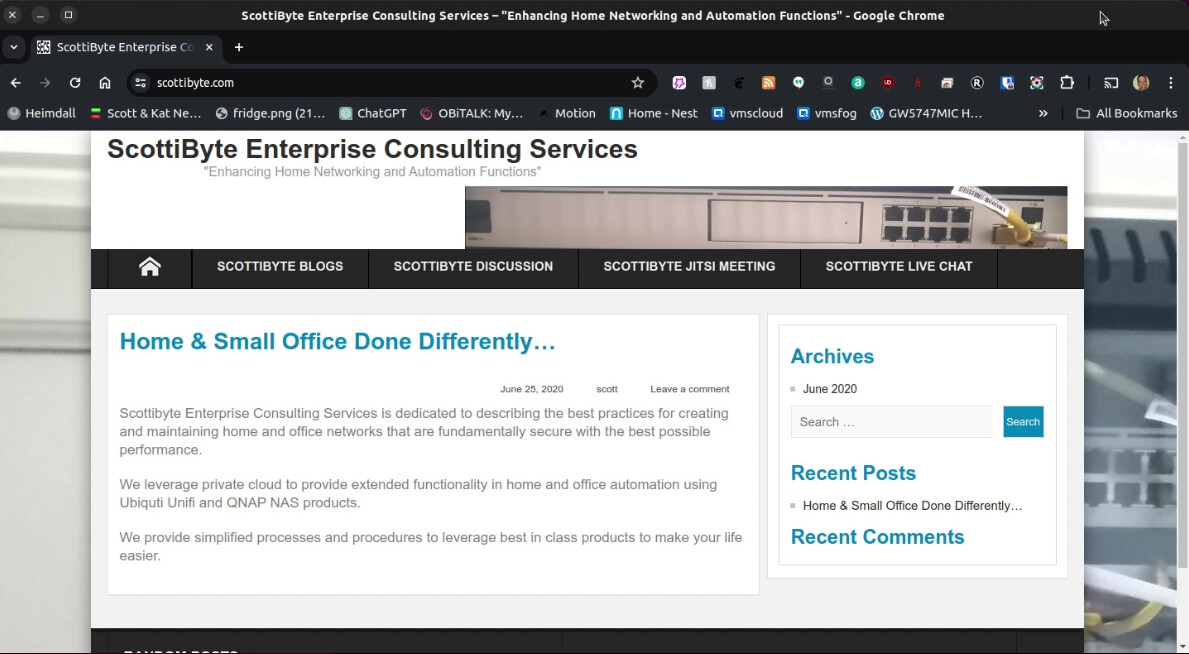
My application is a WebServer which runs a “LAMP” stack.
L - Linux
A - Apache (or other web server)
M - MySQL (or other database)
P - PHP
There are settings in the WebServer configuration that point to components such as the version of PHP.
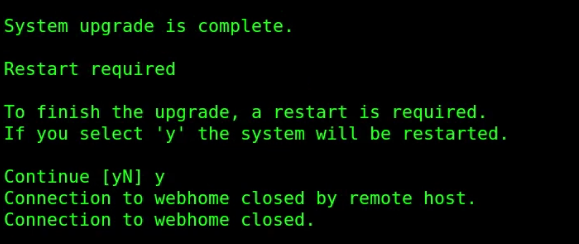
Finally, the upgrade is complete and I get a reboot message. When I type “y” I get disconnected as the system reboots.
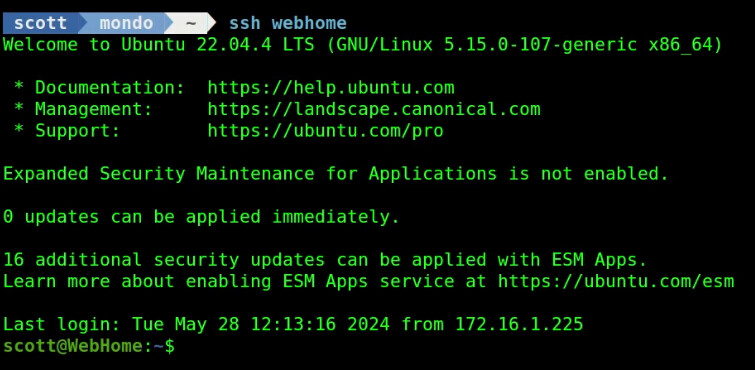
After the system reboots, I can ssh back into the incus container and I see that I am running Ubuntu 22.04
After the upgrade, my website did not work because of changes with the LAMP stack. The precise reason for this is that the version of PHP in Ubuntu 20.04 was PHP 7.4 and the version of PHP in Ubuntu 22.04 is PHP 8.1. The upgrade had no way of knowing that my web browser had PHP 7.4 as an enabled module.
Ultimately, that change was up to me. So, the bottom line is you may need to research the changes/requirements your application has after an OS upgrade. In my case, I disabled the old PHP module, enabled the new one and then restarted the WebServer:
sudo a2dismod php7.4
sudo a2enmod php8.1
sudo systemctl restart apache2.service
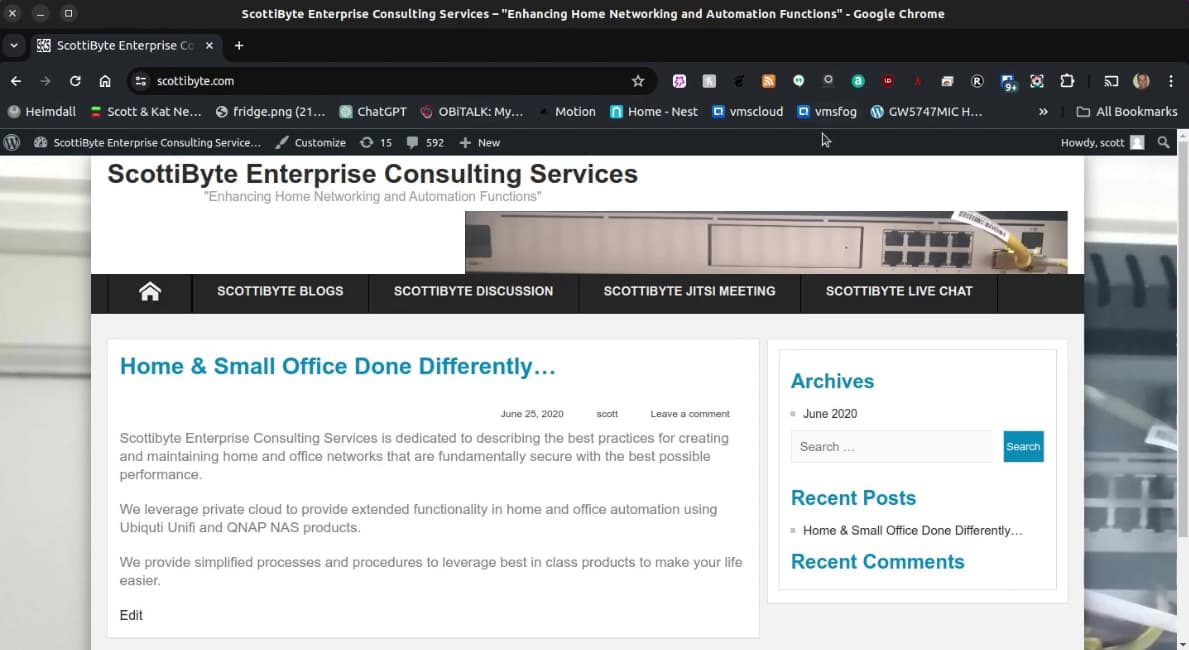
After that, my Website correctly launches.
Now we want to upgrade to Ubuntu 23.10 and we perform the same command we did before.
sudo do-release-upgrade
However, no update is found.
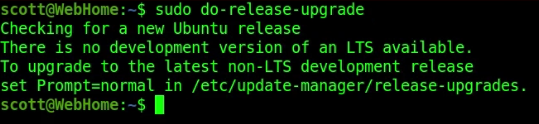
The reason for this is because by default, Ubuntu is set to only search for long term releases (LTS). As mentioned earlier, as of May 2024 we cannot do a direct upgrade from Ubuntu 22.04 to Ubuntu 24.04. We have to wait for Ubuntu 24.04-1 in August before we can do that.
So, that means we need to upgrade to Ubuntu 23.10 first. In order to do that we need to:
sudo nano /etc/update-manager/release-upgrades
In this file change the “prompt=lts” to “prompt=normal”.
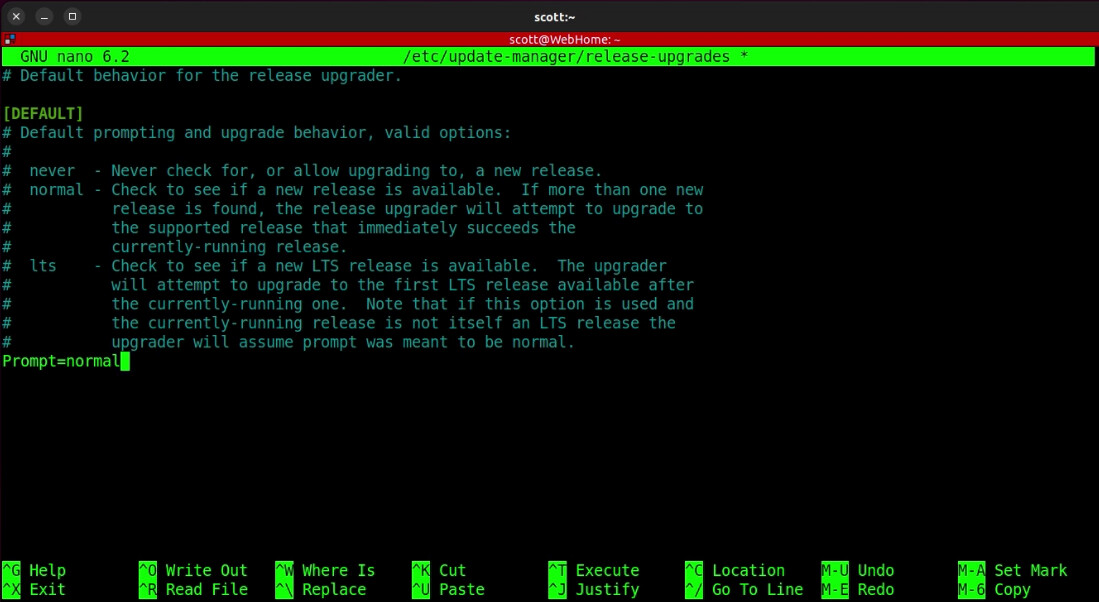
Do a CTRL O and Enter to write the file out and a CTRL X to exit the nano editor.
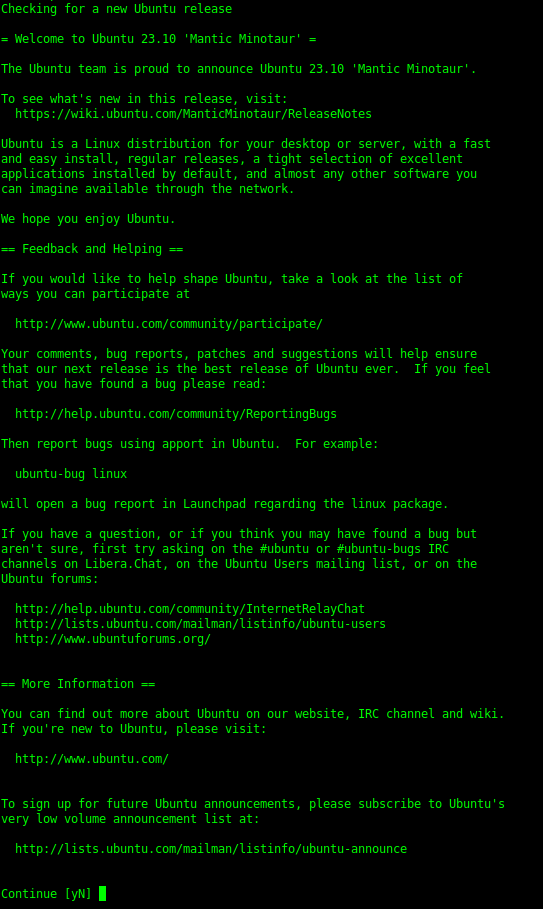
Now check for a new release again and it will find Ubuntu 23.10 Mantic Minotaur.
sudo do-release-upgrade
The upgrade messages will all be similar to the last upgrade.
Generally you will want to keep your existing (.conf) files and not replace them. In the screenshot below, I would want to keep my Apache configuration file since that would be specific to my WebServer.
After the update nears completion, I choose to remove the obsolete packages again.
After the reboot, I am running Ubuntu 23.10.
Finally I perform the upgrade to Ubuntu 24.04 Noble Numbat.
sudo do-release-upgrade
The upgrade process is the same as we have done in the other two upgrades.
When I get down to the obsolete package removal screen, I can see where the Apache2 service failed to start. This is normal and will resolve after the reboot.
You may want to perform interim snapshots on your container to provide you the ability to roll back in the event that a particular upgrade breaks things. My experience has taught me that there is no such thing as too many backups.
The lesson in all this is don’t be afraid to try things because snapshots will save you in the event of a bad decision. You don’t learn without trying.
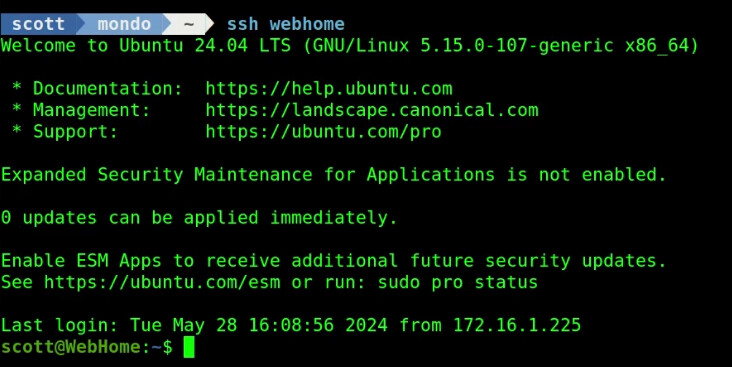
After the reboot, I log in and confirm that Ubuntu 24.04 is running.
The last thing to do is make sure the website is working properly.
Since the container is tested to be running properly, I delete the snapshot since snapshots are stored as a part of the container and they make backups much larger.
After all this work, be sure to take a backup of the container on the incus server:
incus export WebHome WebHome.tar.gz
The export (backup) can be imported on any incus server.
Maintaining updates/upgrades as well as OS releases in your incus containers is important for proper operation and security.