Unifi Alarm Manager is a powerful way to launch external automations hosted in Home Assistant or Hubitat Elevation. In recent months Alarm Manager became available in the Unifi Network Management screen, whereas, it used to only be an option in Unifi Protect.
In this tutorial, we learn how to create alarms in Unifi Alarm manager with Webhook endpoints in both Home Assistant and Hubitat Elevation. This is a very powerful capability that allows you to invoke complex automations based on events that occur on your network that can interact with your home automation environment.
Alarm Manager alarms are defined with a trigger, a scope and an action. The simplest alarms may only send a message to Ubiquiti Unifi Admins in the event that something occurs.
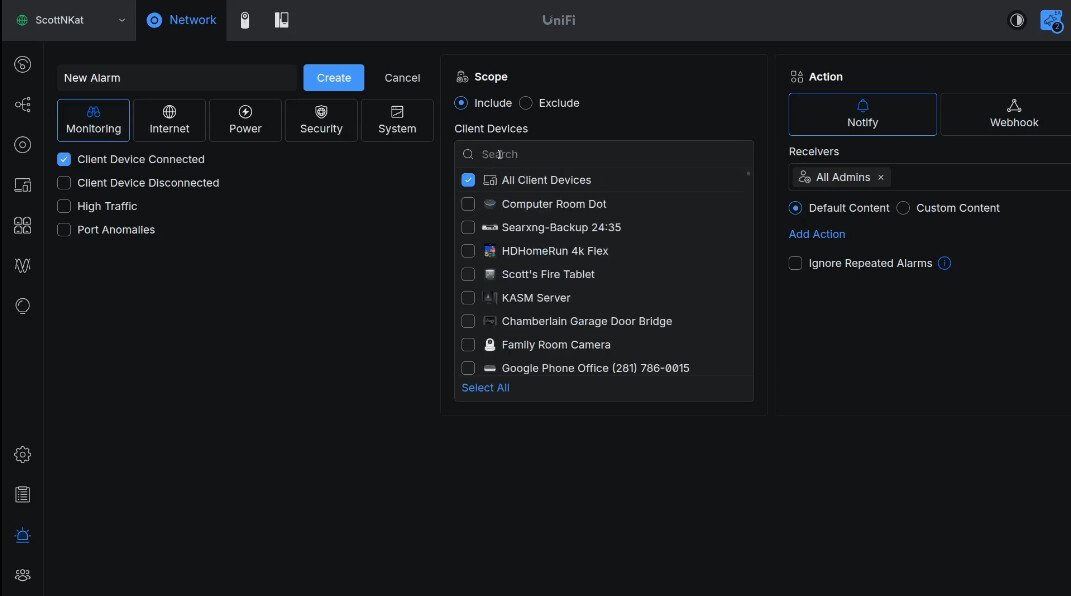
- Trigger - Something that happens such as a client device that connects or disconnects.
- Scope - A list of one or more client devices to watch.
- Action - Either a Notification or a Webhook endpoint.
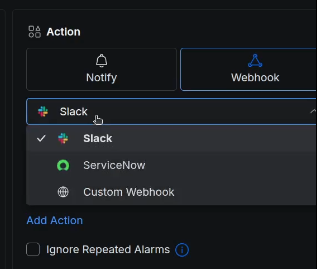
Webhooks are web based APIs that “listen” for some application to initiate a call to them. Unifi Alarm Manager supports Webhook calls to Slack & ServiceNow.
Unifi Alarm Manager also supports calling a “custom” Webhook as an action and that’s what we are going to learn how to do.
We are going to use custom Webhooks to run external routines on both Home Assistant and Hubitat Elevation hubs. These are just examples and you can easily use a custom Webhook to trigger an action on any target system that supports Webhooks.
Webhooks can make very complex calls where you can pass parameters both to and from remote servers. For the purposes of this tutorial, we are going to cover the simplest use case as a starting point.
Custom WebHook Endpoints in Home Assistant
We will start by creating a virtual device to interact with. Go to the “settings” option in your Home Assistant. Then go to “Devices & Services”.
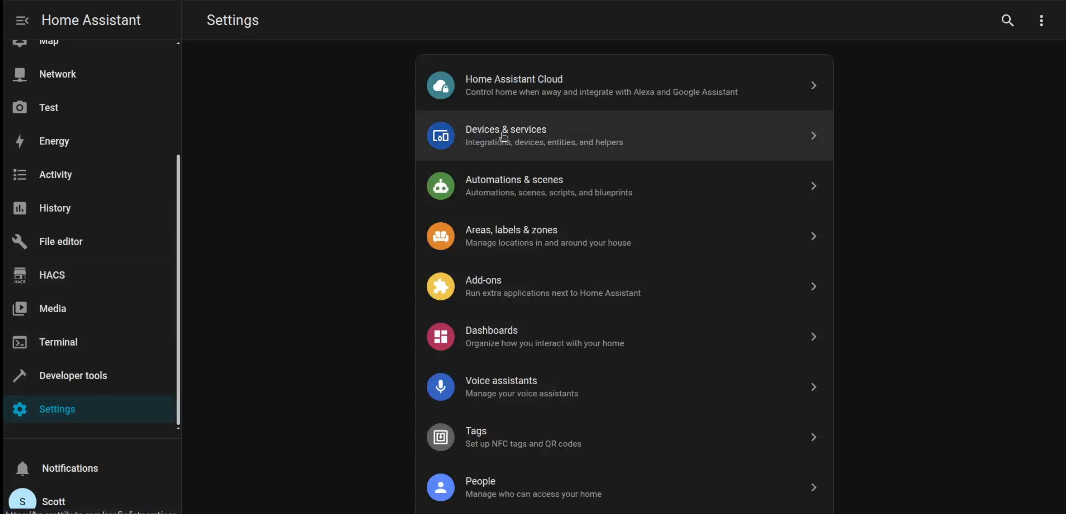
In “Devices & Services” choose the “Helpers” tab at the top.

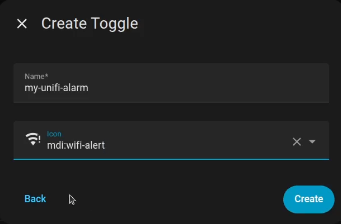
Choose the “+ Create helper” at the lower left of your screen and type in “toggle” for the type of helper to create.
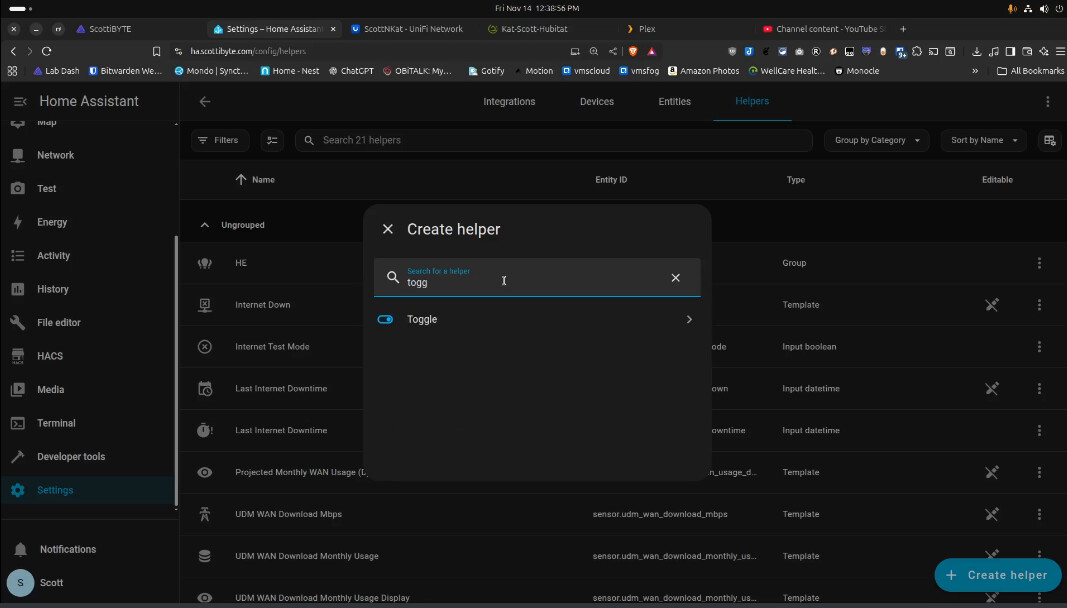
I gave my toggle virtual device a name and I chose an icon for it that seemed meaningful.
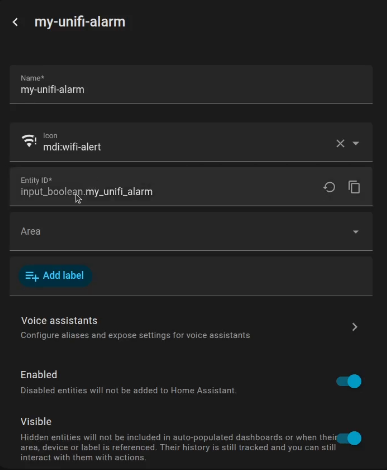
Once you create the helper, you can go back and click on it.
Then if you head to the gear, you can see the entity name it created. In my case, input_boolean.my_unifi_alarm is the name of the entity. In Home Assistant all objects such as switches or devices have entity names and that’s how you interact with them.
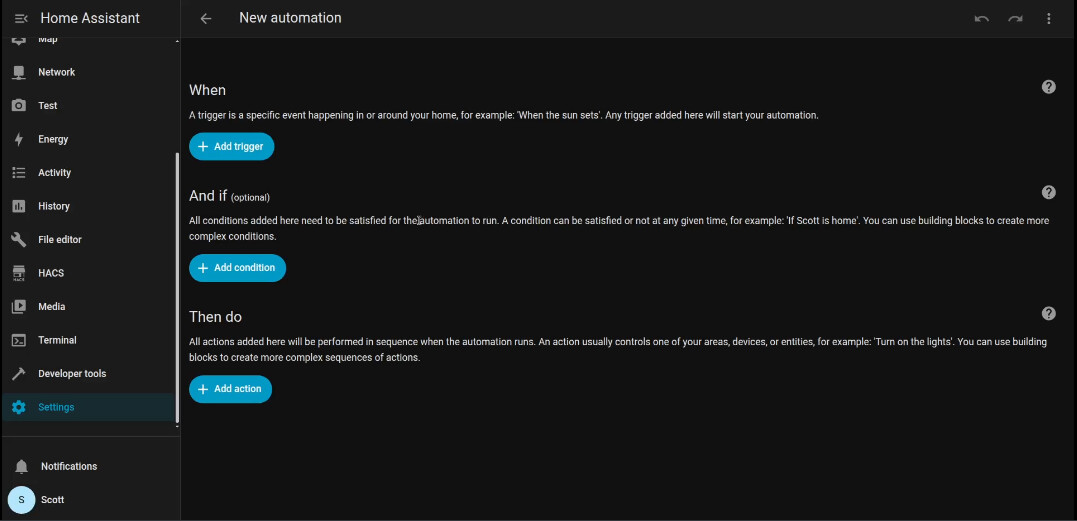
Now go back to “settings”, “Automations & Scenes” and select “Create Automation”.
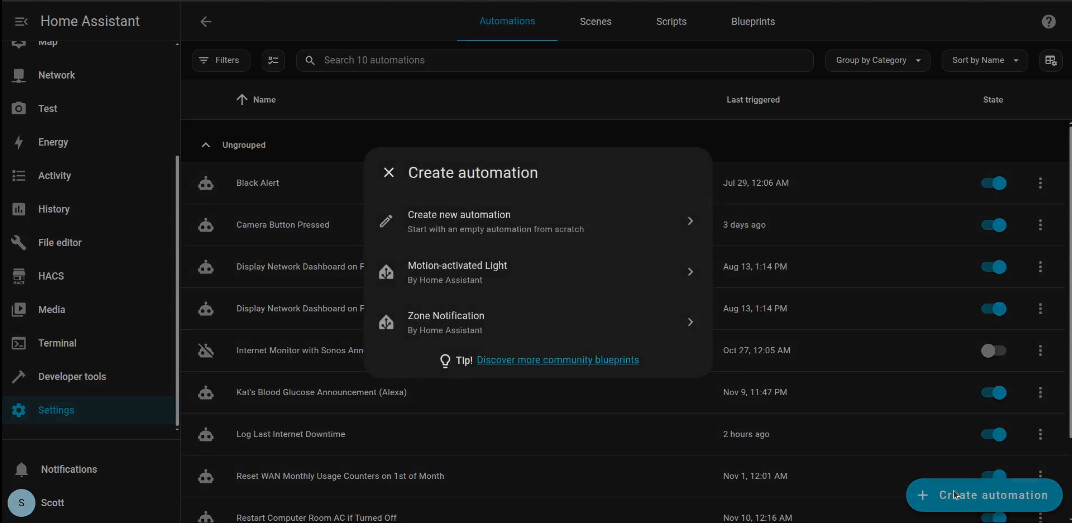
Choose “Create new automation” on the popup above and that brings you to the screen below.
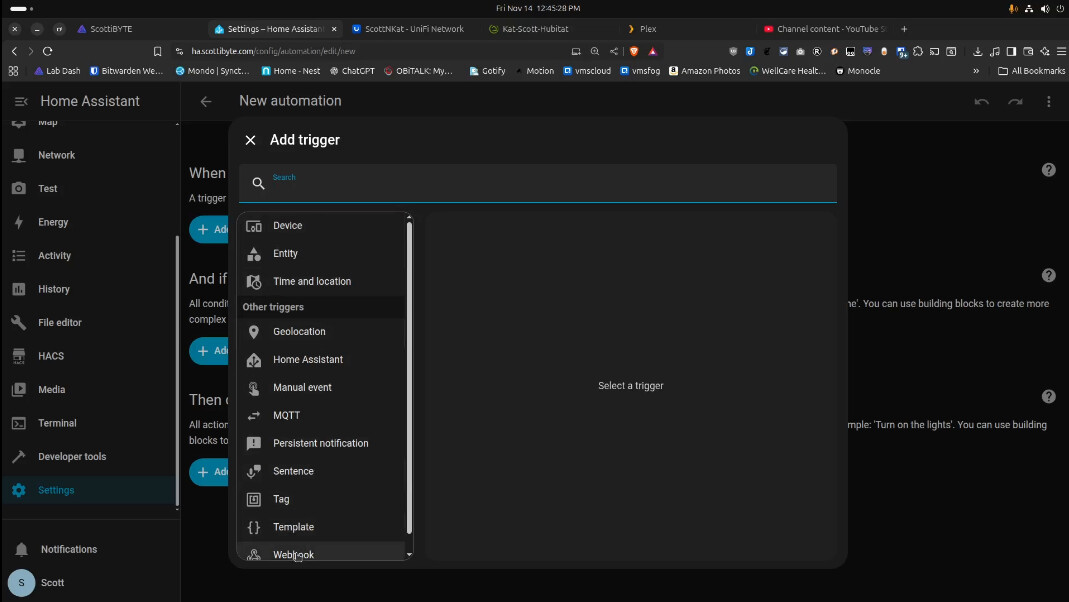
Select “Add Trigger” and choose the “Webhook” trigger.
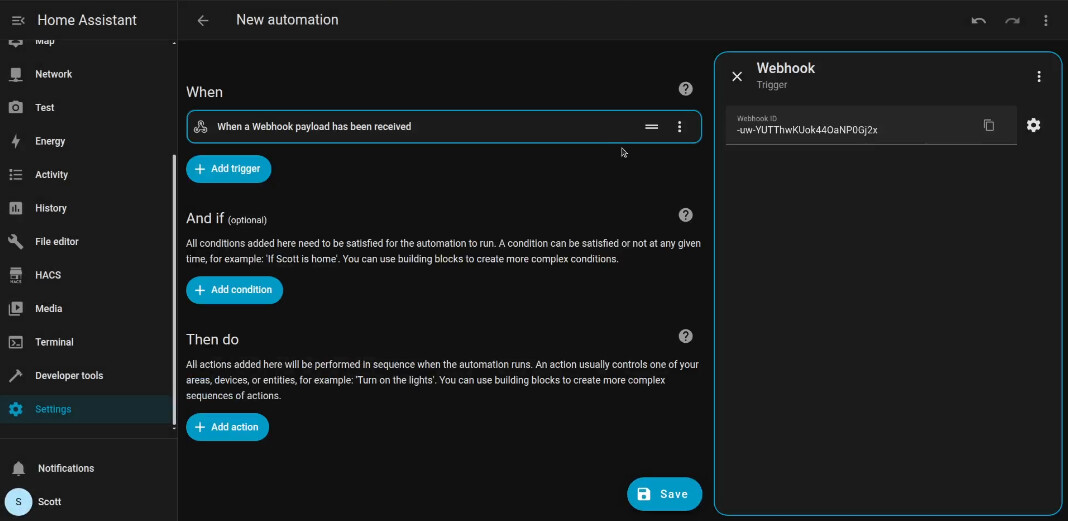
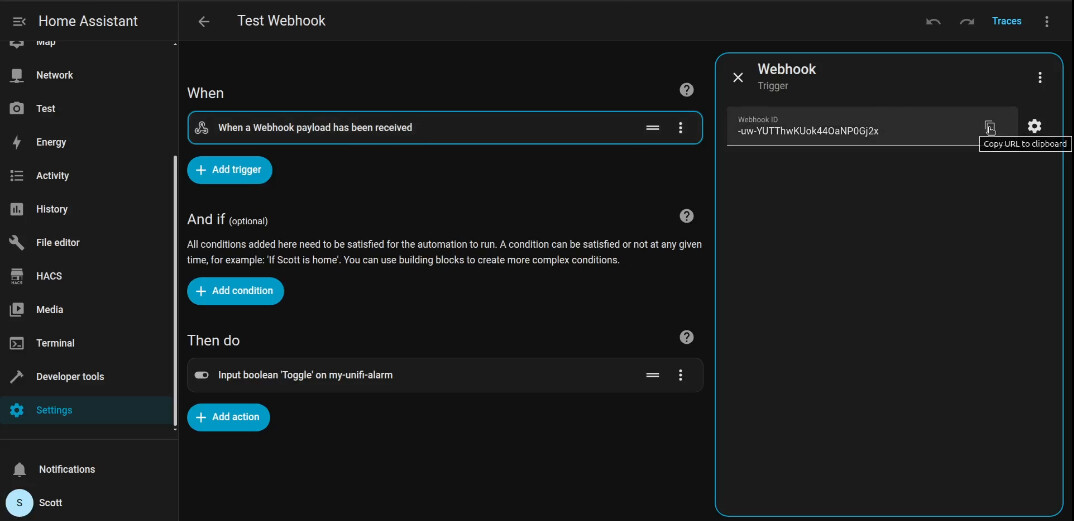
When you click on the “+” on the Webhook option that comes up you get a webhook ID. Treat this as a secret password and don’t divulge it. I deleted mine after the video.
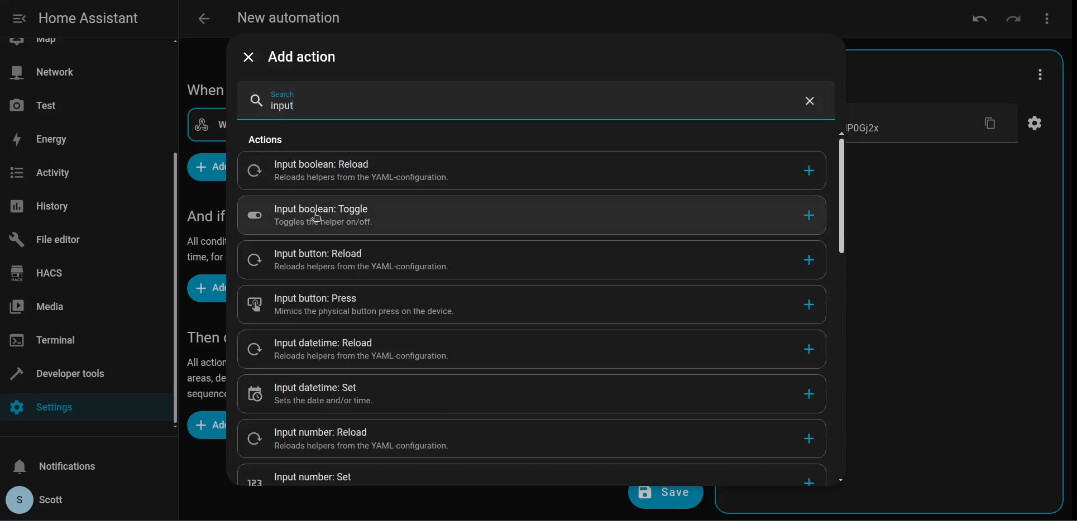
Now go to the “+Add action” option.
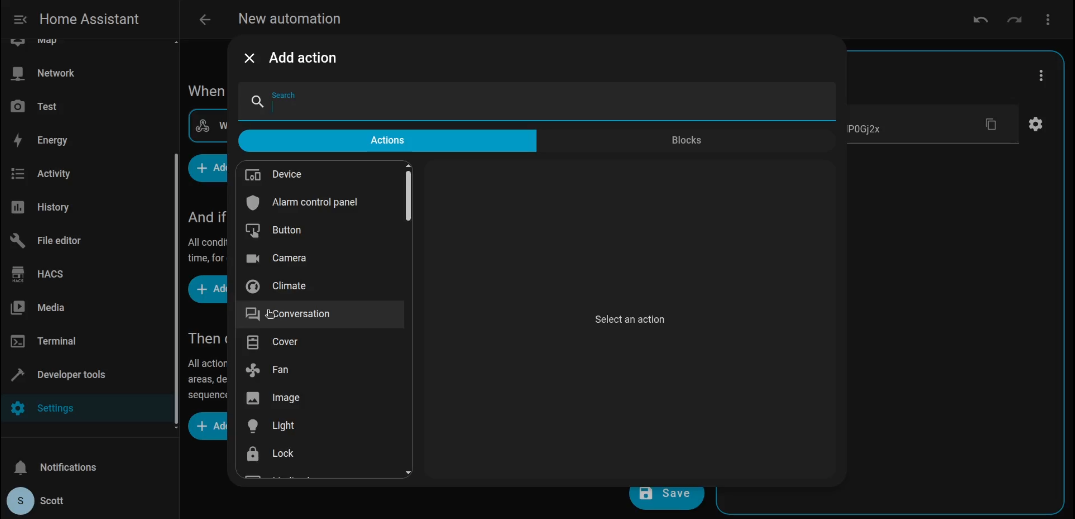
Search for and select the Action named “Input Boolean Toggle”.
In “Input Boolean Toggle” you will click “+Add target” and add your target “my-unifi-alarm”.
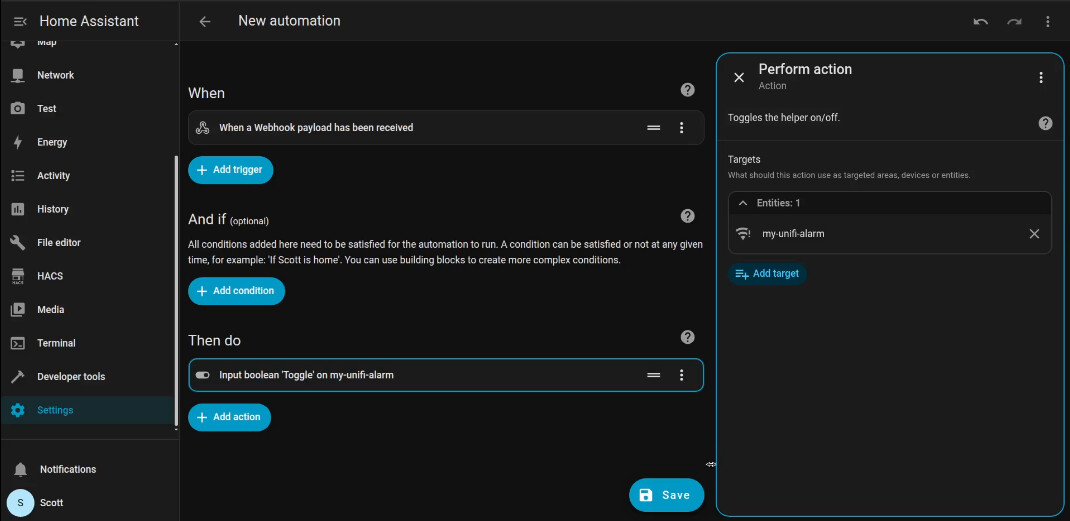
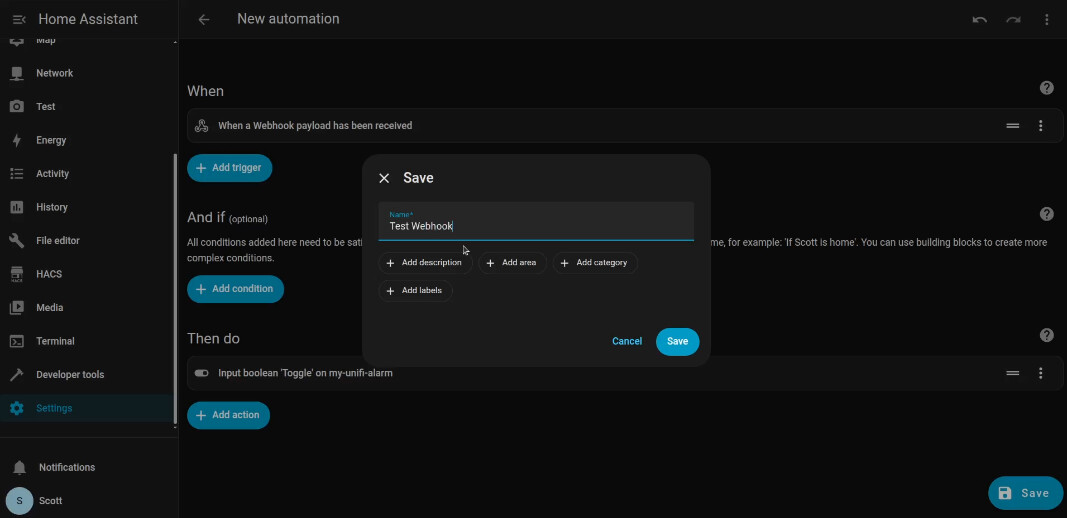
At this point the automation says, “When this webhook is triggered, turn on the toggle”. Save the automation and give it a name.
Go back into your automation and copy the webhook URL as shown below.
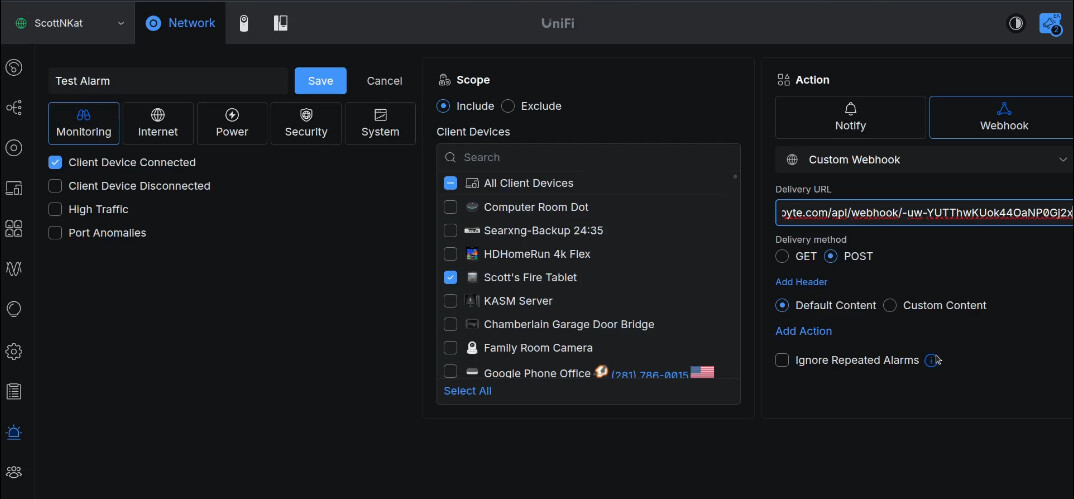
Go back to your Alarm in Unifi Network Alarm Manager and paste the string that you just cut into the “Delivery URL” field as the action and then save the alarm.
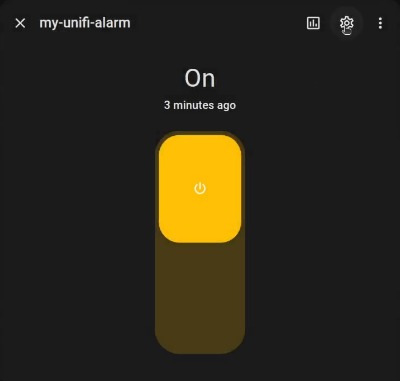
Now in Home Assistant, go back to “Settings”, “Devices & Services”, “Helpers” and click on your helper and toggle it to off as shown below.
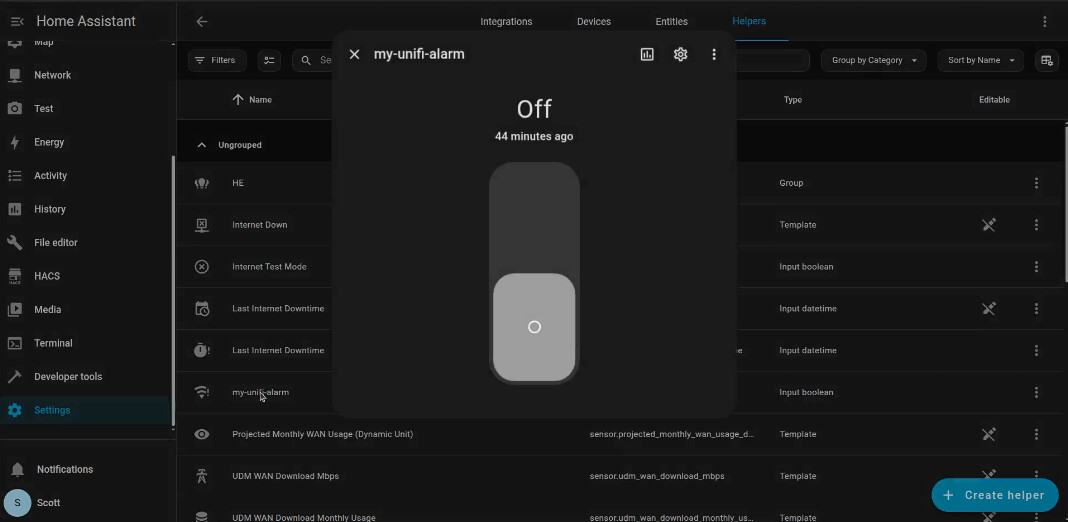
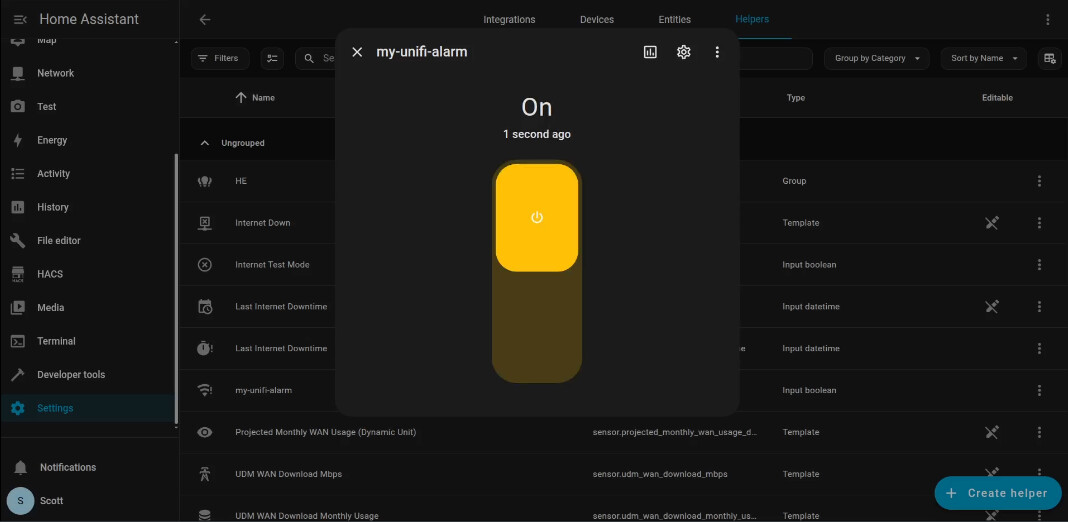
As you will recall, the Alarm in Unifi Alarm Manager is designed to trigger when the device goes online on the network. The wifi on my tablet is off and when I toggle it to on, alarm manager executes the action to call the custom webhook in Home Assistant and the toggle turns on.
Obviously this is a very simple example. The automation in Home Assistant could execute a complex set of actions only bounded by your imagination.
Custom WebHook Endpoints in Hubitat Elevation
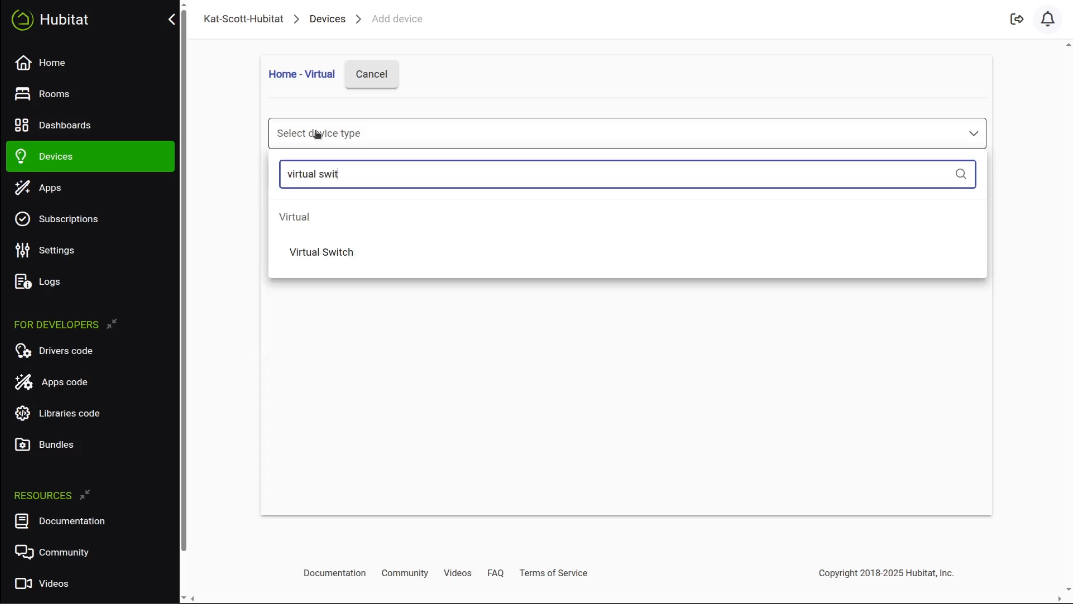
In Hubitat, go to “Devices”, “+Add device”, “Add Virtual device”. Start typing “Virtual Switch”.
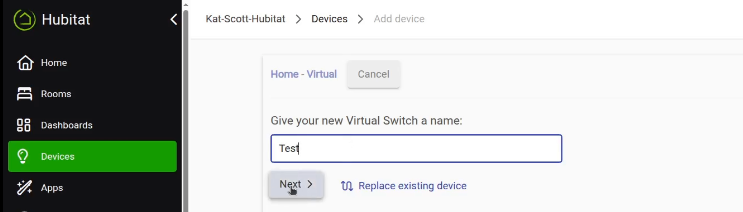
I named my virtual switch “test”.
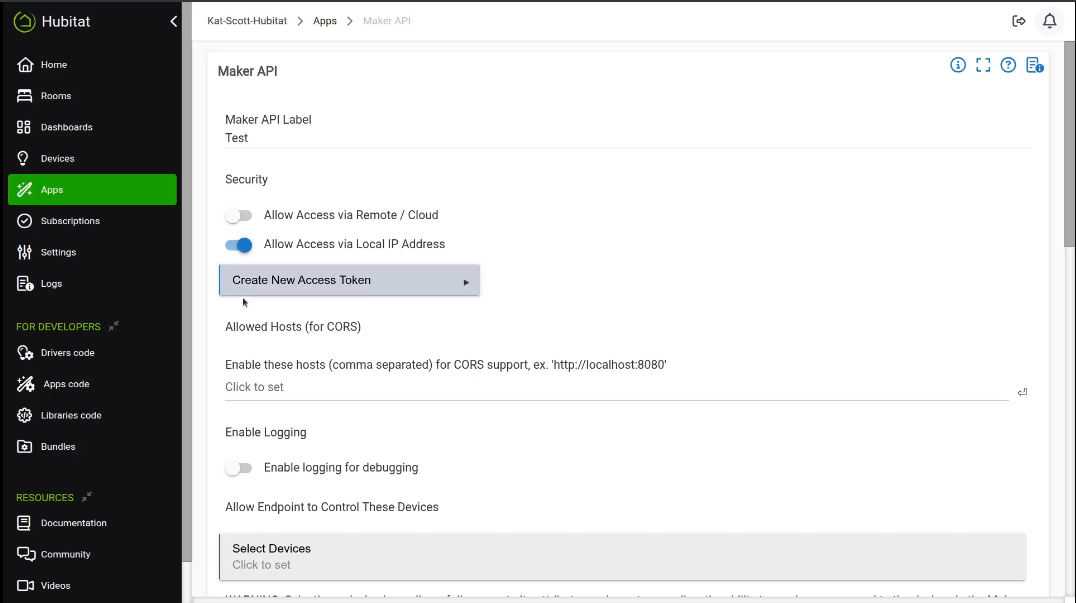
To create our Webhook endpoint, go to “Apps” and click on “+Add built in app”. Select the “Maker API” as the app you want to add.

Give your “Maker API” (Webhook endpoint) a name. I named mine “test”. You can create multiple Maker API endpoints and you can control more than one switch with each endpoint.
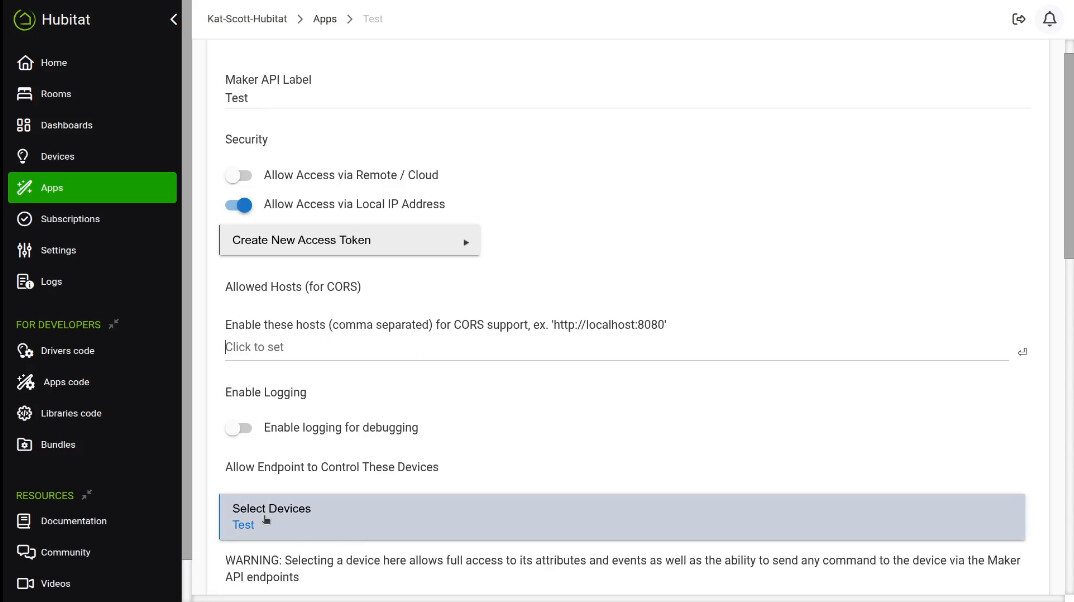
Select one or more switches in the select devices field that you want to have the option to control. I only listed my one switch “test” because that’s all i wanted.
Further down the page is a list of the Webhook endpoints for this Maker API instance. Make a copy of the first one and we will use it soon.
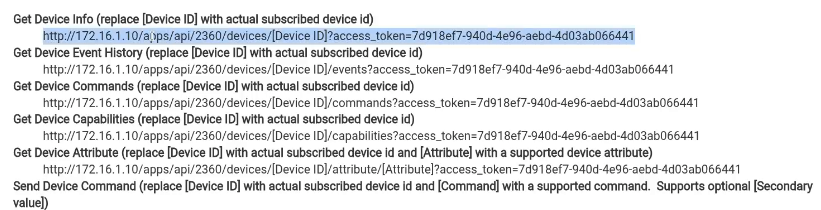
Click Done.

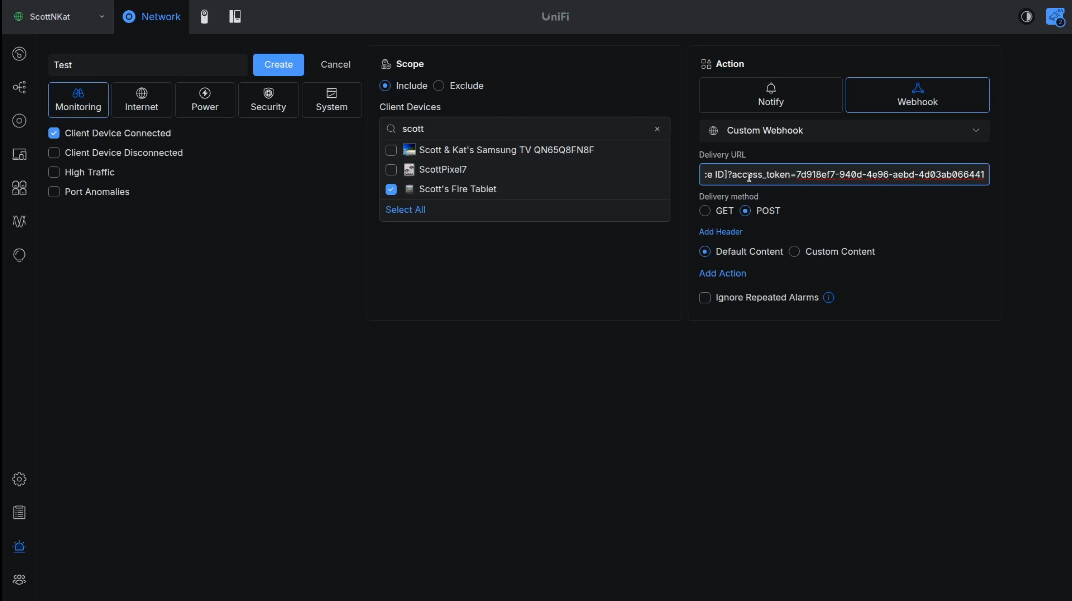
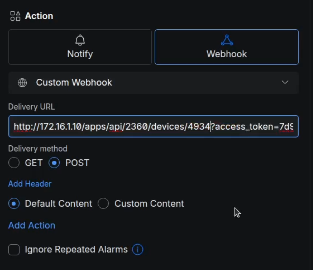
Now go back to Unifi Alarm Manager and create an alarm. My alarm triggers on my Fire tablet connecting to wifi and I paste in the delivery URL as the custom webhook that we just copied from the Maker API.
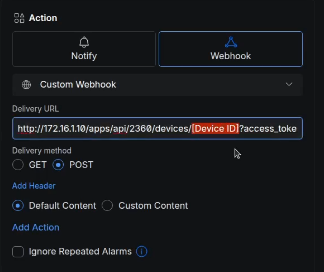
Note the [Device ID] place holder in the URL we just copied.
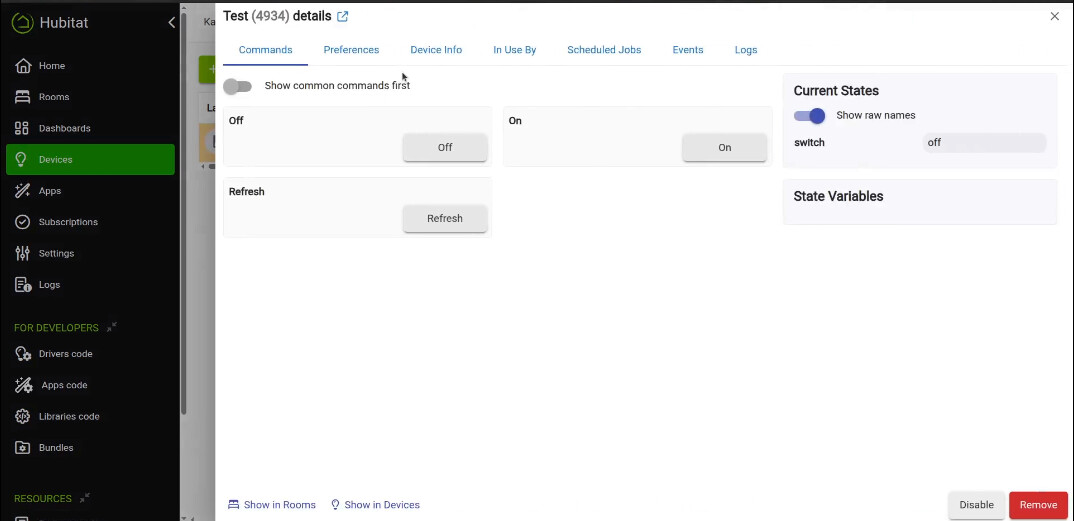
Go back to Hubitat now and find your switch device. Once I click on my “Test” switch, notice that it has a number after it. In my case, that is 4934. That’s the number of this switch device. Yours will differ. Make note of it and go back to editing the Alarm in Unifi Alarm Manager.
So back in the alarm, I paste in the device ID we just got.
Put a slash (/) after the device number and the word “off” or “on” right before the question mark. The on or off controls whether you want to turn the switch on or off.
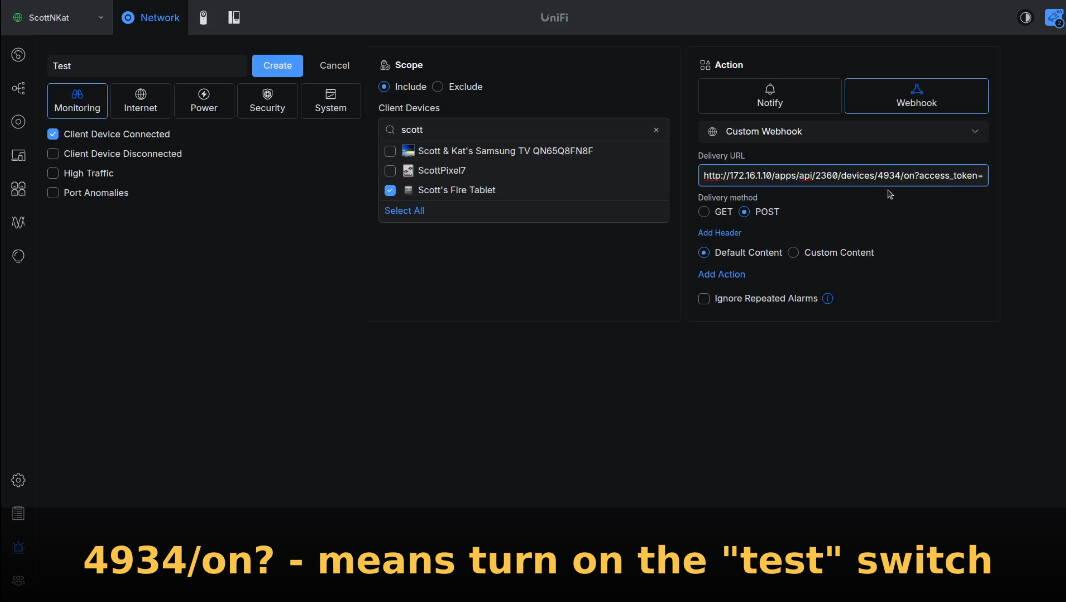
Now, click “Save” to update your alarm in Unifi Alarm Manager.
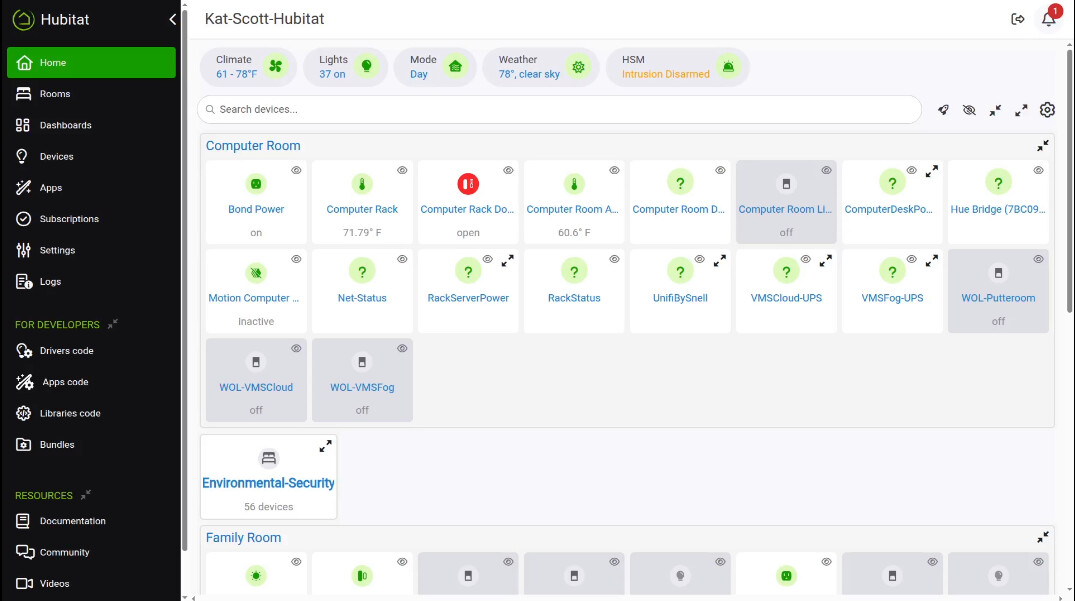
I created a simple Hubitat Dashboard with the “Test” switch so we could test it.
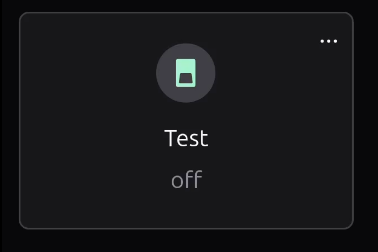
When I turned the on wifi on the Fire tablet, the switch turned on.

As shown in the tutorial, you can also use the Webhook endpoint URL with a curl command to test to see if it is working.
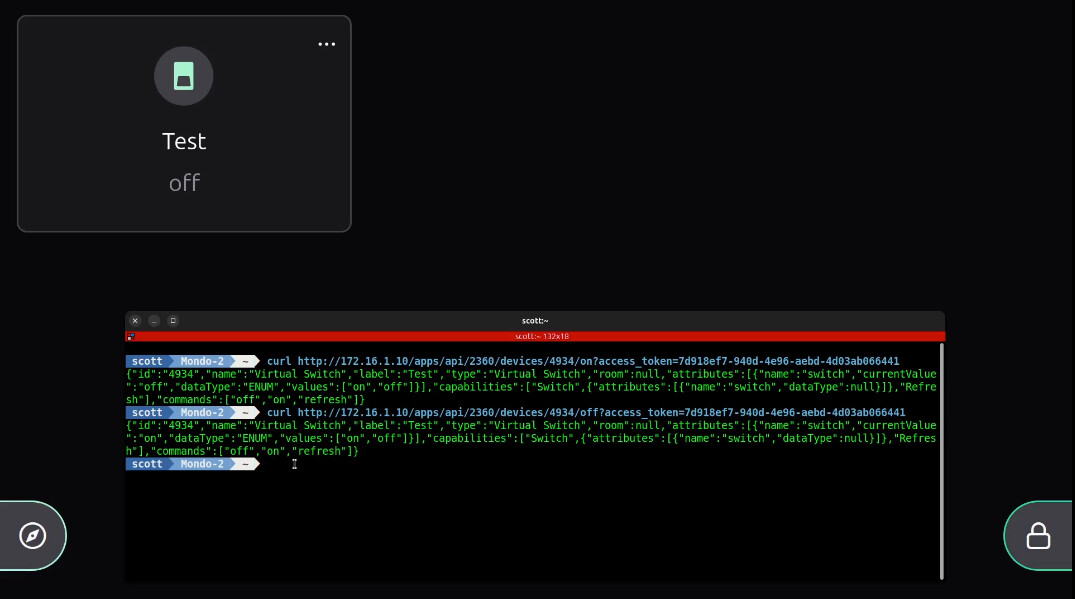
In the endpoint curl commands above, I simply changed from “on” to “off” as the parameter after the numbered switch device ID.
There are many things you can do with Alarm Manager and using custom webhook endpoints as the executed action provides almost unlimited options for what you can accomplish.
This was designed as a beginning guide to give you some ideas for your own use cases.