TextArea is a minimalist browser tab text editor that encodes all your text into the URL hash where it can be shared with others via a URL or a QRCode.
TextArea is a static website and does not store any information on the server where it is installed and so TextArea has no database. I implemented my instance of TextArea in an Incus container and it uses only 390MB of storage and runs in only 64MB of memory.
TextArea seems to be a valuable addition to any Home Lab. In recent tutorials I covered Termix which is a web based terminal access manager, FZF - Fuzzy Command Line Editor, and most recently the Fresh Text Editor as a possible substitute for nano.
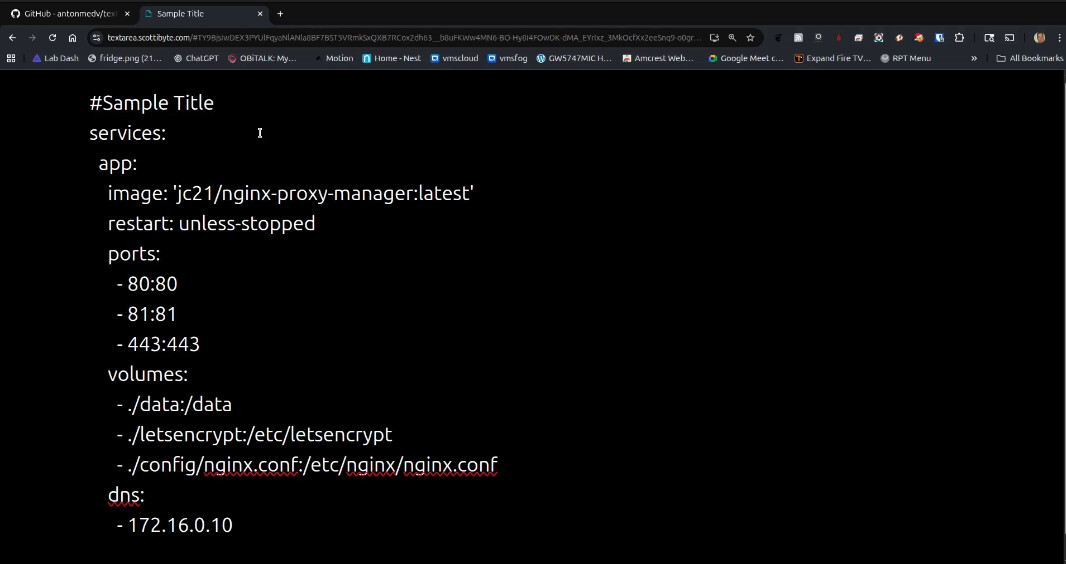
One example use case that I can think of for TextArea might be sharing a docker-compose file with someone since TextArea would preserve the spacing that YAML files are so picky about.
For privacy conscious folks, TextArea stores its data in your local URL hash and no data is stored on your server. In fact, if you never share a TextArea URL, the data remains private to the local URL hash of your web browser. I added a custom command to clear that local hash whenever you like easily.
If you type a “qr” between the trailing slash after your subdomain name and the pound sign/hash tag (#), the program will encode the note into a QR code.
![]()

Similar to the “/qr#” option that the author created, I added a “/new#” option to clear the hash data from your browser to start with a new edit session.
![]()
Note that since the URL encodes all of the text in it, and never on the server, if I perform a “new” that just clears my browser entry. If someone has the original URL they can still access the data because the data is in the URL and not on the server.
To create your own self hosted instance of TextArea, start by creating an Incus container.
incus launch images:ubuntu/24.04 TextArea -p default -p bridgeprofile -c boot.autostart=true
Move inside of the new container.
incus shell TextArea
Update your repositories and take any software updates and then install some dependencies.
apt update && apt upgrade -y
apt install -y nginx git ca-certificates net-tools nano openssh-server -y
Add a user account. Put the user in the sudo group and move to the new account.
adduser scott
usermod -aG sudo scott
su - scott
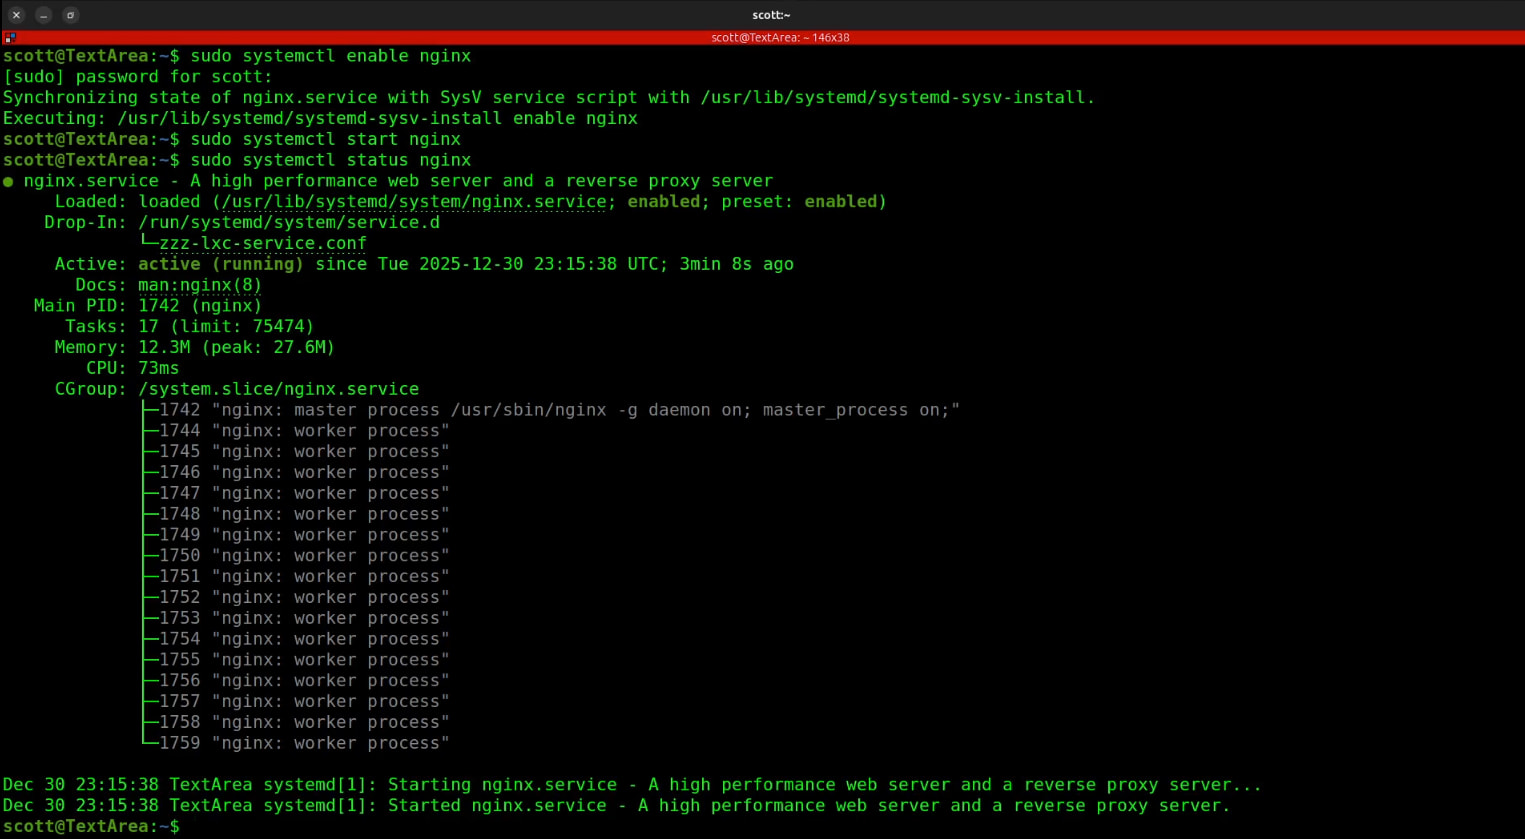
Enable the nginx web server to start on reboot and also start it now.
sudo systemctl enable nginx
sudo systemctl start nginx
Check the nginx web server status.
systemctl status nginx
Move to the web server root.
cd /var/www
Clone the TextArea project to our current folder.
sudo git clone https://github.com/antonmedv/textarea.git
Remove the default sites file for the nginx web server since we will replace it.
sudo rm /etc/nginx/sites-enabled/default
Edit our custom sites file.
sudo nano /etc/nginx/sites-available/textarea
Paste the following data in the nano editor.
server {
    listen 80;
    server_name _;

    root /var/www/textarea;
    index index.html;

    # Serve QR page
    location = /qr {
        try_files /qr.html =404;
    }

    # New File / reset page
    location = /new {
        default_type text/html;
        return 200 '
<!DOCTYPE html>
<html>
<head>
<meta charset="UTF-8">
<title>New File</title>
<script>
  // Clear localStorage and redirect to main editor
  localStorage.clear();
  location.href = "/";
</script>
</head>
<body>
<p>Starting new file...</p>
</body>
</html>
';
    }

    # Normal editor
    location / {
        try_files $uri $uri/ /index.html;
    }

    # Security headers
    add_header X-Content-Type-Options nosniff;
    add_header X-Frame-Options SAMEORIGIN;
    add_header X-XSS-Protection "1; mode=block";

    # Content-Security-Policy compatible with textarea JS
    # 'unsafe-inline' allows the inline JS in index.html that updates the URL hash
    add_header Content-Security-Policy "default-src 'self'; style-src 'self' 'unsafe-inline'; script-src 'self' 'unsafe-inline'";
}
Save the file with a CTRL O and enter and CTRL X to exit the nano editor.
Add a symbolic link for our custom file back to where nginx expects to see it.
sudo ln -s /etc/nginx/sites-available/textarea /etc/nginx/sites-enabled/
Reload nginx so that it reads our new configuration.
sudo systemctl reload nginx
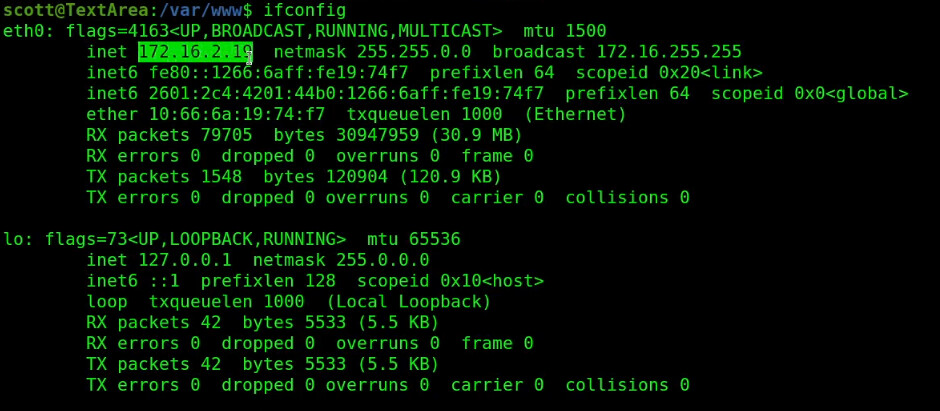
Find out the address of your incus container.
ifconfig
Copy the ip address of your eth0 device. Yours will differ from mine.
If you visit this IP address in your favorite browser, you will be able to type in the web page and TextArea will automatically encode your data in the URL. If the first line you type begins with a “#”, then when you hit enter on that line the current tab in your web browser will be renamed accordingly. Standard browser controls such as Shift CTRL + and CTRL - will zoom the browser in or out making the font larger or smaller.
If you want to share your TextArea URL’s with folks not on your local network, you will need them to be able to access the application via a reverse proxy. It’s not that they access the data this way, but they need to access the application on your network to decode the hashed URL.
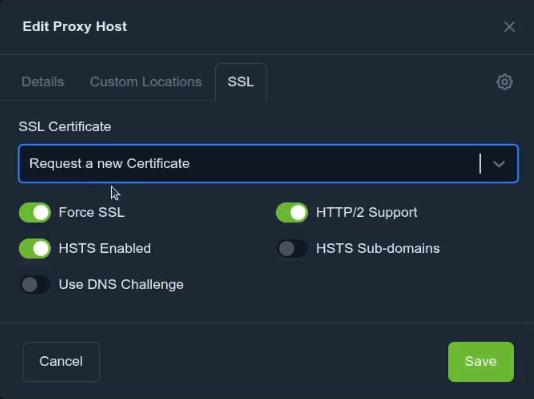
The assumption is that you have purchased a domain name and created a subdomain. The easiest way to host a reverse proxy is via NginX Proxy Manager which I have covered many times before. An example of creating the proxy would be:
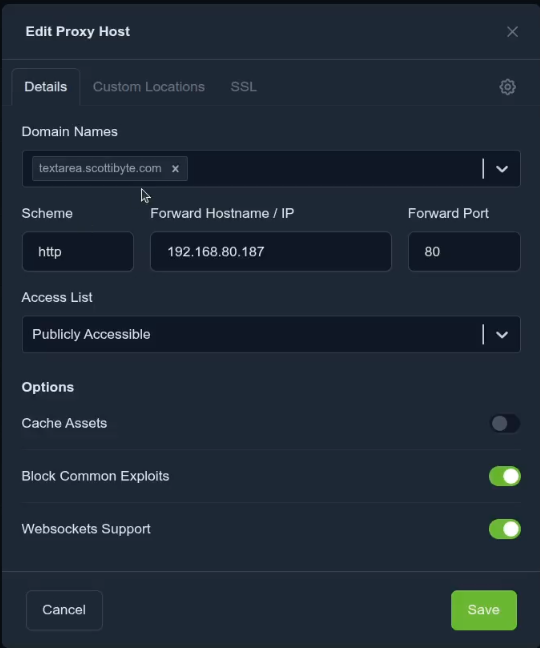
The port would be 80. Your domain name and local IP would differ of course. You would want to head to the SSL tab and request a new Let’s Encrypt certificate as well.
The advantage of this is that now you can share both TextArea URLs and TextArea QR codes to users outside of your local network.
The /new# entry clears the local hash and the /qr# provides a QRCode for the hashed URL.
TextArea seems to be under active development and new versions seem to be released often. To update TextArea from your terminal:
cd /var/www/textarea
sudo git pull
sudo systemctl reload nginx
My code is already at the latest, but here is an example.

As a reminder, TextArea is just a static website. It has no database and nothing persistent on the server. The only place the data is stored is on your local browser cache and my /new# function clears that. Since all the data is stored in the URL hash, that can always be shared and will always have your data as long as you have a copy of the URL used to generate it.
Should you ever decide to modify the sites-enabled file you can execute the following commands to reload it.
sudo nginx -t
sudo systemctl reload nginx
TextArea is a great tool for your home lab and I hope you find it useful.