MAJOR UPDATE TERMIX v2.0 March 14, 2026 adds a Guacamole container as of Termix 2.0 which provides telnet, RDP and VNC capabilities in addition to ssh. Be sure to see the updated compose.yml file below.
WARNING: BREAKING CHANGES FROM V1.9.0 TO V1.10.0. There were changes in how the encryption key and file ownership is handled beginning with v1.10.0. If you are UPGRADING you need to find your database key as shown later in these notes.
The DATABASE_KEY is the new TERMIX_DB_ENCRYPTION_KEY in the new docker-compose file below. Note that you are now forced to use port 8080 in v1.10.0. Port 80 no longer works. You also need to change file permissions. Read on for the amended instructions.
Termix is an open source Terminal Access Manager comparable to the popular commercial program Termius. The Termix server is self-hosted in Docker and there are clients for Windows, MacOS, Linux, IoS, Android and it can be accessed from your favorite web browser as well.
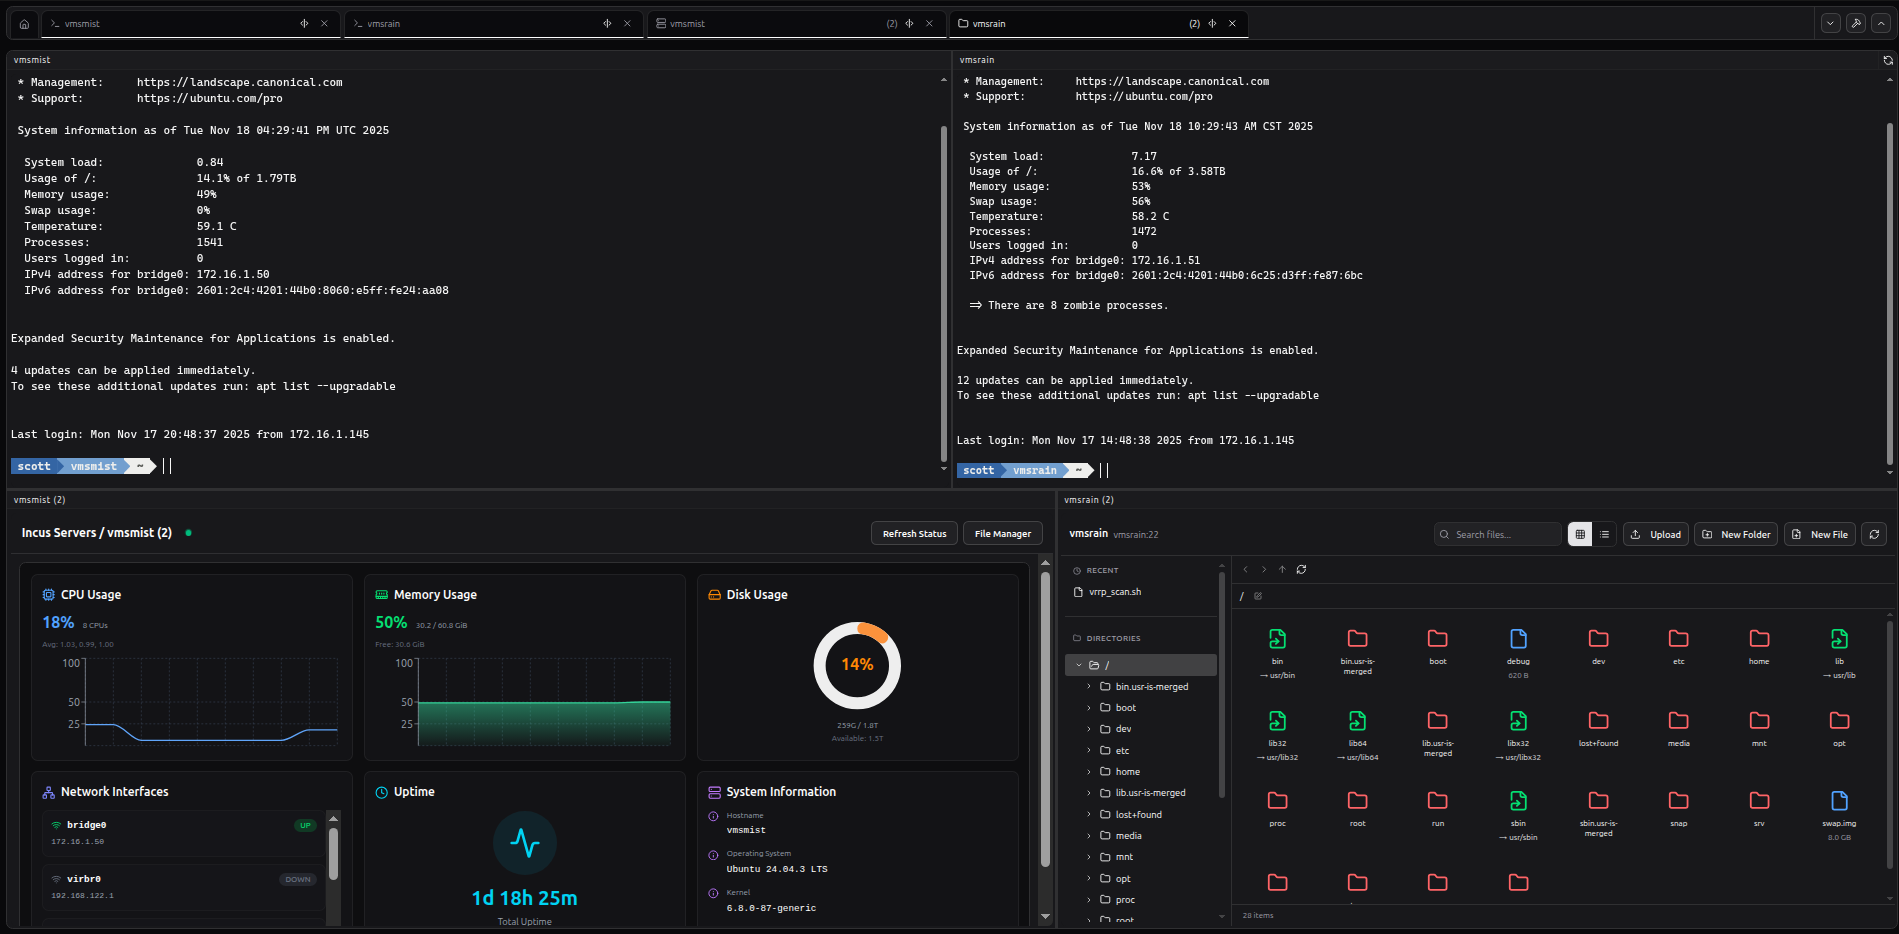
Termix provides ssh terminal access, server stats, and a remote file manager all in an elegant windowed interface facilitating working with multiple systems at once. There is built-in management of ssh keys, multi-factor authentication and ssh tunnels.
In this tutorial, I provide a demonstration of the configuration and use of Termix. I show how to install the Termix server and use both the web interface and the Linux desktop application for Termix.
Termix can be self-hosted. However, I recommend that Termix not be exposed to the public internet despite having enhanced access controls with 2FA. Instead, I use my Termix remotely by VPNing into my network. I use a local dns name to access the application from my browser for covenience.
![]()
If you value ssl encryption, you could serve the application via NginX Proxy Manager, but use access controls to limit it to your local network. Since my main LAN is a trusted network, I am good with the local DNS name access. Credentials are stored in the Termix database on your self-hosted Termix server encrypted.
As of 17 November 2025, Termix released v1.9.0 and one of the big changes is the new drag and drop window manager.
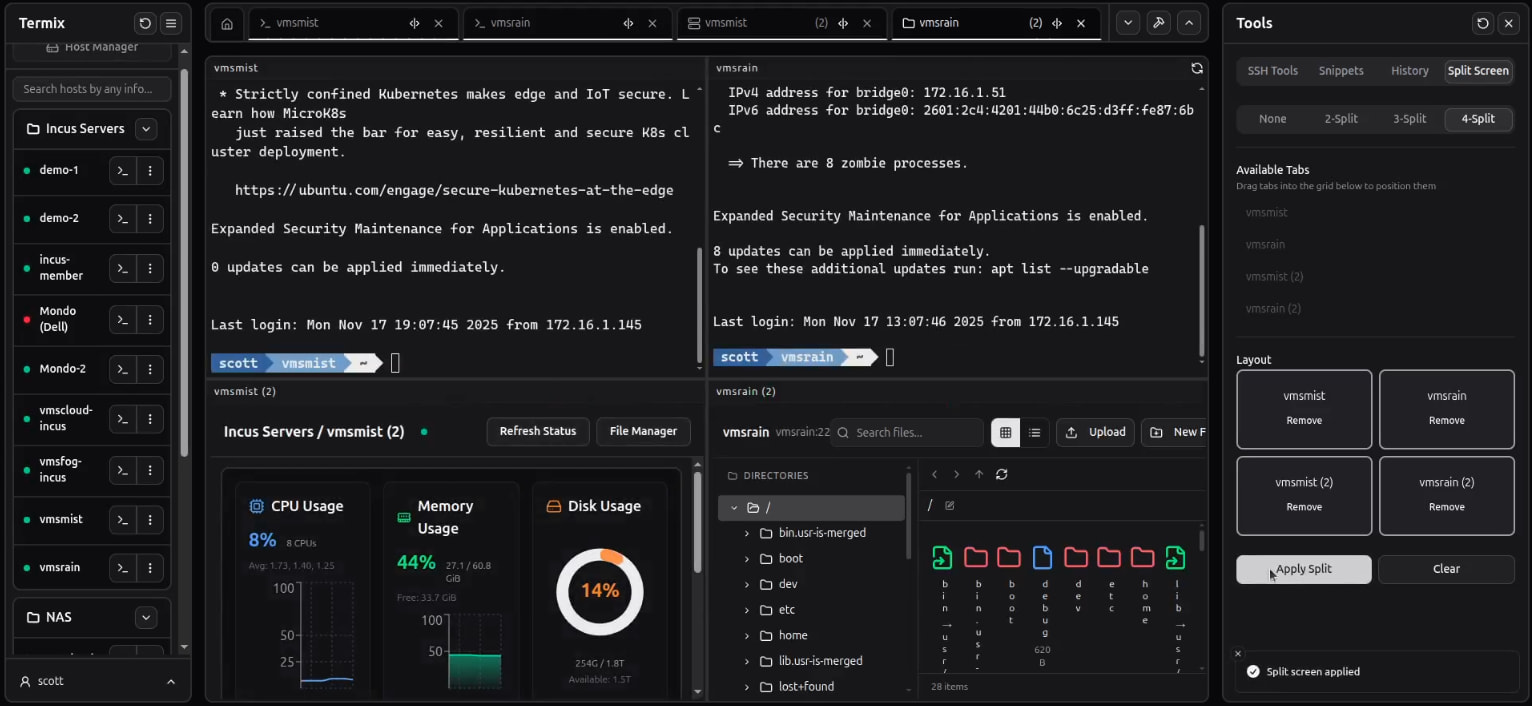
The desktop and the web based interfaces both have the same controls. You can use the standard zoom in CTRL Shift + and zoom out CTRL - to make the fonts and user interface either larger or smaller dependent on how much you want to see on the screen at once or how legible you want to make it.
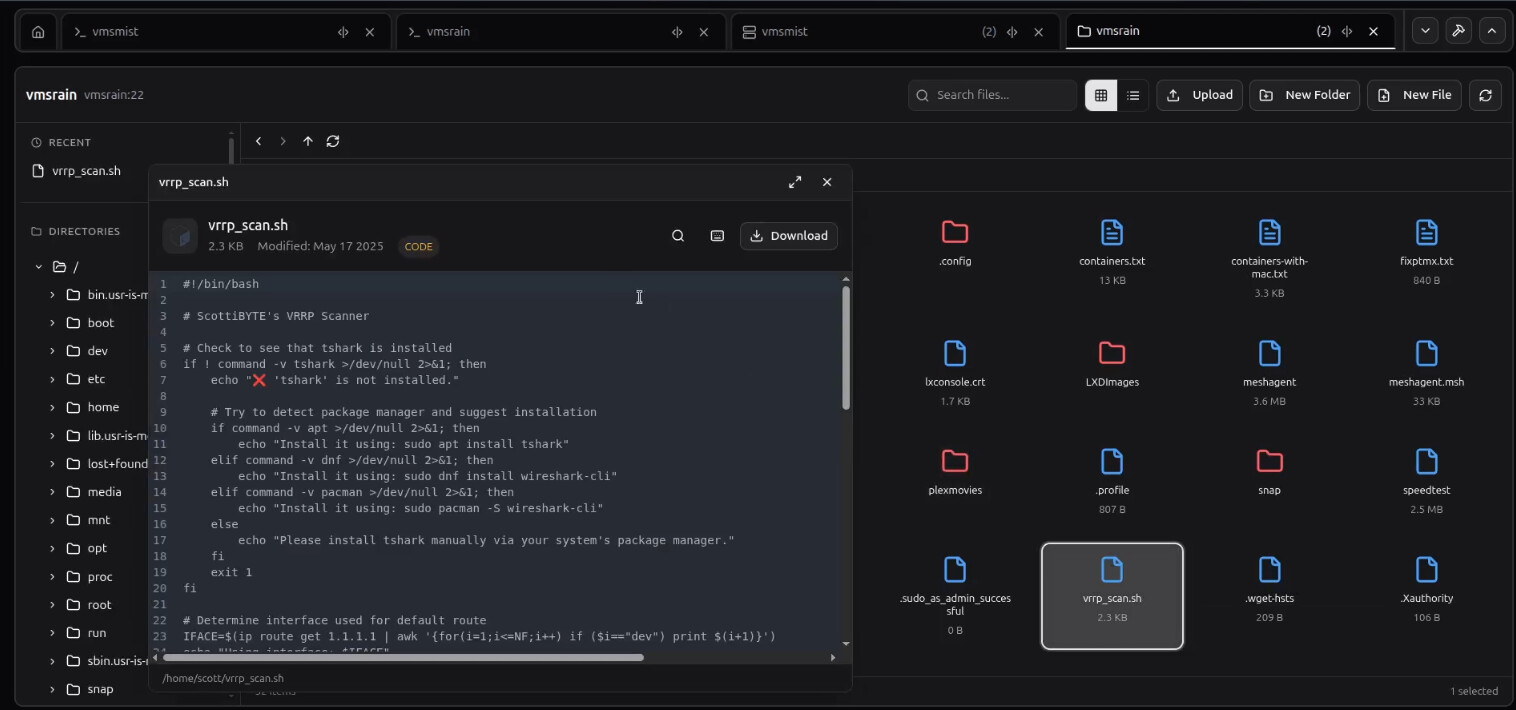
The built in file manager can navigate to any file on your remote systems and even allow you to display them.
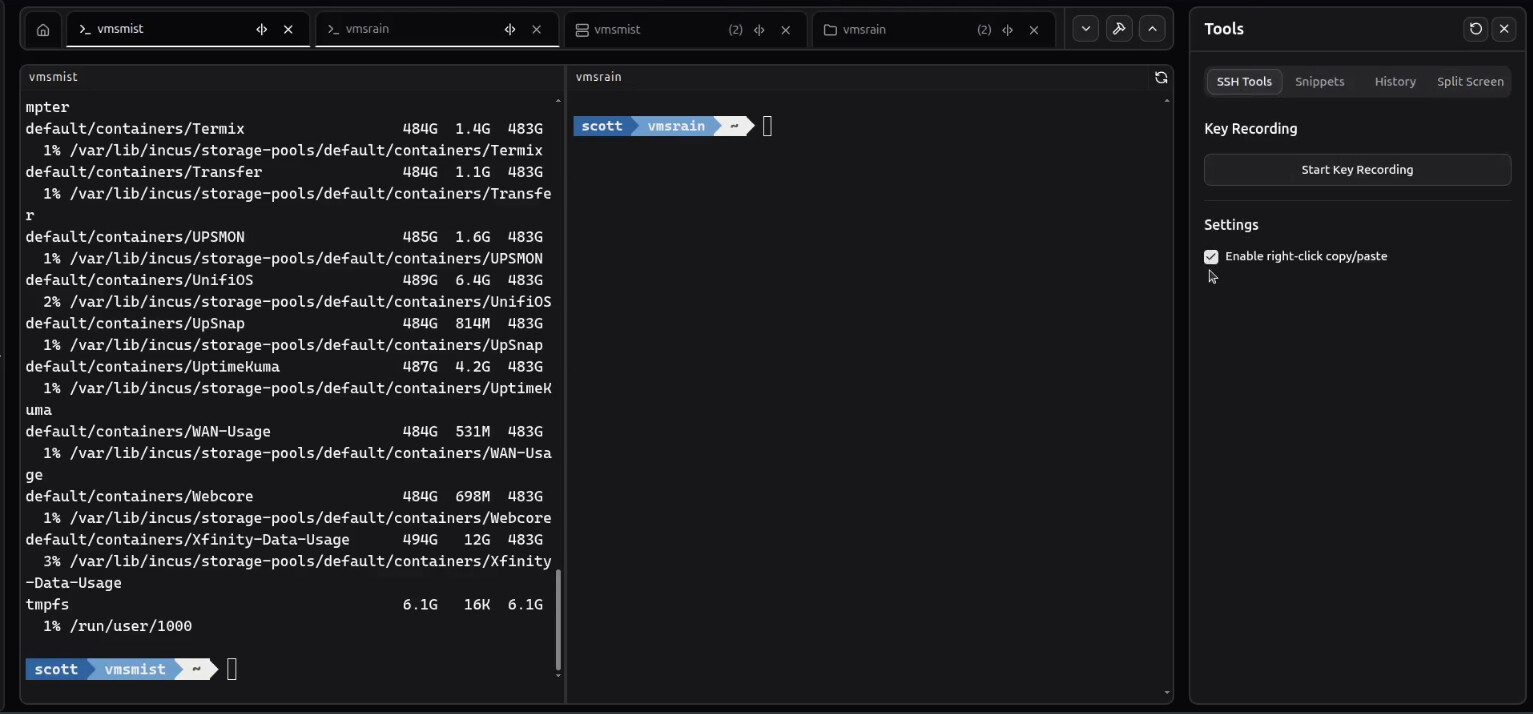
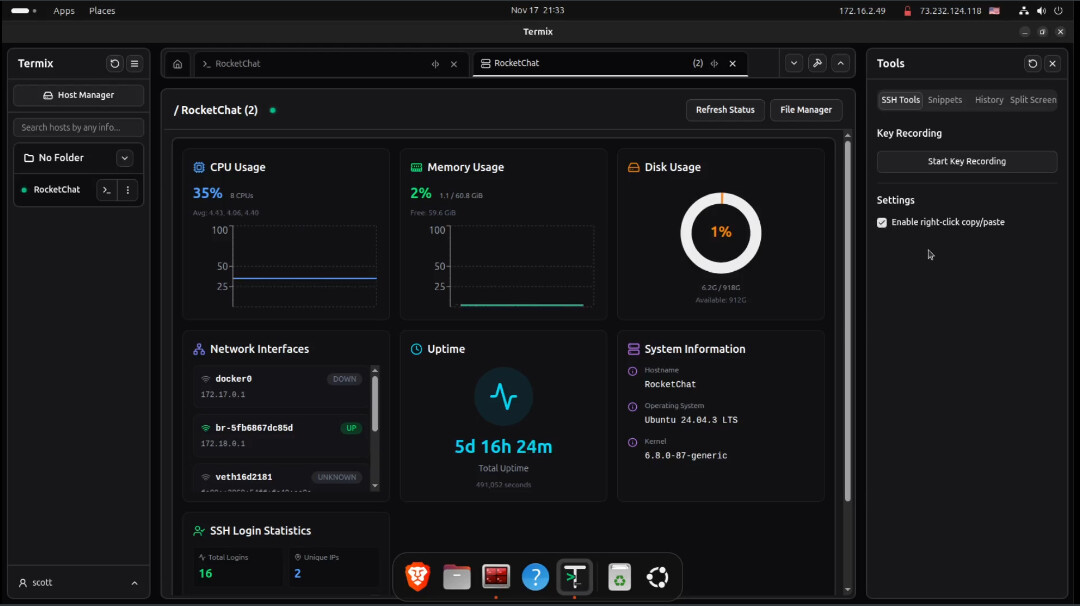
A key usage note for Termix is to head over to the Tools menu and into the “SSH Tools” tab. There you will want to put a check mark in the “Enable right-click copy/paste” setting. This allows you to copy selected text into your cut buffer by pressing your right mouse button. The paste operation is the standard Shift CTRL V. The reason for this accommodation is because the standard Shift CTRL C command normally opens the web browser development console and cannot be easily remapped.
I am going to install Termix inside of an incus container. You can install it on any docker host.
Let’s start by creating a container with an address on your main LAN using the bridgeprofile presented in all of my tutorials.
incus launch images:ubuntu/24.04 Termix -p default -p bridgeprofile -c boot.autostart=true -c security.nesting=true
Enter the shell of the new container.
incus shell Termix
Accept all the updates.
apt update && apt upgrade -y
Install some dependencies.
apt install curl nano net-tools openssh-server dnsutils -y
Install docker from the script on the docker website.
curl https://get.docker.com | sh
Add a user account and then add it to the sudo and docker groups.
adduser scott
usermod -aG sudo scott
usermod -aG docker scott
Move over to the user account.
su - scott
Make a folder for the application and move into it.
mkdir termix
cd termix
Edit a docker compose file.
nano compose.yml
Insert the following.
services:
  termix:
    image: ghcr.io/lukegus/termix:latest
    container_name: termix
    restart: unless-stopped
    ports:
      - "8080:8080"
    volumes:
      - ./data:/app/data
    depends_on:
      - guacd
    environment:
      TERMIX_WEB_PORT: "8080"
      TERMIX_SERVER_URL: "http://n.n.n.n:8080"
      TERMIX_DB_ENCRYPTION_KEY: "****"
      GUACD_HOST: "guacd"
      GUACD_PORT: "4822"
    dns:
      - 172.16.0.10
      - 1.1.1.1

  guacd:
    image: guacamole/guacd:latest
    container_name: guacd
    restart: unless-stopped
    ports:
      - "4822:4822"
In the code above, we have to use port 8080 because of recent changes to the program. I tried port 80 as in the video, but that’s not working anymore. Also the code above adds a Guacamole container as of Termix 2.0 which adds telnet, RDP and VNC capabilities in addition to ssh.
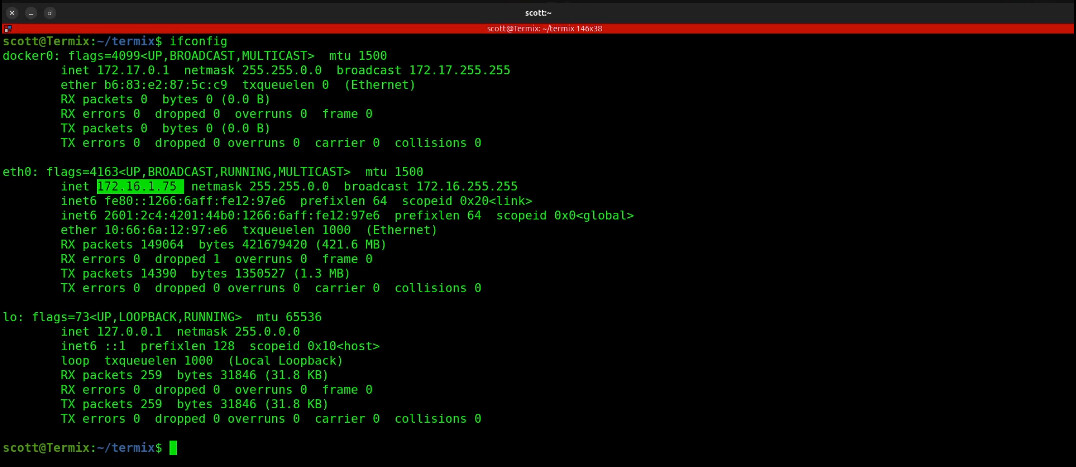
Change the n.n.n.n above to be the address of your Termix container. Look for that address with :
ifconfig
and use the address for eth0.
Change the x.x.x.x address above to be the address of your local DNS server. This might be your Pi-hole or a local DNS you maintain on your network elsewhere. If in doubt, make this the address of your default gateway. That’s the address you use to manage your router.
With this configured, this is how I was able to enter dns names rather than IP addresses into Termix profiles.
Save the file with CTRL O and enter and then CTRL X to exit the nano editor.
Download the container overlays to build and start the application.
docker compose up -d
Next we need to change the data folder ownership and permissions properly. The containerized application expects 1000:1000 exactly!
sudo chown -R 1000:1000 ./data
sudo chmod -R u+rw ./data
Stop the application.
docker compose down
Start the application again now that the permissions are correct.
docker compose up -d
Type out the .env file and look for the DATABASE_KEY:
cat ./data/.env
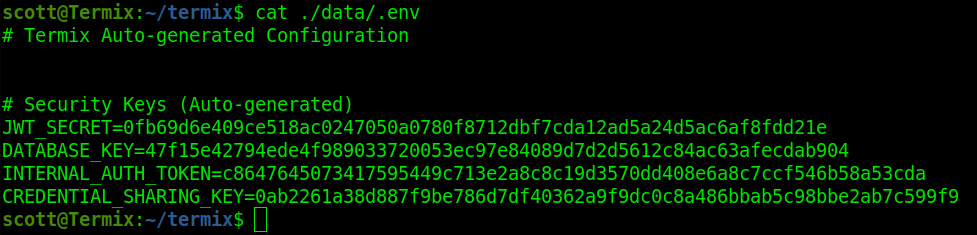
Copy your value of the DATABASE_KEY (not mine above) and go back and edit your compose file:
nano compose.yml
Change the TERMIX_DB_ENCRYPTION_KEY: “****” so that the DATABASE_KEY you just found is between the quotes and replaces the **** Save the file with a CTRL O and enter and CTRL X to exit the nano editor.
Finally, restart the application.
docker compose restart
Do an ifconfig to find out the address of your running container which will be different from mine.
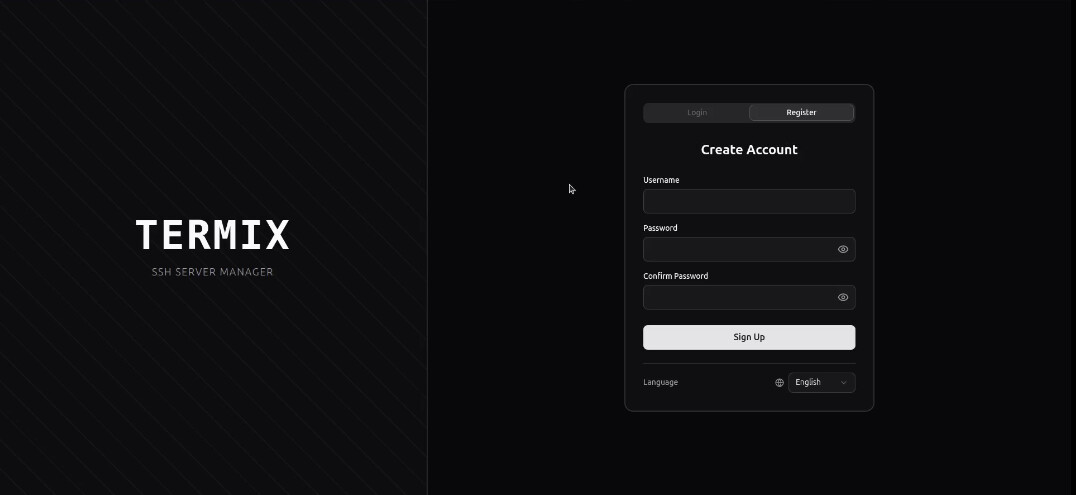
When you visit that address, you will see the Termix registration screen and the first account that you create will be the admin account.
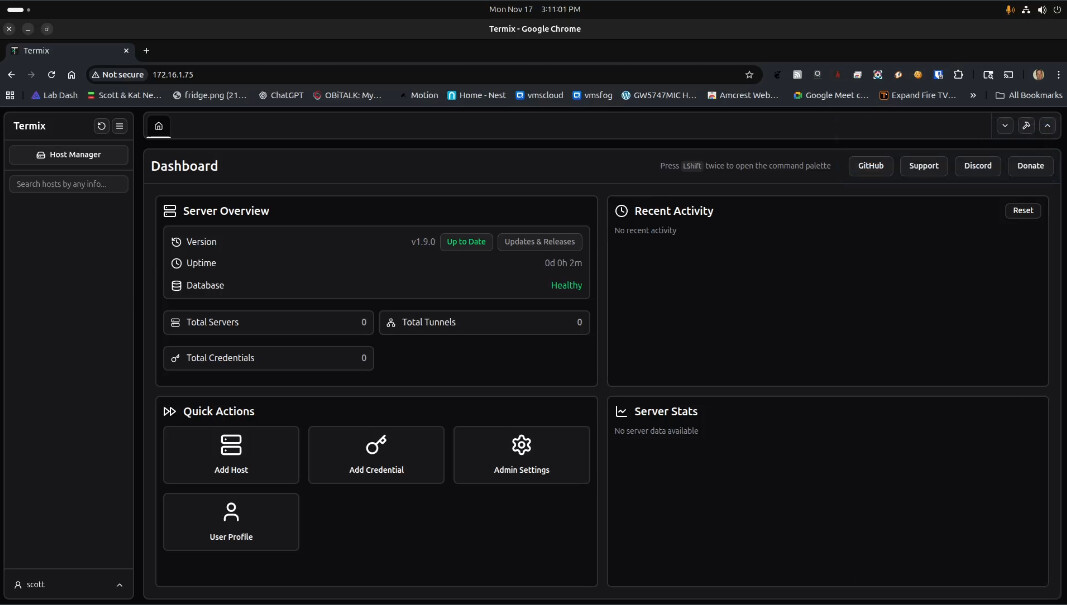
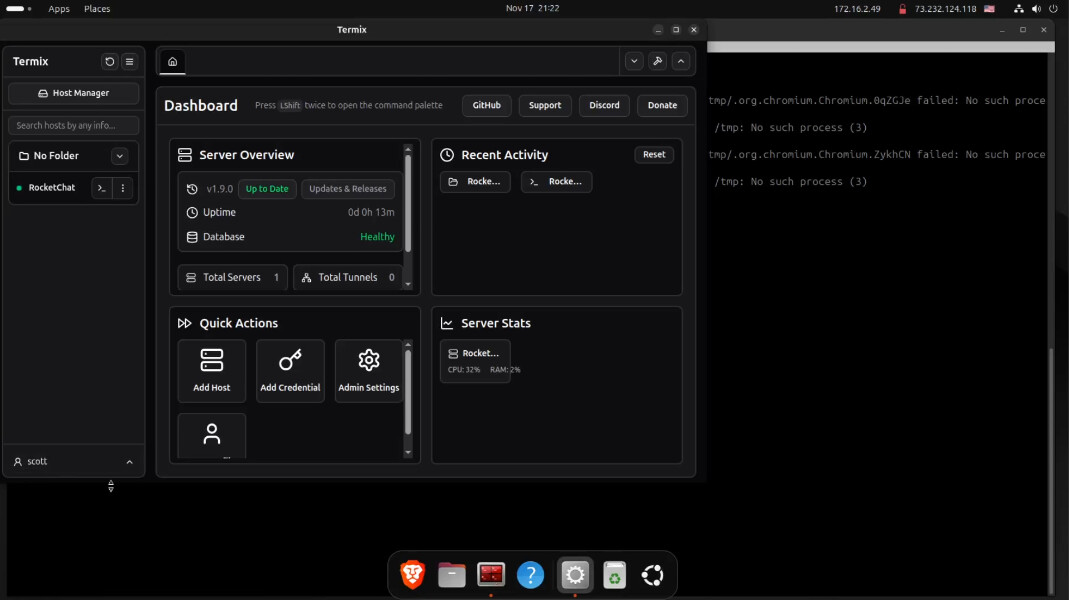
When you login, you will be taken to the initial dashboard.
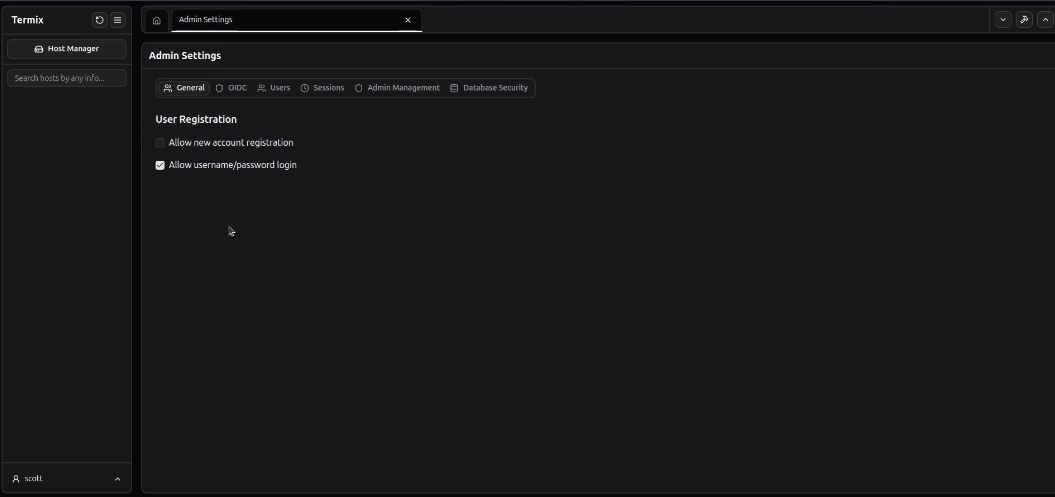
For additional security in my homelab, I decided to turn off the ability for allowing users to register new Termix accounts in the admin settings.
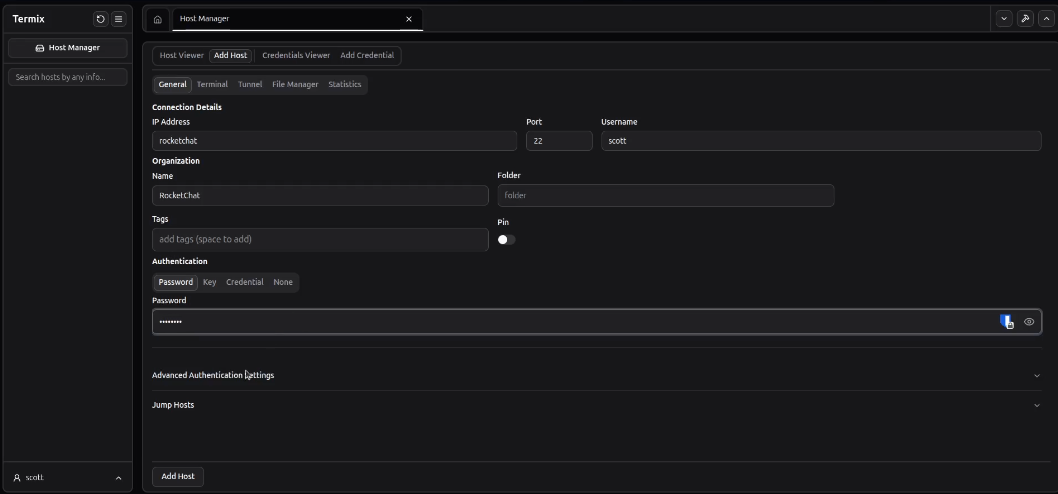
In the tutorial, I added my first system as my rocketchat server. I was able to use the dns name because it is defined on my local DNS server and we configured Termix to use local dns.
A great place to ask questions or to just tag up with me is my RocketChat server at https://chat.scottibyte.com.
To install the desktop client for Linux (there are Windows & MacOS clients too as well as Android & IoS clients) you will want to log into your Linux desktop machine.
Move over to your Linux desktop and start by downloading the Termix desktop for Linux.
wget -O termix.deb https://github.com/Termix-SSH/Termix/releases/latest/download/termix_linux_x64_deb.deb
Change the permissions on the temporary folder for access by the desktop application later.
sudo chmod 1777 /tmp
Install the application.
sudo dpkg -i termix.deb
You can run the application with the following command. The “no-sandbox” option is needed because Termix is an Electron app and Ubuntu sandboxes it by default for security, but that prevents it from running properly.
termix --no-sandbox
You can add an alias to your .bashrc file so that you can simply type termix from the command line.
echo "alias termix='termix --no-sandbox'" >> ~/.bashrc
source ~/.bashrc
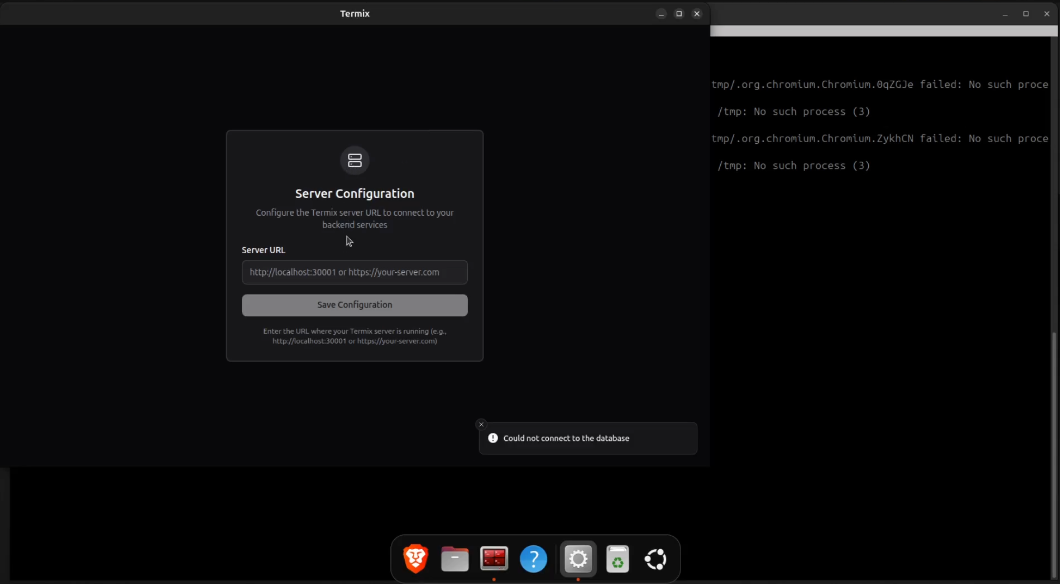
When you start the desktop application, you will need to provide the URL address of your Termix server.
Once logged into the Termix Desktop application, the interface is the same as the web interface.
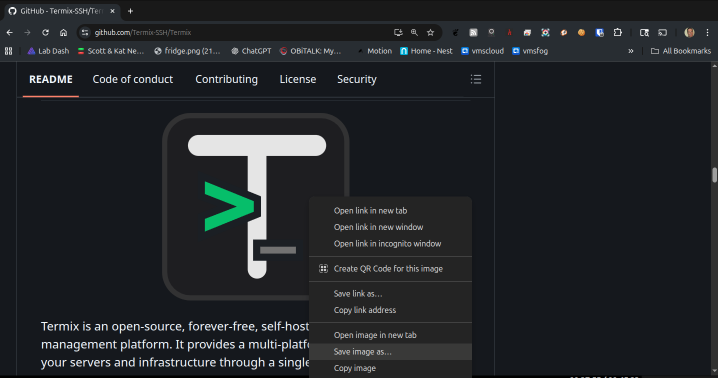
Let’s go get an image of the Termix application icon by visiting:
https://github.com/Termix-SSH/Termix
Save a copy of the icon to a file on your system found down the page. Save the image of the icon to your pictures folder.
Create a desktop file.
nano ~/.local/share/applications/termix.desktop
Insert the following.
[Desktop Entry]
Name=Termix
Comment=Terminal and SSH Web Client
Exec=/opt/Termix/termix --no-sandbox
Icon=/home/scott/Pictures/termix.png
Terminal=false
Type=Application
Categories=Utility;Network;Terminal;
Adjust the path to the icon file accordingly and then save the file with CTRL O and enter and CTRL X to exit the nano editor.
Provide execute privilege to the new file.
chmod +x ~/.local/share/applications/termix.desktop
Update the gnome desktop applications database.
update-desktop-database ~/.local/share/applications
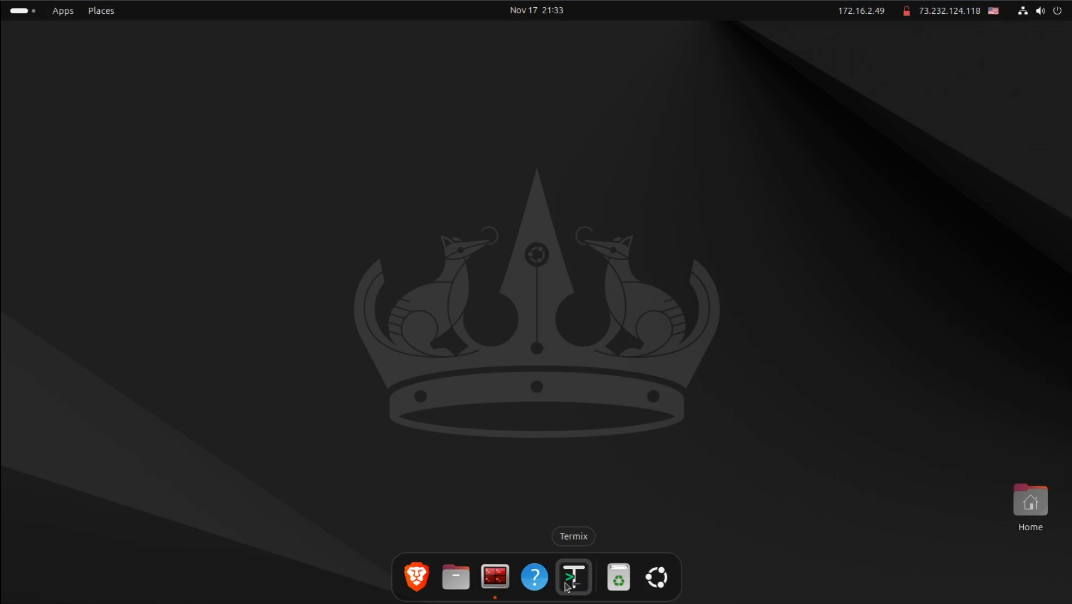
At this point, launch Termix from your terminal.
termix
Right click the icon on your menu bar and pin it. In virtue of the desktop file, the icon is now correct.
Don’t forget to enable the right click copy setting on your desktop Termix as well.
Termix is being actively developed and the author is adding new features all the time. I hope you enjoy this app as much as i do.