This is a step by step tutorial on how to replace a smaller drive with a larger drive on an Ubuntu server. I also include the steps to enlarging an Incus Virtual Storage pool since I cover Incus so often.
To begin with, go out to https://rescuezilla.com/ and download a copy of Rescuezilla which we will use to clone your disk. There are great instructions there on how to create a bootable USB device for Rescuezilla.
In the video I used this USB NVMe Drive Enclosure to place my new larger 4TB NVMe drive for the cloning operation.
You will want to connect your new larger disk drive to an external enclosure and plug it into your computer before proceeding.
I started by booting my Rescuezilla from the startup boot menu of my Minisforum computer which I accessed with the F7 function once I saw the Minisforum splash screen. Different vendors have different ways of accessing the boot menu.
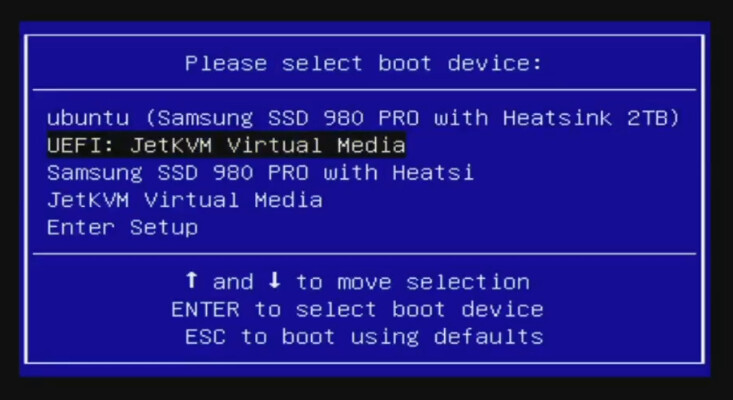
My Rescuezilla ISO was stored on my JetKVM virtual media storage and so that is what I used.
Once Rescuezilla is started, you will see the application screen.
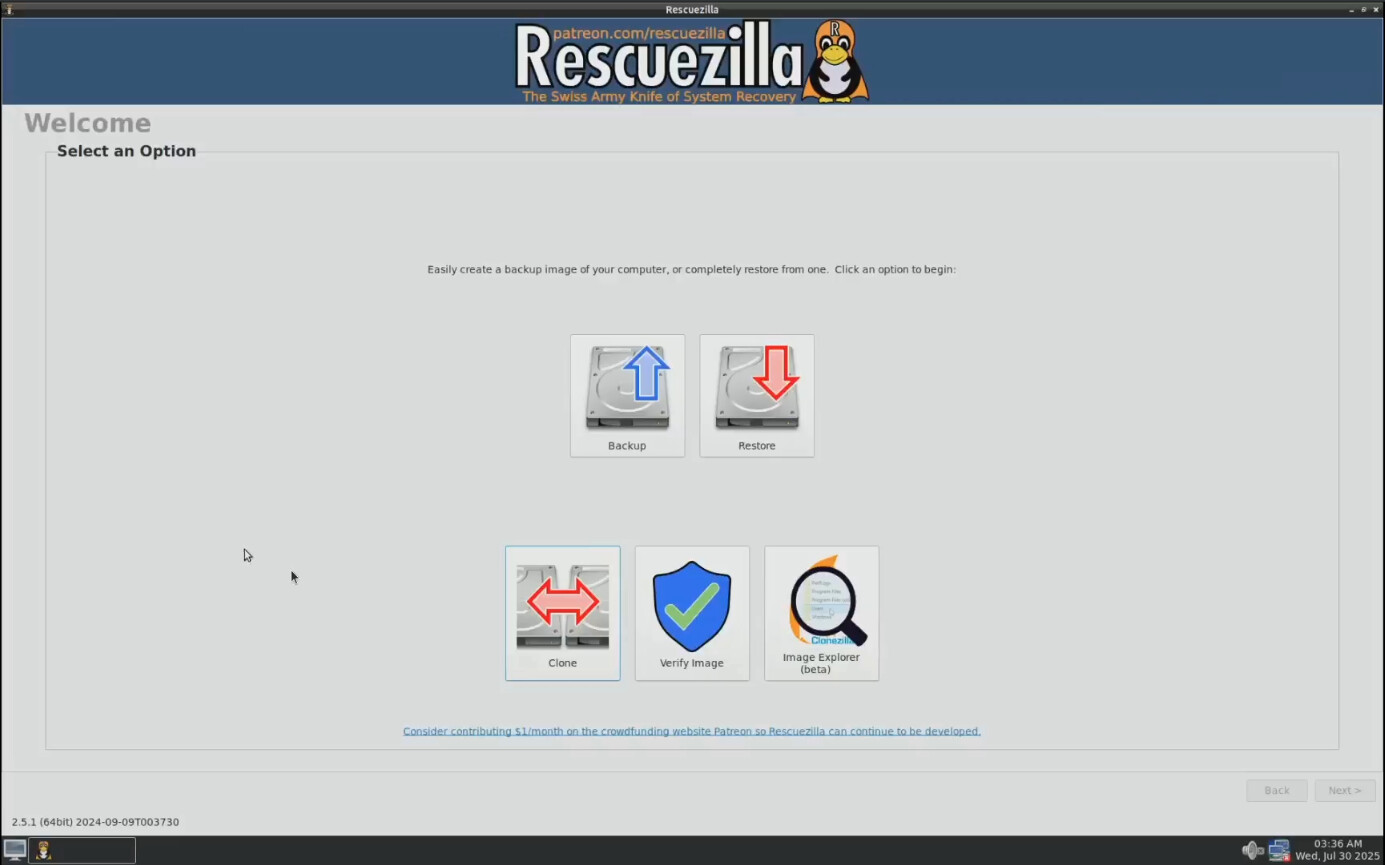
You will want to choose the “Clone” option from the menu which makes a copy of a disk from one drive to another.
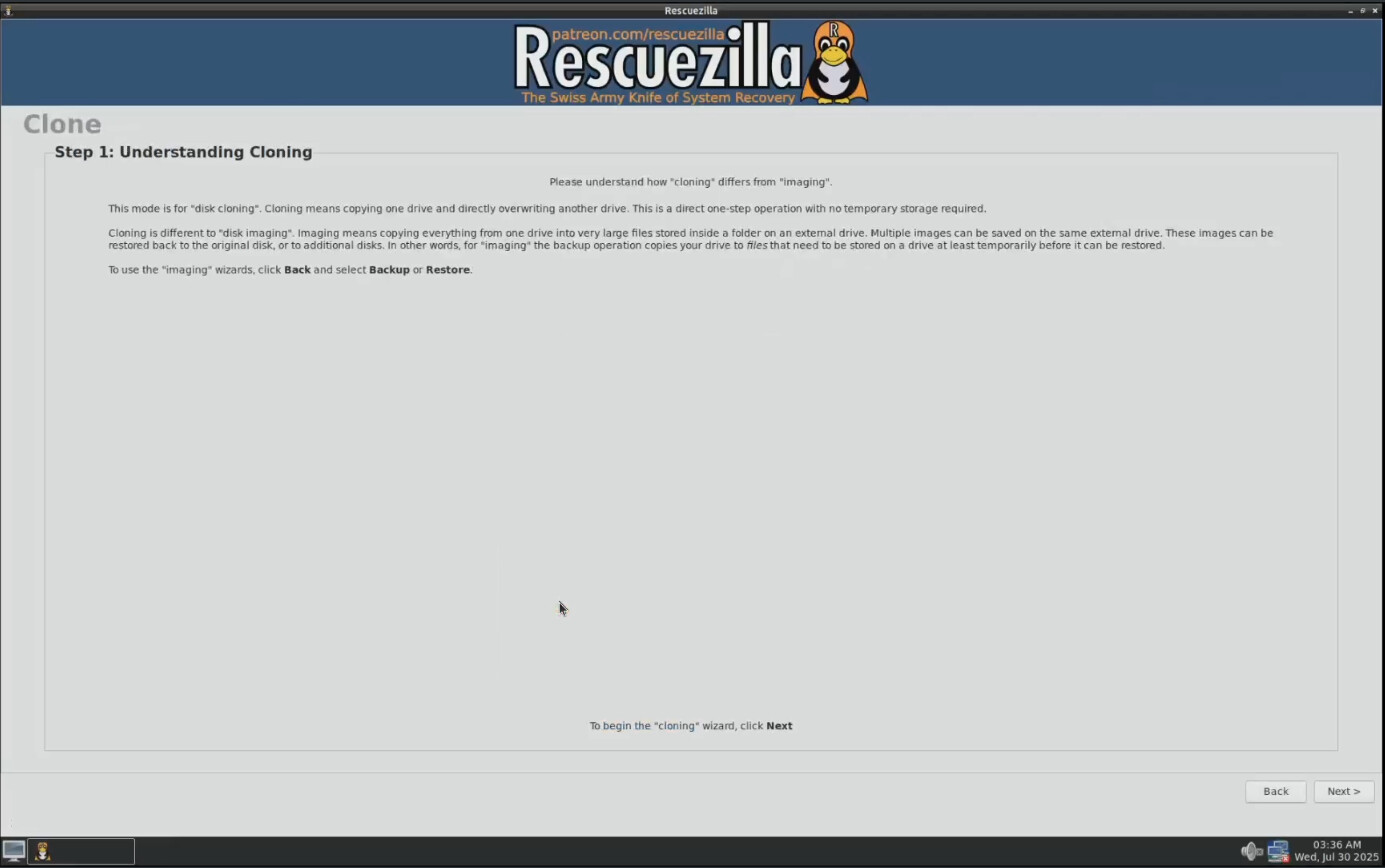
The advantage of this is that you will get an exact copy of the original drive on the new drive. As we learn later, the disadvantage of this is that we get an exact copy of the original drive to the new drive.
A clone operation requires that the drive you are copying is either smaller than or exactly the size of the new drive that you are cloning to. The point of this tutorial is to move to a larger drive and so we will assume that the new drive you placed in the external enclosure is larger than the drive in the system that you have been using.
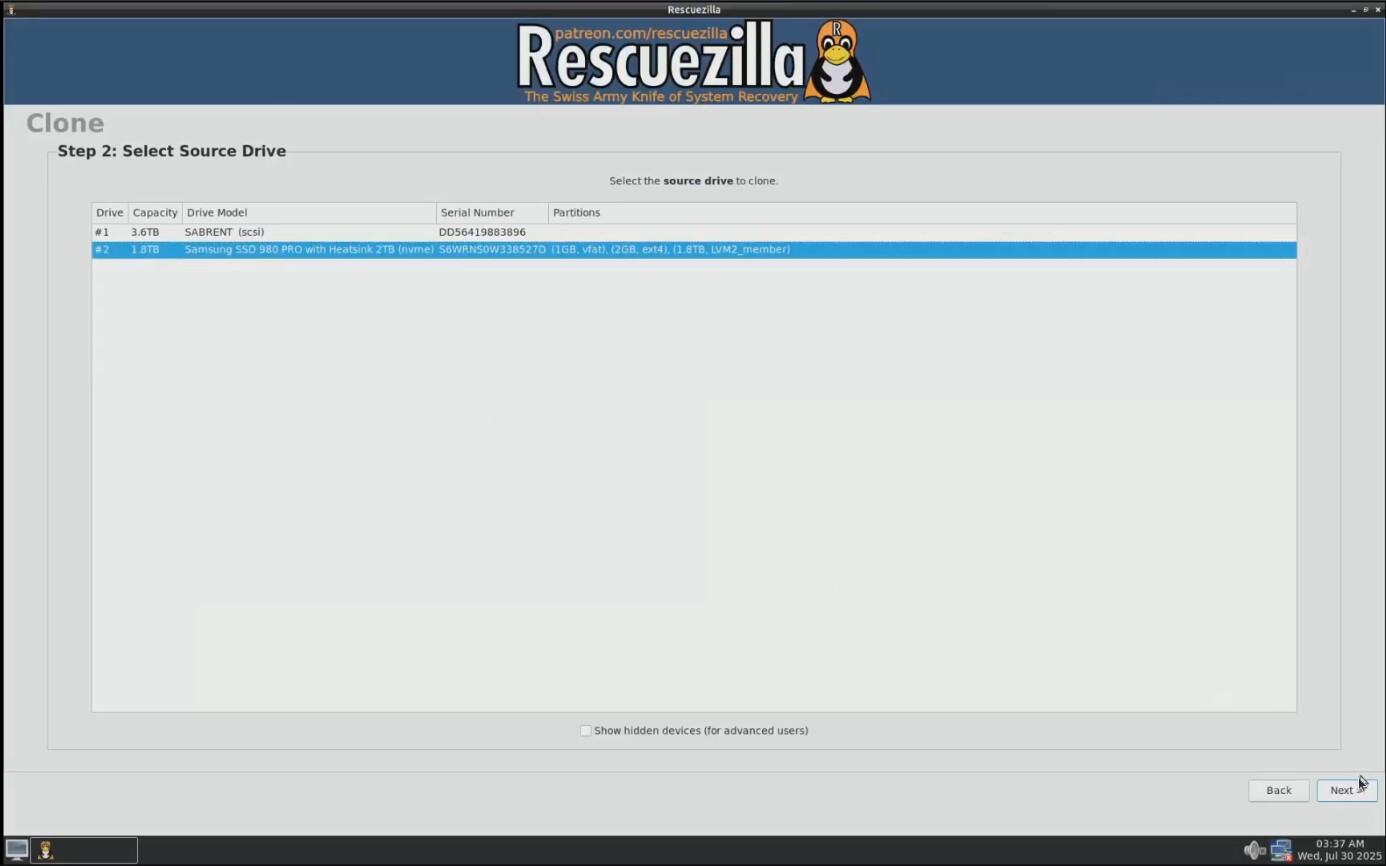
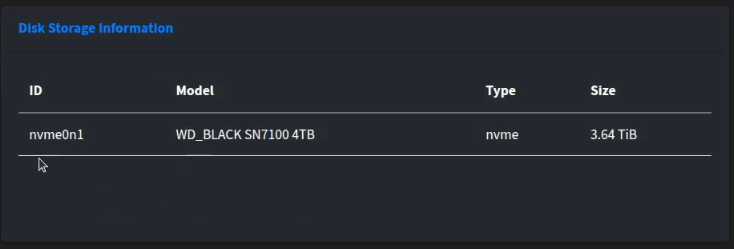
When I hit “Next” on the clone operation, Rescuezilla scans my drives. The existing drive that I want to clone is a 2TB Samsung 980 Pro and the new drive is a 4TB WD Black SN7100. The new drive shows up as a “SABRENT” only because that is the vendor of the USB enclosure I am using.

I select my smaller Samsung drive as the source drive to clone and I hit “Next”.
The destination drive is the “SABRENT” and I hit “Next” after selecting it.

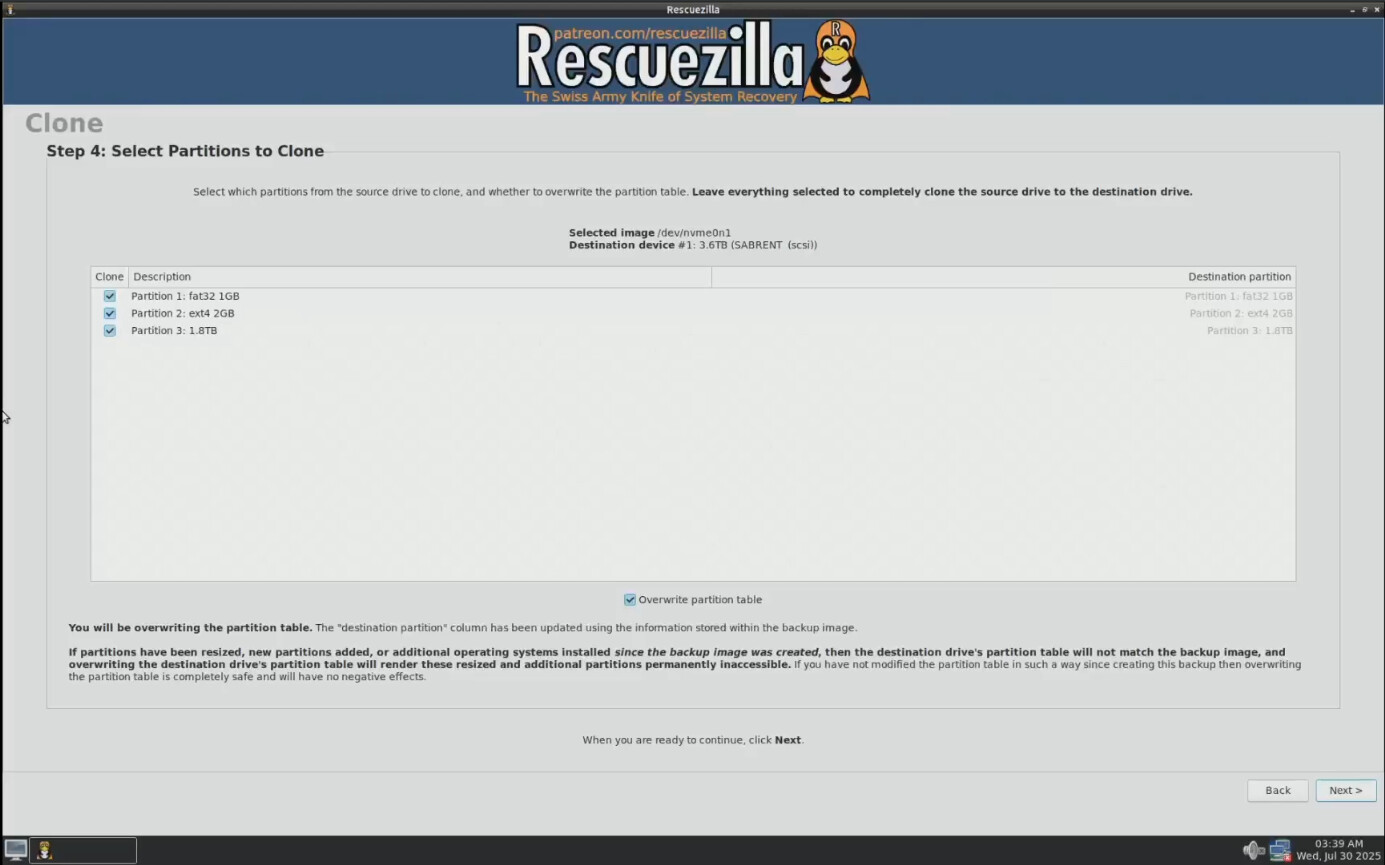
This next screen shows the partitions on the drive to be copied and you can click “Next” without making any changes.
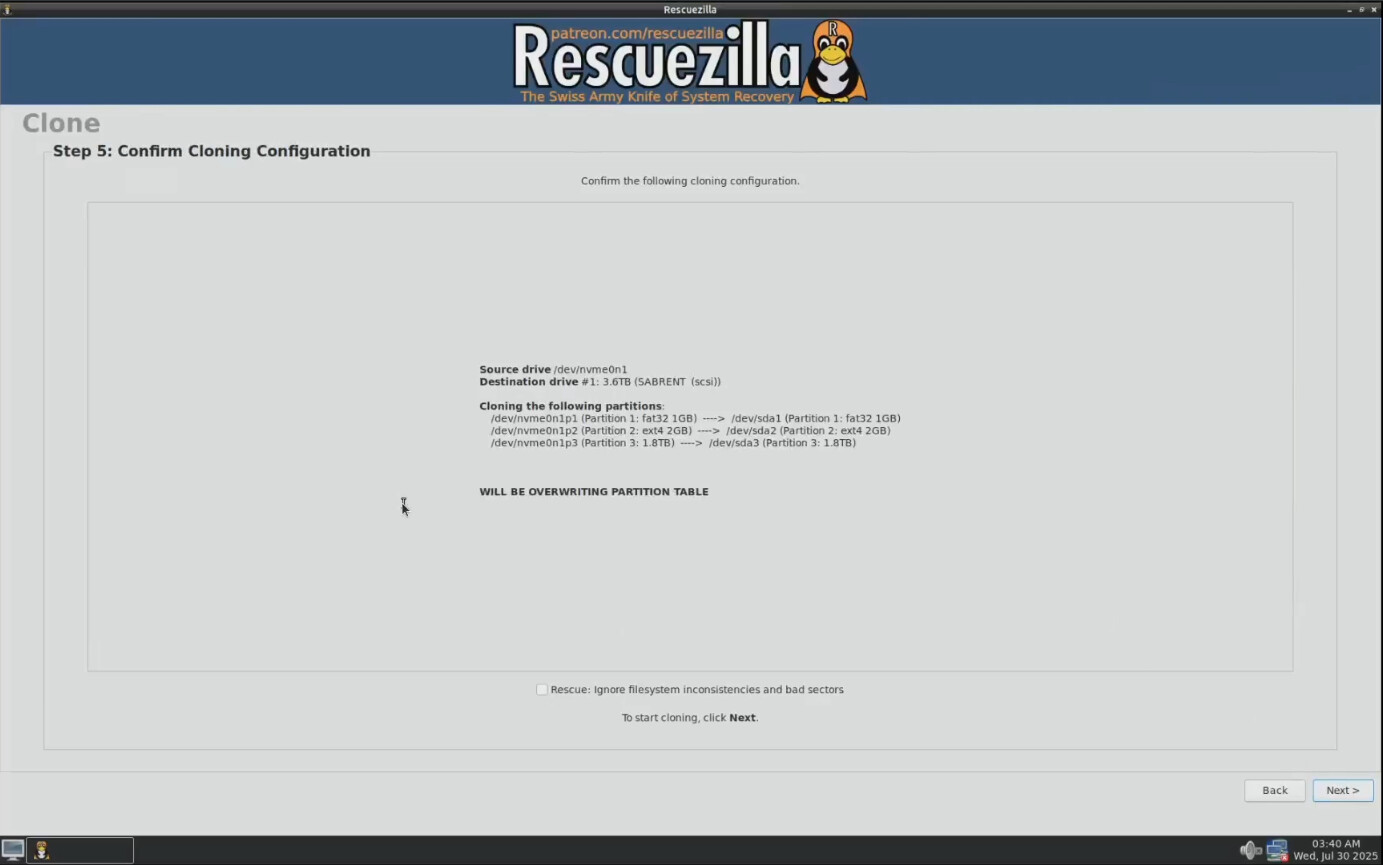
We have a confirmation/summary screen showing what will be cloned.
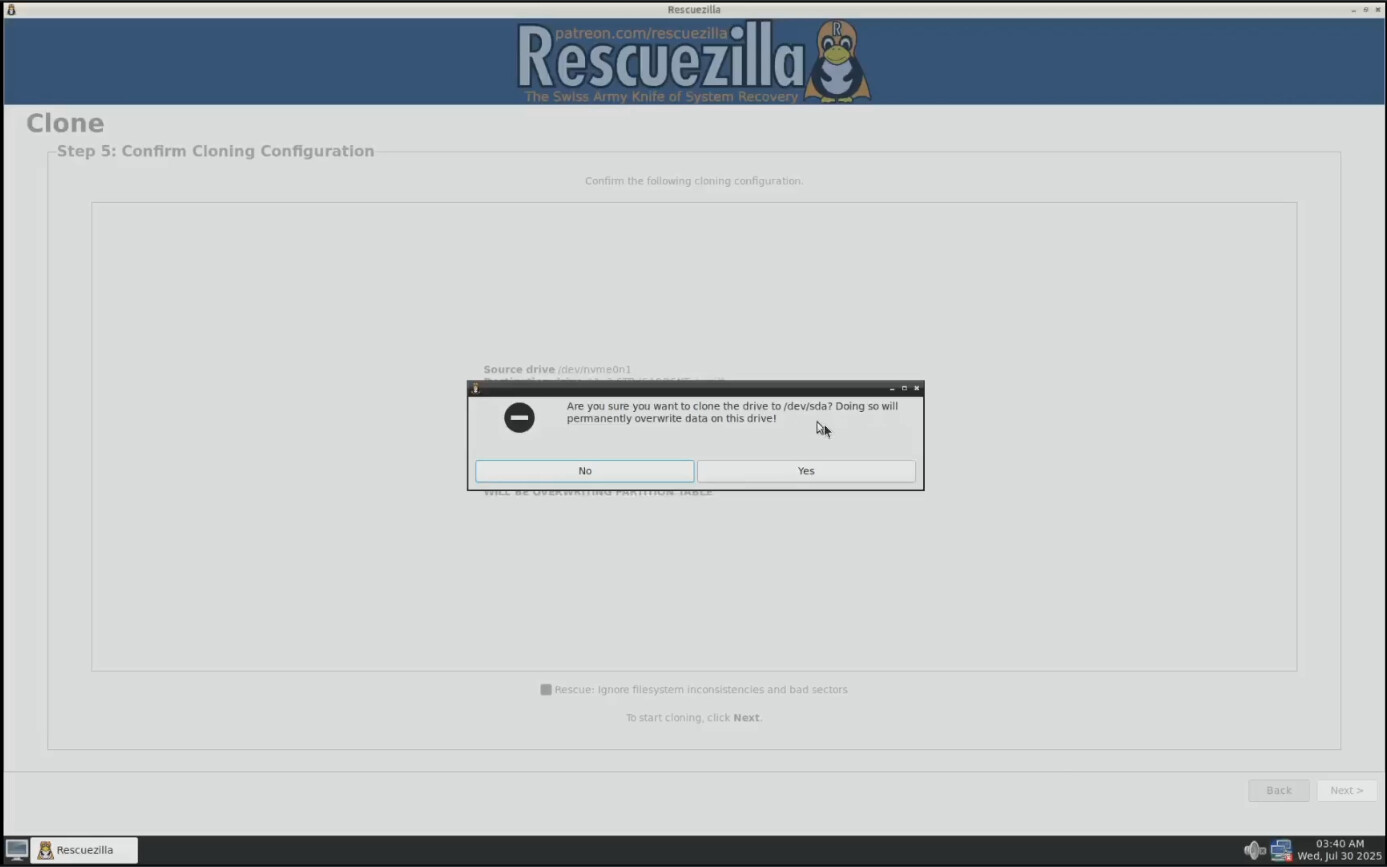
You get one final warning before you proceed, so make sure you selected the right drives.
After the cloning operation is complete, you will most likely get an error message related to the logical volume manager partition on an Ubuntu server disk.

The error above is expected and will will fix that. After you dismiss the error message you will see a clone summary.
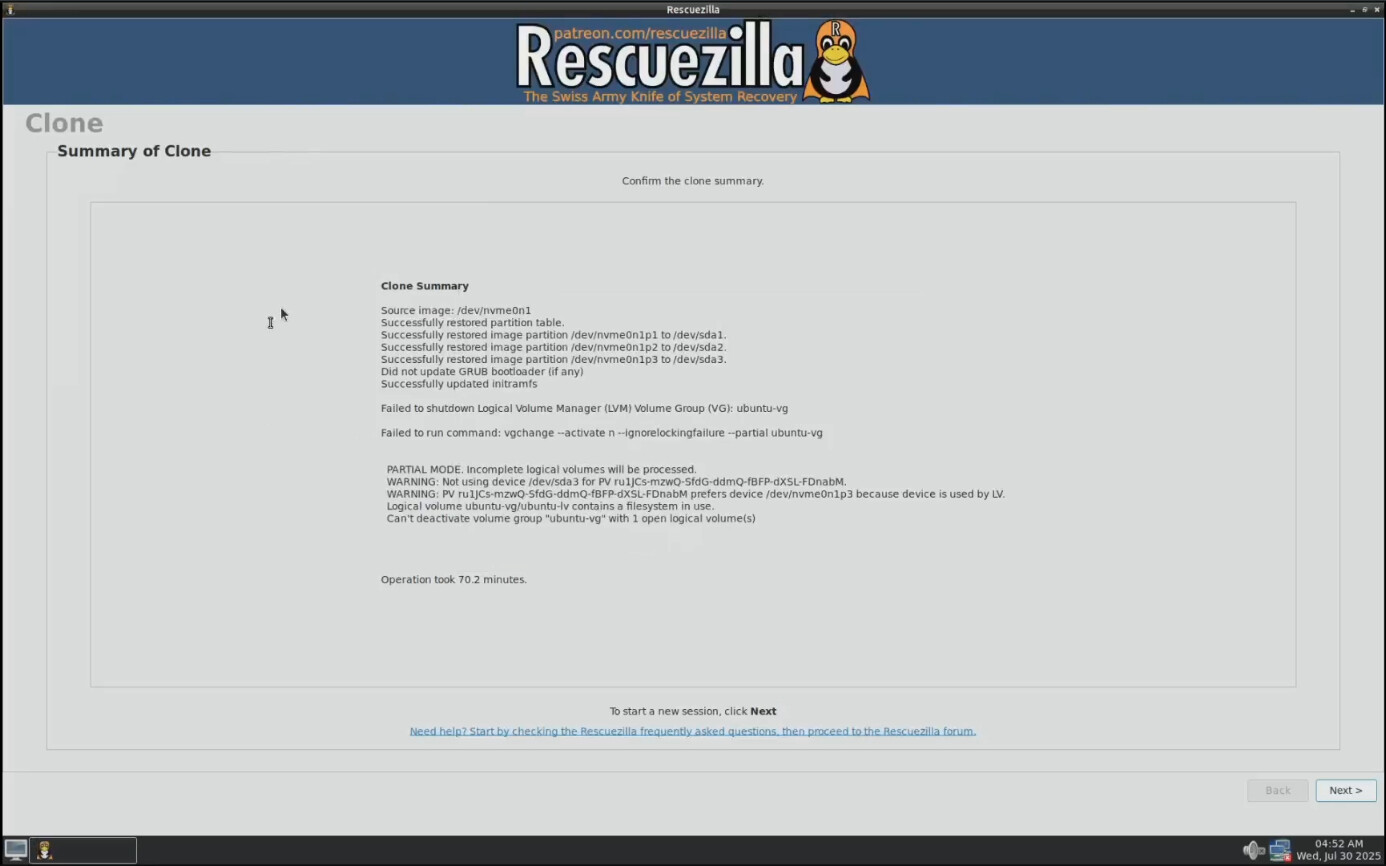
The important part above is that all three partitions were copied.
Now click “Next” to go back to the initial Rescuezilla menu and hit the “X” in the upper right of the window to exit the application, but stay in the booted Rescuezilla OS which is Ubuntu.
The important part is that we are not booted from the new drive. Launch GParted from the Rescuezilla Desktop. When GParted starts, select your new drive from the menu as shown in the video.
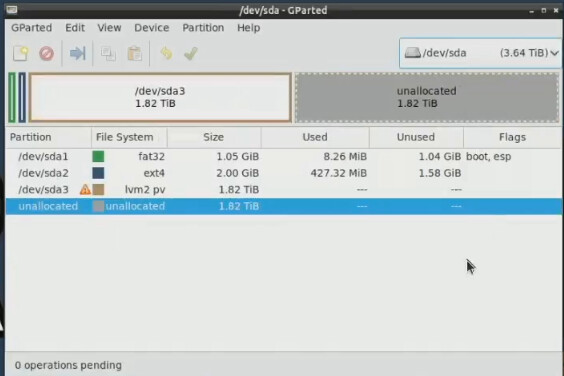
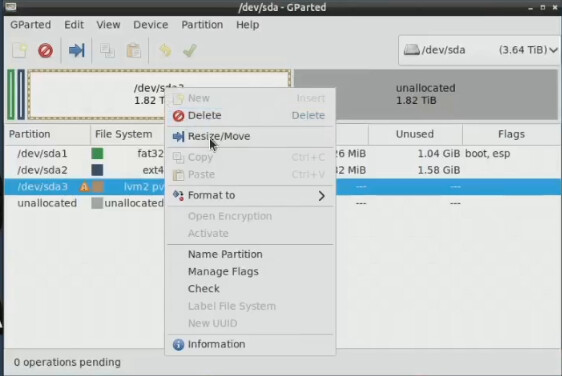
Notice that the root partition shown above is only taking up a small part of the available space. Right click that partition and choose the Resize/Move option.
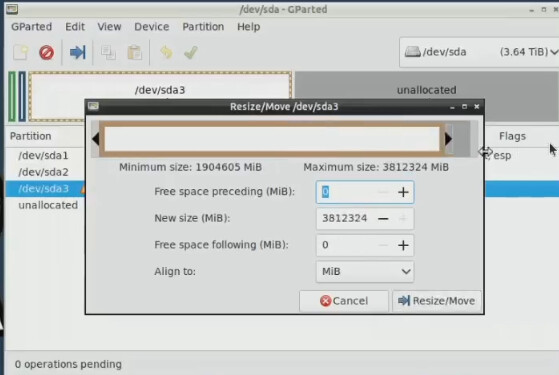
Drag the size of the partition all the way to the right and click the Resize/Move button.
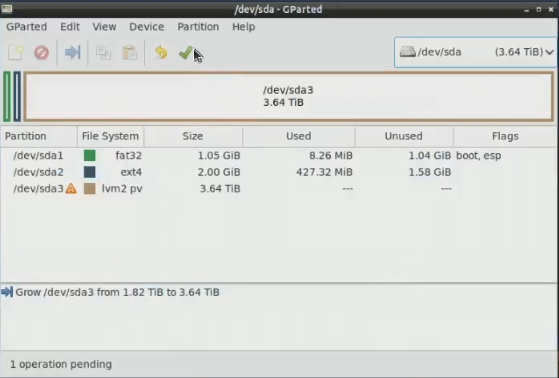
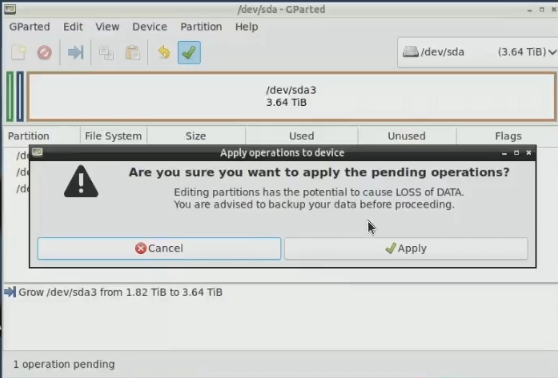
To make this take effect, click the Green Check Mark.
Accept the prompt with the “Apply” option.
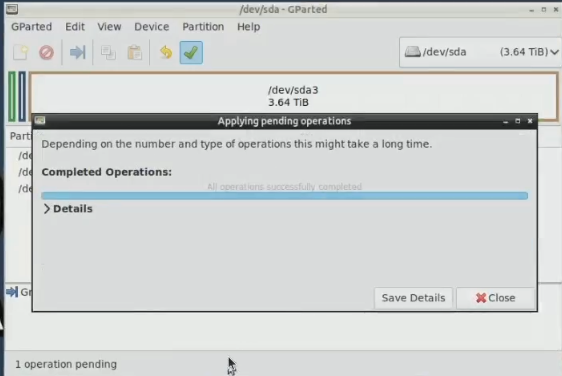
The operation will complete quickly and you can then click “Close”.
When this completes, you have a screen like the following.
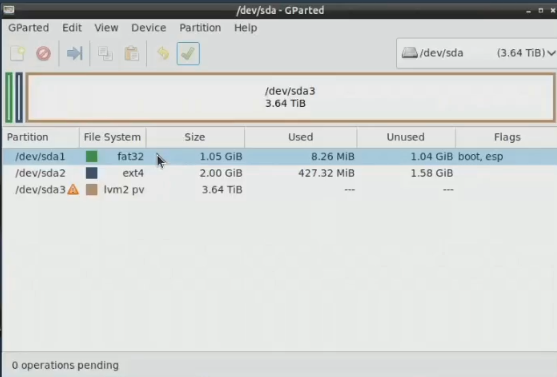
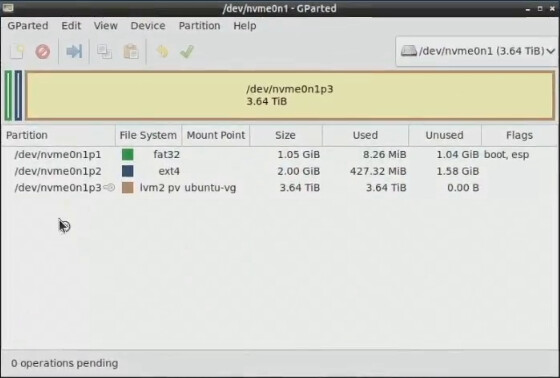
Notice the yellow triangle on the /dev/sda3 partition above and that’s because there are issues with the root partition we copied.
At this point, shutdown the computer and remove the old drive and replace it with the new drive. You will want to boot Rescuezilla once more for the remaining steps.
When Rescuezilla boots after swapping your drives, exit the Rescuezilla program and start a terminal from the shortcut on the desktop.
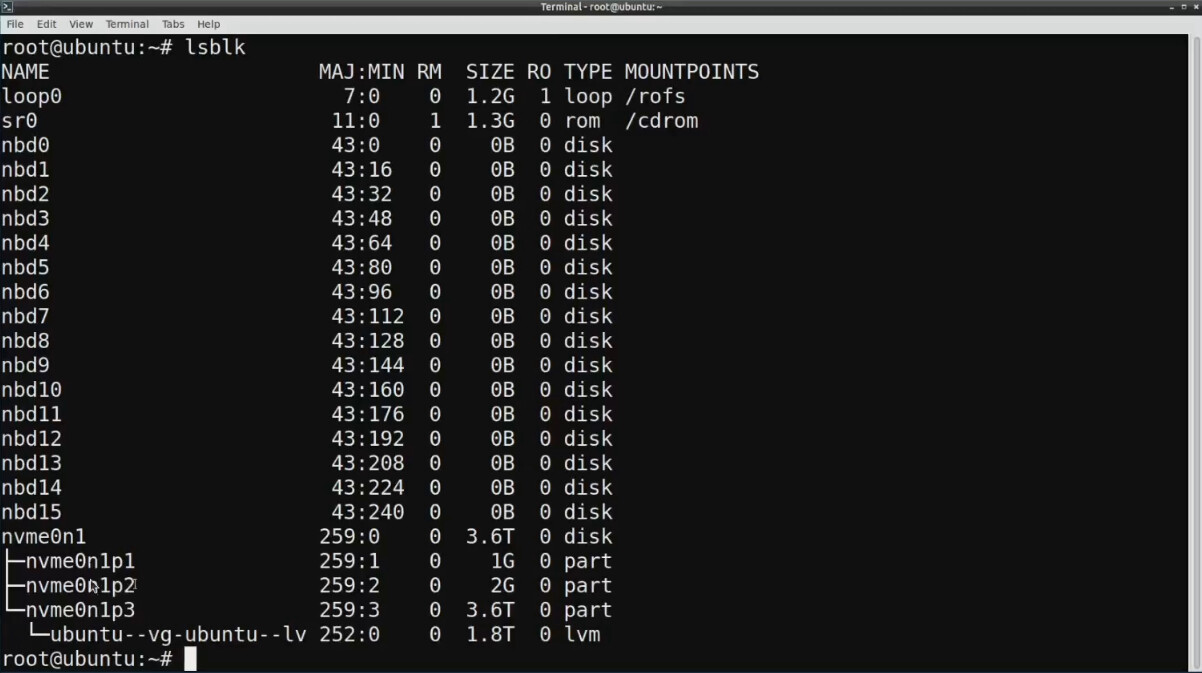
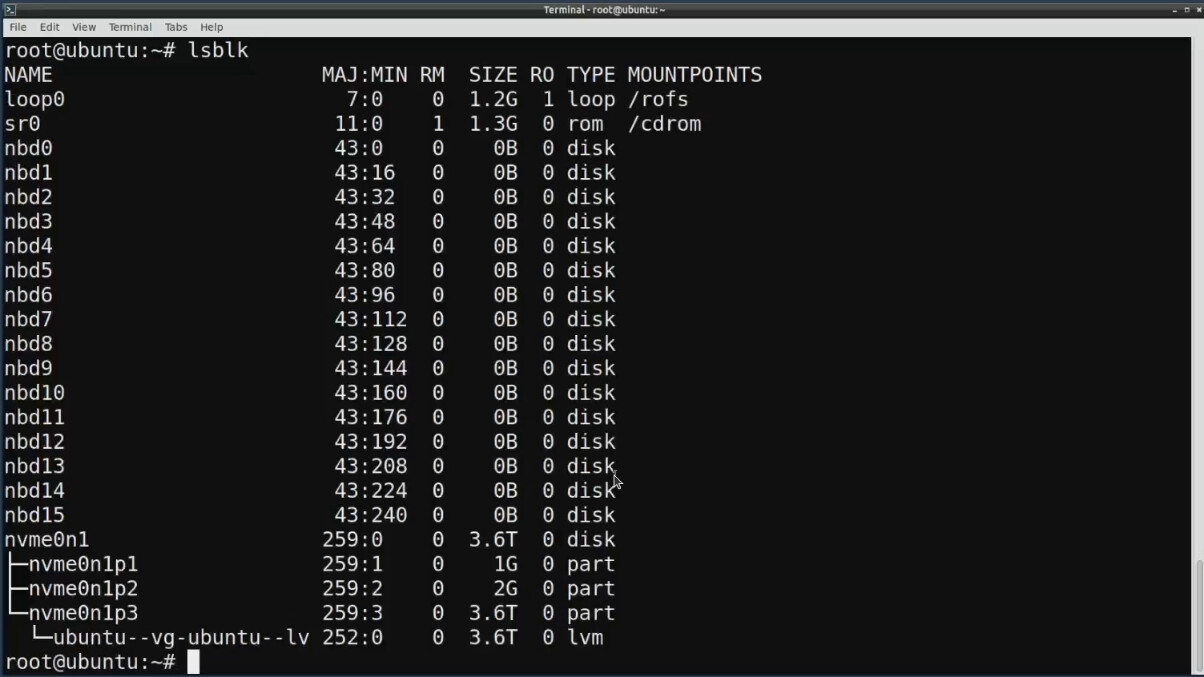
Look at your block storage.
lsblk
Notice below that although nvme0n1p3 shows as 3.6TB, the Logical Volume Manager Manager group is only 1.8TB and that’s something we need to fix.
The first step in the resizing operation is to perform the following command (the name of your partition may vary).
pvresize /dev/nvme0n1p3

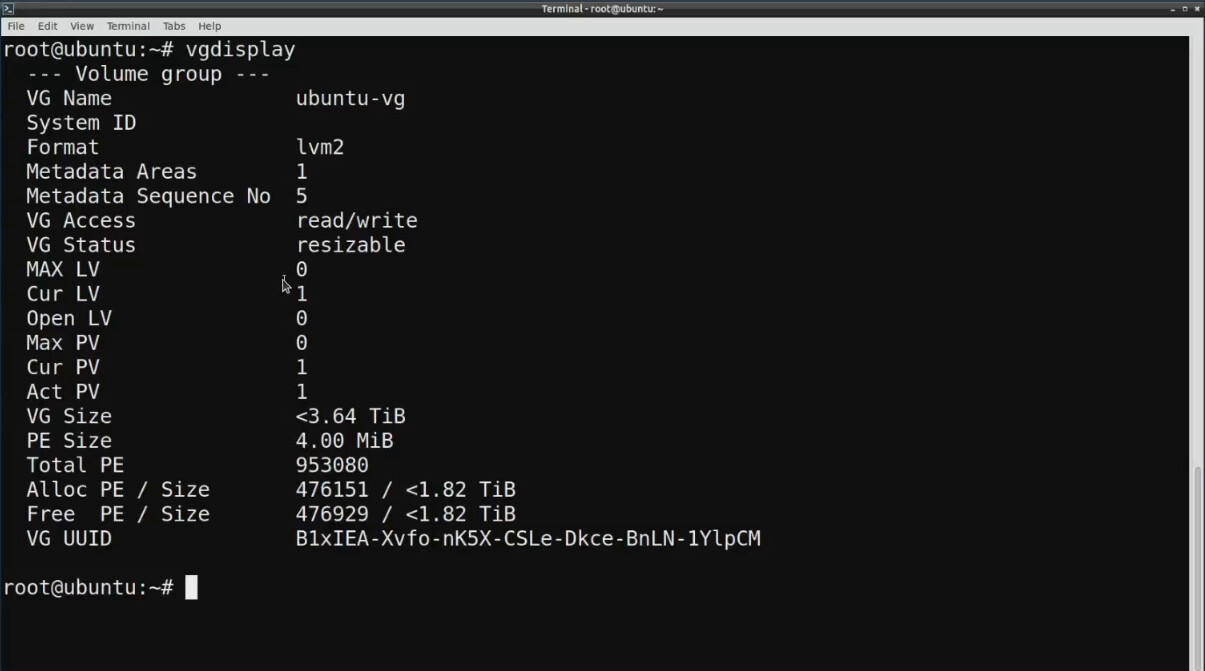
The following command shows the logcal volume manager groups.
vgdisplay
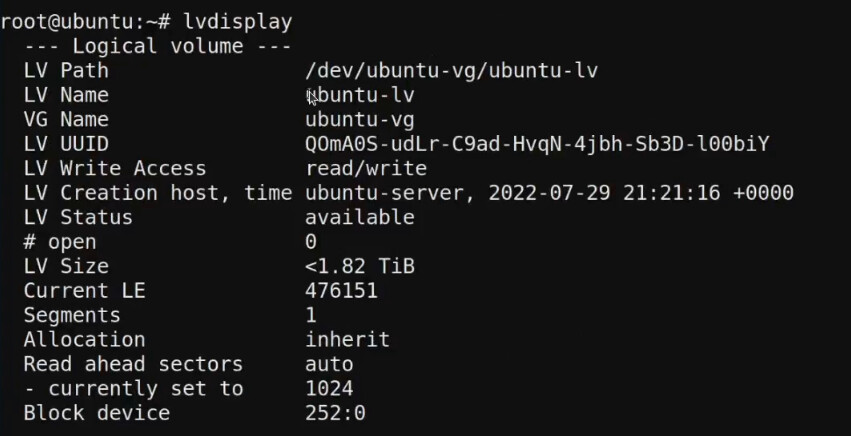
The next command shows us the name of your logical volume.
lvdisplay
To extend the size of the logical volume to use the free space.
lvextend -l +100%FREE /dev/ubuntu-vg/ubuntu-lv

The last step is to resize the file system inside of the logical volume.
resize2fs /dev/ubuntu-vg/ubuntu-lv

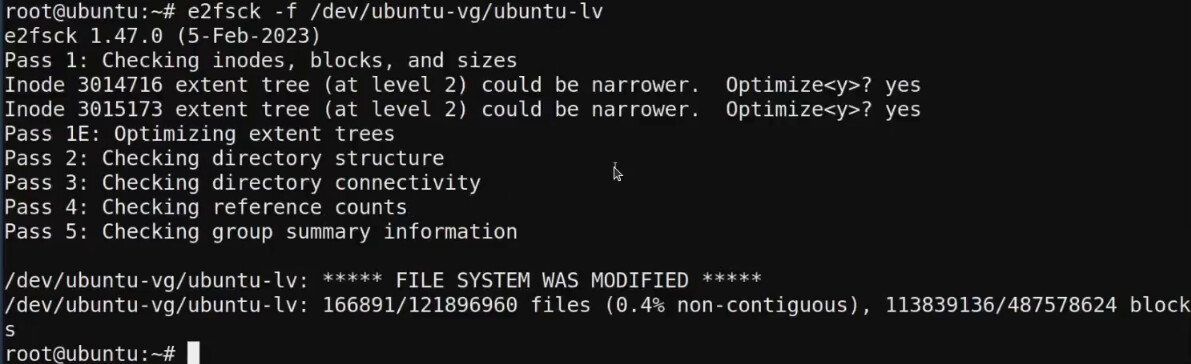
As a best practice, you should perform a file systems check to correct any remaining issues and accept any suggested changes.
e2fsck -f /dev/ubuntu-vg/ubuntu-lv
The file system is now properly sized and configured.
lsblk
If you now launch GParted, you will see that the warning is gone because the drive is properly configured.
Reboot to the new hard drive in the system and not Rescuezilla.
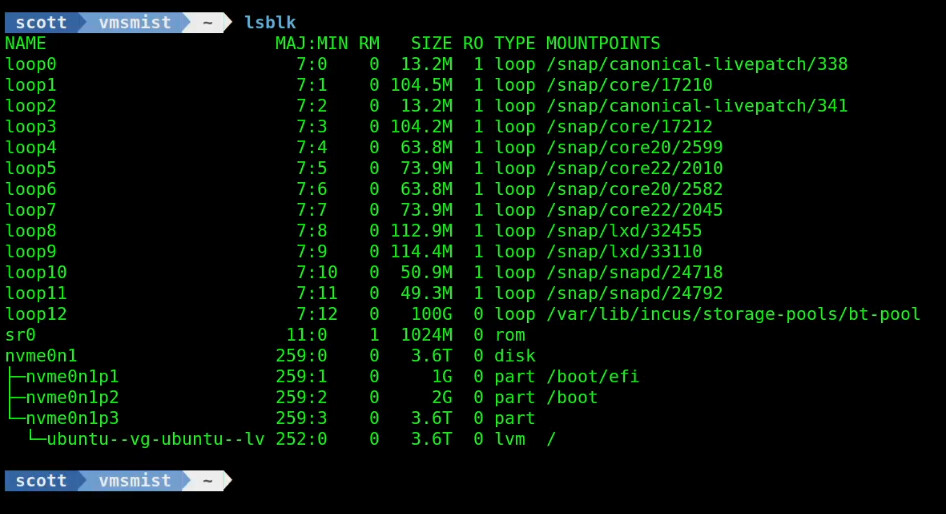
I logged into the system and displayed my block storage.
lsblk
Since my Ubuntu server is an Incus Server, I went into my LXConsole and observed that all my containers are running.
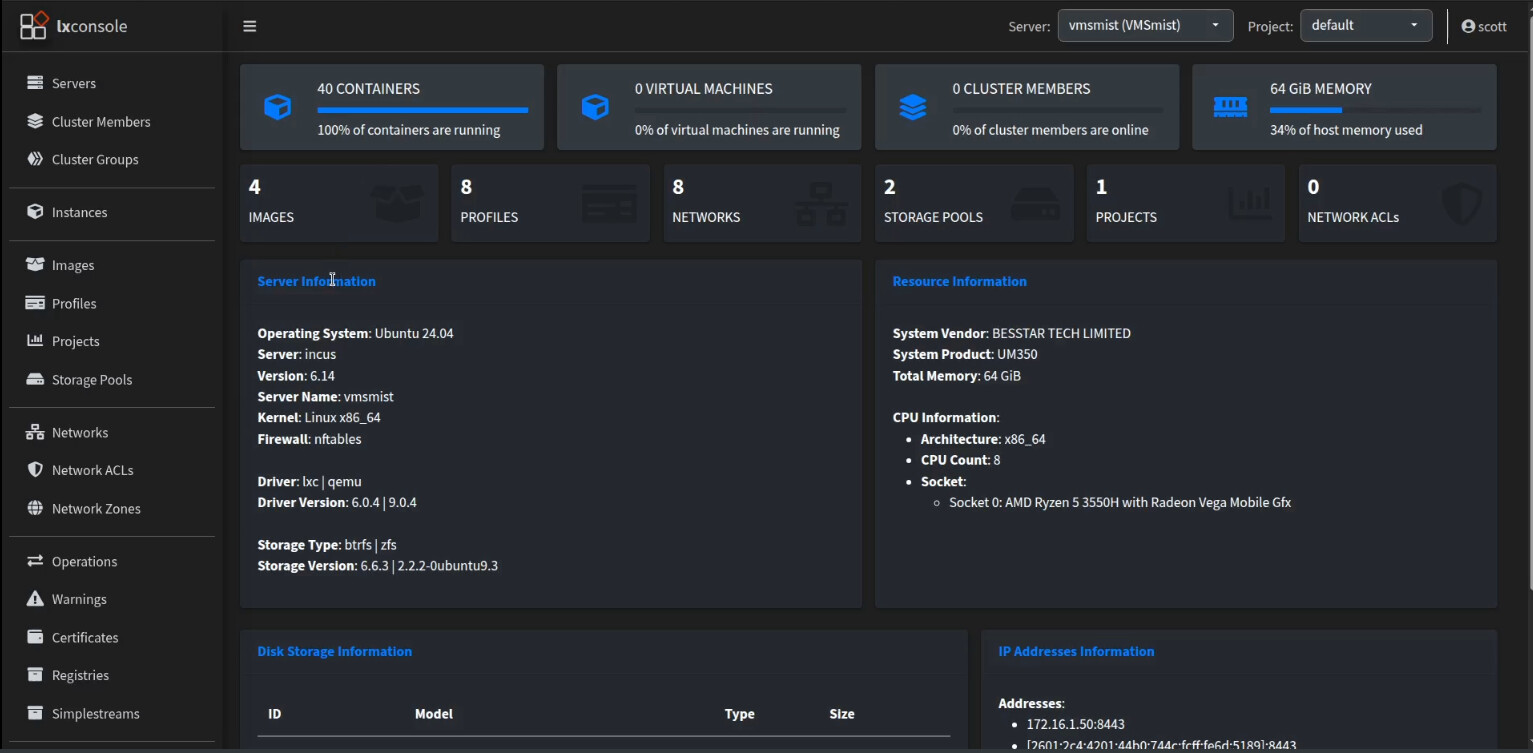
LXConsole sees the new drive.
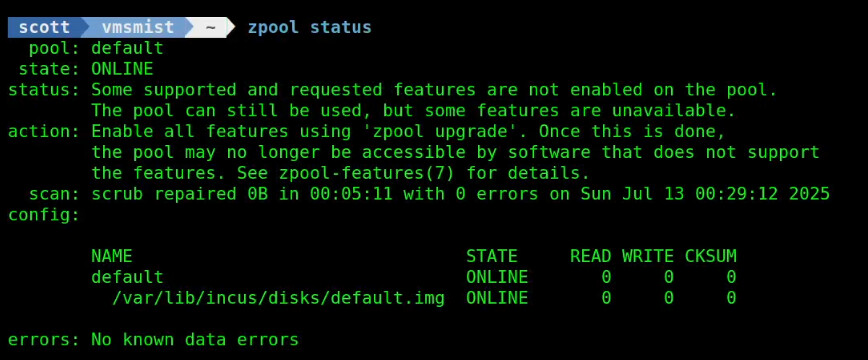
Presumably, since we have a new larger drive, you might want to enlarge the Incus default storage pool we created in my Incus Containers Step by Step tutorial. The default storage pool was a virtual file system in which we created a zfs storage pool inside.
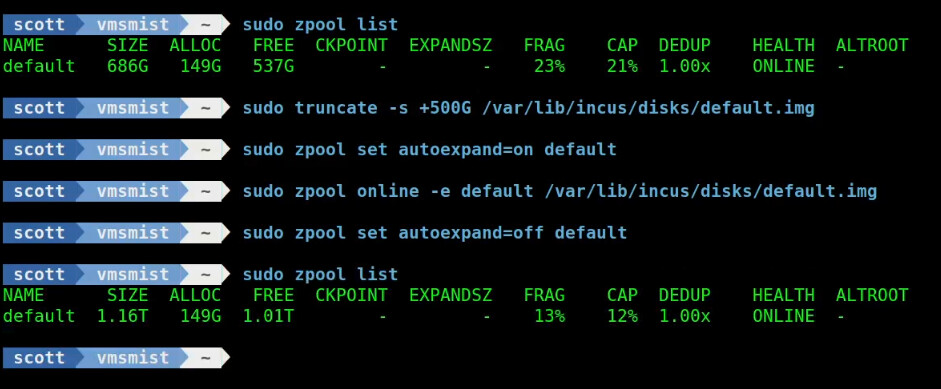
You can see the size of your Incus storage pool with the command:
sudo zpool list

Before we can expand the storage pool, find out where it lives.
zpool status
Before you can expand your storage pool, you must stop all your containers.
incus stop --all
In my example, I increased the size of my storage pool to make it 500GB larger. I wanted to use most of the space on the new drive for other purposes and so I only enlarged my storage pool by 500GB.
sudo truncate -s +500G /var/lib/incus/disks/default.img
The command above made the size of the virtual file larger, but didn’t expand the zfs file system. To do that:
sudo zpool set autoexpand=on default
sudo zpool online -e default /var/lib/incus/disks/default.img
sudo zpool set autoexpand=off default
Now you can restart all of your Incus containers.
incus start --all
Although I used the WD Black NVMe drive in this tutorial, I discovered that it has a number of power efficiency optimizations that are not really Linux server friendly. For that reason, my recommendation for a 4TB NVMe drive is the Crucial P310 4TB PCIe Gen4 2280 NVMe M.2 SSD. I have this drive on my VMSRain Incus server and it is a solid performer.