ScottiBYTE Assist is designed as an alternative to remote-support and remote-access products such as TeamViewer, Chrome Remote Desktop, AnyDesk, LogMeIn, RustDesk, and MeshCentral, while taking a deliberately different approach to how remote access is established. In addition, ScottiBYTE Assist is completely locally hosted by you and the source code is open source and published in its entirety on GitHub. There are no proprietary code segments and everything is transparent for your examination.
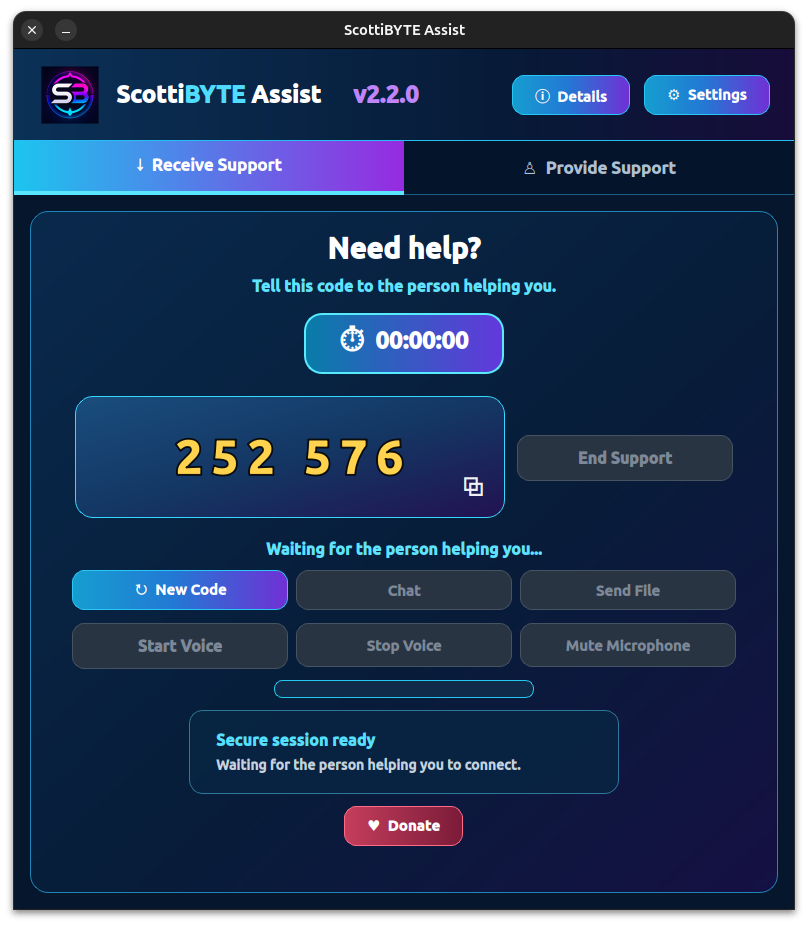
ScottiBYTE Assist is remote Assistance software and not remote control software. The difference is that ScottiBYTE Assist is for attended use only. That means that there has to be a person at the receiving end to provide you the six digit code and no provider can ever connect to a computer without that code. In the case of Windows, if the provider launches a privileged operation such as a PowerShell with Admin or the Registry editor, the receiver user must acknowledge the UAC prompt before access is granted. This is by design for extra security.
If I had designed the Windows provider client to handle UAC acknowledgement, then I would to have had to pay Microsoft for a signed driver and go through the driver certification process. To me, that flies in the face of open source software. The Windows client handles admin access through a control panel privilege elevator service and a helper process that are installed when the program is installed. That service strictly accepts connections only from the ScottiBYTE Assist client and no other programs.
If the receiver is a Linux user using the Wayland window manager, all connections are first approved by the receiver via the Wayland access portal which is part of the Wayland security model and not part of ScottiBYTE Assist. The Linux X11 window manager users do not have this extra level of approval because that security layer was not a part of X11 when it was designed in the mod-1980’s. I first used X11 on Digital Equipment Corporation VMS in 1995. Linux operating systems are making a clear decision to move away from X11 entirely. Ubuntu 26.04 is actually Wayland only.
A typical 20,000-line web application might mostly consist of database operations, HTTP endpoints, business logic, forms and UI. Assist crosses a lot more architectural boundaries and that makes it far more complex than you might imagine.
Assist is Qt/C++, GStreamer, Opus/audio processing, VP8/video, PipeWire & Wayland portals, X11, Windows desktop capture/input behavior, UAC/elevation, WebSockets, HTTP transfers, networking/NAT considerations, authentication, SQLite, Docker, reverse proxies and a browser-based administration interface.
Even something seemingly simple such as “show the other person’s screen and let me control it” crosses many boundries.
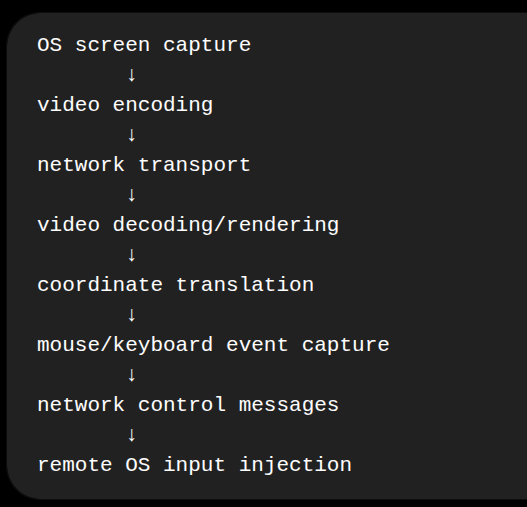
I could go on for hours describing the minutia surrounding the architectural design of ScottiBYTE Assist. Instead, let me just say that this is a unique implementation for remote assistance requiring 8-12 hours a day over a period of five weeks. Rather than just wrapping RDP or VNC, ScottiBYTE Assist has a uniquely designed remote assistance protocol. I put pen to paper and designed that.
I used ChatGPT for the actual coding, but I went through around 20,000 prompts. I did all the design work myself (did I mention that?) and I performed simulated WAN tests which could only go so far. Although not tested personally, I believe that GNat/double NAT users could host ScottiBYTE Assist on their networks via a Cloudflare Zero Trust tunnel because ScottiBYTE Assist does everything over port 443 and everything is encapsulated in htttps.
A big “thank you and shout out” to my long time friend David for his many nights helping me test from 9pm to 5am for at least the last two weeks. David’s critique and eye for consistency allowed me to polish the interface to provide a professional look. Also, a thanks to my subscriber Hasan who assisted me with locating bugs in the voice configuration and its persistent settings. Hasan also provided a remote connection with five screens so I could scale the remote control interface.
Install Assist on any Docker server. I am using an Incus container.
incus launch images:ubuntu/26.04 Assist -p default -p bridgeprofile -c boot.autostart=true -c security.nesting=true
Connect to the container.
incus shell Assist
Update the new instance.
apt update && apt upgrade -y
Install some dependencies.
apt install nano curl net-tools openssh-server -y
Install Docker from the script on the docker website.
curl https://get.docker.com | sh
Add a user account and put it in the docker and sudo groups for management.
adduser scott
usermod -aG sudo,docker scott
Move over to the new user account.
su - scott
Create the applications folder structure and move into the app folder.
mkdir -p ~/scottibyte-assist/data
cd ~/scottibyte-assist
Edit a docker compose file.
nano compose.yml
Copy the following code into the editor.
services:
  assist-server:
    image:
      scottibyte/scottibyte-assist-server:latest

    container_name:
      scottibyte-assist-server

    restart:
      unless-stopped

    environment:
      NODE_ENV: production
      HOST: 0.0.0.0
      PORT: 3089
      PUBLIC_URL: https://assist.example.com
      DATABASE_PATH: /app/data/assist.sqlite
      SESSION_LIFETIME_MINUTES: 30

    ports:
      - "3089:3089"

    volumes:
      - ./data:/app/data

    healthcheck:
      test:
        - CMD
        - wget
        - --quiet
        - --spider
        - http://127.0.0.1:3089/api/health
      interval: 30s
      timeout: 5s
      retries: 3
      start_period: 10s
Change your public URL above to match the name of the subdomain that you plan to use for your Assist server, Do a CTRL O and enter to save the file and a CTRL X to exit the editor.
Start the application:
docker compose up -d
Check to see that it is running.
docker ps

Check the docker logs for your first time server setup/provider code which is needed before you can provide anyone remote assistance. Provider privilege is strictly controlled by the server for security reasons.
docker compose logs
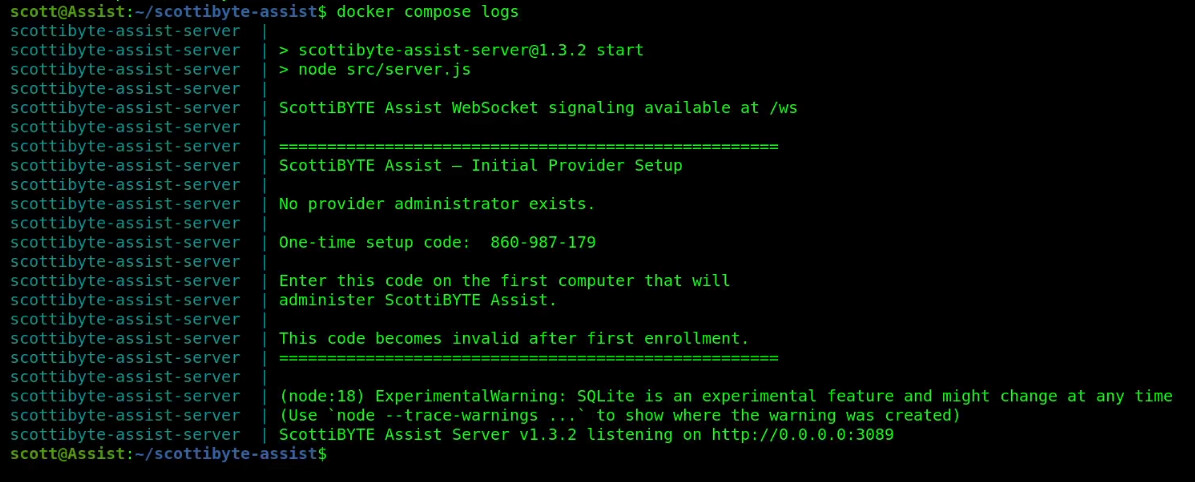
Look for your one-time setup code. Yours will differ from the one pictured.
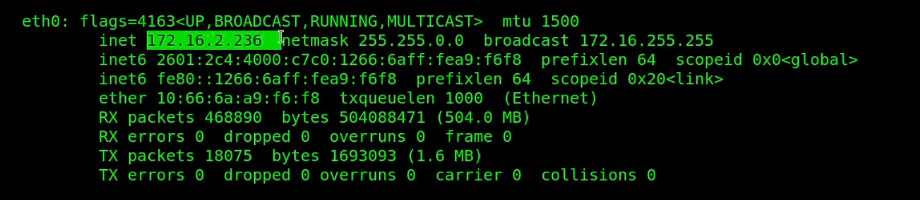
Find out the address of your docker server (this Incus container).
ifconfig
Go to your DNS provider and create a subdomain for the assist application. In the video I had previously created test.scottibyte.com. Create a name that you like (hint: assist.mydomain.com).
Then go to your NginX Proxy Manager and create a new proxy record for that domain pointing the IP address you just found.
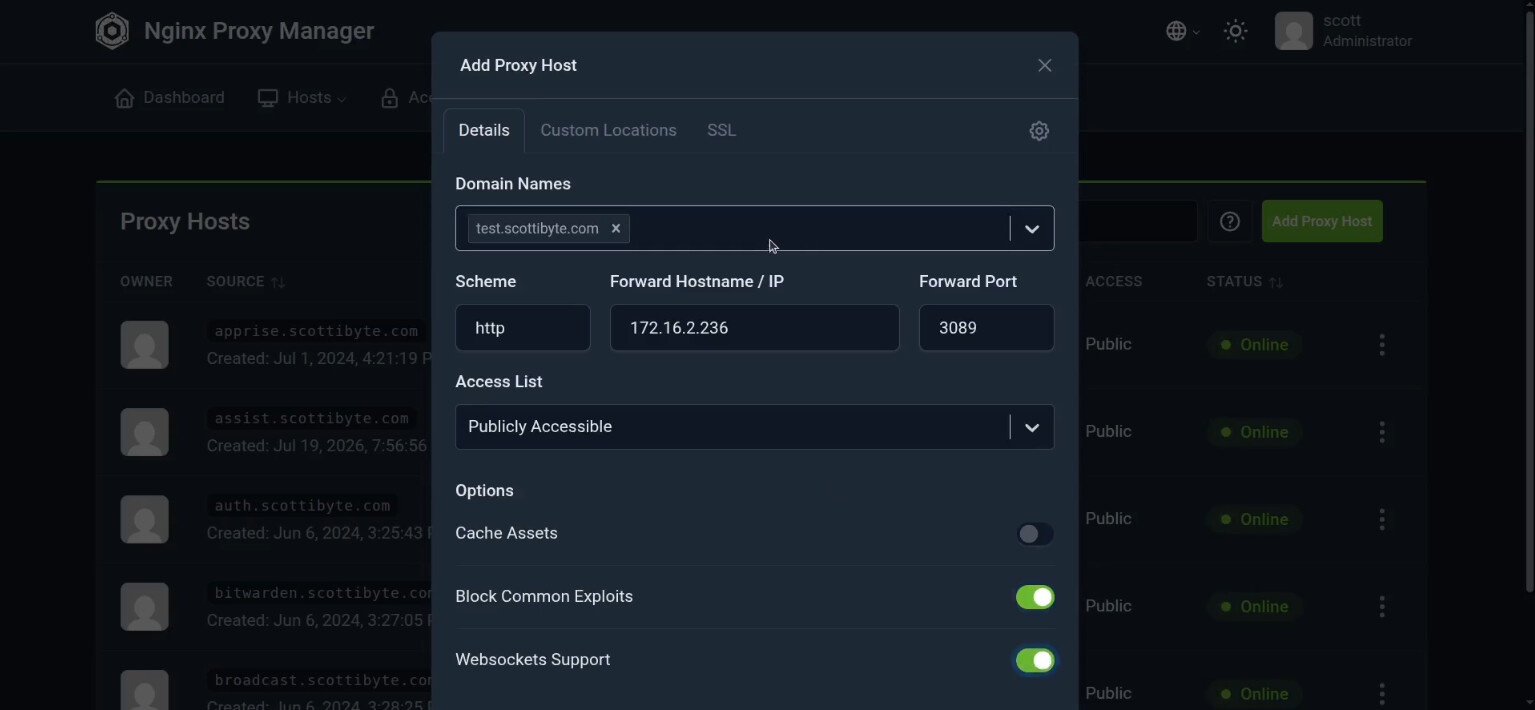
Head over to the advanced options by clicking on the gear.
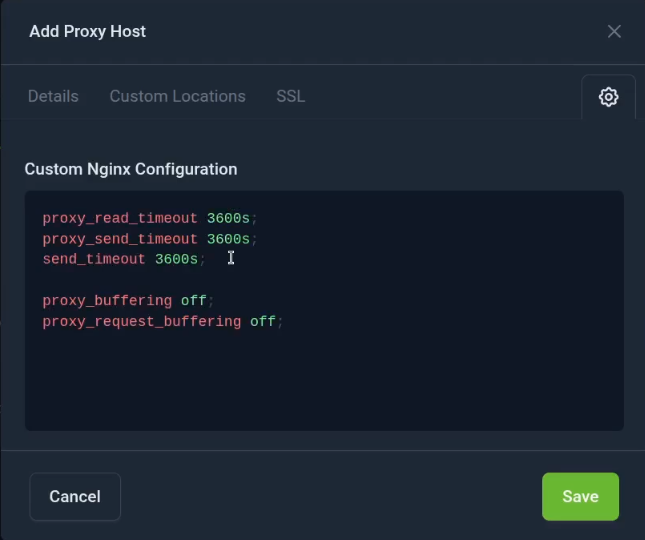
You will want to enter the following into the custom Nginx Configuration for this host. Since ScottiBYTE Assist uses websockets, this information is required to make NPM more resilient for rapid fire messages.
proxy_read_timeout 3600s;
proxy_send_timeout 3600s;
send_timeout 3600s;

proxy_buffering off;
proxy_request_buffering off;
Here’s what it looks like in the GUI.
Click SAVE.
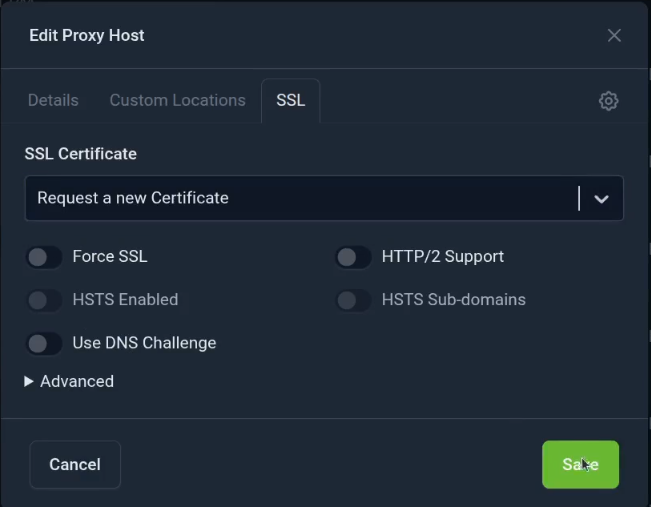
Find the new entry and edit it. Go to the SSL screen and "request a new certificate and click Save again.
Go back and edit the record again and turn force SSL on.
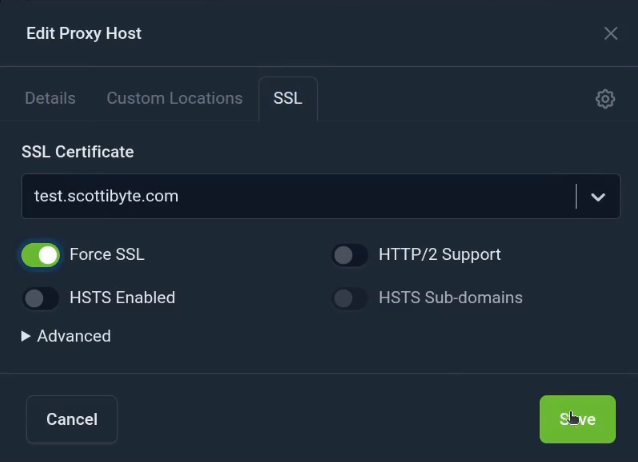
Click Save for the final time.
Go to your web browser and enter the subdomain we just defined the proxy for and you should be at the ScottiBYTE Assist portal page.
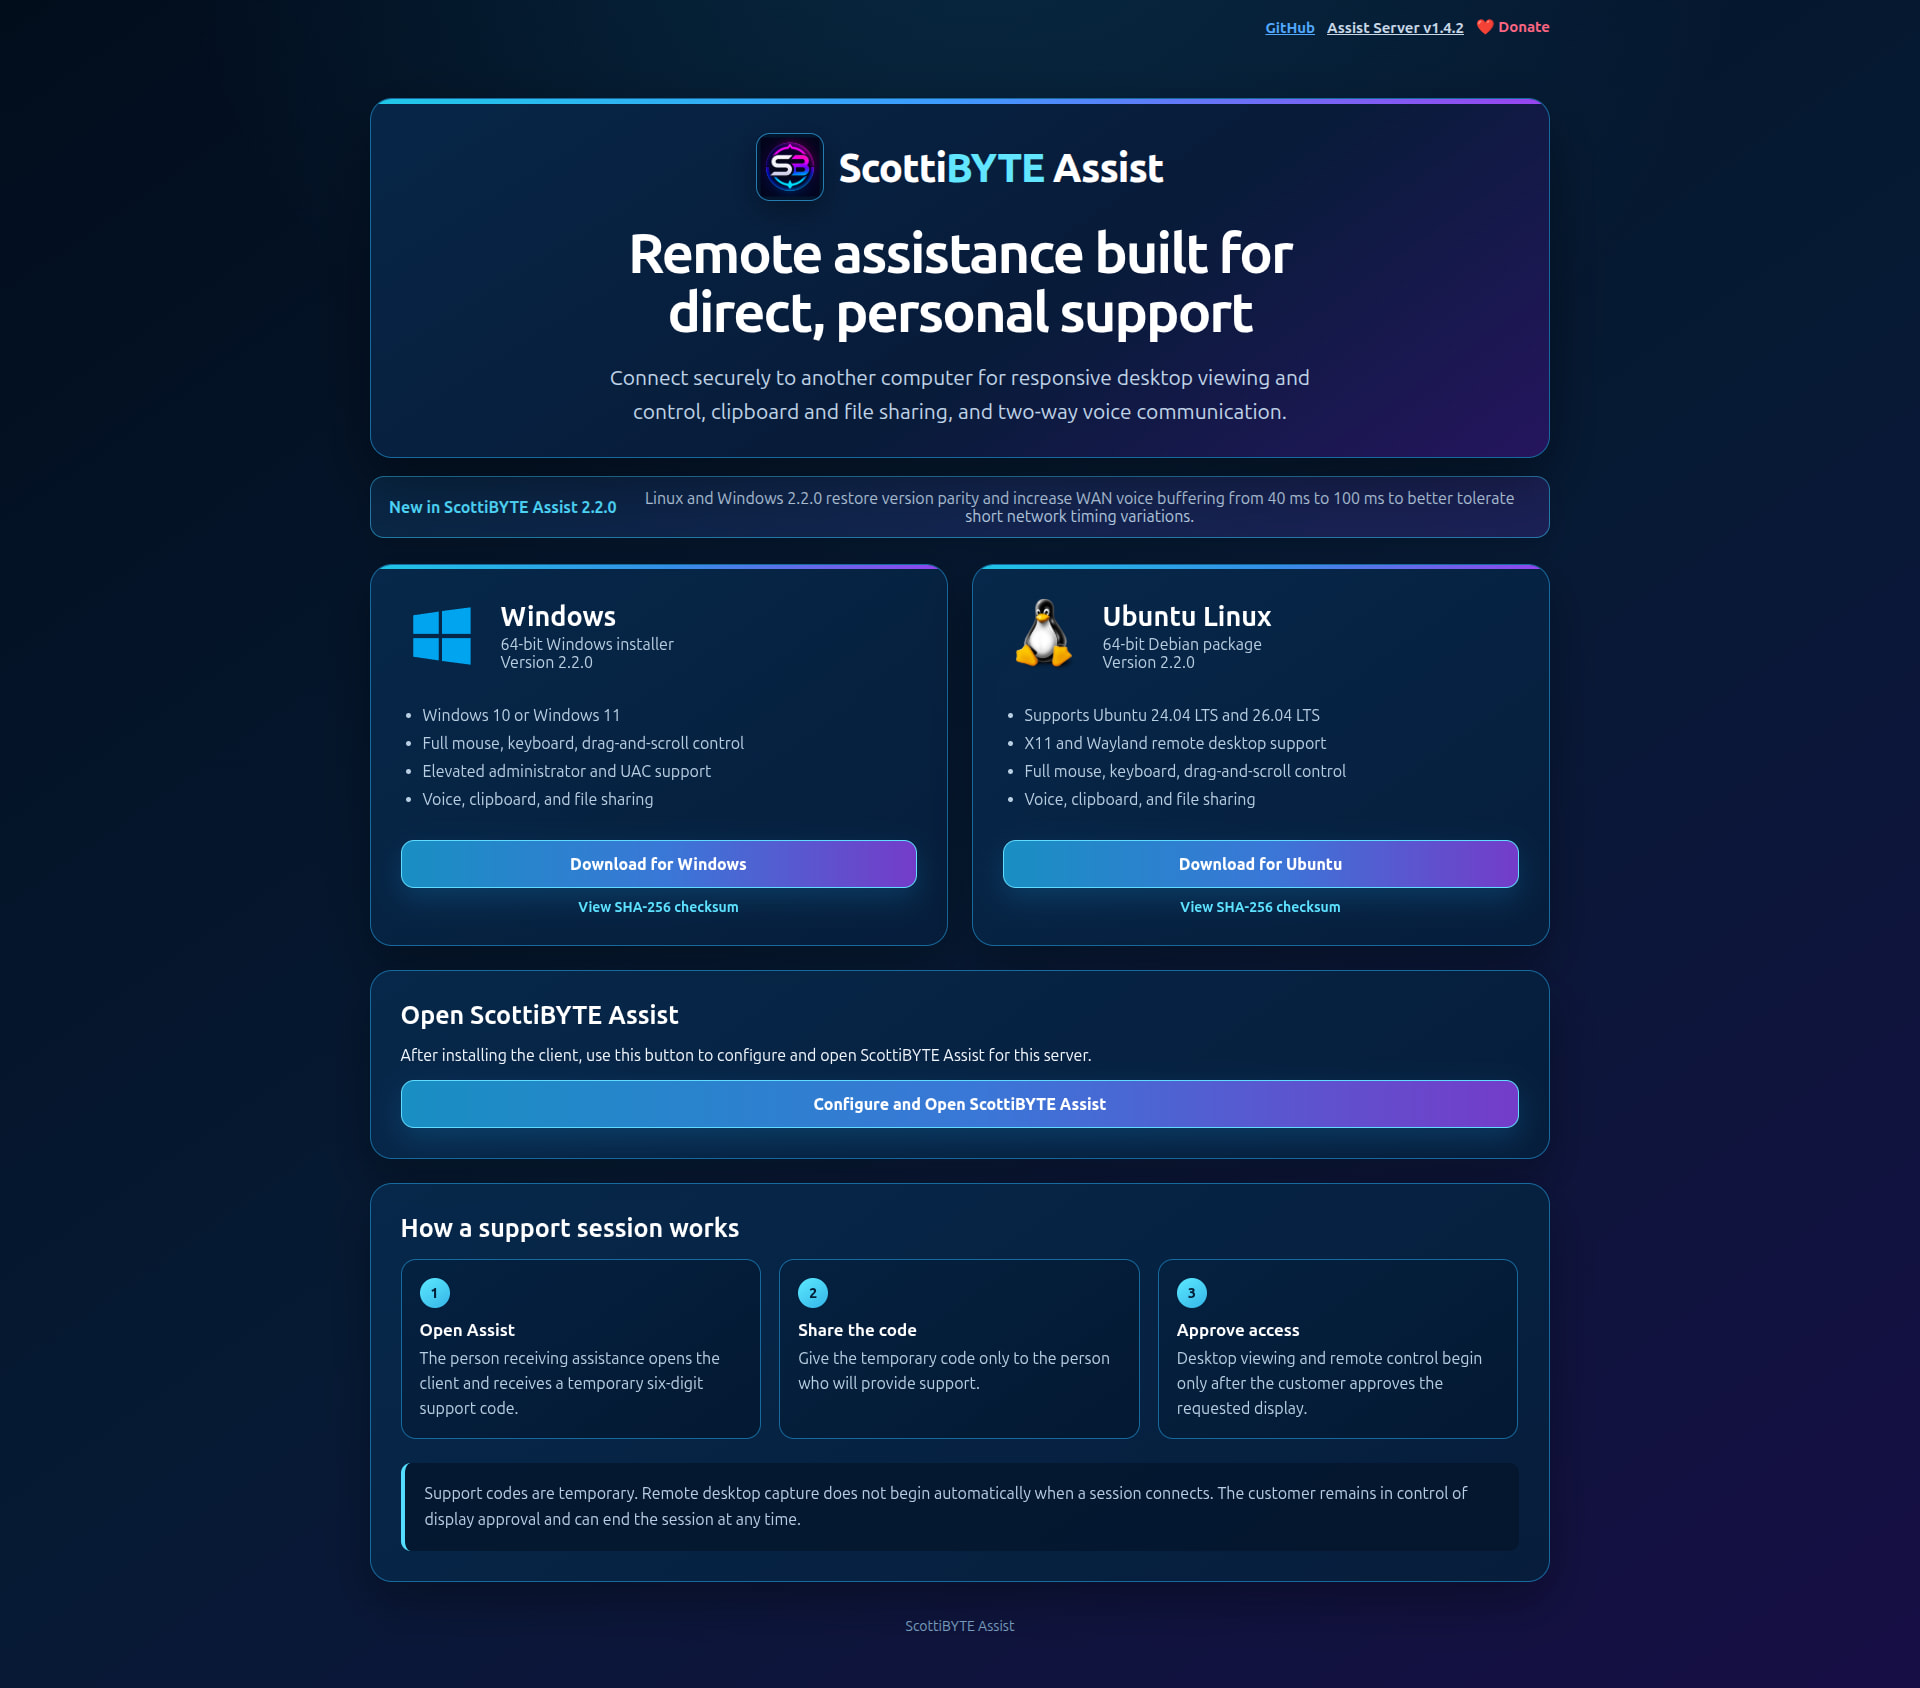
Download either the Windows or Linux client depending on your desktop preference. The computer that you run the first client on and register first will become the superuser. The superuser can log into the admin interface and create other provider privileged clients as needed.
I downloaded, installed and ran the Ubuntu Linux client. Both Windows and Linux clients look and function identically.
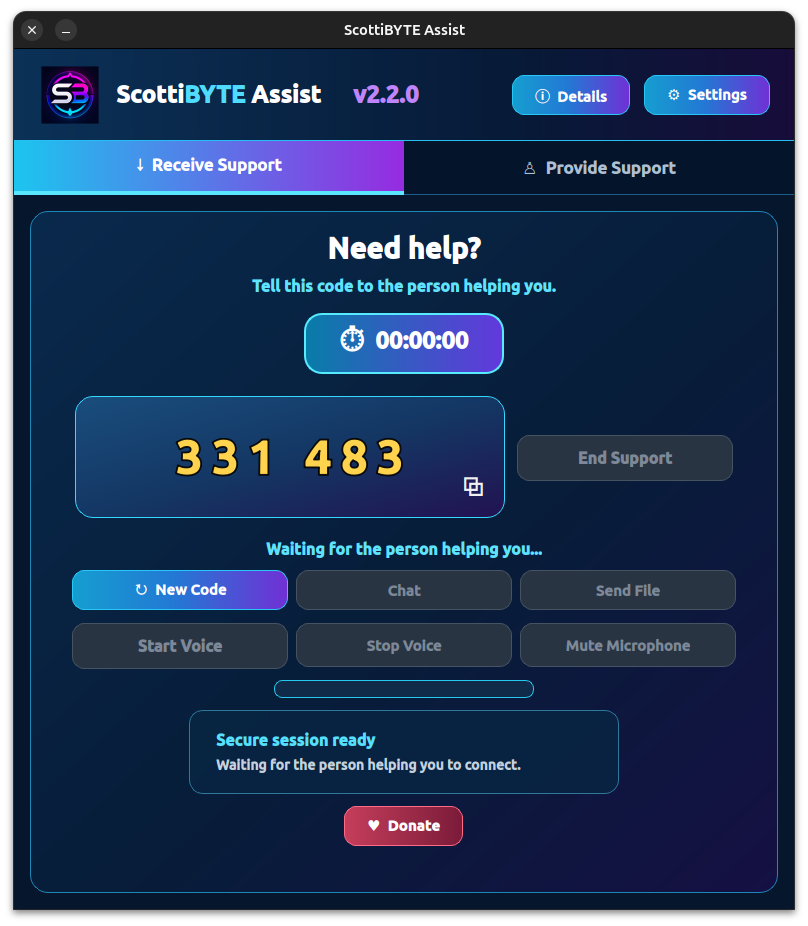
Head over to the settings.
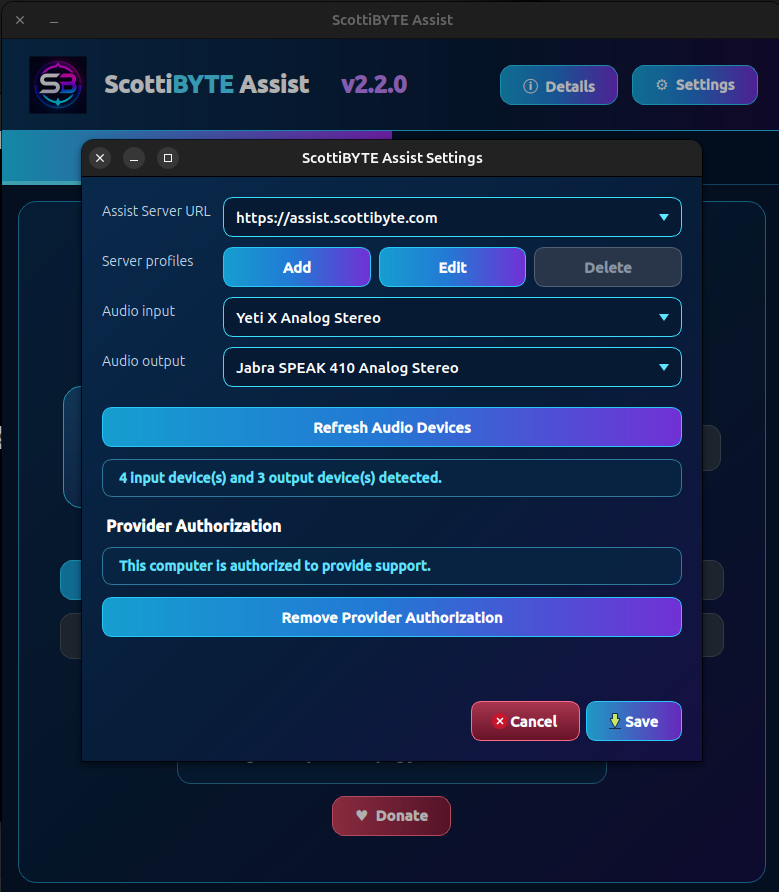
You will want to enter the “Assist Server URL” that you used in the web browser to access the portal. That is the address of your Assist server. You can also configure your input and output audio devices at this time and then click Save.
You will be presented with an initial provider setup bootstrap screen.
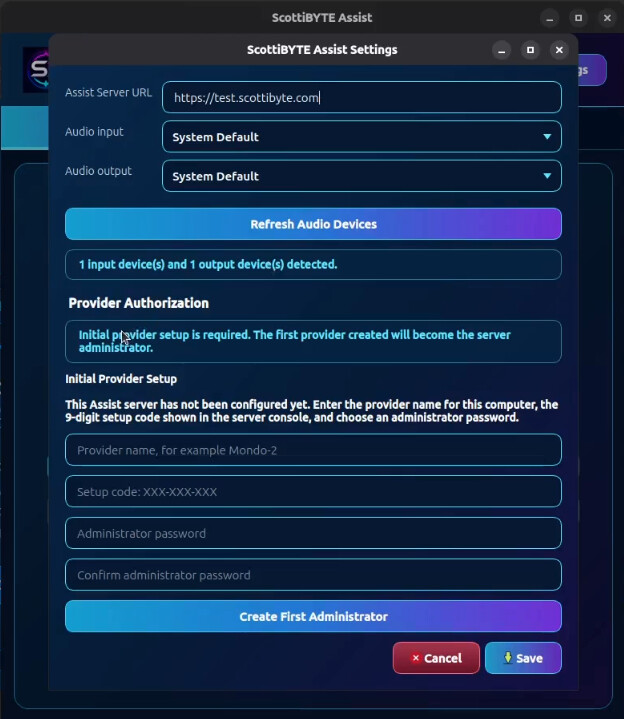
Above you will want to provide a name for the workstation that you are registering and as a reminder this becomes the one and only superuser who can manage additional providers.
So, enter a name that has meaning for you. Then enter that one-time setup code we got from “docker compose logs” (your docker compose logs). Enter a decently complex password and verify it and make sure you store that password in your password manager. The password that you create is used to manage the admin portal to grant/revoke provider privilege to other client computers.
So, in the video I did this.
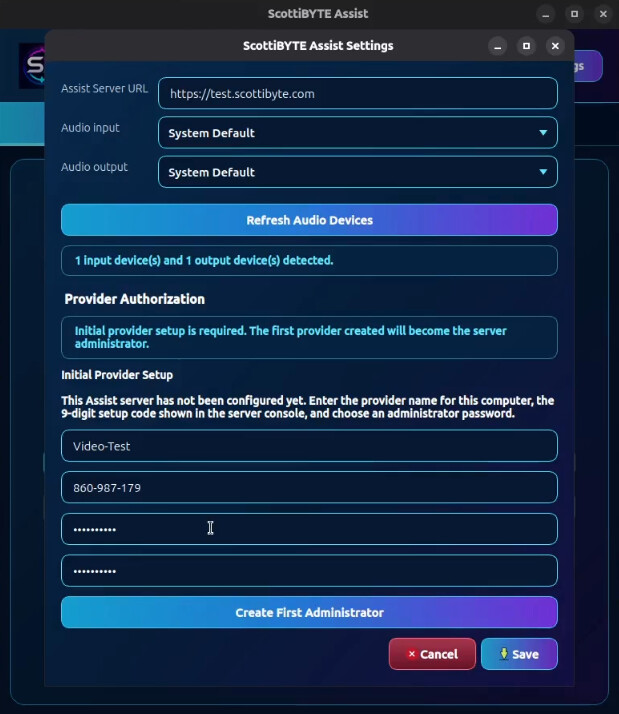
Then you click “Create First Administrator”.
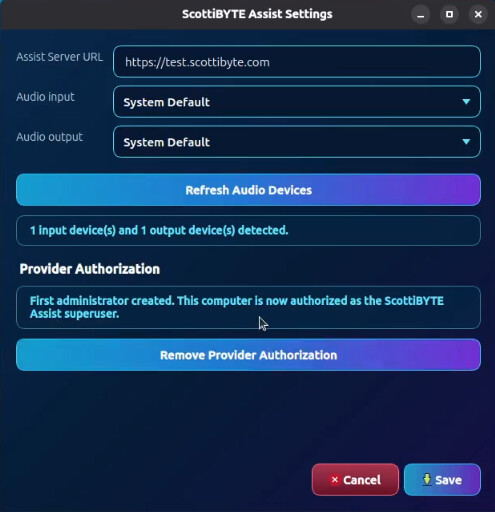
The password that you created is the password that you use to enter the admin portal.
Finally, click Save to exit the settings screen.
At this point, you can provide support to another user who has downloaded and installed a ScottiBYTE Assist client from your portal.
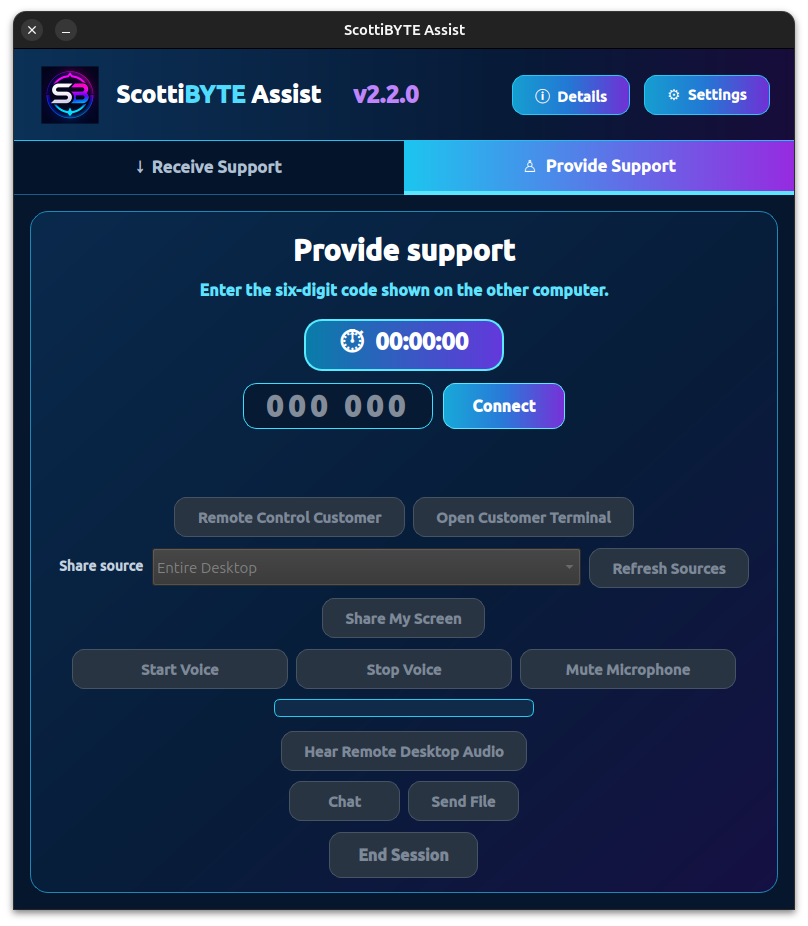
All they have to do is go into settings and set your Assist server URL, choose their audio device preferences and press save and then provide you the six digit code they get on their “Receive Support” tab.
Let’s head over to your web browser and put a “/admin” at the end of your portal URL.
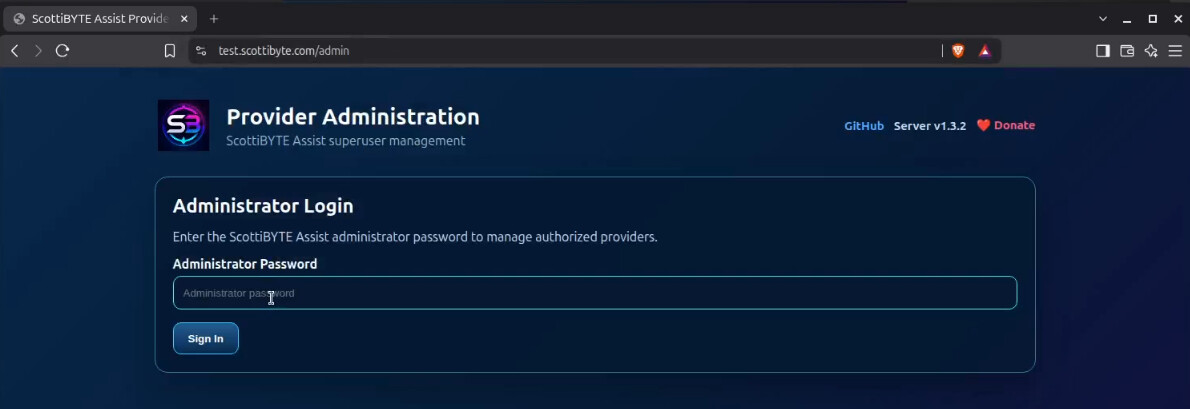
Provide the password that you entered when setting up the first client that we just did. That is the authorization password for managing providers. Once you enter that password you will see the admin screen.
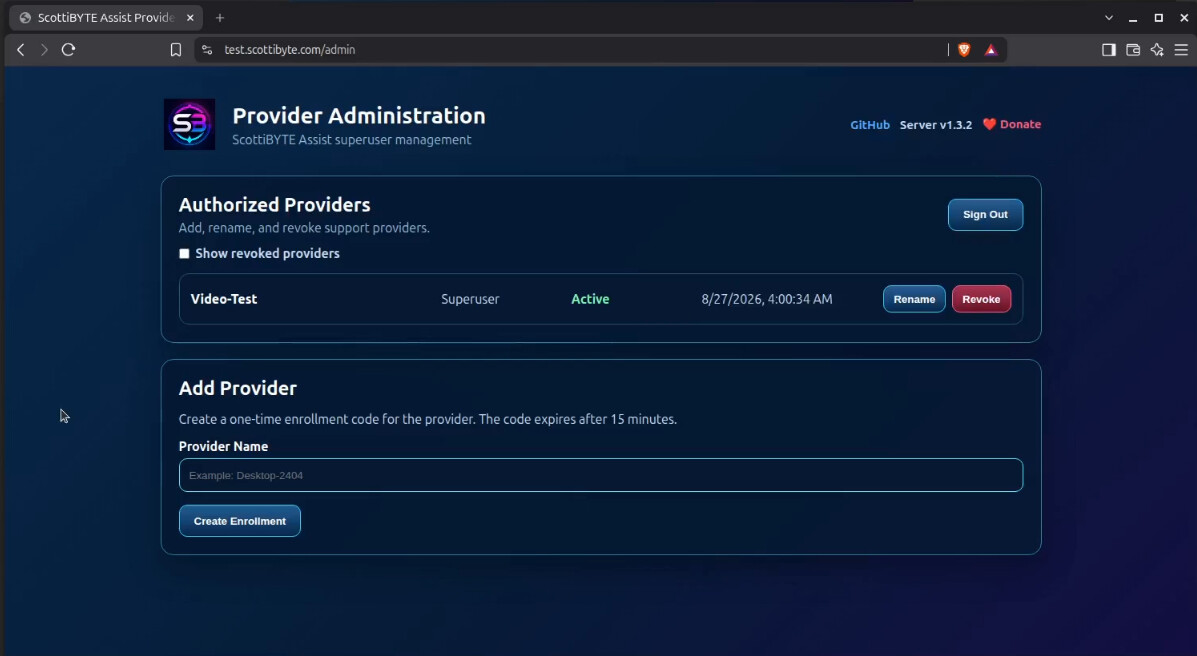
You will notice that the first computer you added defined that client system as the superuser. The superuser is the person possessing the password that you used to log into this admin interface. You can optionally add other providers by typing a name of the computer that you want to be a provider and clicking “Create Enrollment”. Choose names that make it easy for you to remember which computers you have designated as providers.
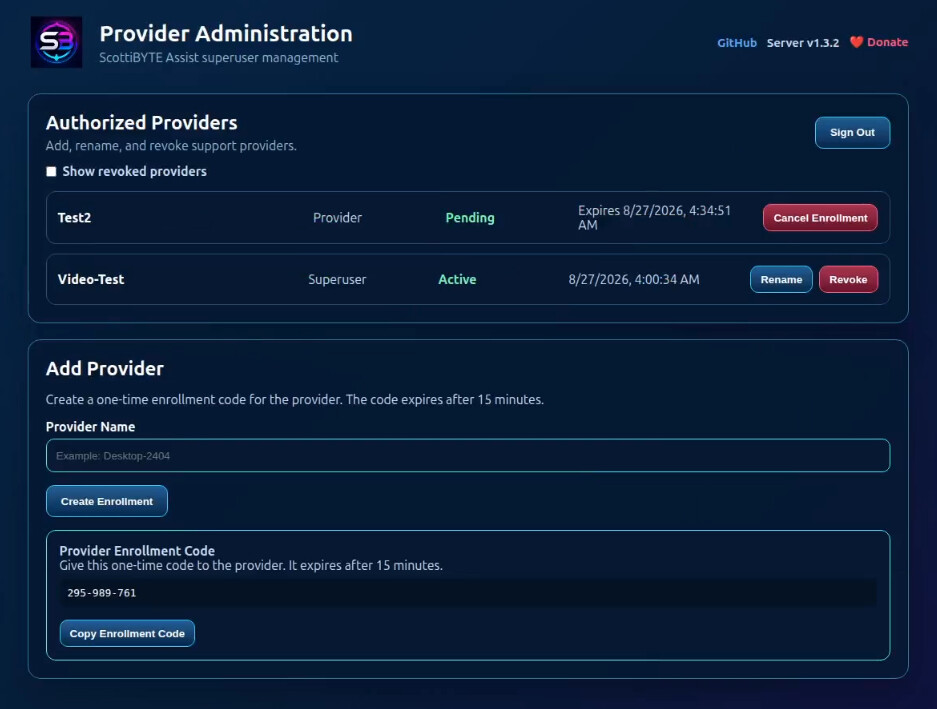
The enrollment code is a one-time use code that expires after 15 minutes if it is not used. The idea is you enter that code on the ScottiBYTE Assist client on another computer in the settings screen to authorize it as a provider.
You can also revoke any provider privilege at any time through this interface.
Don’t revoke your superuser. That’s a great way to shoot yourself in the foot. I may have disabled that, but don’t try it.
As of this writing, the Assist Server is at v1.3.2. However, when you:
docker compose pull
docker compose up -d
You will often not see the assist version change, but those commands also update the versions of the clients offered by your portal and so you would be updating the clients versions when available. Clicking on the version number in the portal goes to the release page and that will tell you if there are new versions of the clients and what the changes are.
ScottiBYTE Assist is completely locally hosted and all of the source code is on my Github. It is all open source and you are welcome to modify it or come to the chat at https://chat.scottibyte.com to engage with me to discuss this or other projects.