This is a very simple guide to installing a RocketChat server. In the second half of the video I show how to export the database from an older RocketChat server and import it to the new server.
Start by creating an Incus container as covered in many of my other tutorials.
incus launch images:ubuntu/24.04 RocketChat -p default -p bridgeprofile -c boot.autostart=true -c security.nesting=true
Connect to the container and take all of the updates.
incus shell RocketChat
apt update && apt upgrade -y
Install some dependencies:
apt install openssh-server net-tools curl nano -y
RocketChat is a docker application. Install docker from the script on the docker website:
curl -sSL https://get.docker.com | sh
Add a user account and put it in the sudo and docker groups.
adduser scott
usermod -aG sudo scott
usermod -aG docker scott
Move over to the new account.
su - scott
Create a folder for the RocketChat configuration and move into it.
mkdir rocketchat
cd rocketchat
Create a docker compose file:
nano docker-compose.yml
Paste the following contents into the editor.
services:
  rocketchat:
    image: rocketchat/rocket.chat:latest
    command: >
      node main.js
    restart: unless-stopped
    volumes:
      - ./uploads:/app/uploads
    environment:
      - PORT=3000
      - ROOT_URL=https://mychosensubdomain.com
      - MONGO_URL=mongodb://mongo:27017/rocketchat?replicaSet=rs0&directConnection=true
      - MONGO_OPLOG_URL=mongodb://mongo:27017/local?replicaSet=rs0&directConnection=true
      - MAIL_URL=smtp://smtp.email
    depends_on:
      - mongo
    ports:
      - 3000:3000

  mongo:
    image: mongo:7.0
    restart: unless-stopped
    volumes:
      - ./data/db:/data/db
      - ./data/dump:/dump
    command: ["mongod", "--replSet", "rs0", "--bind_ip_all"]  # Enable replication and allow binding to all IPs

  mongo-init-replica:
    image: mongo:7.0
    command: >
      bash -c "
        until mongosh --host mongo:27017 --eval \"print('waiting for connection')\"; do
          echo \"Waiting for MongoDB to become available...\";
          sleep 5;
        done;
        echo \"MongoDB is available. Initializing replica set...\";
        mongosh --host mongo:27017 --eval \"
          rs.initiate({
            _id: 'rs0',
            members: [{ _id: 0, host: 'mongo:27017' }]
          })\";
      "
    depends_on:
      - mongo
Be sure to change the root URL to match the subdomain name that you have created on your DNS provider’s management page. Yes, you must have a domain name to do this.
Do a CTRL O and enter to write the file out and a CTRL X to exit the nano editor.
Start your new RocketChat instance:
docker compose up -d

Now list your running containers.
docker ps

You should see only two containers (RocketChat & MongoDB) because the mongodb replica set performs its operations and then exits.
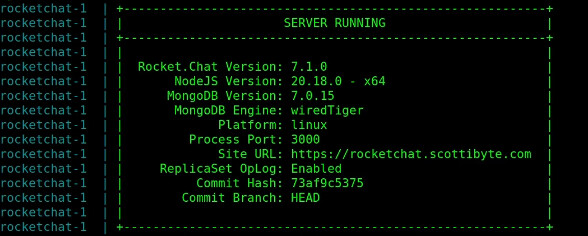
Examine the log files:
docker compose logs
You are looking for the server information towards the beginning of the log file and it will verify your server is running and the versions.
Find out the IP address of your eth0 device in your RocketChat Incus container:
ip -br -4 addr show dev eth0
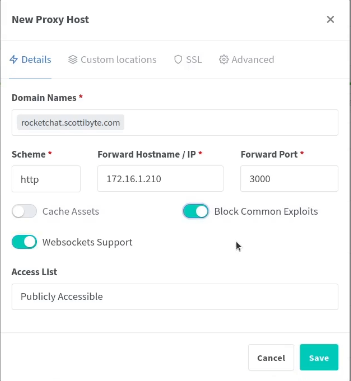
Go into your NginX Proxy Manager and create a Proxy that uses your domain name that you specified in the ROOT_URL of the docker-compose file using the address we just found at port 3000.
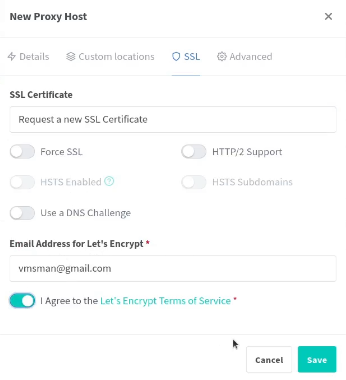
Don’t forget to head over to the SSL tab and add a Let’s Encrypt certificate.
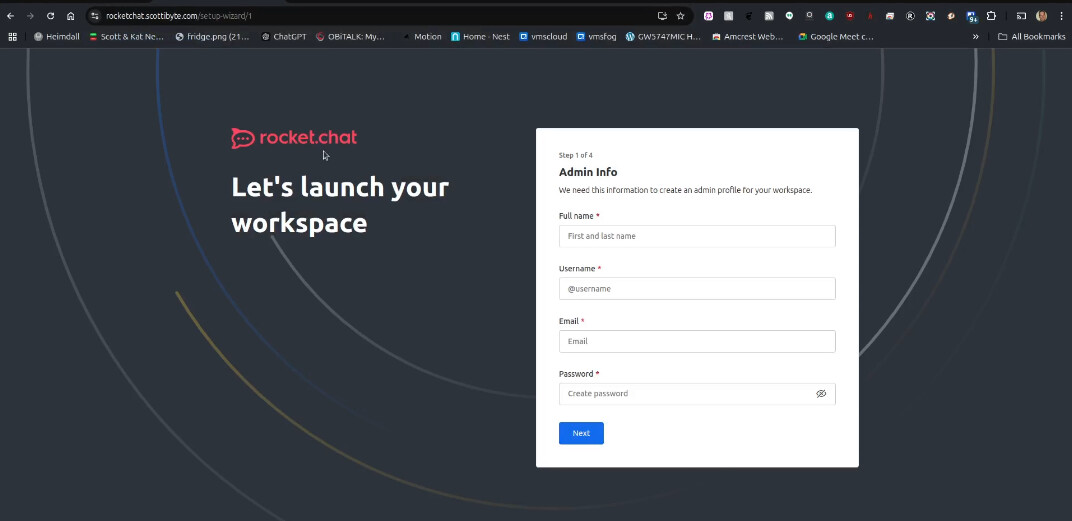
In a new tab in your web browser, head over to the subdomain address for which we just created the proxy and you should see the following screen where you can enter your name, username, email and password for your new server.
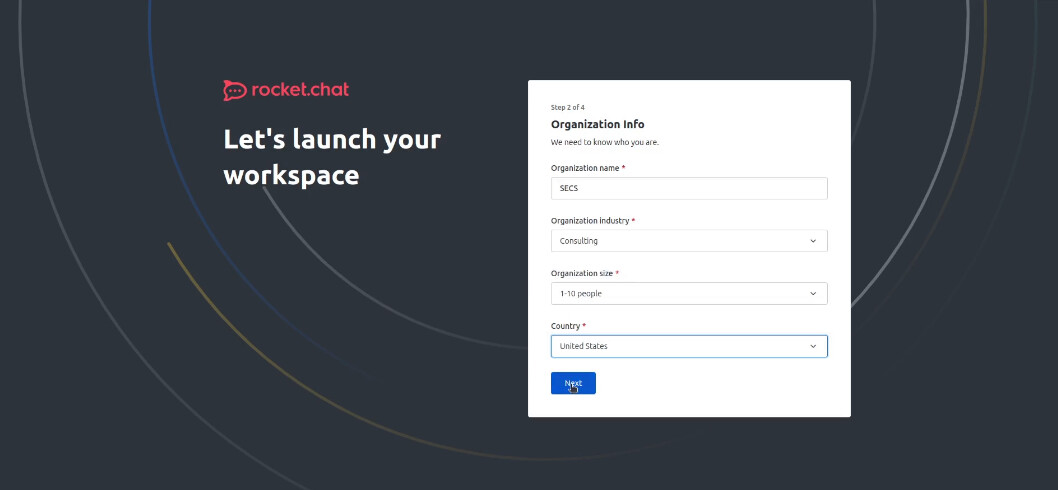
The second screen prompts for an organization name, industry, organization size and country.
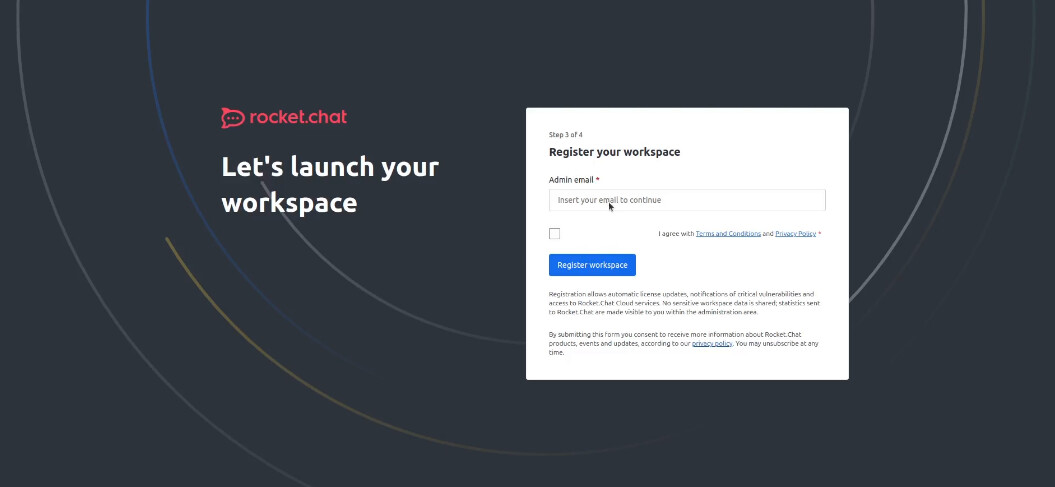
Agree to the terms of service. Do you ever read these?
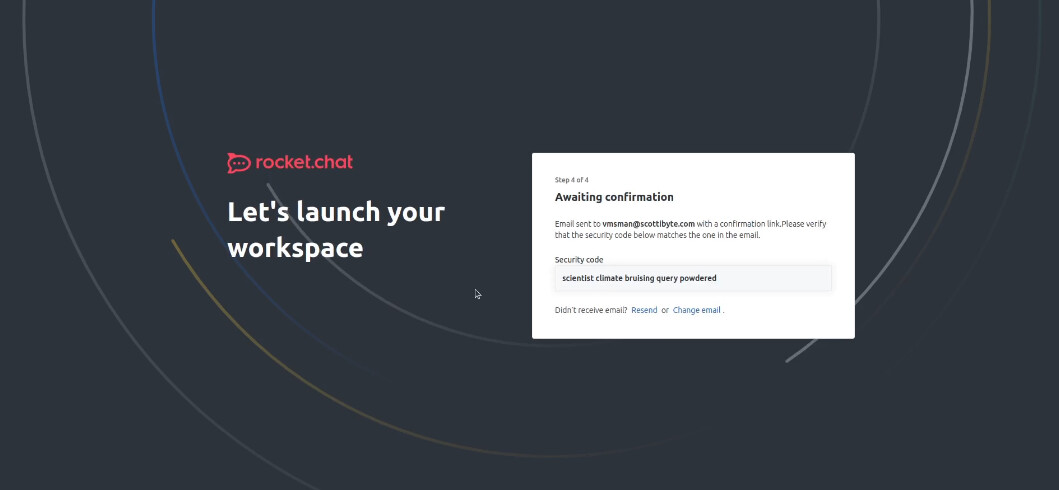
The next screen will await for you to acknowledge the workspace registration email before it lets you access your configured RocketChat server.
The email you will receive looks like the following and you will want to click on “Verify registration”.
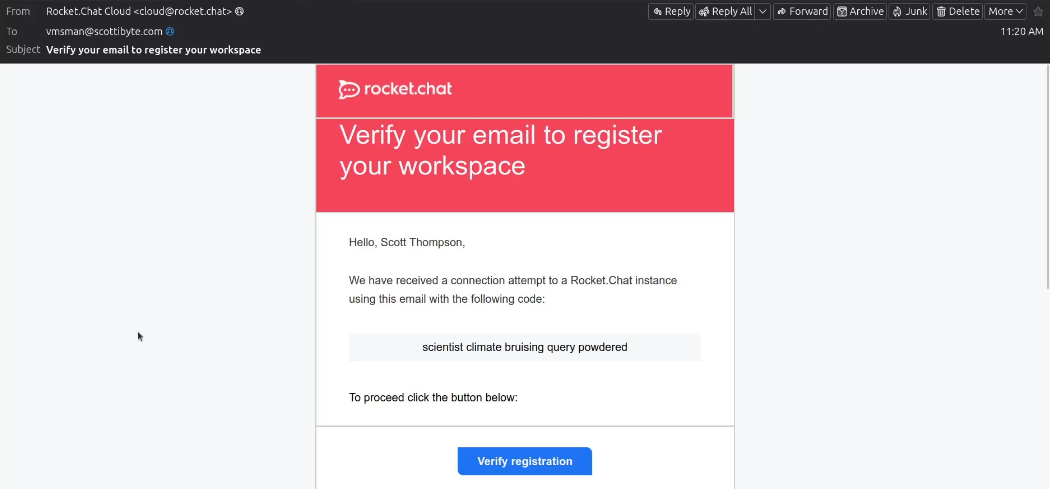
You will then see a confirmation in your web browser.

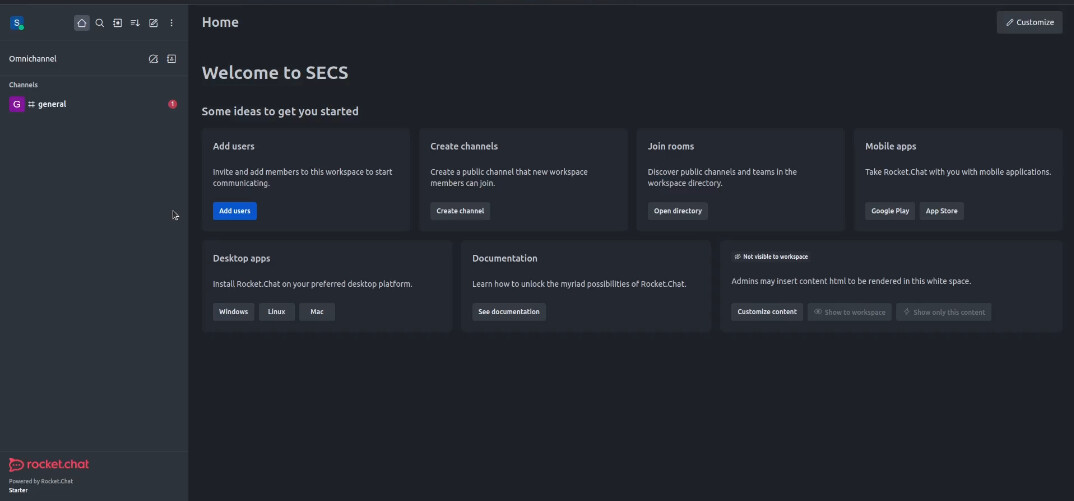
Once you head back to your RocketChat screen, you will see your RocketChat workspace.
At this point you are done with the installation of RocketChat. The second half of this tutorial is devoted to showing you how you can migrate an old RocketChat server to this new server or just how to backup and restore a RocketChat database with all your users, rooms and other settings.
I also describe how to upgrade your RocketChat server toward the end of this document.
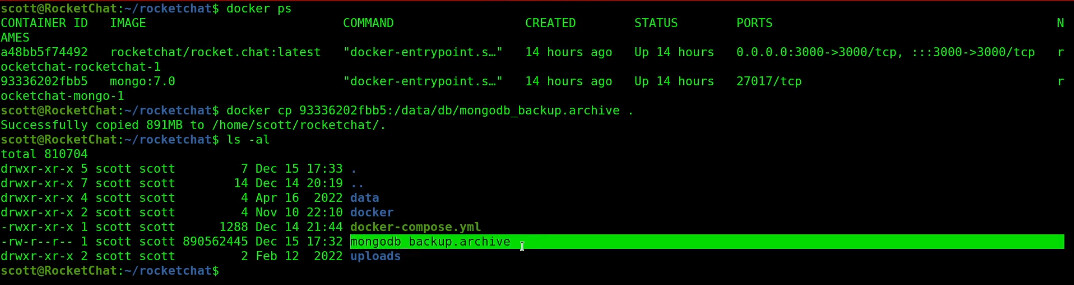
Sign on to your old (or really any existing RocketChat installation). Check the running containers.
docker ps

Here’s an example command to perform a backup of the database inside of your MongoDB container (your container ID will differ).
BIG GLARING NOTE: Realize that you must have exactly the same version of MongoDB running on the server you are backing up on the server on which you want to restore the backup.
docker exec 93336202fbb5 mongodump --archive=/data/db/mongodb_backup.archive
The command above created a backup inside of the container and the following command copies that backup to outside the container.
docker cp 93336202fbb5:/data/db/mongodb_backup.archive .
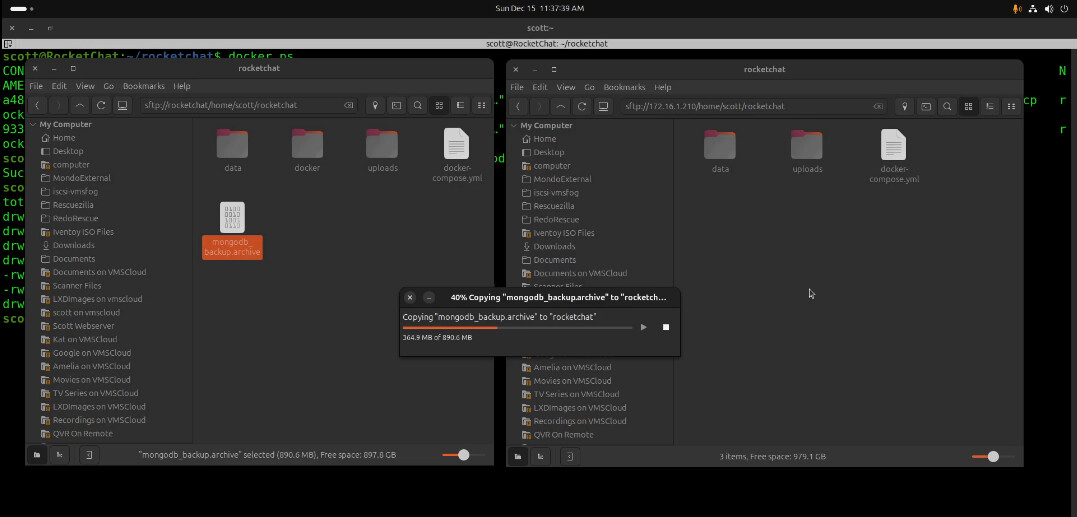
In the video, I used Secure File Transfer Protocol (SFTP), which is a part of openssh-server, to copy the backup file from my old rocketchat server to the new rocketchat server that we just installed. This was a simple drag and drop copy.
Now log off of the Rocketchat server on which we just created the backup and log into the new target Rocketchat server where you want to restore the database backup.
Here’s the terminal session on the new RocketChat server showing the database backup we just moved.

First, stop the RocketChat server, but leave the database up and running.
docker stop rocketchat-rocketchat-1

Now we will copy the backup archive inside of the mongodb container. (Note your ID will differ).
docker cp mongodb_backup.archive 45ebbc664cbb:/data/db/mongodb_backup.archive
Now execute the database restore:
docker exec 45ebbc664cbb mongorestore --archive=/data/db/mongodb_backup.archive
Once the restore is complete:
docker compose down
Start the container with:
docker compose up --build -d
At this point, as long as your backup versions of RocketChat and MongoDB were the same on the old and the new server, everything should be good. If you edited your docker-compose file to specify a specific rocketchat container tag to match your old server, you will want to change it back to the “latest” tag.
To update to new versions of RocketChat as they are released:
docker pull rocketchat/rocket.chat:latest
docker compose stop rocketchat
docker compose rm rocketchat
docker compose up -d
In the tutorial, I showed that the new Rocketchat server has the rooms, users, and conversations from the old server.