Upgrading to a larger disk is something we all have to do eventually. In this tutorial we talk about how to expand the partitions and file systems on the new drive to take advantage of the space.
In November of 2022 I presented a similar tutoral entitled Moving a Linux Server to a Larger Drive. That tutorial focused on resizing a Linux boot partition on a Logical Volume Manager (LVM) file system.
This time I am focusing on resizing (enlarging) a root partition for a simple partition for a typical desktop. My use case in the video is enlarging the root partition for an Incus virtual machine that is running my Home Assistant that is running out of space.
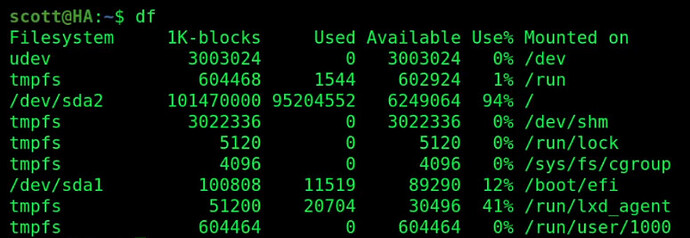
All disk drives are what we refer to as block oriented storage. Disk drives have partition tables with partitions on them and file systems in the partitions. Here’s an example of a listing of the mounted file systems on my Home Assistant installation on an Incus VM.
Note that in the example above, the root (/) partition is on /dev/sda2 in my case. Be sure to examine your system with a “df” command to see where your root file system is mounted.
Linux servers often do not use this simple file layout and instead use something called Logical Volume Manager (LVM). LVM is a way to layout a single “logical” volume which may consist of many physical volumes or entire hard drives. LVM is a often referred to as a Just a Bunch of Disks (JBOD), and so there is no built in safety for them. However, managing large disk farms is easy with an LVM and the underlying structure is often RAID. Anyway, my tutorial notes linked above, address how to resize a single disk LVM often found on servers, so I won’t address that here.
An LVM “maps” space to partitions and will look like the following:
Just to be clear, today we are dealing with resizing a simple root partition and not an LVM as covered in the other article.
In the case of replacing a physical desktop drive with a larger drive, my suggestion is to use Rescuezilla to image or clone your existing disk to a new and larger disk. You might want to watch my last video where I not only used Rescuezilla to make a copy of a drive, but I customized Rescuezilla to work with iSCSI target storage offered by my NAS for convenience.
In my use case, which is enlarging my Incus Virtual machine which happens to host my Home Assistant instance, I need to first stop and then take a snapshot of the Incus VM for safety.
incus stop HomeAssistant
incus snapshot create HomeAssistant ReforeDriveResize
For my Incus VM I don’t really have a way to operate on the hard drive without having the VM booted. In the case of the desktop, it’s possible to boot a live Ubuntu CD (the ISO to install Ubuntu, but used in the “try Ubuntu mode” rather than installing Ubuntu).
It’s possible to resize the root partition of a running system without booting a live CD, just not as safe. Maybe that’s not an issue since you would still have the older smaller drive in reserve in case of a problem since all you do is back it up with Rescuezilla which does not modify it in any way.
In the video I say that the root partition needs to not be mounted for this operation, but you really can do this on a booted Linux and it will work. It’s just not as safe as mentioned above.
My Incus VM for HomeAssistant has a drive size of 100GiB. It is nearly full and so for this exercise, I am resizing it to 150GiB. To do that, I used this command:
incus config device override HomeAssistant root size=150GiB
Now I can restart my Incus VM.
incus start HomeAssistant
From this point on, the instructions are the same for a physical computer or an Incus VM. If you want to exercise more safety for modifying the desktop computer, you can always boot a live USB as mentioned earlier and modify the drive, but that’s your choice.
I’m able to perform these opearations on the running OS, so I did so on my Incus VM.
So, at this point you will have a larger Incus VM disk or a larger physical drive that you cloned. However, the system partition and the file system do not reflect the larger size.
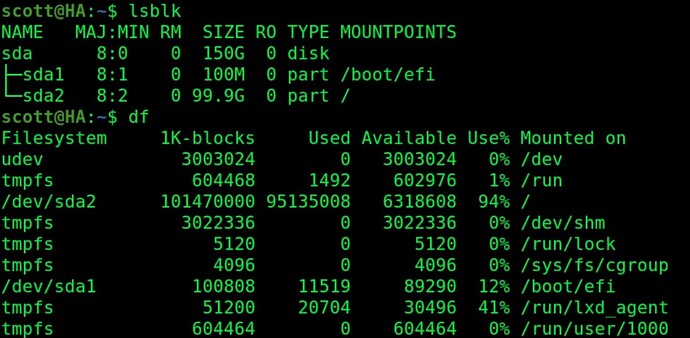
By viewing the block oriented storage (lsblk) I can see that device sda (your drive may be different) has the new 150GB size.
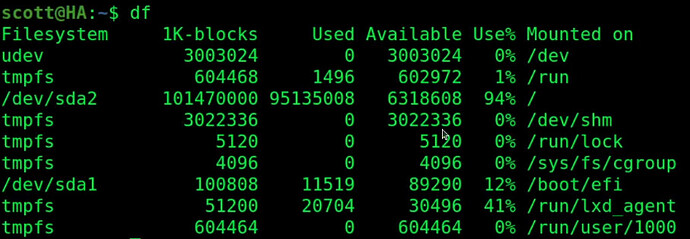
However, the “df” command still shows that the /dev/sda2 partition where the root partition is mounted (yours may differ) is still 94% used.
To resize the root partition of your drive be sure to identify which drive that you want to change in case you have more than one drive. In my case, the drive I want to modify is /dev/sda:
sudo parted /dev/sda
At the “parted” prompt I want to resize the root partition (/dev/sda2) to utilize 100% of the new space.
resizepart 2 100%
To exit parted:
quit
Despite resizing the partition, I still do not see any additional space on the root partition and that is because I resized the partition, but not the file system inside of that partition.
To resize the file system inside of the root partition to use all of the space inside of the partition assuming my root partition is /dev/sda2:
sudo resize2fs /dev/sda2
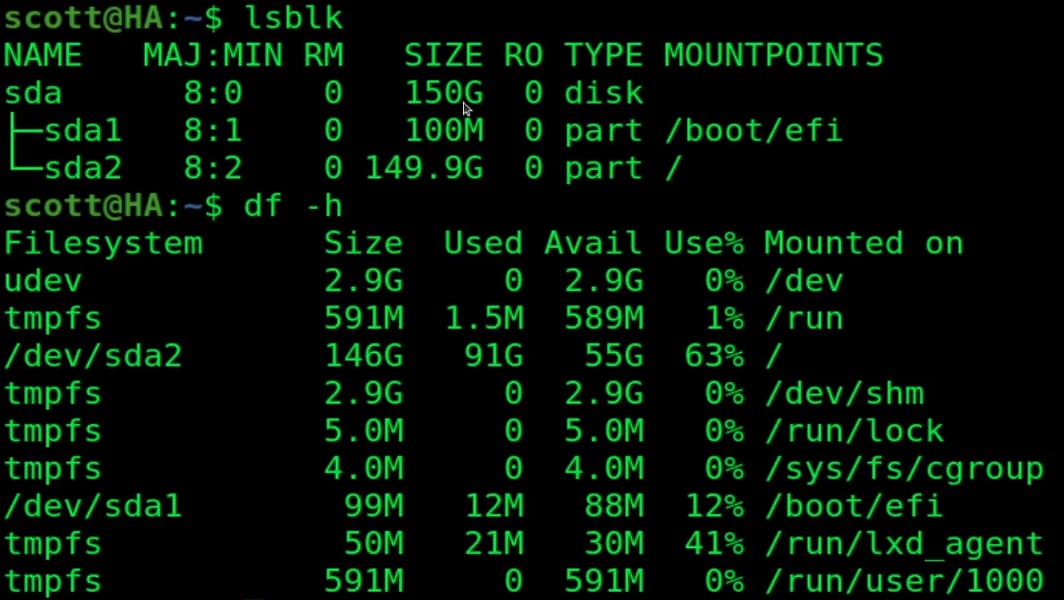
Note that the lsblk command shows that device sda is 150GB and that the “df -h” command now shows the root (/) partition to be 146GB formatted instead of 99GB and the drive space in use is only 63%.
That’s all there is to enlarging the root partition and the file system inside of the root partition to take advantage of a new larger drive both in an incus VM or on a desktop system.
This can also be used to enlarge a Windows C drive, although you may have to move the recovery partition because partition drive space must be contiguous. consider using “gparted” from your booted Rescuezilla disk as a way to more easily see what you are doing in the case of a Windows disk.


