I use Apache Guacamole, Remotely, and Rustdesk for open source self hosted remote assistance tools. This time I show how to install and configure MeshCentral for the Home Lab and for remote assistance.
NOTE: This document was last updated on 10-November-2025 to incorporate additional improvements and performance tuning which is different from what was stated in the video tutorial. Be sure to follow what I state below.
MeshCentral is more robust than any of the tools mentioned above because it provides not only remote control of a remote system, but also system monitoring, and command line access. MeshCentral is regarded as an enterprise class tool or one that a managed service provider might use.
MeshCentral has a resident agent that is a client you can install on the system that you want to control. The resident agent provides the ability to allow for connection to unattended systems or for monitoring unattended systems.
The MeshCentral “Instant Client” is a link that you can send to someone you want to have download a client that is installed for a one-off support session. Once they disconnect from the instant session, there is no access to their system unless they explicitly begin another session.
MeshCentral is a web app meaning that it can be hosted on port 443 and behind NginX Proxy Manager unlike Rustdesk which requires a range of open ports.
Both Remotely and Rustdesk are installed with Docker. MeshCentral is written in Javascript Runtime (Node.js) and Node Package Manager (NPM).
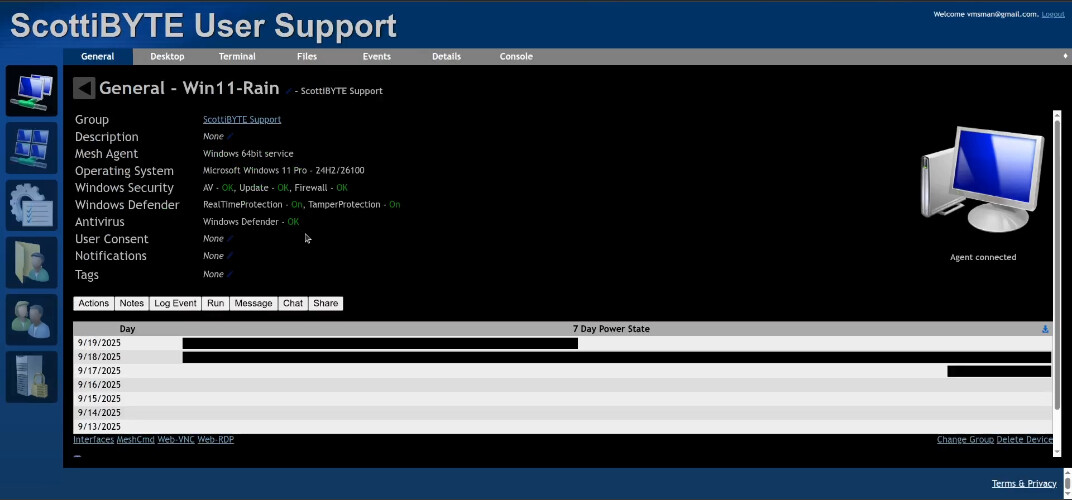
MeshCentral is also very good at monitoring systems connected with its resident agent.
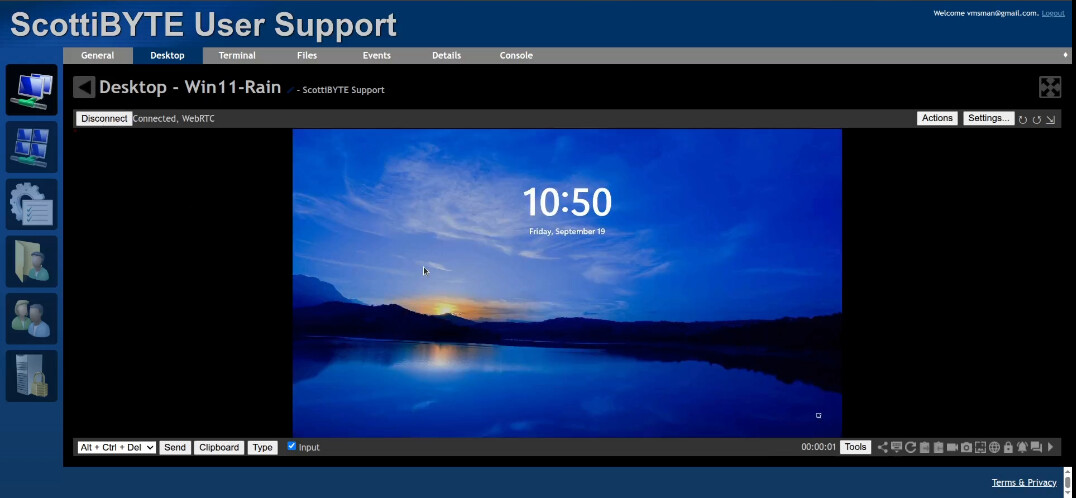
MeshCentral supports a graphical connection.
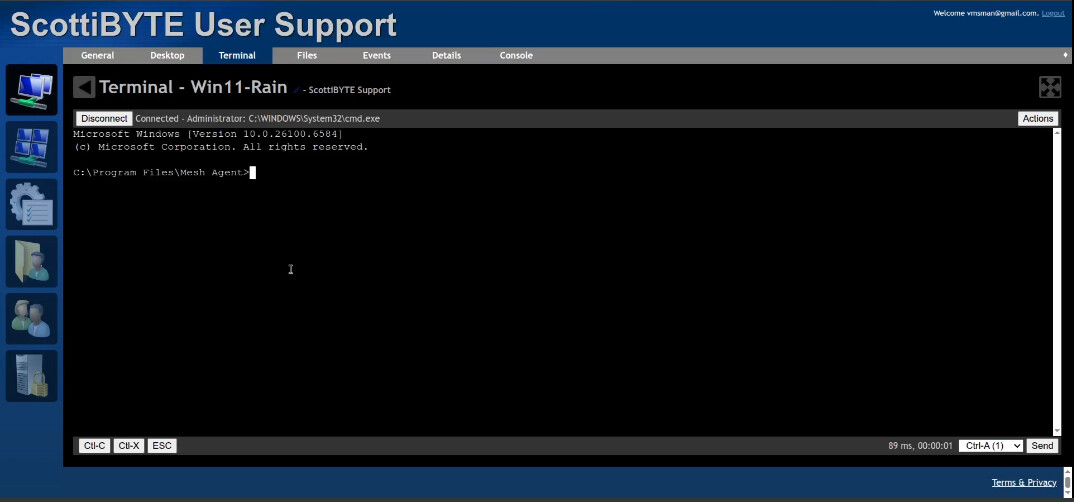
Likewise, it supports a command line interface.
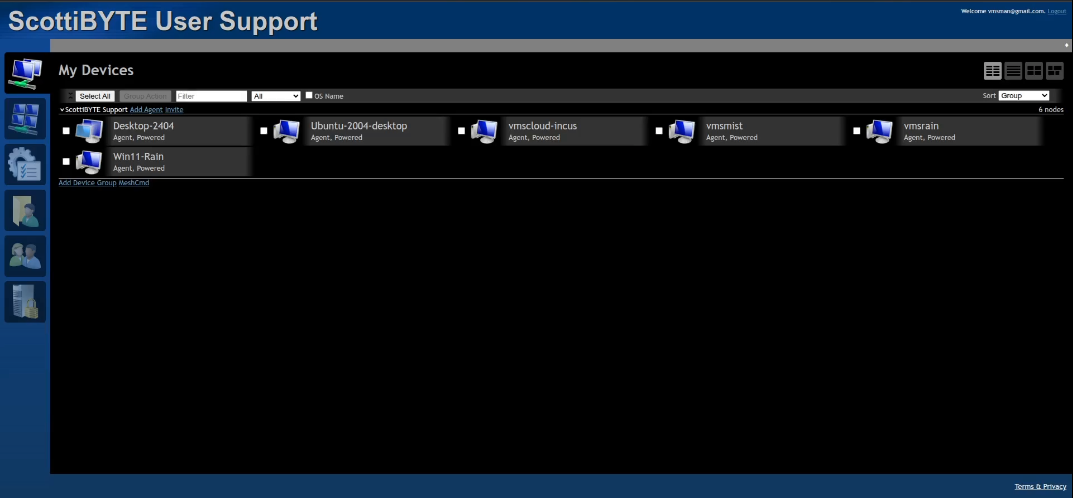
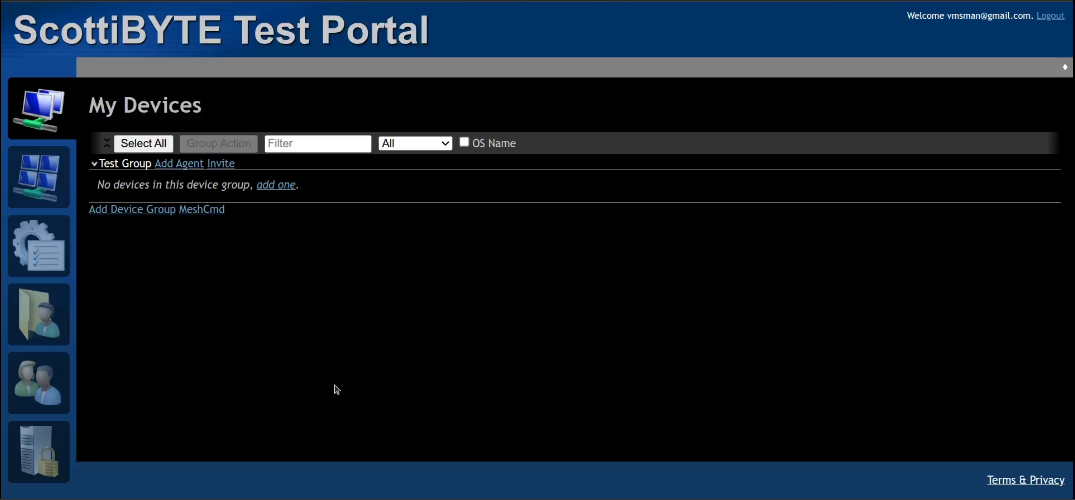
The user interface allows the creation of groups and devices can be managed inside of groups. All of my devices below are in a group named “ScottiBYTE Support”.
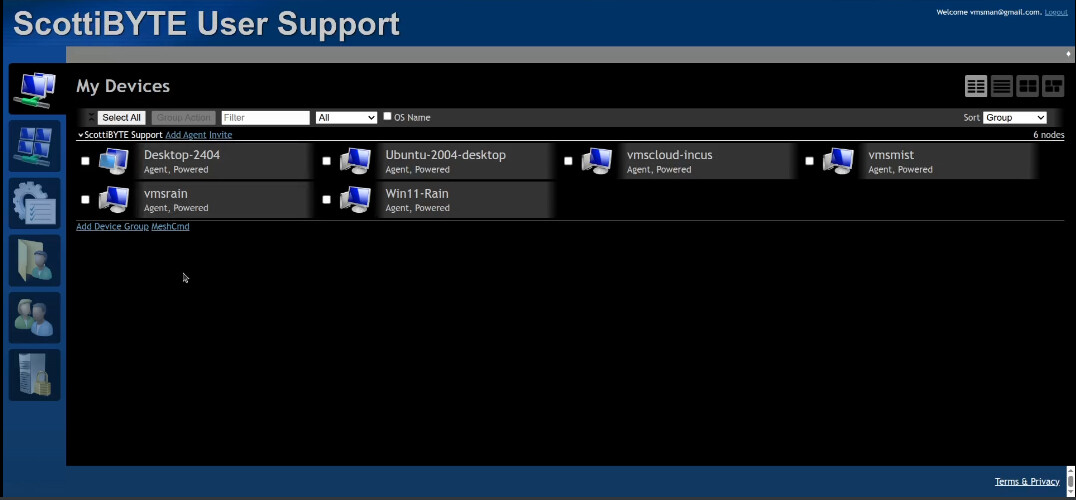
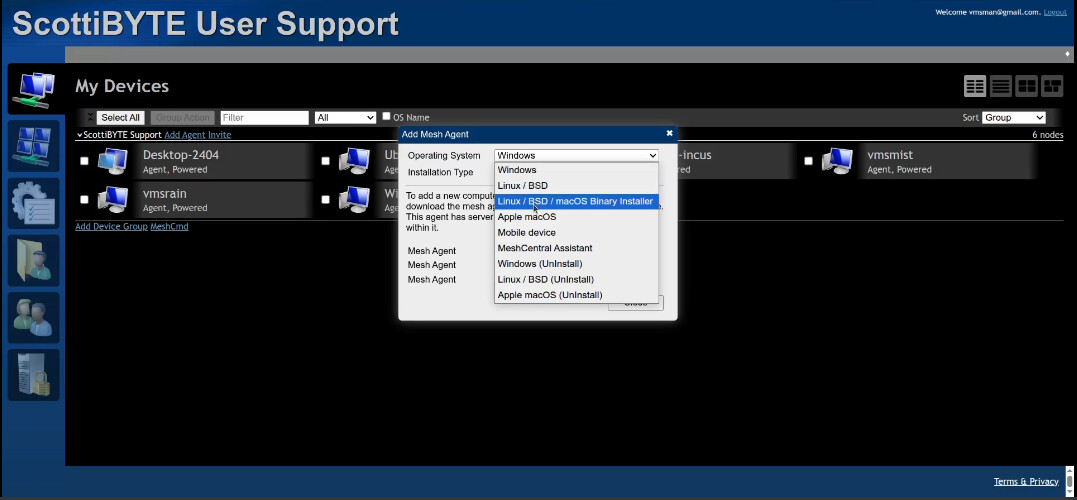
The “Add Agent” option allows for the installation of a resident agent that will provide realtime monitoring and remote control capability.
The “Invite” option provides a portable agent for one-time support or under the control of the target user because no agent is installed permanently.
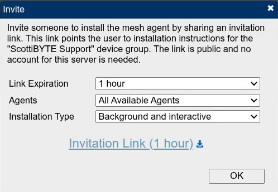
Once you click the “Invitation Link” (you can also download it). The link takes you to a screen like this with all the types.
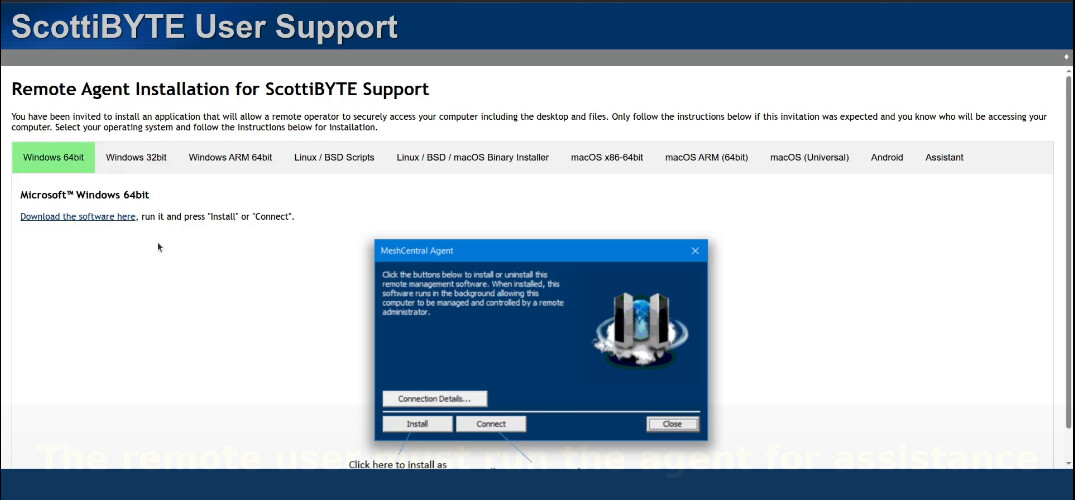
The idea is that you would email this link to the person you want to assist unless you configure the SMTP email options. They would click on the link and download the agent or follow the instructions in the email. When they run the downloaded agent it will appear like this.
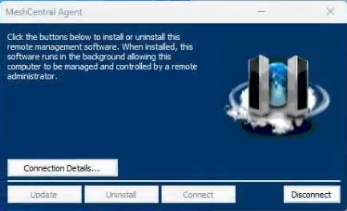
Clicking “Connect” runs the agent instantly without installing it. When the remote user clicks “Disconnect” that ends the remote assistance session.
I am installing MeshCentral in an Incus container. I creating the container with an address on my LAN:
incus launch images:ubuntu/24.04 MeshCentral -p default -p bridgeprofile -c boot.autostart=true
Connect to the container.
incus shell MeshCentral
Accept the updates.
apt update && apt upgrade -y
Install some dependencies.
apt install nano net-tools openssh-server curl wget git build-essential -y
Add a user account.
adduser scott
Grant sudo privilege to the user.
usermod -aG sudo scott
Move to the user account.
su - scott
Install Node.js.
curl -fsSL https://deb.nodesource.com/setup_20.x | sudo -E bash -
sudo apt install -y nodejs
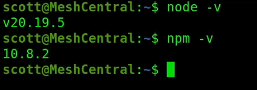
Verify the versions of the installs.
node -v
npm -v
Create the folder for MeshCentral:
sudo mkdir -p /opt/meshcentral
Change the ownership of the folder to your username with the following command. $USER is a standard Linux variable that is the currently logged in user.
sudo chown $USER:$USER /opt/meshcentral
Move over to the installation location.
cd /opt/meshcentral
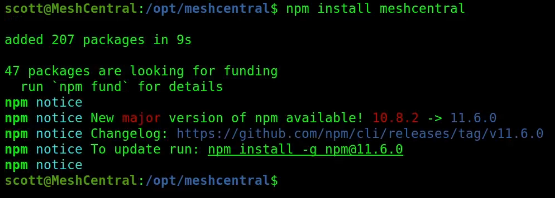
Install MeshCentral.
npm install meshcentral
Create a MeshCentral data folder.
mkdir meshcentral-data
Edit the configuration file for MeshCentral. I have made several updates since the video.
sudo nano /opt/meshcentral/meshcentral-data/config.json
Insert the following into the editor.
{
  "$schema": "https://raw.githubusercontent.com/Ylianst/MeshCentral/master/meshcentral-config-schema.json",
  "settings": {
    "cert": "mesh.example.com",
    "WANonly": true,
    "Port": 3000,
    "AliasPort": 443,
    "RedirPort": 0,
    "TLSOffload": true,
    "AgentPing": 60,
    "AgentPong": 900,
    "AgentIdleTimeout": 0,
    "AdminCanSeeAllDevices": true,
    "ignoreWebCert": true,
    "ignoreagenthashcheck": false,
    "plugins": { "enabled": true },
    "webrtc": true,
    "WebTimeout": 6000000,
    "TrustedProxy": "1.2.3.4",
    "SessionTimeOut": 0,
    "AllowHighQualityDesktop": true,
    "MaxInvalidLogin": 5,
    "webrtcConfig": {
      "iceServers": [
        { "urls": "stun:stun.l.google.com:19302" },
        { "urls": "stun:stun1.l.google.com:19302" },
        { "urls": "stun:stun2.l.google.com:19302" }
      ]
    },
    "log": "meshcentral.log"
  },
  "domains": {
    "": {
      "title": "My User Support",
      "newAccounts": true,
      "mstsc": true,
      "ssh": true,
      "agentInviteCodes": true,
      "userInviteCodes": true,
      "agentConfig": true,
      "deviceGroupActions": true,
      "certUrl": "https://mesh.example.com:443",
      "userNameIsEmail": true,
      "smtp": {
        "host": "smtp.gmail.com",
        "port": 465,
        "from": "example@gmail.com",
        "user": "example@gmail.com",
        "pass": "myemailpassword",
        "tls": true,
        "verifyEmail": true
      }
    }
  }
}
Be sure to change the domain from mesh.example.com to the subdomain that you created at your domain name service provider. Change the TrustedProxy to the TCP/IP address of your NginX Proxy Manager. Fill in the SMTP section for your email settings which is critical. Change the titles according to your liking. Also change the certURL to be your subdomain. Finally, CTRL O and enter to save the file and CTRL X to exit the nano editor.
To have MeshCentral run when the container starts, we will create a systemd service.
sudo nano /etc/systemd/system/meshcentral.service
Insert the following into the file.
[Unit]
Description=MeshCentral Server
After=network.target

[Service]
Type=simple
User=scott
WorkingDirectory=/opt/meshcentral
ExecStart=/usr/bin/node /opt/meshcentral/node_modules/meshcentral
Restart=always

[Install]
WantedBy=multi-user.target
Be sure to change the “scott” username to your username. Save the file with CTRL O and enter and CTRL X to exit the editor.
Reload the service folder.
sudo systemctl daemon-reload
Add the service to run on reboot.
sudo systemctl enable meshcentral
Start the service now.
sudo systemctl start meshcentral
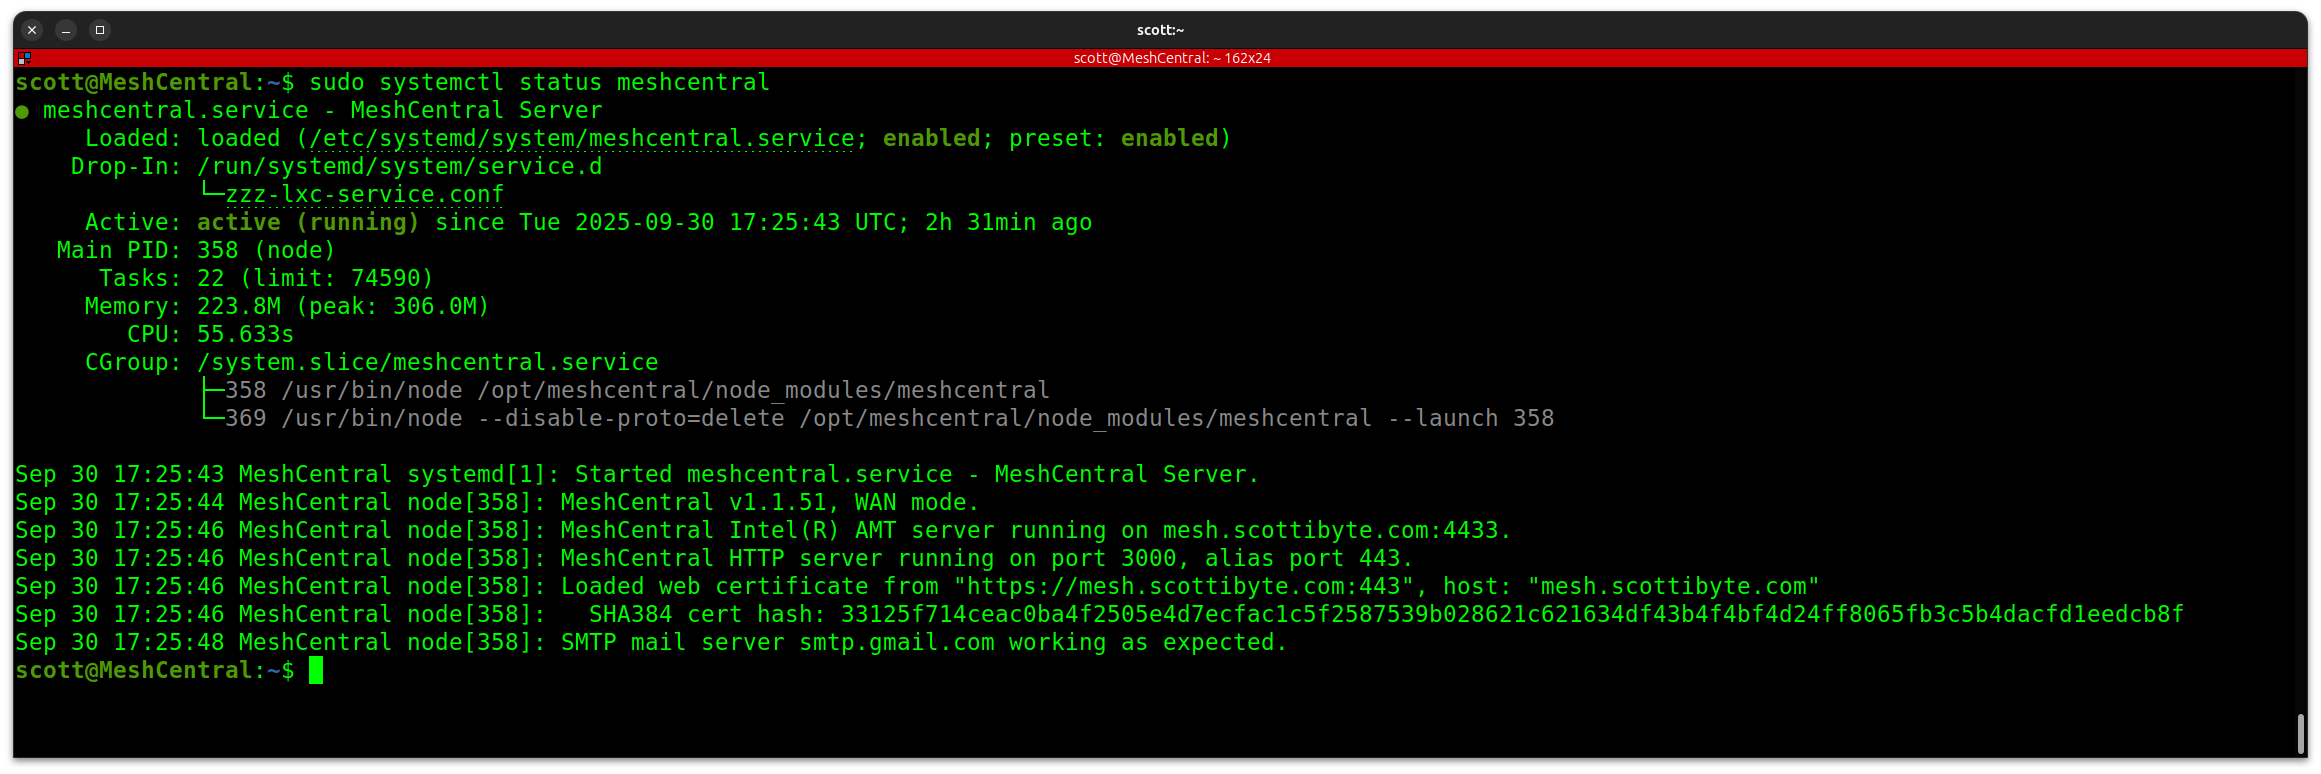
Check the status to make sure it is started.
sudo systemctl status meshcentral
MeshCentral gets regular updates. To update your MeshCentral:
cd /opt/meshcentral
sudo npm install meshcentral@latest
sudo systemctl restart meshcentral
To see your currently running version number:
npm list meshcentral
Find out the address of your container.
ifconfig
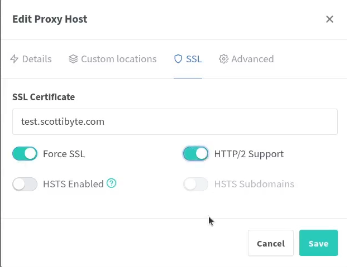
Go to your NginX Proxy Manager and add a new proxy record with your domain name (matches the one in config.json) and the address you just found and the other settings below.
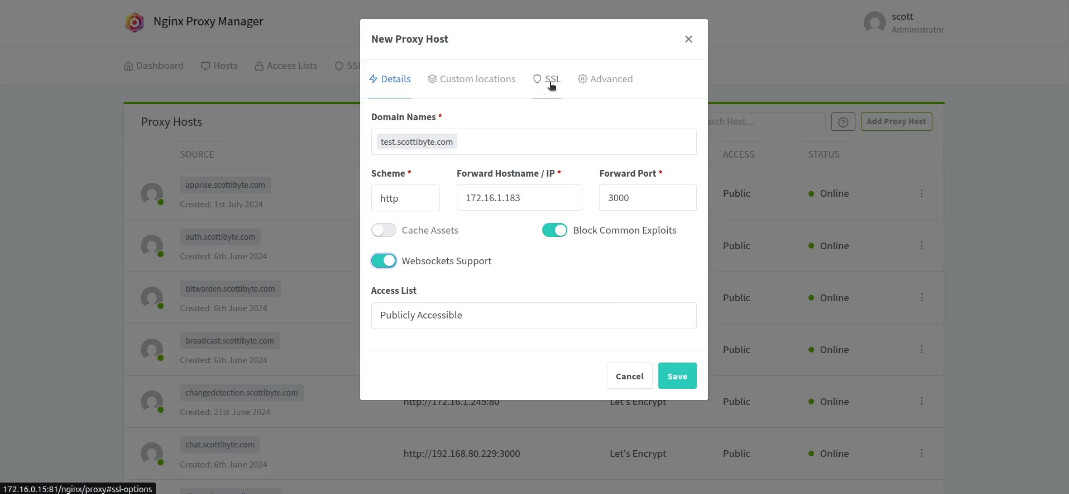
Head over to the SSL tab and and request a new certificate.
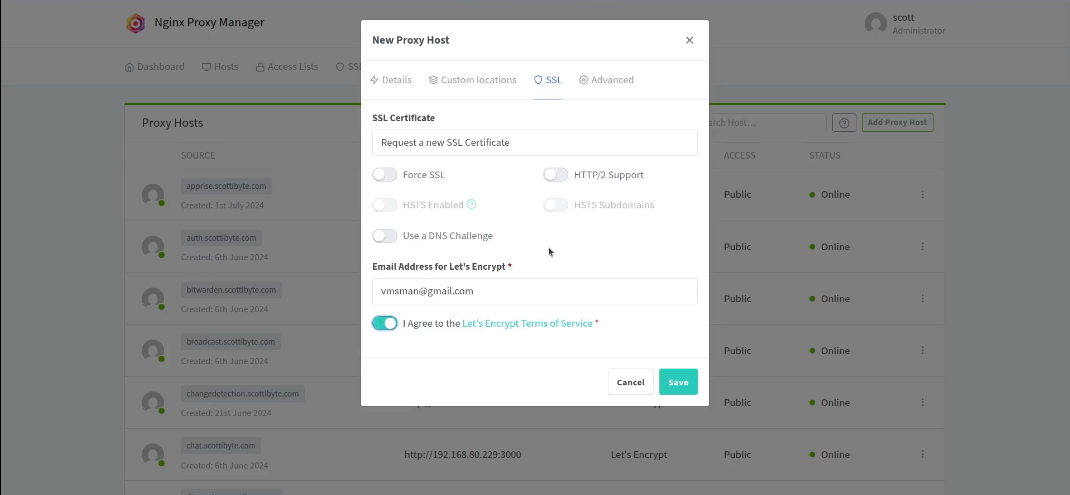
Due to additional testing, I was able to remove the “advanced” code section shown in the video. Once your proxy record is added, go back in and edit it and set the following:
Something else that you will need to do to make this work properly on your local network is to create a local DNS name. This may not be required on some router/gateways. The issue is that MeshCentral may not work well with NAT pinning which is a situation where the program goes out your WAN port and comes back in to access a local server to be remote controlled.
To solve this problem, define a local DNS name on your network that points your MeshCentral subdomain name to the LAN address of your NginX Proxy Manager (NPM) Server.
I already do this with my Pi-hole on many of my NginX Proxied services. Basically, I have my scottibyte.com domain point to the LAN address of my NPM. Then, I create a CNAME record on my LAN that points my MeshCentral subdomain name to my scottibyte.com. If you don’t do this, you may find that you can connect and control systems on the Internet, but not on your local network.
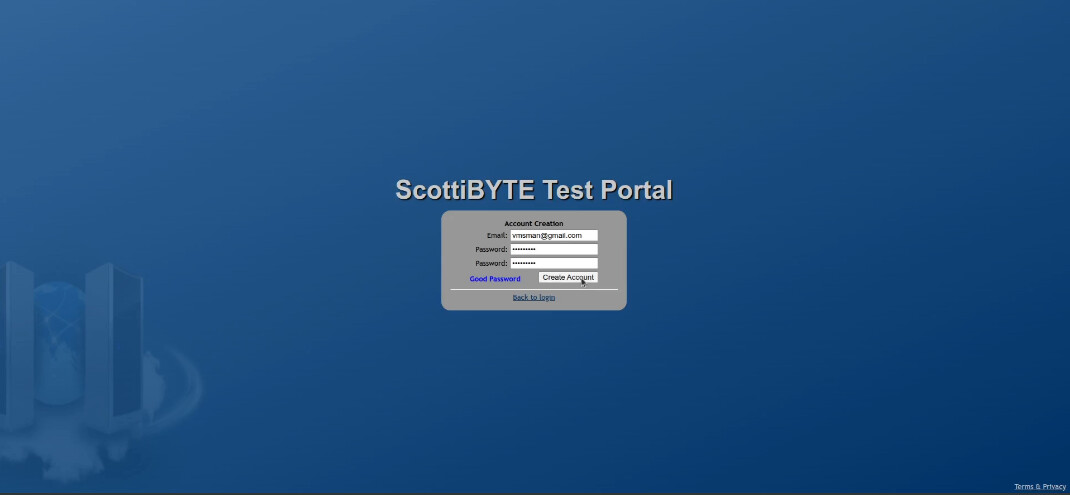
Once you create the DNS entry described above, visit your domain name and you should see a login window.
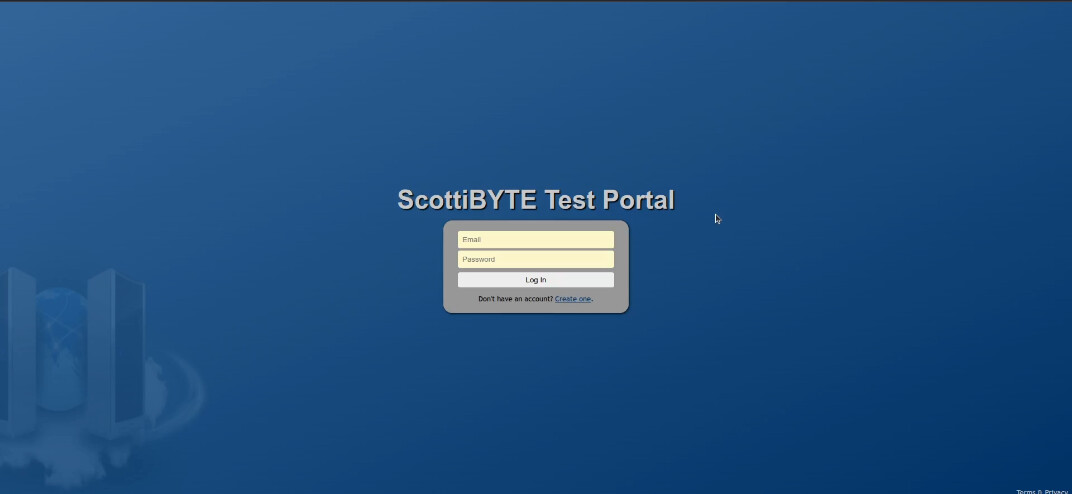
Click the option to create an account. This will create the admin account.
You will now be logged in and you can begin using MeshCentral.
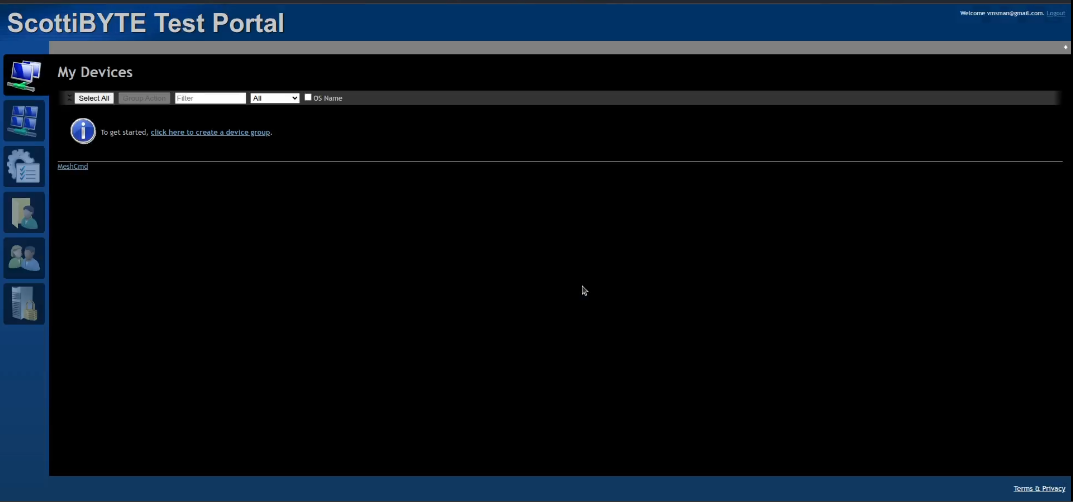
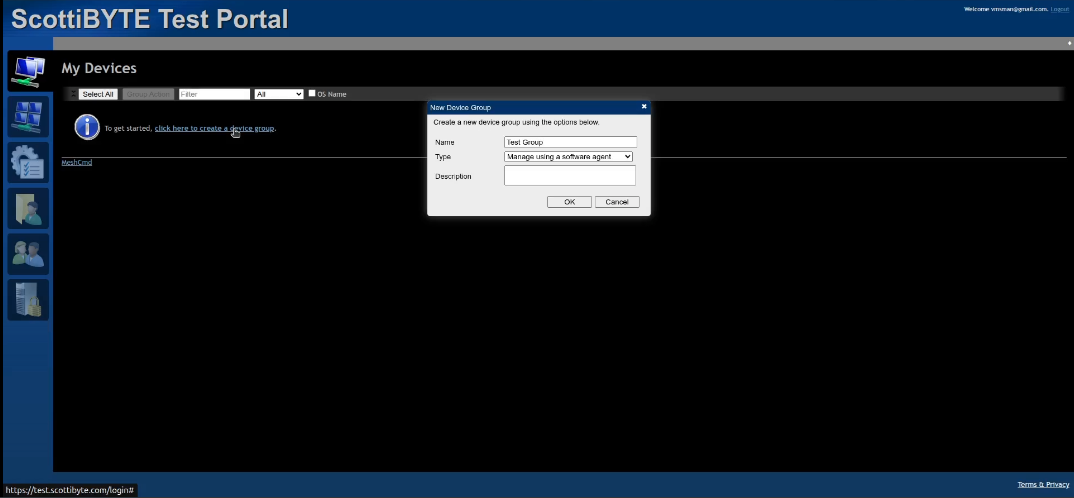
Start by creating a device group. You must have a group before any devices can be added.
With the group created, you can begin adding systems with either the “Add Agent” or the “Invite” options.
Enjoy your MeshCentral system.