PaperlessNGX is an open source web based document management system. In this tutoral, I show how to install PaperlessNGX in an Incus container.
Start by creating an incus container for PaperlessNGX:
incus launch images:ubuntu/24.04 PaperlessNGX -p default -p bridgeprofile -c boot.autostart=true -c security.nesting=true
Connect to the newly created container and update the repositories.
incus shell PaperlessNXG
apt update
Install some dependencies.
apt install curl nano net-tools openssh-server -y
Install docker since PaperlessNGX is a docker application.
curl -sSL https://get.docker.com | sh
Add a user account and place it in the sudo and docker groups for management purposes.
adduser scott
usermod -aG sudo scott
usermod -aG docker scott
Move over to the new user account.
su - scott
Create an application folder and move into it.
mkdir paperlessngx
cd paperlessngx
Create a docker compose file:
nano docker-compose.yml
Insert the following code into the file.
services:
  broker:
    image: docker.io/library/redis:7
    restart: always
    volumes:
      - ./redisdata:/data

  db:
    image: docker.io/library/postgres:15
    restart: always
    volumes:
      - ./pgdata:/var/lib/postgresql/data
    environment:
      POSTGRES_DB: paperless
      POSTGRES_USER: paperless
      POSTGRES_PASSWORD: PostgresPassword

  webserver:
    image: ghcr.io/paperless-ngx/paperless-ngx:latest
    restart: always
    depends_on:
      - db
      - broker
      - gotenberg
      - tika
    ports:
      - "80:8000"
    healthcheck:
      test: ["CMD", "curl", "-fs", "-S", "--max-time", "2", "http://localhost:8000"]
      interval: 30s
      timeout: 10s
      retries: 5
    volumes:
      - ./data:/usr/src/paperless/data
      - ./media:/usr/src/paperless/media
      - ./export:/usr/src/paperless/export
      - ./consume:/usr/src/paperless/consume
    env_file: docker-compose.env
    environment:
      PAPERLESS_REDIS: redis://broker:6379
      PAPERLESS_DBHOST: db
      PAPERLESS_DBPASS: PostgresPassword
      PAPERLESS_TIKA_ENABLED: 1
      PAPERLESS_TIKA_GOTENBERG_ENDPOINT: http://gotenberg:3000
      PAPERLESS_TIKA_ENDPOINT: http://tika:9998

  gotenberg:
    image: docker.io/gotenberg/gotenberg:7.10
    restart: always

    # The gotenberg chromium route is used to convert .eml files. We do not
    # want to allow external content like tracking pixels or even javascript.
    command:
      - "gotenberg"
      - "--chromium-disable-javascript=true"
      - "--chromium-allow-list=file:///tmp/.*"

  tika:
    image: apache/tika:latest-full
    restart: always
Change the two locations for the Postgres password above mentioned in the video and be sure that they match. Do a CTRL O and enter to write the file out and a CTRL X to exit the nano editor.
Now create the environment variable file:
nano docker-compose.env
Insert the text below into the file.
# The UID and GID of the user used to run paperless in the container. Set this
# to your UID and GID on the host so that you have write access to the
# consumption directory.
USERMAP_UID=1001
USERMAP_GID=1001

# Additional languages to install for text recognition, separated by a
# whitespace. Note that this is
# different from PAPERLESS_OCR_LANGUAGE (default=eng), which defines the
# language used for OCR.
# The container installs English, German, Italian, Spanish and French by
# default.
# See https://packages.debian.org/search?keywords=tesseract-ocr-&searchon=names&suite=buster
# for available languages.
#PAPERLESS_OCR_LANGUAGES=tur ces

###############################################################################
# Paperless-specific settings                                                 #
###############################################################################

# All settings defined in the paperless.conf.example can be used here. The
# Docker setup does not use the configuration file.
# A few commonly adjusted settings are provided below.

# This is required if you will be exposing Paperless-ngx on a public domain
# (if doing so please consider security measures such as reverse proxy)
PAPERLESS_URL=https://paperless.yourdomain.com

# Adjust this key if you plan to make paperless available publicly. It should
# be a very long sequence of random characters. You don't need to remember it.
PAPERLESS_SECRET_KEY=astringofrandomcharacters

# Use this variable to set a timezone for the Paperless Docker containers. If not specified, defaults to UTC.
#PAPERLESS_TIME_ZONE=America/Chicago

# The default language to use for OCR. Set this to the language most of your
# documents are written in.
#PAPERLESS_OCR_LANGUAGE=eng
#PAPERLESS_FORCE_SCRIPT_NAME=/PATHPREFIX
#PAPERLESS_STATIC_URL=/PATHPREFIX/static/ # trailing slash required
If you plan to make your PaperlessNGX instance available on the Internet, you will need to create a subdomain name at your DNS provider as described in many of my tutorials. You will also need to adjust the PAPERLESS_URL in the file you are editing. In addition, change the PAPERLESS_SECRET_KEY to a random string for security. You may also want to remove the hashtag from the front of the PAPERLESS_TIME_ZONE variable and set it to your local time zone.
Once you have made these changes, CTRL O and enter to write the file out and CTRL X to exit the nano editor.
To download the container overlays and start PaperlessNGX for the first time:
docker compose up -d
After the docker compose finishes, you will want to do a “docker ps” command and wait untill the application is “healthy” and not “starting”.
docker ps

After PaperlessNGX is in the healthy state, but before you can use it you must execute a command to execute the initial database setup and create an admin username and password.
docker compose run --rm webserver createsuperuser
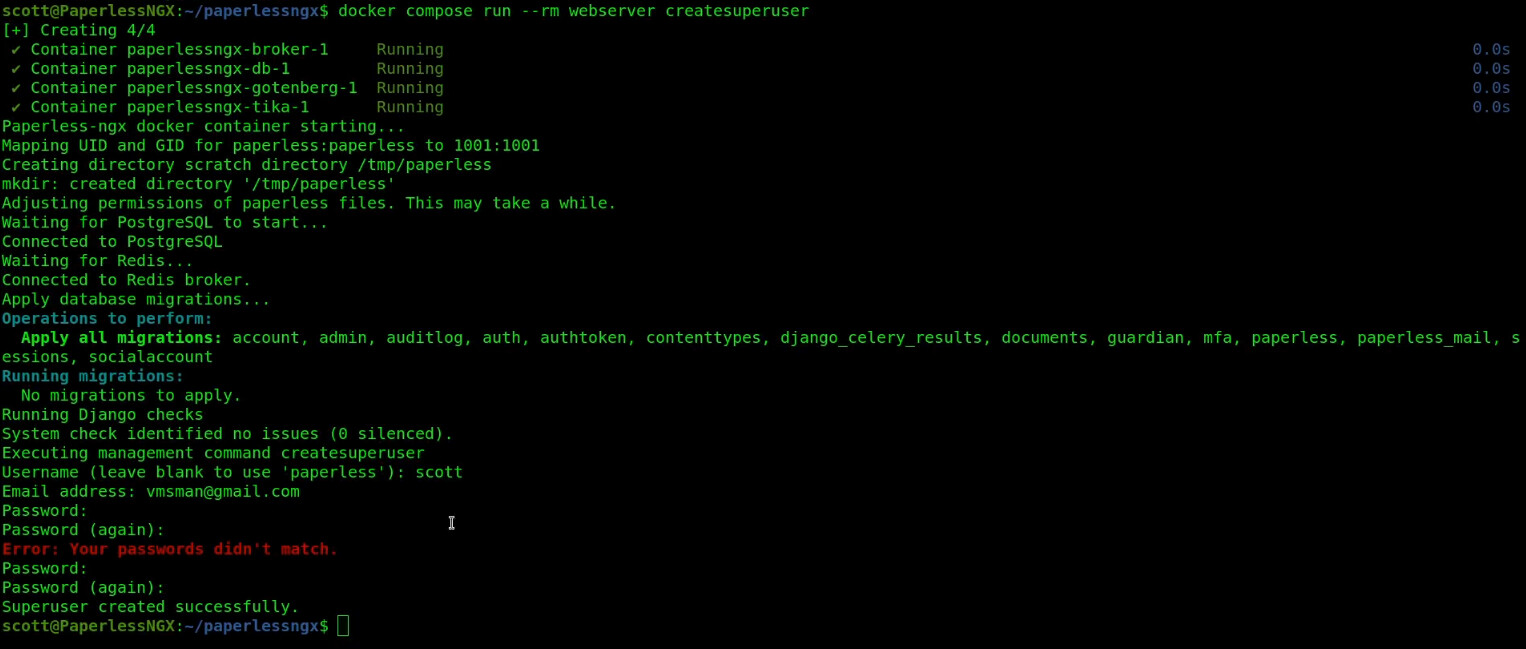
It may take a couple minutes before you see the username prompt. I initially mistyped my password notification and had to enter it twice. You should see “Superuser created successfully” once completed as above.
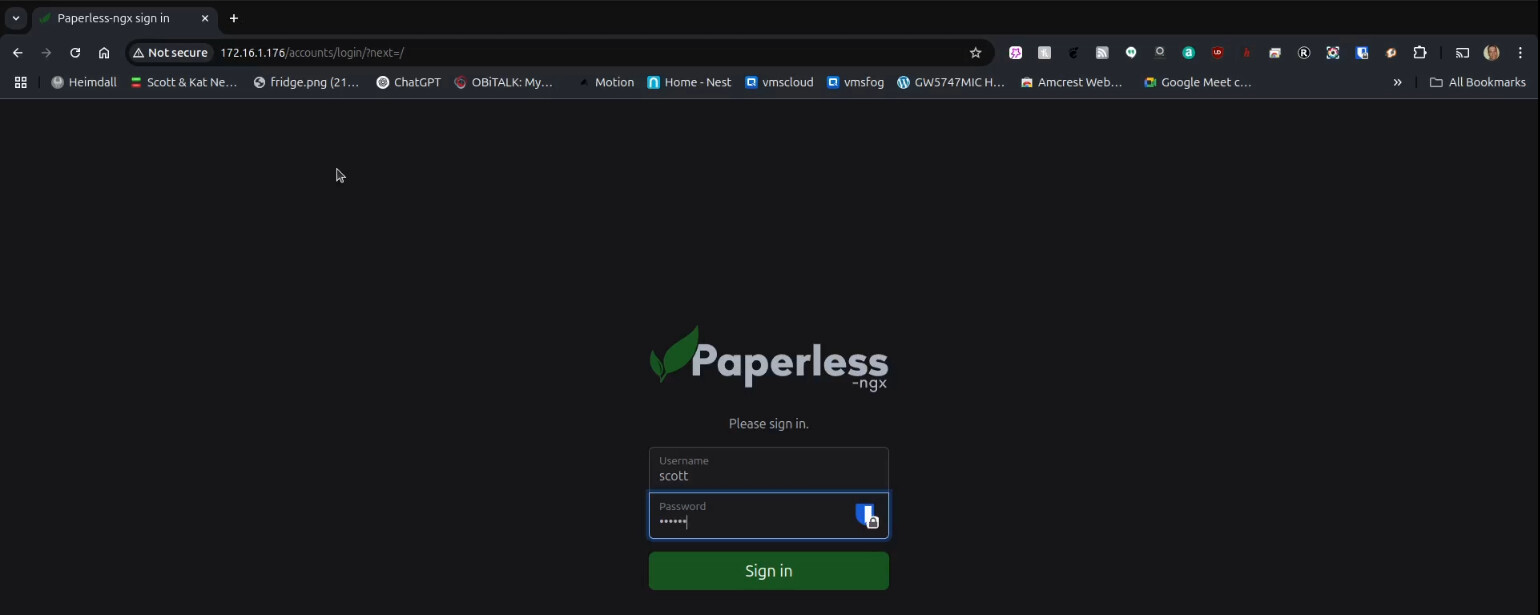
List your network devices and look for the address for eth0. Your address will differ from mine.
ifconfig

Go to your web browser at the address you just found and you should see the login screen where you will use the username and password you just created to log in as the administrator.
After you login, you will see the PaperlessNGX dashboard with an option to start the tour. The tour is helpful to get you started.
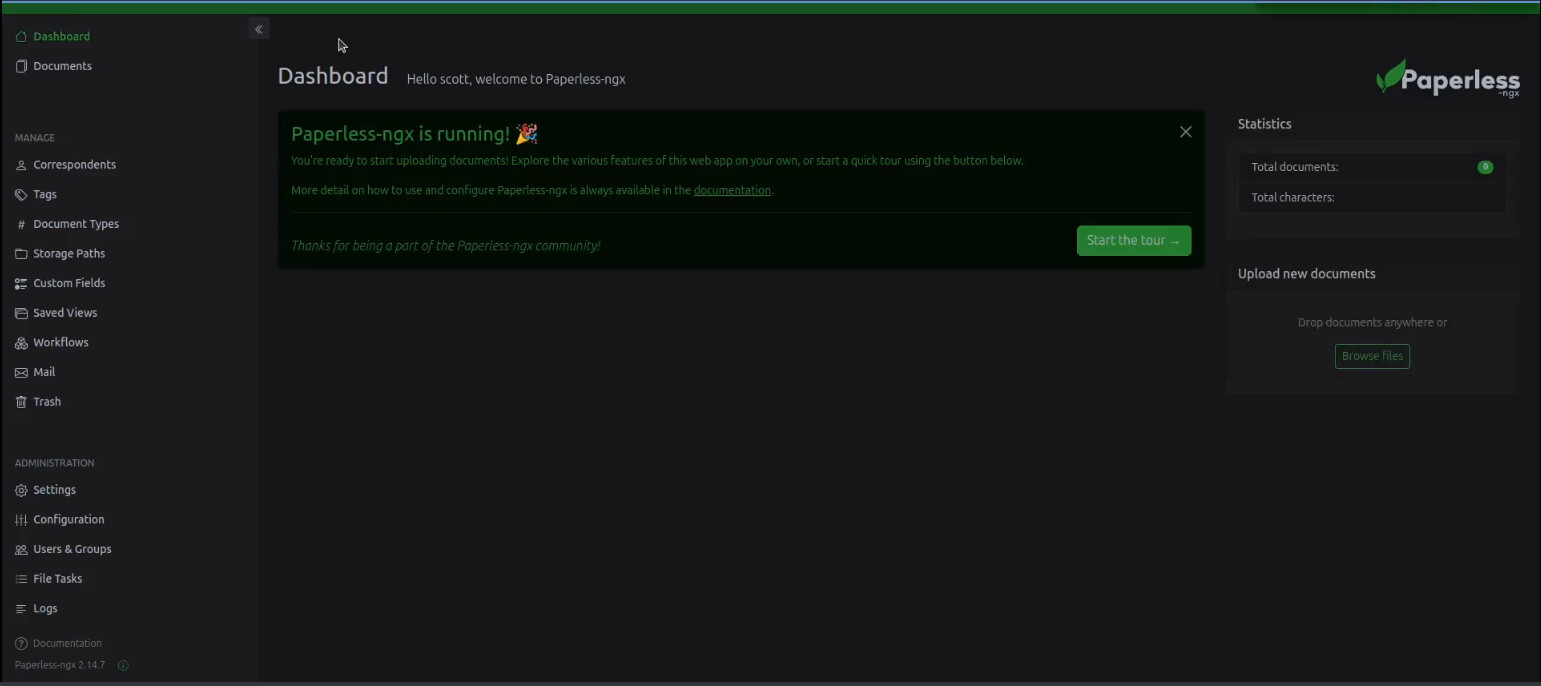
As shown in the video, you can drag and drop documents to add them to PaperlessNGX. Be sure to read the documentation to learn how to use the program.
You will also want to go to your router DHCP settings and set a DHCP reservation for your PaperlessNGX incus container to be sure it gets the same address always. Assuming you created a subdomain name, you will also want to create an NginX Proxy Manager record that points to this address at port 80.
PaperlessNGX supports creating other user accounts and documents can be shared or restricted to particular users and groups. This is a great program to safely store and reference all of your important documents.