NginX Proxy Manager (NPM) is a program that allows sharing your single ISP granted WAN address amongst multiple services that you want to offer from inside your network. It does so by looking at DNS subdomain names you define at your DNS Domain provider and selectively routing those requests to designated servers inside your network. Today we implement NPM in an Incus container.
About a year before this tutorial, I produced two videos, NginX Proxy Manager and Local DNS and another entitled Why you Need Reverse Proxy.
Since I have been covering implementing applications using the incus container virtualization tool, I wanted to cover NPM again. In the past, my NPM tutorials showed implementing NPM in a LXD container.
Before you can use a reverse proxy tool such as NPM, you must have purchased a domain from a domain name provider. My suggestion is to purchase a domain from Cloudflare.com because of the many services they provide. A domain can be purchased for as little as $9 USD per year.
Once you have a domain, it is advisable to define an “A Record” at your DNS Provider for your domain that simply points to the public address of your router granted by your Internet Service Provider (ISP).
You can easily find that address by entering the following in the URL line of your favorite browser:
https://ifconfig.me
It is desirable to have your domain name track the address of your WAN connection since it can change. I have another tutorial entitled Google Domains Migration to Cloudflare which has a section devoted to using the Cloudflare API to adjust your domain name address if it changes. The detailed show notes for that video are here. Towards the bottom of those notes I show creating a LXD container to accomplish this and it can be an incus container by simply changing the “lxc launch” to an “incus launch” when you create the container.
Each service that you want to define with NPM requires that you define a “CNAME” record at your Domain Name Service provider. A CNAME DNS record is simply an alias. That means that if the domain A record for “scottibyte.com” is defined as “1.2.3.4” then the CNAME record for “chat.scottibyte.com” simply points to scottibyte.com and that means that it also points to “1.2.3.4”. So, if you have 10 services defined by different subdomain names, they all point to the same address.
This may seem confusing at first, but realize that the job of the NPM software is to look at the subdomain name and to appropriately route the request to the correct server inside of your network that is hosting the service. The fact that the addresses of all your services are just the same public WAN address of your router, only means that connecting to your services is initiated by finding your router address which is where your “network lives”. The only exception to this is if your ISP grants you a Carrier Grade (CGNAT) address, in which case NPM will not work and you can stop reading this article. CGNAT provider examples are T-Mobile Home Internet and Starlink. Since CGNAT providers, AKA “double NAT” do not provide you a pubically accessible address, there is no way to reach your services. In that case, you might want to explore Cloudflare Tunnels, but that is for another day.
On my network, all of the “servers” are actually Incus Containers. If you haven’t gotten started with incus yet. watch Incus Containers Step by Step.
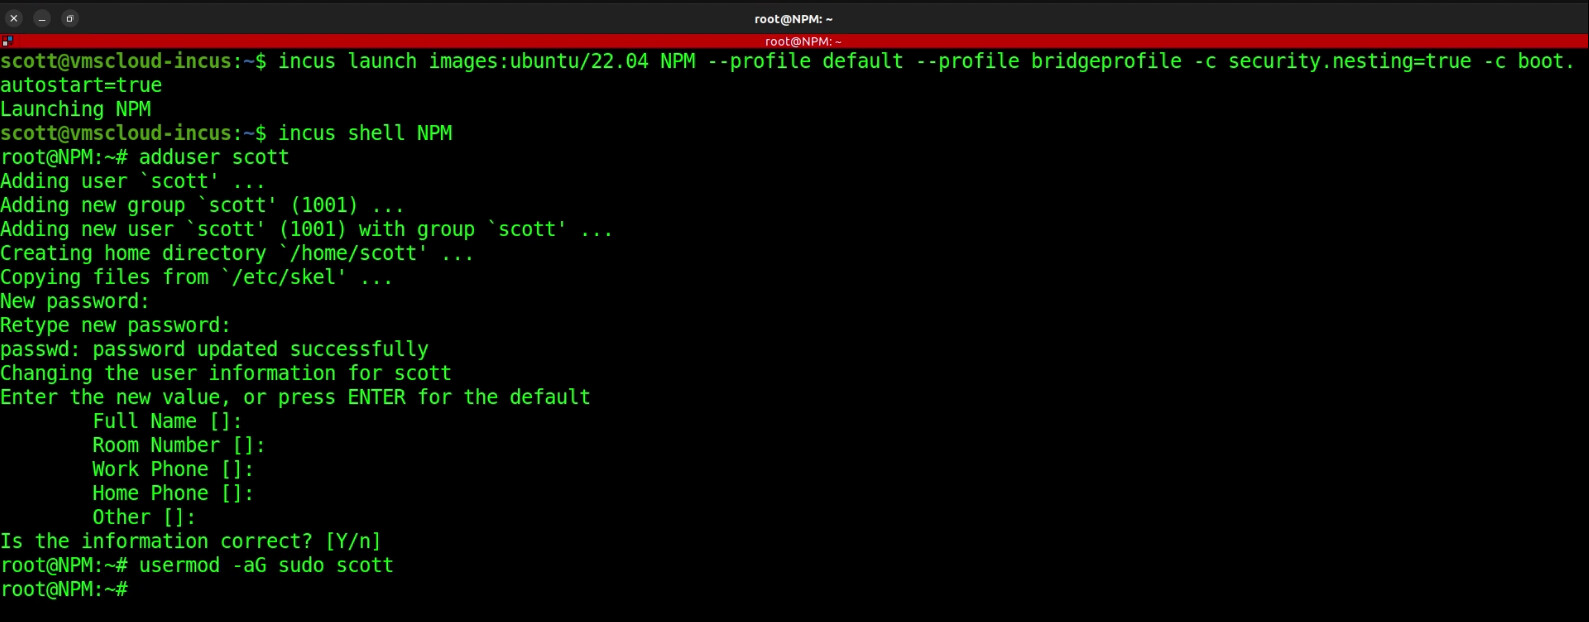
To begin with, sign on to your Incus server and create a container for NPM with the following command:
incus launch images:ubuntu/22.04 NPM --profile default --profile bridgeprofile -c security.nesting=true -c boot.autostart=true
Connect to the container we just created:
incus shell NPM
Add a username and put that user into the “sudo” group.
adduser scott
usermod -aG sudo scott
Here’s where you should be so far.
Apply all of the current updates to the OS of the container.
apt update && apt upgrade -y
Install the dependencies.
apt install curl nano
Since NPM is a docker application, install docker and docker-compose:
curl -sSL https://get.docker.com | sh
apt install docker-compose -y
Add your user to the docker group.
usermod -aG docker scott
Move over to the user account we created earlier.
su - scott
Create a folder for NPM and move into it.
mkdir NPM
cd NPM
Create a docker-compose file:
nano docker-compose.yml
Insert the following text into the file.
version: '3'
services:
  app:
    image: 'jc21/nginx-proxy-manager:latest'
    restart: unless-stopped
    ports:
      - '80:80'
      - '81:81'
      - '443:443'
    volumes:
      - ./data:/data
      - ./letsencrypt:/etc/letsencrypt
Write the file out with CTRL O and enter and a CTRL X to exit the nano editor.
Start up the NPM docker container:
docker compose up -d
You verify that the container is running with the following command:
docker ps
Find out the address of your incus container with the following command:
ip -br -4 a
You want the address of the “eth0” device.
You are done creating the Incus NPM container and you can exit it now.
exit
exit
Go to your web browser at the address we just found at port 81 by typing the address and a “:81” at the end and you should see the NPM login screen.
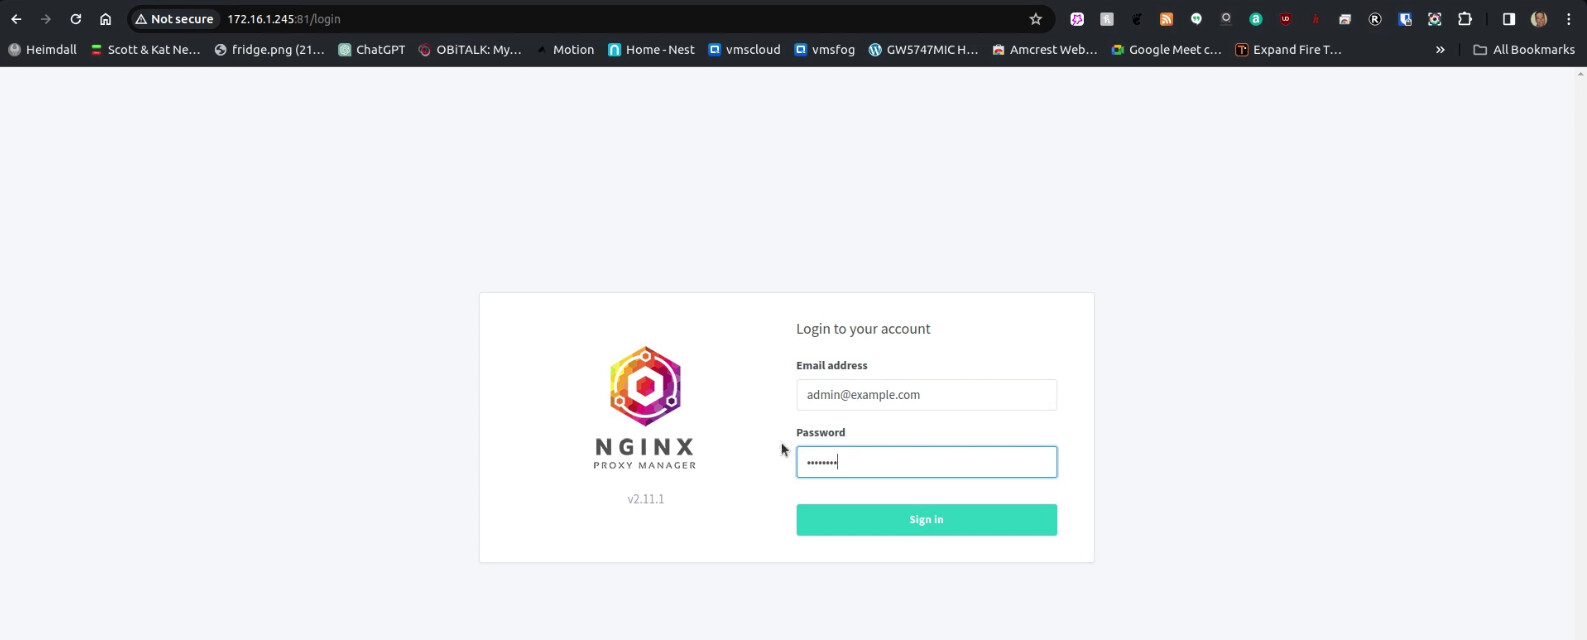
The initial username is “admin@example.com” and the initial password is “changeme”.
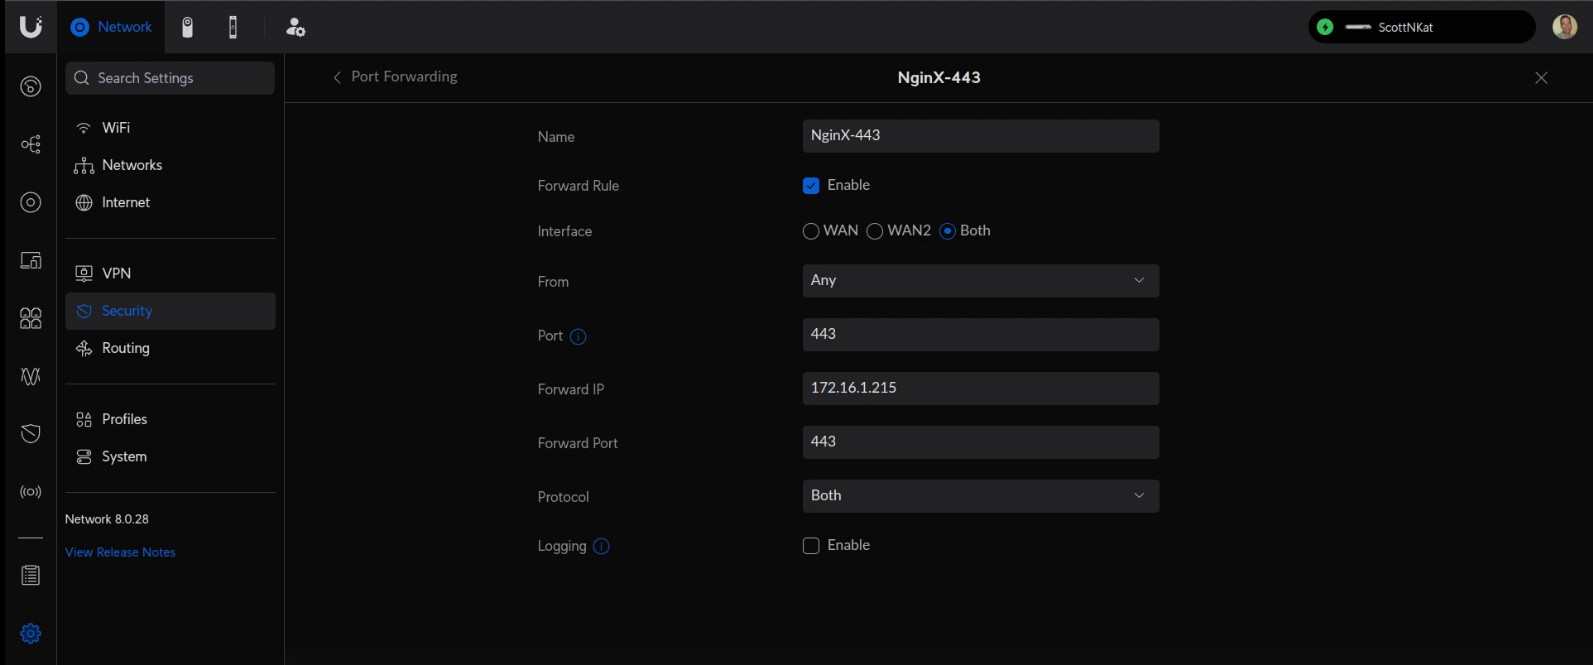
Before we go further, we need to go to your router and define port forwarding definitions that point ports 443 and 80 to the address of your Incus NPM container that we found above. Unfortunately, port forwarding is different for different brands and models of routers. Check your router documentation. NPM will not work until you have port fowards for ports 443 and 80 that point to the address of your Incus NPM container that we just configured.
In the following screenshot, this is a port forwarding definition for my port 443 on my Ubiquiti UDM Pro router.
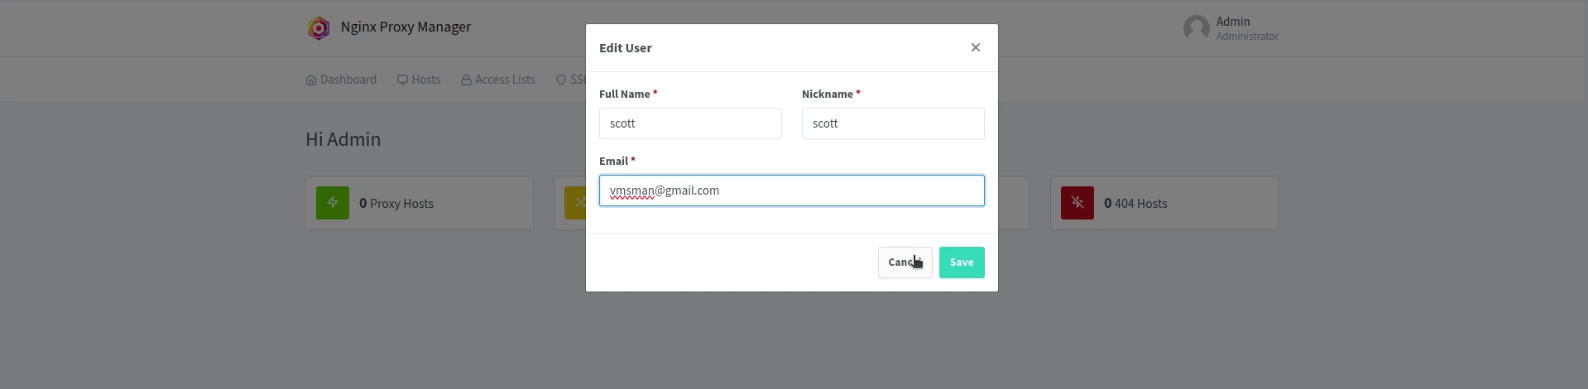
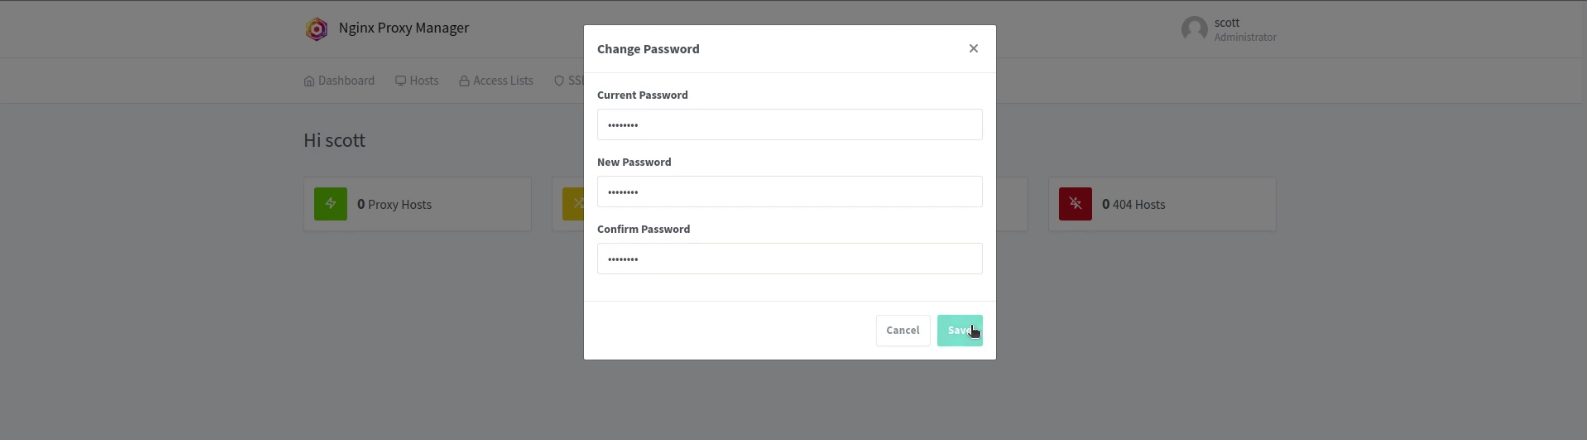
Now, back at the NPM web page your will want to edit your username, nickname and email address on the NPM screen.
Once you click “Save” you will see the following screen to set your password. Note that your current password is “changeme”.
Assuming that you have installed an application that you want to publically host and you have a CNAME record for that application defined at your Domain Name Service Provider, you can go into the “Proxy Hosts” option in NPM and add a host. Here’s an example.
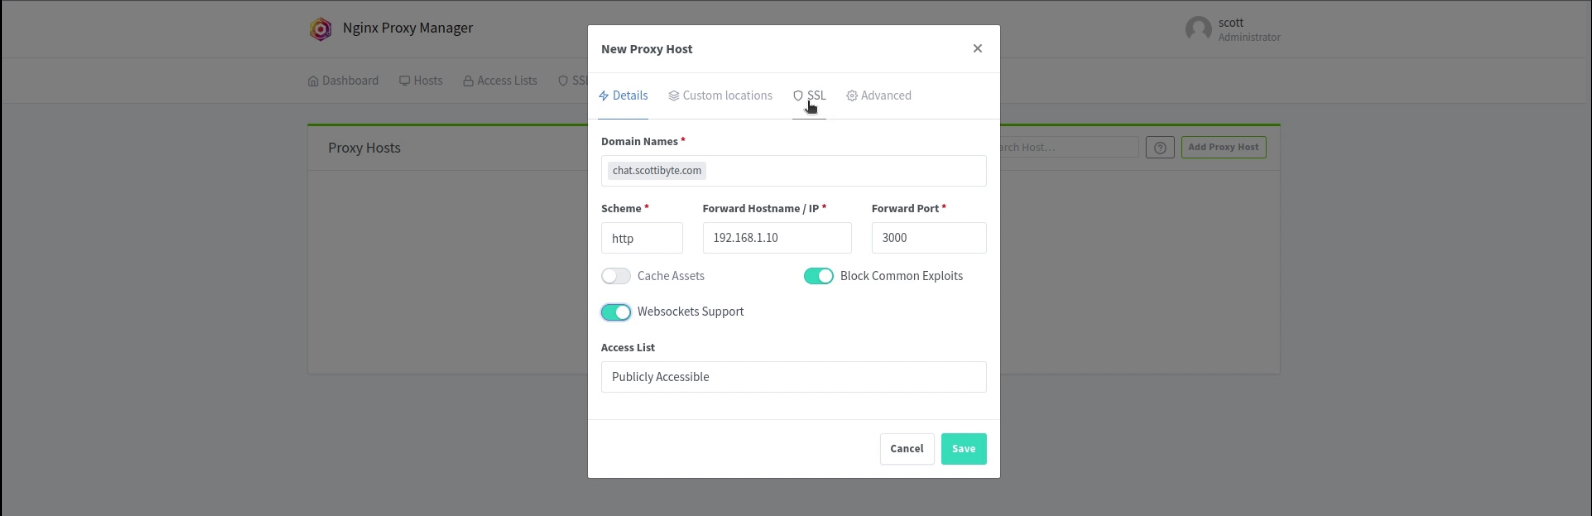
Once you fill this screen in, click on the “SSL” tab to get a self signed SSL certificate from Let’s Encrypt.
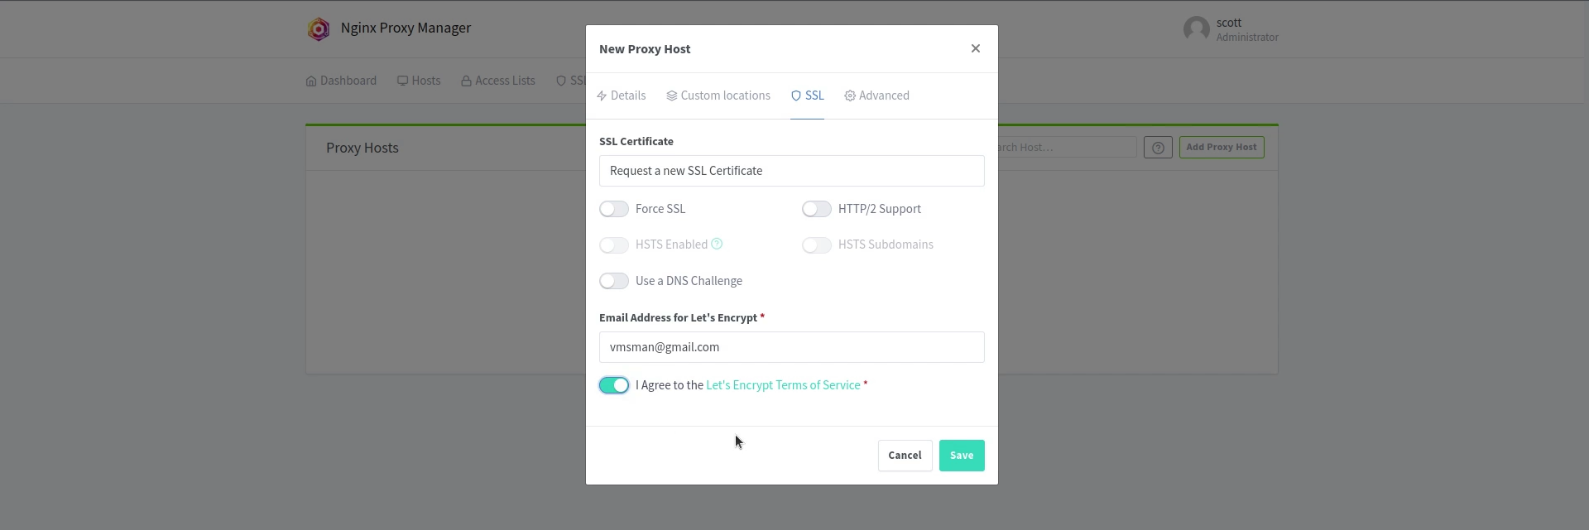
On the screen above, you select the option to request a new certificate and you agree to the Let’s Encrypt terms of service. After that, click “SAVE” and if you have done everything correclty so far, you will have your first service defined for public access with SSL encryption enabled.
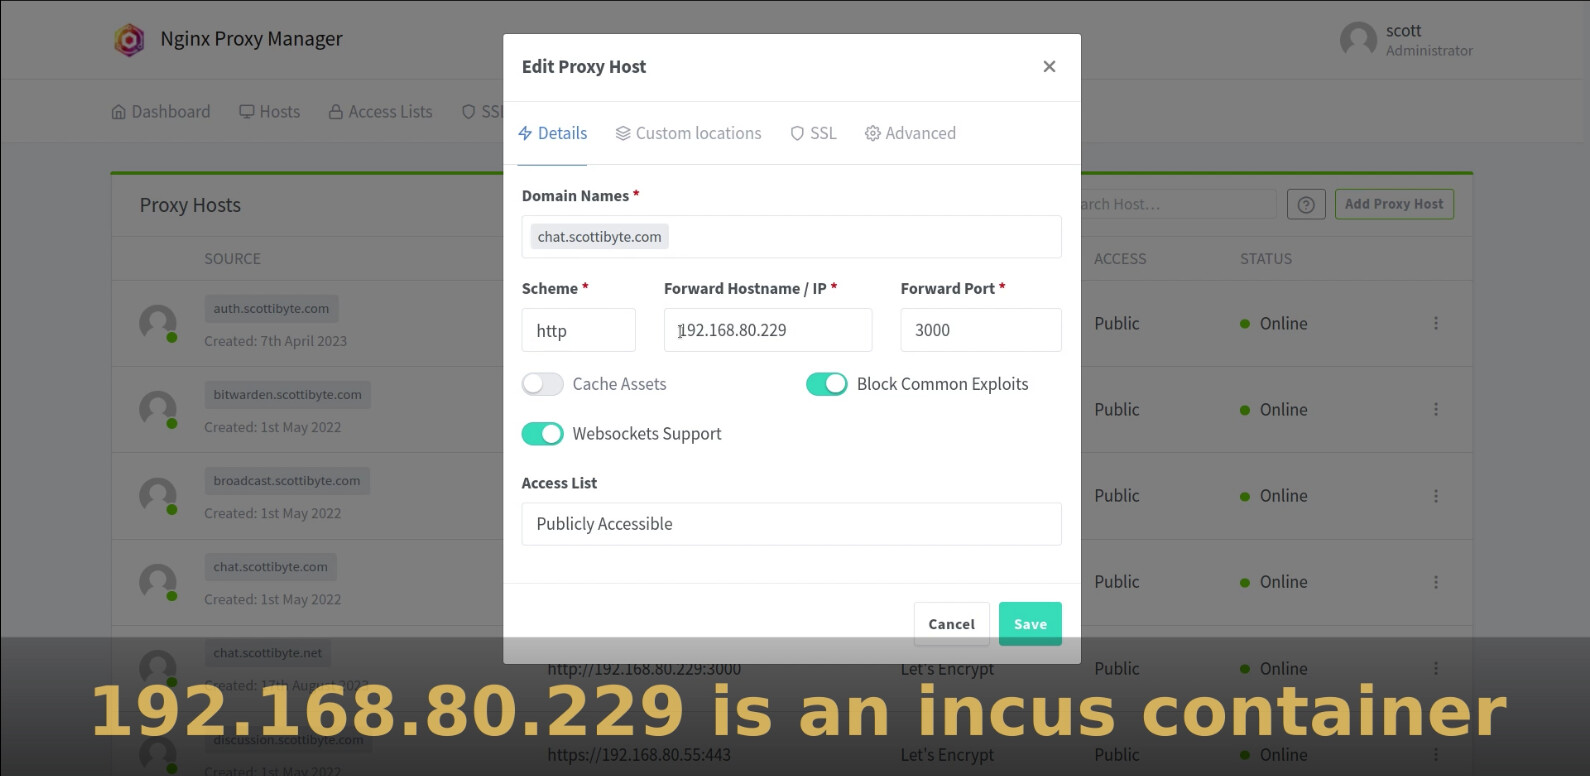
An example of my chat.scottibyte.com definition in NPM is below.
The SSL tab of that definition is below.

So, NginX Proxy Manager (NPM) is a solution to the problem of hosting many services on a network with only one ISP granted public WAN address. Watch my channel for examples of applications you can host with NPM.
NOTE: When updated versions of NPM come out, you can update NPM as follows:
ssh your-incus-server
incus shell NPM
su - scott
cd NPM
docker compose pull
docker compose up -d