This is a brief video demonstrating some helpful Linux command line tools useful in the Home Lab to view your network performance and metrics.
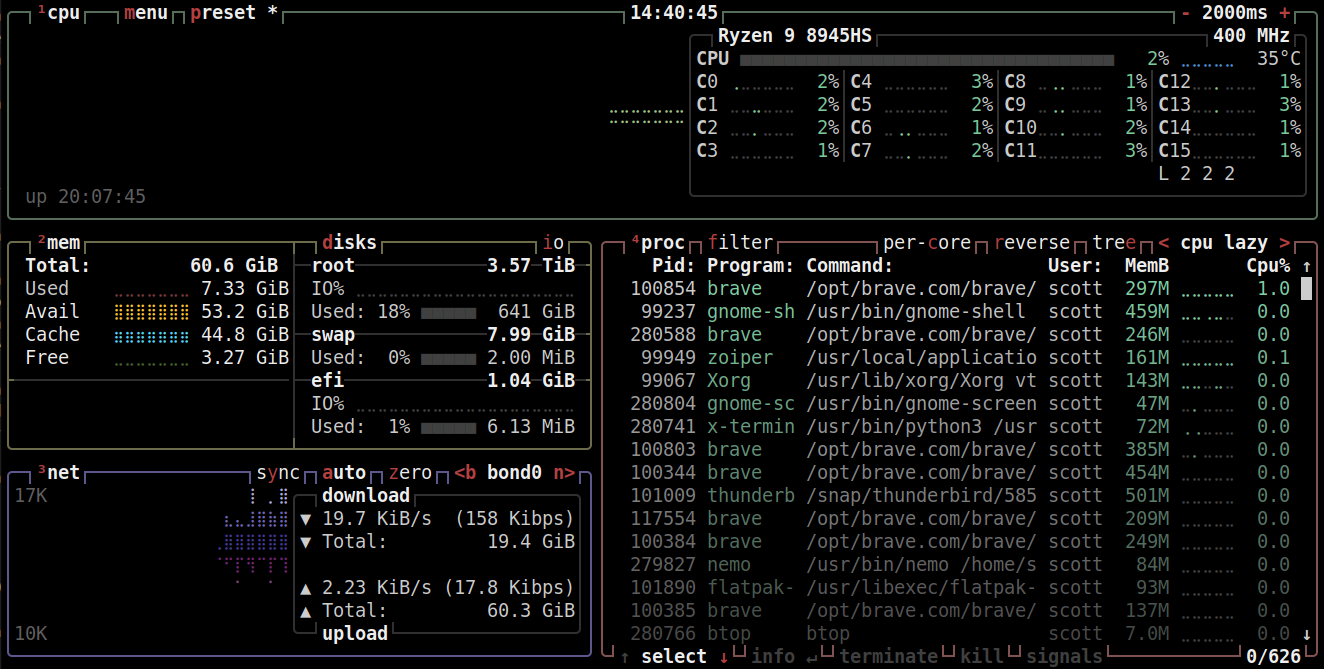
Although not a “network” command line tool specifically, “btop” is one of the nicest tools to assess your system resources.
sudo apt install btop
btop
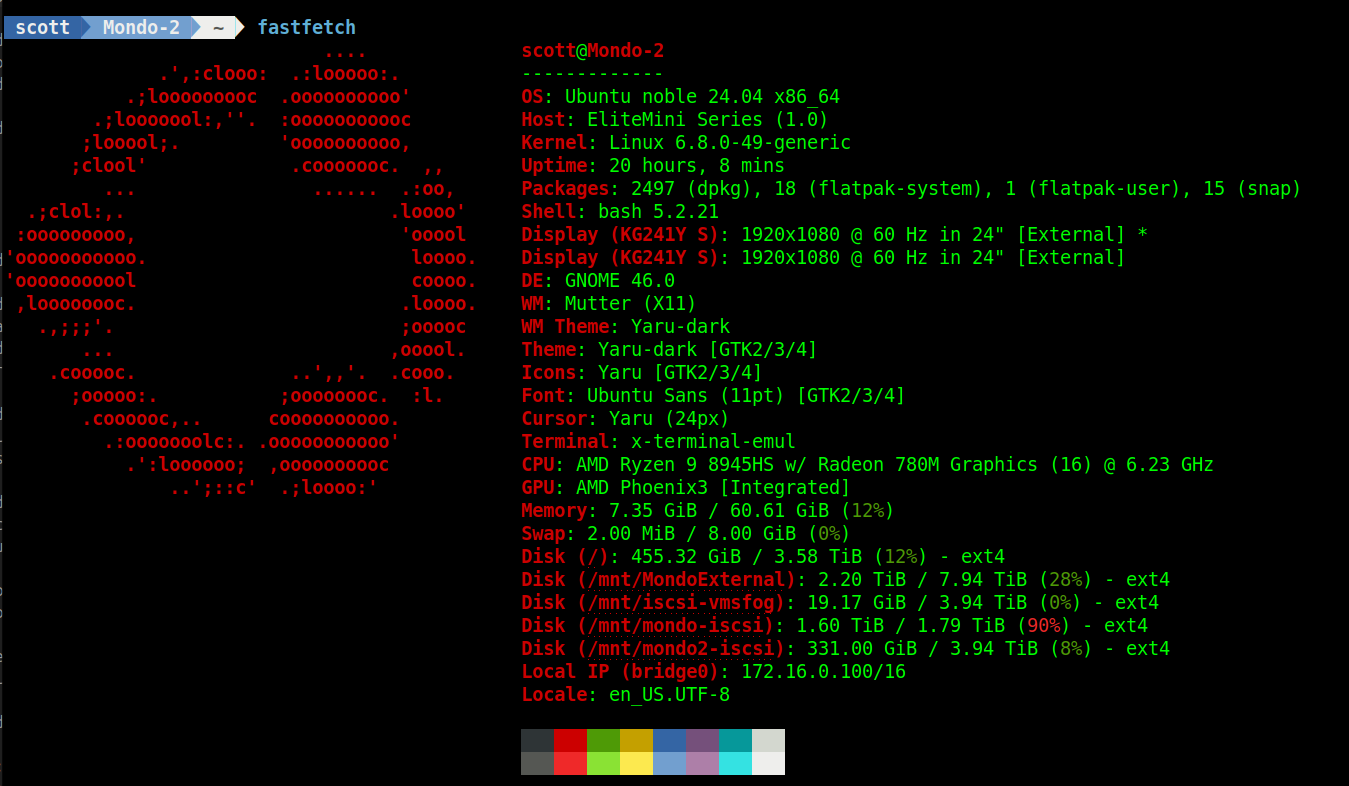
Fastfetch is another great utility. In Ubuntu 24.04:
sudo apt install fastfetch
fastfetch
The following is a fastfetch listing from my new desktop system.
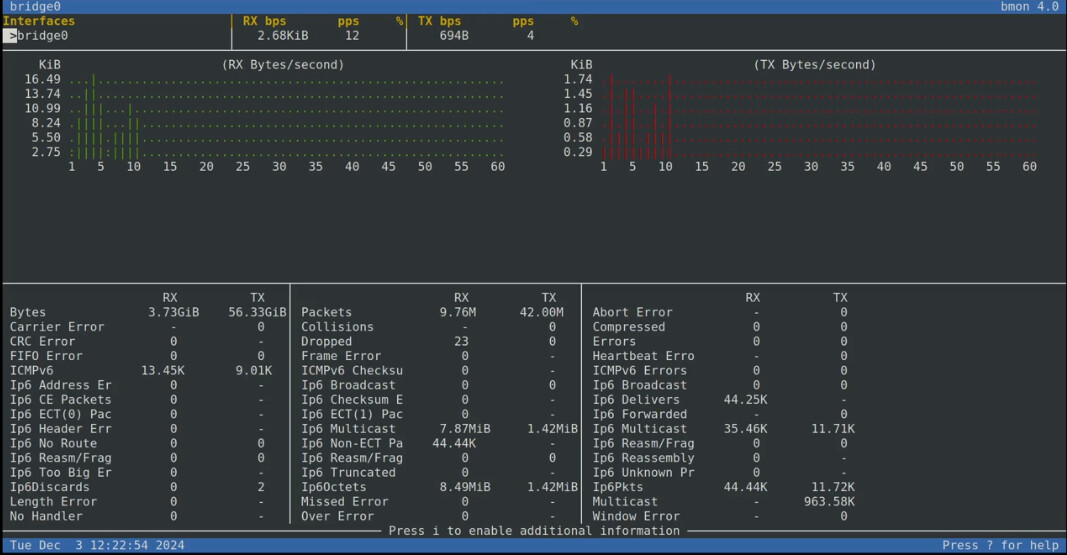
A great real-time network metrics display tool is “bmon”. You can install Bandwidth Monitor:
sudo apt install bmon
From my “Incus Containers Step by Step”, here I am using bmon to look at my “bridge0” network interface which is a software virtual switch or bridge.
bmon -p bridge0
The “ip” program is the most commonly used program to example and control network parameters. It’s normally installed by default. If it isn’t, here’s how to install it in Debian based systems like Ubuntu:
sudo apt install iproute2
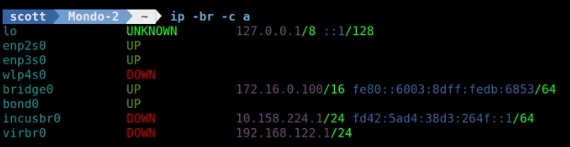
A command you can use to display all of your network interfaces and their assigned addresses is:
ip -br -c a
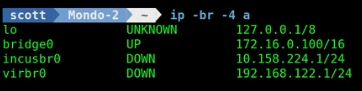
If you are interesting in only the interfaces that have IPv4 addresses assigned to them.
ip -br -4 a
List just a single interface with “ip”:
ip -br -4 addr show dev bridge0
![]()
This next package provides us several utilities:
sudo apt install dnsutils
Another package that provides mostly the same utilities:
sudo apt install inetutils-traceroute
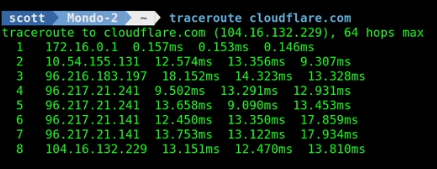
Traceroute is a utility that shows you the path to a remote system and is a part of the dnsutils package:
traceroute cloudflare.com
Another application similiar to traceroute is mtr tiny described as “My TRaceroute”
sudo apt install mtr-tiny
The mtr-tiny program is a realtime display which is a combination of ping and traceroute.
mtr-tiny cloudflare.com

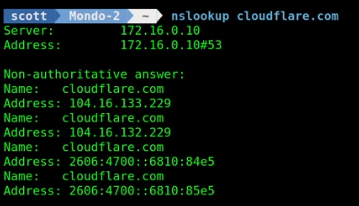
DNSUtils also has name server lookup (nslookup):
nslookup cloudflare.com
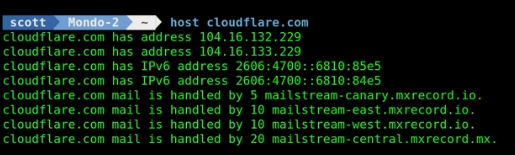
Another nslookup type of command is “host”:
host cloudflare.com
Net-tools also has a few different utilities.
sudo apt install net-tools
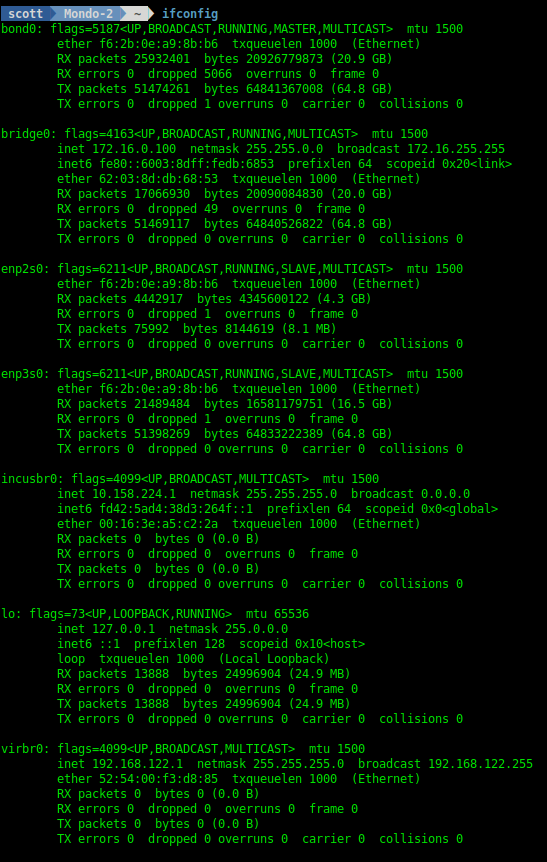
Ifconfig show a summary configuration of your network interfaces on your system:
ifconfig
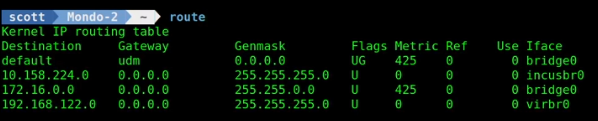
The “route” command is also a part of net-tools and it lists all of your static/dynamic routes. The most common route would be your default route which will point to the address of your router. Routes define where to go in order to connect to other networks.
route
Another command that does the same thing except using the “ip” command:
ip route show

The arp command is used to manipulate and view the ARP (Address Resolution Protocol) cache, which maps IP addresses to MAC addresses on a local network.
You can view the arp table with:
arp -a
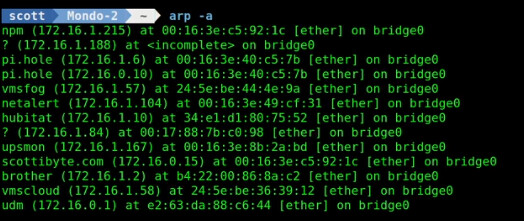
I remember creating a static ARP address to provide an IP address to a printer at work that didn’t have an IP address on my LAN in order to remotely manage it. The arp table tracks the physical IP address mapping to MAC addresses of the most recently contacted systems.
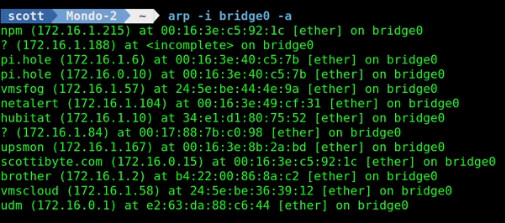
You can look at the arp table for an individual interface. This is the same as the listing above since all my traffic is routed through my virtual switch bridge0 by my design.
arp -i bridge0 -a
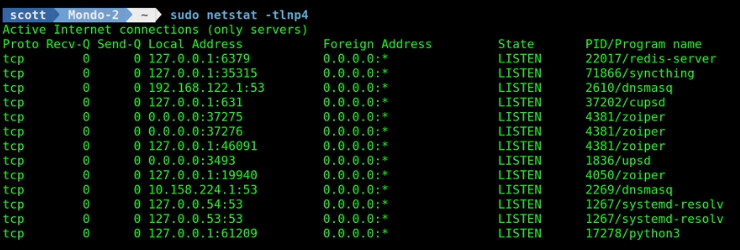
Netstat is a great utility the tells you which open ports you have on your system and which programs (server – daemons) they point to. This is a great way to tell if a program is running and communicating the way that you think it is. We use “sudo” to display the name of the program which requires privilege.
sudo netstat -tlnp4
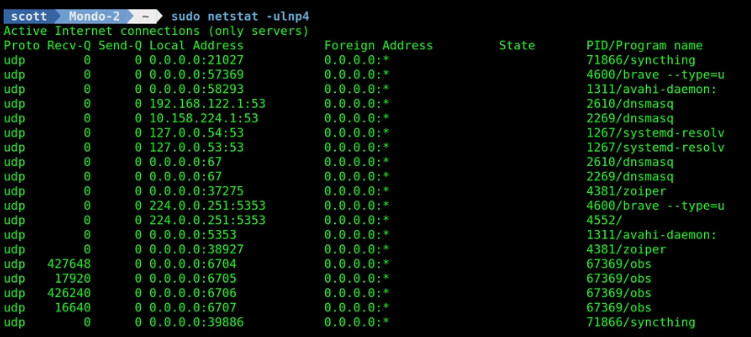
To do the same command except to display user datagram packets (UDP) as opposed to TCP:
sudo netstat -ulnp4
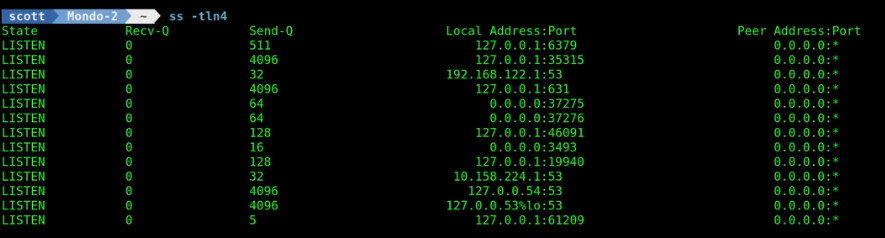
You can also use “ss” which uses the same parameters as netstat:
ss -tln4
You can also use nmcli which is the network manager command line interface to view and configure your network. If you are using Ubuntu, although nmcli works, the recommended best practice for network configuration is to use netplan.
I have other videos where I discuss netplan. In particular, we use netplan to configure the bridge0 interface in the “Incus Containers Step by Step” and “LXD Step by Step” videos.
On my recent system upgrade, I took this a step further. I have dual 2.5Gbps network interfaces on my new Minisforum UM890. Since I have a managed network switch, I configured two ports on the switch for link aggregation (IEEE 802.3ad).
Link aggregation, bondingh, trunking, and teaming are all names for combining multiple interfaces together to create a single connection. In my example, I have devices enp2s0 and enp3s0 which are both 2.5Gbps NICs. I created a “bond0” device from them which effectively gives me a 5Gbps connection.
I configured two ports on my network switch as link aggregated ports (LACP) to talk to the bonded device on the desktop. I used the same concept in the step by step videos where I created a bridge0 virtual switch and it uses “bond0” as its parent device.
Here’s what my netplan file looks like:
network:
  version: 2
  renderer: NetworkManager
  ethernets:
    enp2s0:
      dhcp4: false
      dhcp6: false
    enp3s0:
      dhcp4: false
      dhcp6: false
  bridges:
    bridge0:
      addresses:
      - "172.16.0.100/16"
      nameservers:
        addresses:
        - 172.16.0.10
      dhcp4: false
      interfaces:
      - bond0
      parameters:
        forward-delay: "4"
        stp: true
      routes:
      - to: "default"
        via: "172.16.0.1"
  bonds:
    bond0:
      interfaces:
      - enp2s0
      - enp3s0
      parameters:
        mode: "802.3ad"
Note both the bond0 device and the 802.3ad mode protocol. I do not assign an ip address to enp2s0, enp3s0, or bond0. All system communication takes place over bridge0 by this design.