This tutorial covers the steps to use the Minisforum MS-S1 Max mini workstation as an Ubuntu Server. This powerhouse of a mini workstation has some important caveats to address before it can run as a server.
The MS-S1 Max has some impressive specs with an AMD Ryzen AI Max+ 395, 128GB LPDDR5X @8000 MT/s, a 2TB NVMe and the GPU is a Radeon 8060S. There are two USB 4 40Gbps ports on the front and two USB 4 v2 80Gbps ports on the rear. It has a PCIx-16 slot that is PCIx-4 compatible electrically. This system also has dual 10GbE NICs which are the new Realtek RTL8127 controller not yet a part of the Linux 6.8 kernel.
The 16 cores and two threads per core make the MS-S1 Max an impressive beast for compute intensive tasks including AI workloads.
The system comes pre-installed with Microsoft Windows 11 Pro and is configured with secure boot and fast boot enabled which provided no way to enter the BIOS or alternately boot via USB since the usual DEL, F2, ESC or F7 keys had no effect.
The MS-S1 Max is different because it offers only EFI boot and has no legacy BIOS boot fallback mode. This is likely the design of systems to come. As it turns out, the lack of a legacy boot option created an issue we will see later.
I ended up having to wait for the Windows mini-setup to complete before I had the ability to enter the BIOS. Rather unexpectedly for such a fast system, this Windows setup process took nearly 90 minutes.
Once Windows was fully up, I could enter the system recovery options screen.
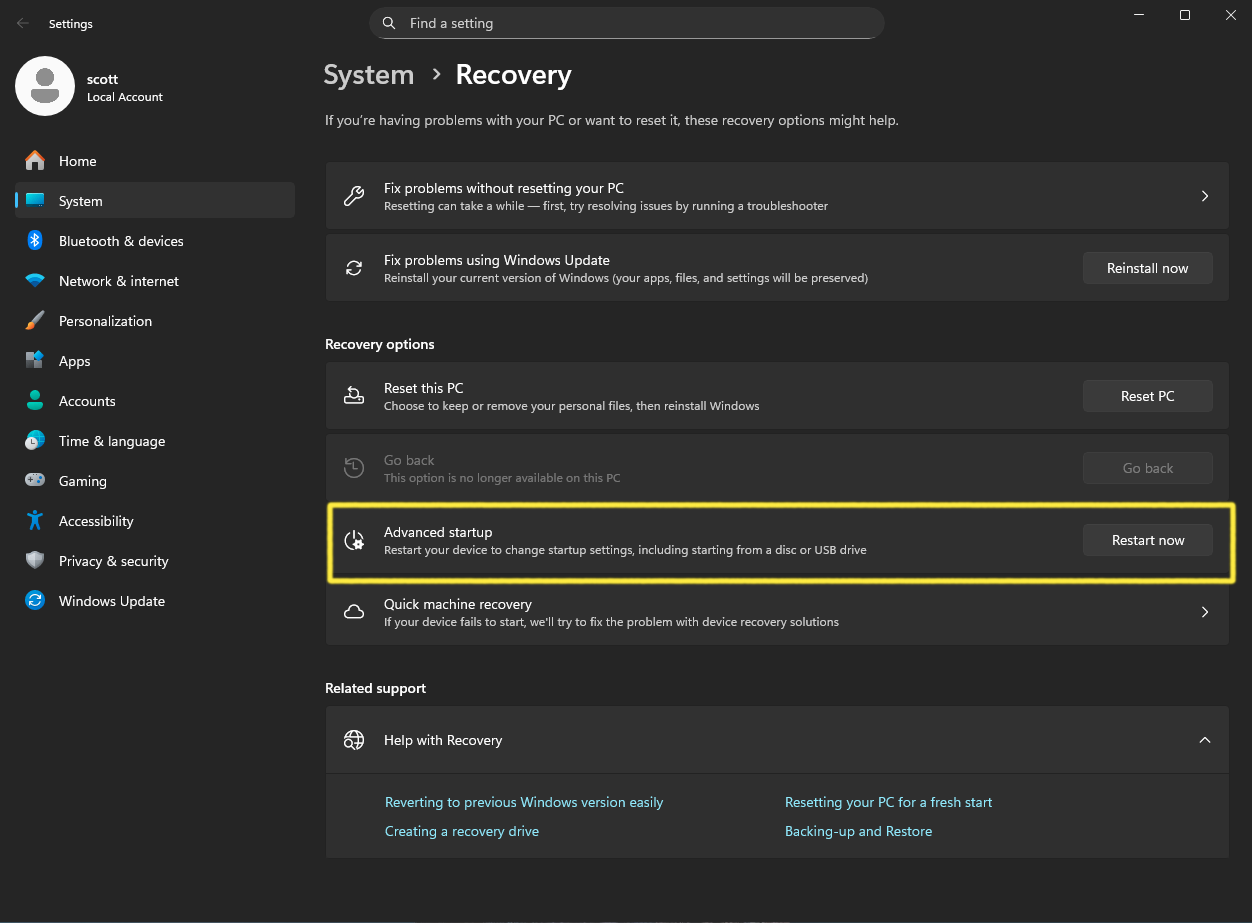
Choosing “Advanced Setup” lead me to the Troubleshoot option.
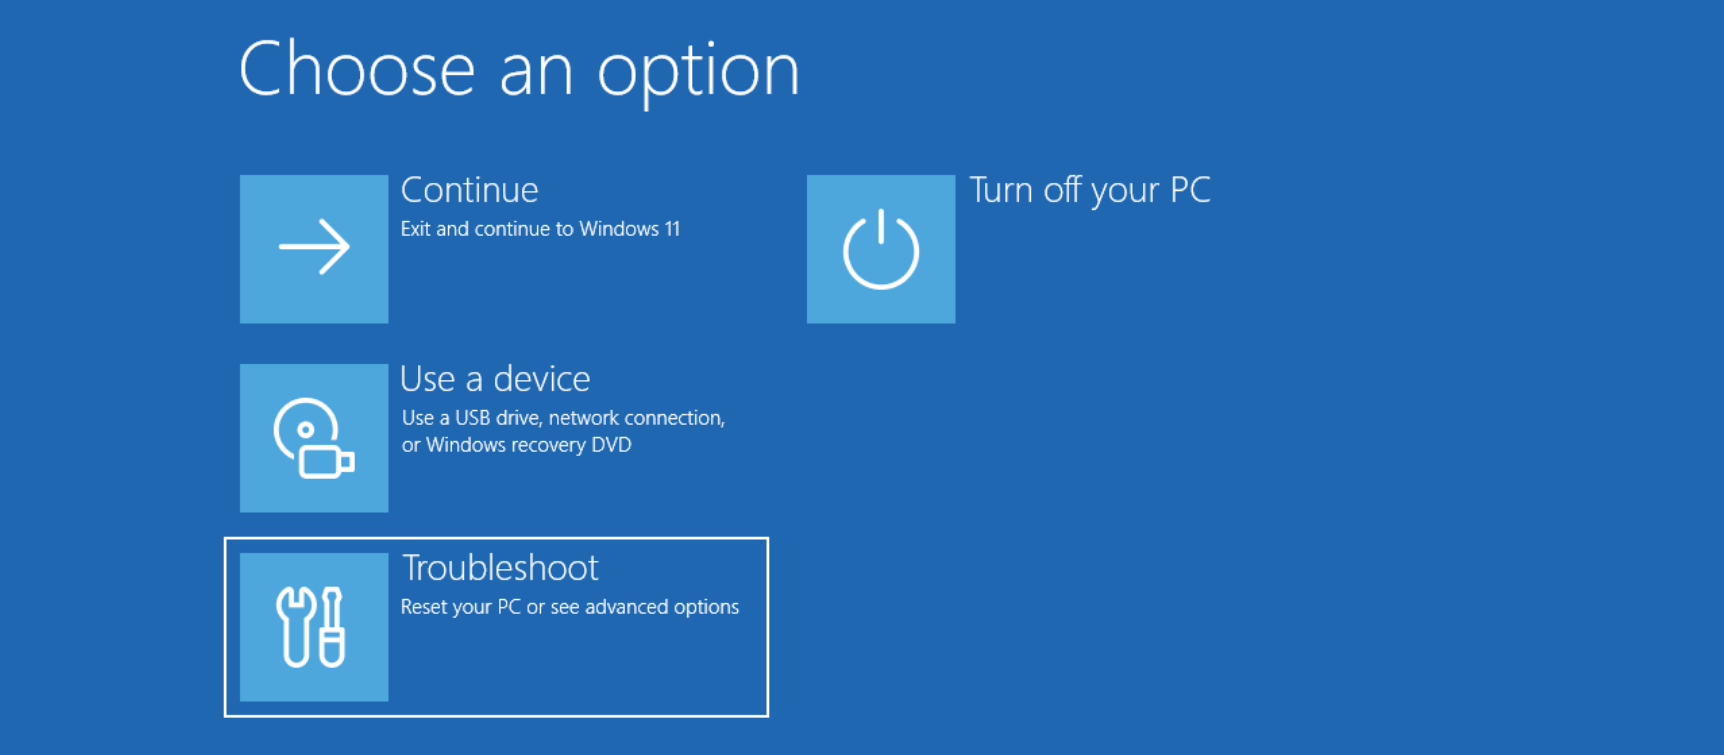
Then I chose “Advanced Options” on the Troubleshoot screen.

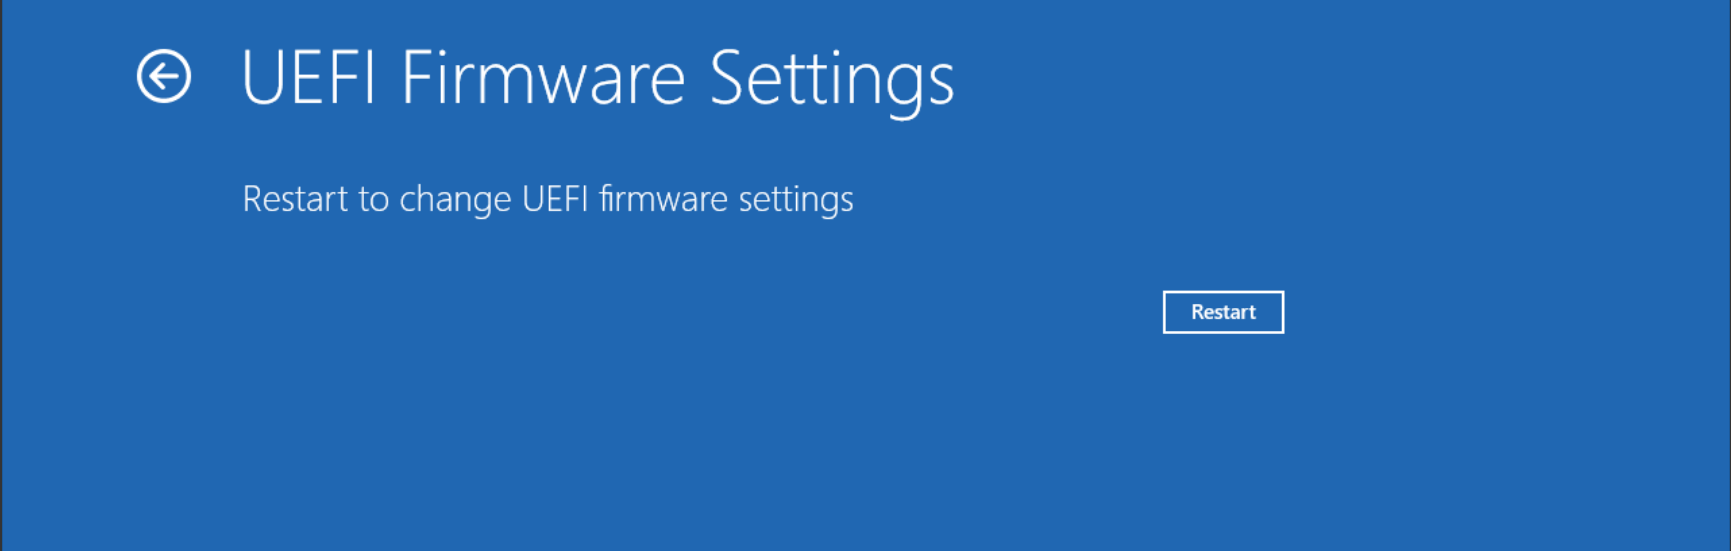
Next, “UEFI Firmware Settings”.
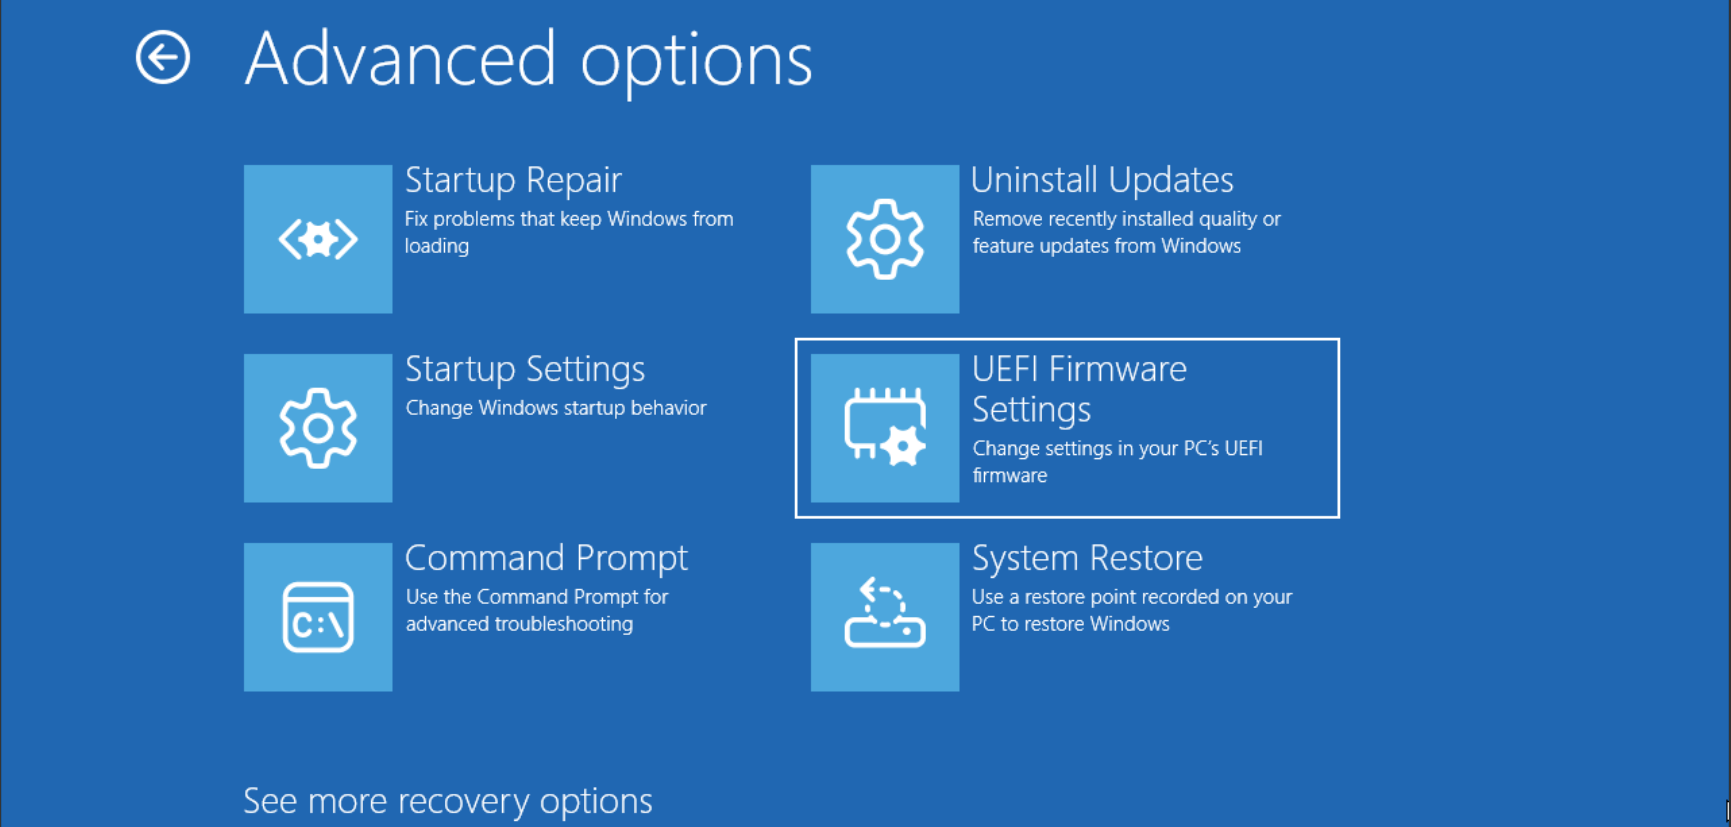
The restart button put me in the Minisforum BIOS screen.
Technically, Minisforum has a system setup screen and not a BIOS screen since this system has no BIOS boot capability as mentioned above. Once in the BIOS I could turn off secure boot and change the boot priority to boot an Ubuntu 24.04 server live disk.
I ended up having to boot an Ubuntu Live Desktop disk to run gparted in order to delete the existing Windows partitions before the Ubuntu Server install would let me override the existing partitions. This is odd since the server install has always allowed me to specify my own partition table.
My end goal was to configure the system as an Ubuntu server running Incus and so I followed the steps outlined in my Incus Containers Step by Step tutorial.
After the system was booted, the 10GbE adapters were not available because RTL8125 (ie RTL8127) drivers were not part of the Linux 6.8 kernel. My first step was to install these drivers.
Install the required dependencies and kernel headers. This includes dynamic kernel module support (dkms) which automatically rebuilds kernel modules when the kernel is upgraded. This is critical for drivers that are not included as a part of the kernel drivers tree.
sudo apt install -y build-essential dkms git linux-headers-$(uname -r)
Clone the Realtek RTL8125 DKMS driver source.
git clone https://github.com/awesometic/realtek-r8125-dkms.git
Copy the driver code into the DKMS source tree.
sudo cp -r . /usr/src/r8125-9.016.08
Register the driver module with DKMS. This allows DKMS to track this module and so it knows how to rebuild it.
sudo dkms add -m r8125 -v 9.016.08
Compile/build the driver against your current kernel.
sudo dkms build -m r8125 -v 9.016.08
Install the compiled module which copies the built “.ko” file into /lib/modules/$(uname -r)/updates/dkms/. On the next kernel update DKMS will rebuild r8125 and install it automatically.
sudo dkms install -m r8125 -v 9.016.08
Load the driver into the running kernel without having to reboot.
sudo modprobe r8125
Verify that the module is loaded.
lsmod | grep r8125
![]()
Check the network device names.
lspci | grep -i net

Above you can see the two RTL8127 10GbE adapters listed as well as the MediaTEK wifi 7 adapter.
We can now list the device names.
ip link | grep enp*

Note that initially my device names were enp7s0 and enp8s0. The screenshot about has the names enp97s0 and enp98s0 as a result of the PCIx bus being re-enumerated following my upgrading of the motherboard firmware.
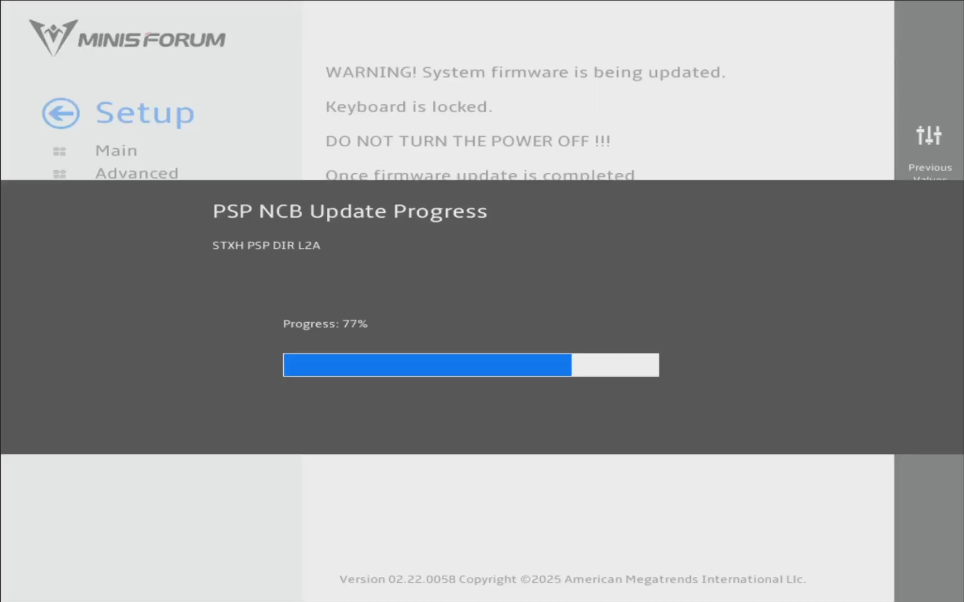
After a few hours of running, the system locked up. I knew this was not due to the network drivers. However, my intuition led me back to the symptoms of both Windows and Ubuntu install running uncharacteristically slowly. On a whim, I visited the Minisforum site and went to Support – downloads where I found a new firmware v1.0.6 which I downloaded and unzipped.
Minisforum has no firmware upgrade option in their BIOS setup menus. Instead, you copy the unzipped files to the top level of a USB device. Upon reboot, the system recognizes there is an update available and asks if you want to apply it. The USB device does not need to be bootable for this to work. So, I applied the firmware update.
The system booted way faster. My 10GbE device names changed after the firmware update as mentioned above and the update arbitrarily re-enabled secure boot. As a result, my unsigned NIC drivers I just installed did not load and so I had no network. It took me awhile to discover that.
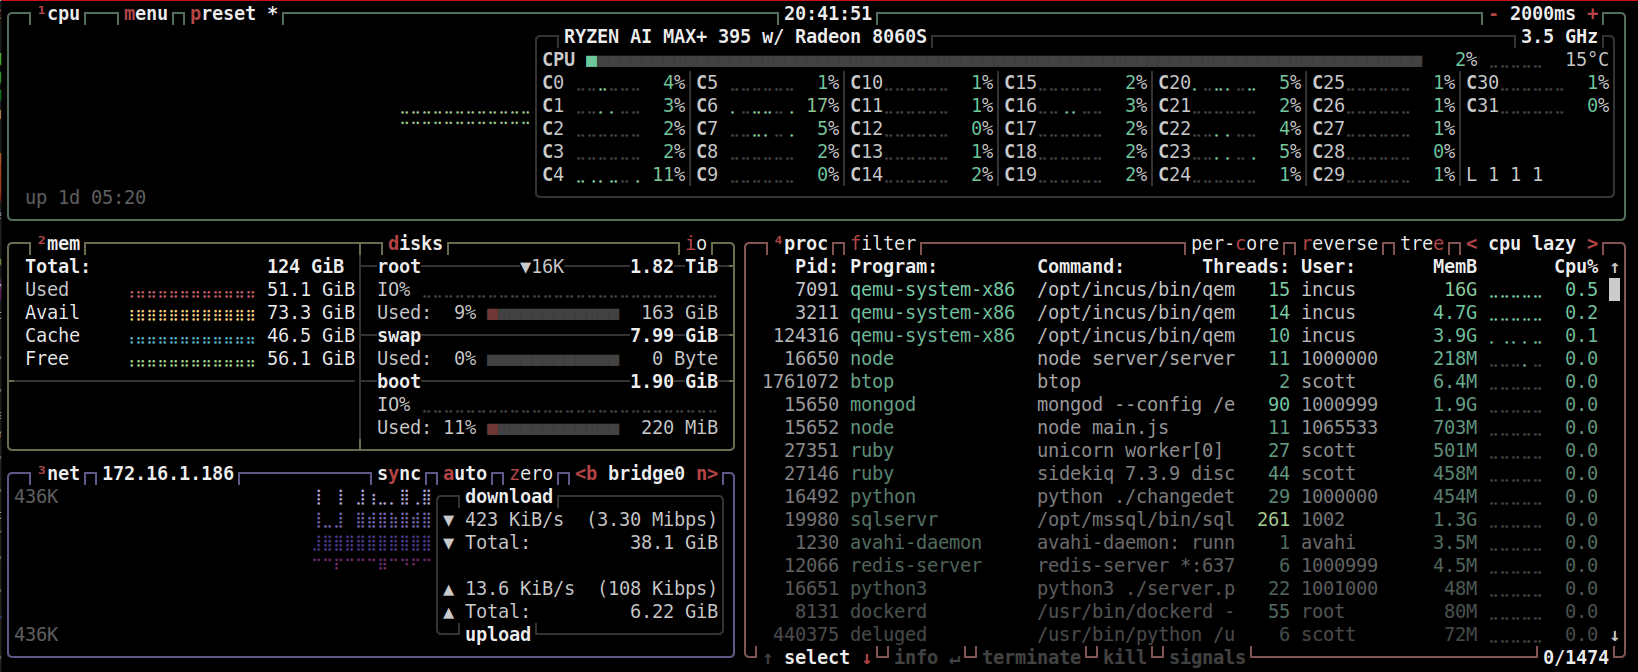
Once I disabled secure boot and rebooted the system, it came up VERY quickly. I had already installed incus and moved around 12-15 containers to the system and I was mounting five NFS shares as well. The system booted from power-off to being able to sign on in just under 10 seconds. In another 20 seconds all my incus containers were fully online.
So, this system is crazy FAST. I conclude that the old firmware that my unit was shipped with was flawed since my boot time decreased from 90 seconds to 30 seconds with everything fully online with no other changes to the OS.
My network was back. I could ping the system, but I could only login from the console. All my incus containers were not responding and I could not ssh.
Most traditional servers (Intel or older AMD) provide a text-mode console via VGA or EFI GOP (Graphics Output Protocol). When Linux boots with no console=, it automatically binds /dev/tty0 to whatever the firmware exposes. As you will recall, I mentioned that the MS-S1 Max is solely EFI boot and so therefore has no legacy VGA fallback found in legacy ROMs.
The result is that there is no text mode virtual terminal (VT) exposed by default. This results in session dependent operations like interactive ssh and auto-mounting drives to fail. Yes, my aforementioned NFS mounts were not mounted. Even though the HDMI attached screen device sees output, the system has no TTY to associate to it. This is BAD in Linux.
So, I edited the GRUB (Grand Unified Bootloader) which is the Linux boot manager.
sudo nano /etc/default/grub

All I had to do was to add the “console=tty” as shown in the nano screenshot above.
Update the grub.
sudo update-grub
Reboot the system.
sudo reboot now
When the system rebooted, everything was correctly functioning and after a week everything has been stable.
Per my Incus Containers Step by Step tutorial, here was my netplan file. I used only the first 10GbE adapter since I had only one 10GbE switch port available.
network:
  version: 2
  renderer: networkd

  ethernets:
    enp97s0:
      dhcp4: no
      dhcp6: no

  bridges:
    bridge0:
      interfaces: [enp97s0]
      addresses: [172.16.1.186/16]
      routes:
        - to: default
          via: 172.16.0.1
      nameservers:
        addresses: [172.16.0.10, 1.1.1.1]
      parameters:
        stp: false
        forward-delay: 0
      dhcp4: no
Key takeaways from this exercise are that Minisforum firmware is installed from a USB device with the update files at its root and there is no firmware update option in the BIOS. I updated to SHWSA_1.06_260104B which I downloaded from Minisforum.
I believe the original firmware was flawed based on how slow both Windows and Ubuntu server were. I was annoyed that secure boot was buried three levels deep in the BIOS menu and that it was reset after the firmware update. The console=tty0 issue was new to me because this is the first time I worked with a UEFI only system.
I look forward to using this system for upcoming tutorials in 2026.