This tutorial is about learning to migrate QNAP Container Station LXD containers to an Ubuntu server running LXD. QNAP networks are defined in the QTS Network & Virtual Switch application from the QTS Desktop.
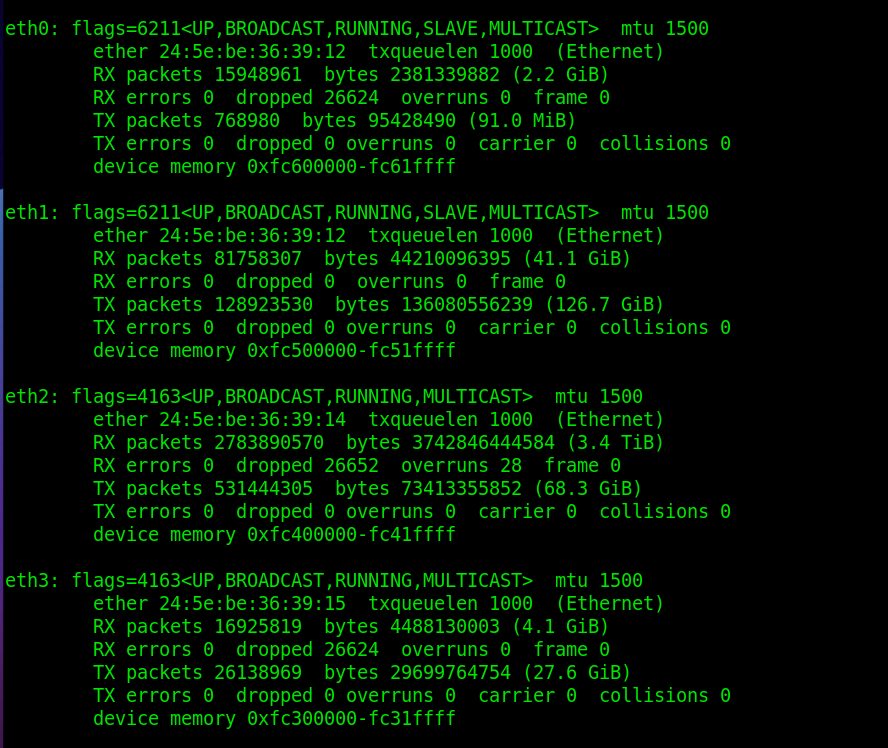
QNAP physical Ethernet adapters have names like eth0, eth1, eth2, and eth3.
You can ssh into your QNAP with:
ssh admin@192.168.1.___
Examine your QNAP physical adapters with “ifconfig” or “ip a” and look for your “eth” devices and you should see something like this:
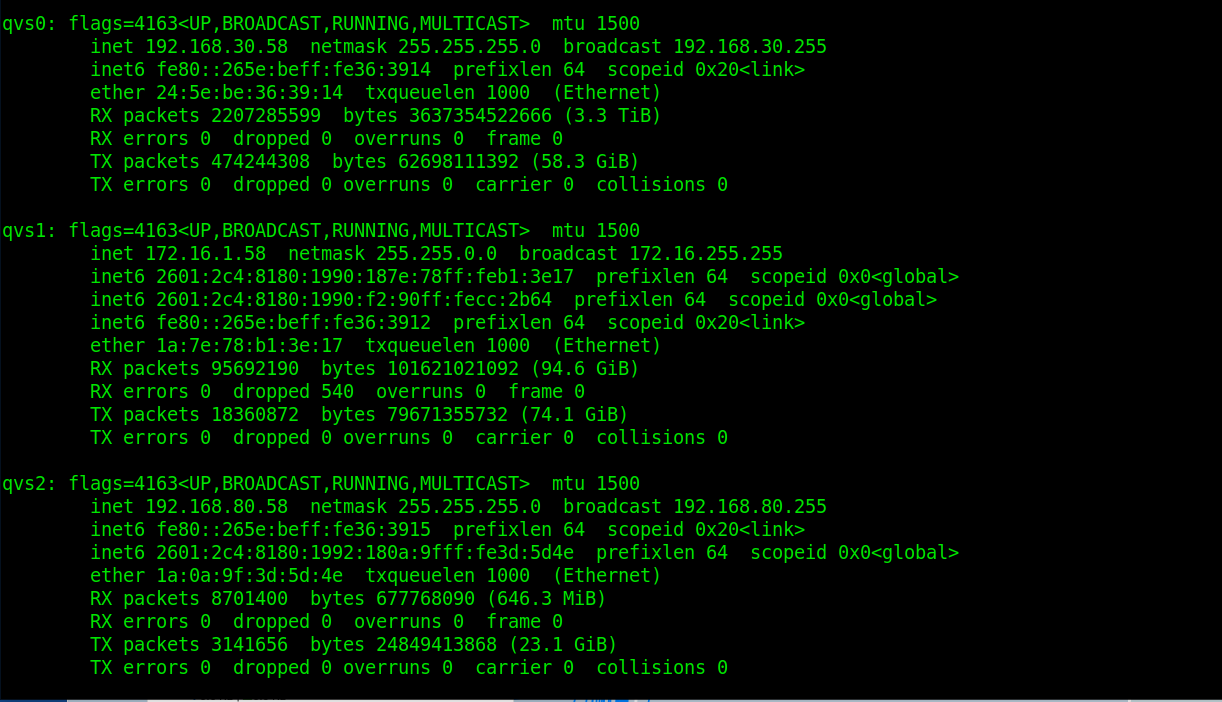
In the same listing, you will see your virtual switches which are labelled as “qvs” devices and they should look like this:
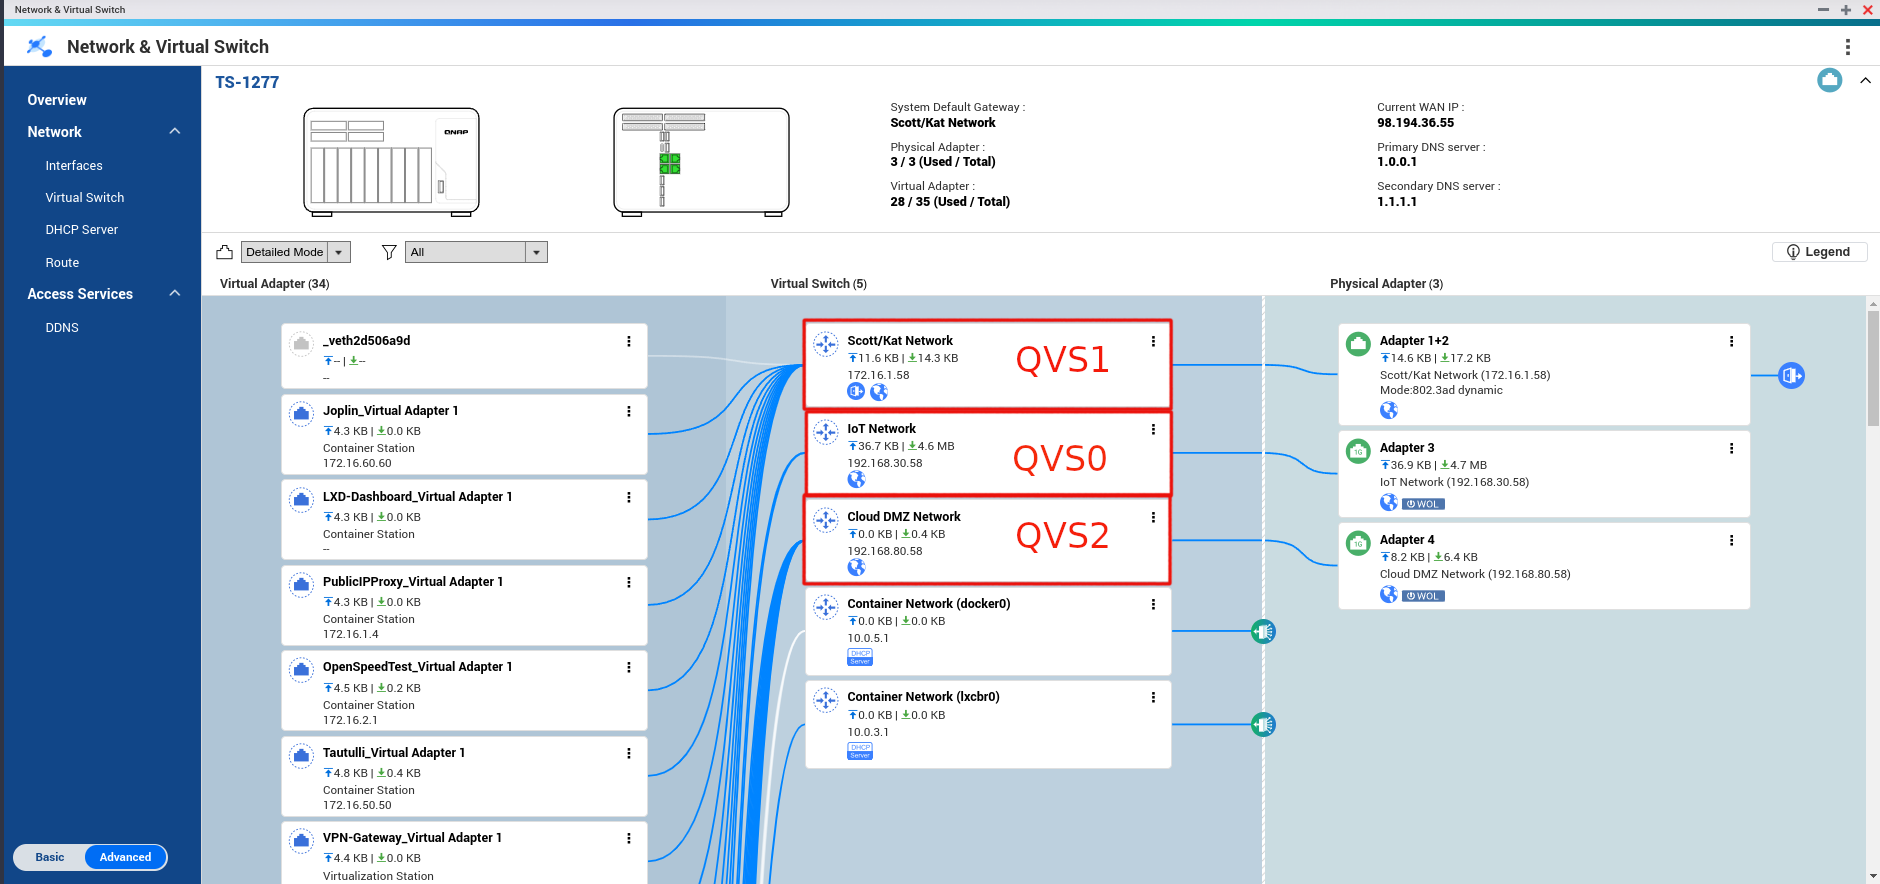
You can run QNAP Network & Virtual Switch and you should be able to match up the addresses of the “qvs” devices to your virtual switches:
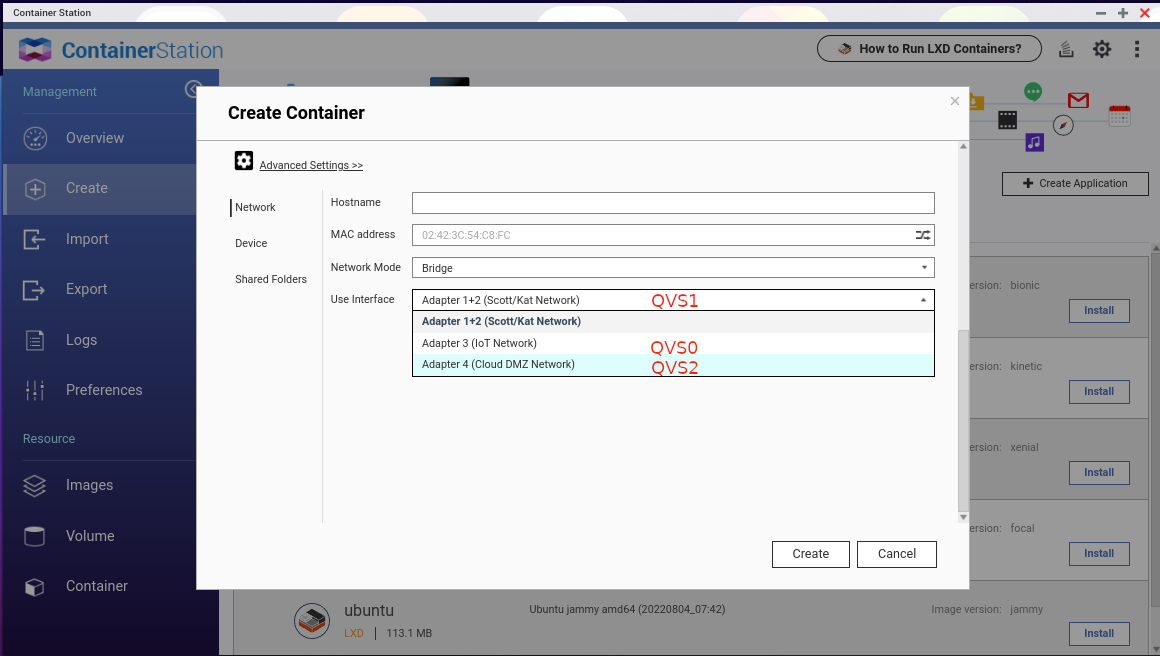
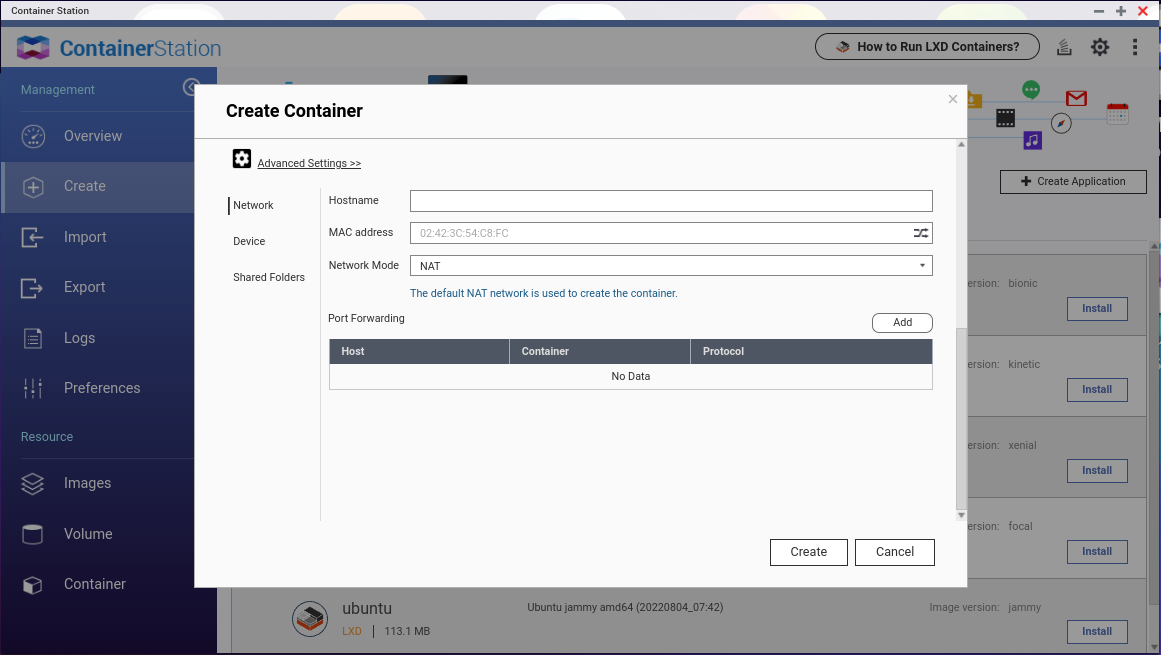
You can also see this association in container station when either editing or creating a container by going into “advanced settings” and looking at the “user interface” for a container whose network mode is “bridge”.
To make your container portable, you need to change it from bridged network mode to NAT network mode. I know this will lose the LAN address association and give the LXD container a NAT address temporarily, but we will fix this:
Create a bridge profile from the QNAP command line as follows by ssh’ing into your QNAP:
ssh admin@192.168.1.___
lxc profile create bridgeprofile
Edit the bridge profile to point to the correct “qvs” device for your connection as described above. Simply copy and paste the entire code block below including the “EOF” to the ssh session and press enter:
cat <<EOF | lxc profile edit bridgeprofile
description: Bridged networking LXD profile
devices:
  eth0:
    name: eth0
    nictype: bridged
    parent: qvs0
    type: nic
EOF
Now modify your container to use the new profile:
lxc profile assign CONTAINER-NAME default,bridgeprofile
Wait a few minutes and your LXD container will get the same LAN address it had previously despite the fact that the Container Station thinks NAT network mode is set.
Now lets backup your LXD container while you are still in the ssh session on the QNAP. This leaves the container intact, it just stops it for the backup. We leave it stopped because when we restore it on the target Ubuntu server running LXD, it will have the same MAC address and so it will get the same IP address.
cd /share/Container
mkdir Backups
cd Backups
lxc stop CONT-NAME
lxc export CONT-NAME CONT-NAME.tar.gz
Now connect to your Ubuntu server with ssh or open a terminal if you are on the target ubuntu system desktop. Keep in mind that this assumes you have watched my other videos and have installed and initialized LXD on the Ubuntu target system:
This also assumes you have watched my “Cheap Self-Hosting Server” tutorial where I reviewed how to change your Ubuntu Ethernet controller to a “bridge” device and that you have named the bridge “bridge0”. If so, continue with the commands below.
Create the “bridgeprofile” just like on the QNAP:
lxc profile create bridgeprofile
Now edit the bridge profile by pasting the entire code block that follows to the ssh or terminal:
cat <<EOF | lxc profile edit bridgeprofile
description: Bridged networking LXD profile
devices:
  eth0:
    name: eth0
    nictype: bridged
    parent: bridge0
    type: nic
EOF
You will have to move the backup of the container that we exported to the ubuntu system. Hint: Use Secure File Transfer Protocol “sftp”, which is a part of openssh_server as I have featured many times before on the channel. Assuming the container backup file is now local, restore it:
lxc import CONT-NAME.tar.gz CONT-NAME
After you import the container, you can start it and it will be running under the same address as before. Note, unless you change the MAC address for the container, you cannot run the QNAP container and this new container at the same time because they will conflict on the network.
lxc startCONT-NAME
Other noteworthy stuff
I frequently cover VLANS and Bridging LXD containers on the channel.
If you have a use case for an untagged VLAN interface which also gets an address on your MAIN LAN, you can do the following on the QNAP or a Linux node running LXD.
lxc profile create untagged
cat <<EOF | lxc profile edit untagged
description: Untagged macvlan profile
devices:
  eth0:
    name: eth0
    nictype: macvlan
    parent: bridge0
    type: nic
EOF
An example of a profile for a numbered VLAN that exists on your managed network:
lxc profile create vlan80
cat <<EOF | lxc profile edit vlan80
description: VLAN80 profile
devices:
  eth0:
    name: eth0
    nictype: macvlan
    parent: bridge0
	vlan: 80
    type: nic
EOF
A simple example of how to create a container with the VLAN above:
lxc launch ubuntu:20.04 example --profile=default --profile=vlan80
You can also change assigned profiles on a container:
lxc profile assign example default,bridgeprofile