In this tutorial we learn how to migrate a Windows 11 Virtual Machine from Microsoft Windows Hyper-V to a LXD VM. This will involve first migrating the Hyper-V Virtual Machine instance to a Linux KVM VM.
If you are unfamiliar with KVM, you may want to watch my “KVM Virtual Machines 101” tutorial which explains how to install and use KVM/QEMU virtual machines. If you already have KVM/QEMU installed, we will use “virt-manager” in this migration process.
NOTE: THIS MIGRATION ONLY SUPPORTS VM’s THAT WERE CREATED ORIGINALLY AS “GENERATION 2” HYPER-V VIRTUAL MACHINES.

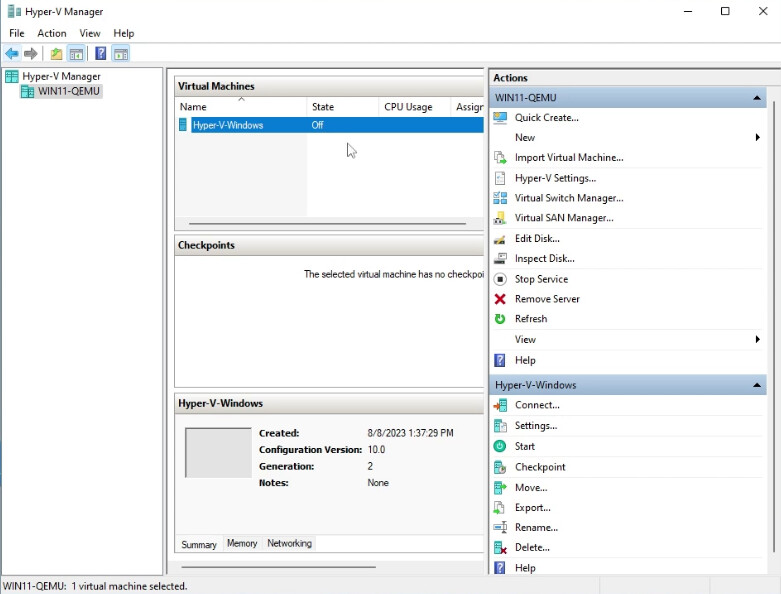
Begin by making sure that your Hyper-V Virtual Machine is shutdown. Hyper-V Manager should show the state of the virtual machine that you want to migrate as “off”. The virtual machine in my example is “Hyper-V Windows”.
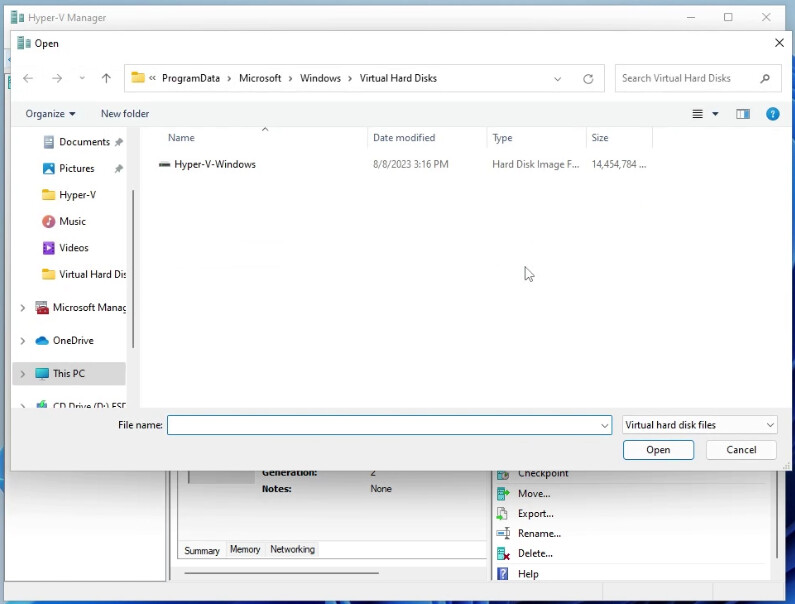
Select the “Inspect Disk Option” under the “Actions” menu on the right side of the screen and you should see a Windows Explorer window listing your virtual machine disk files as follows.
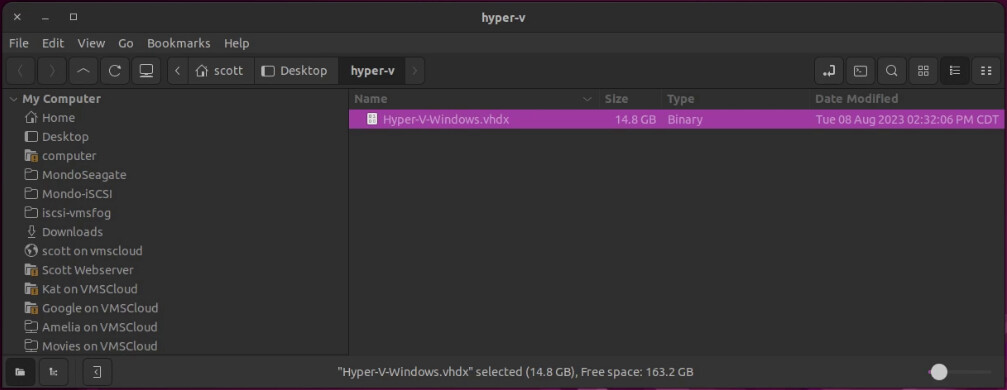
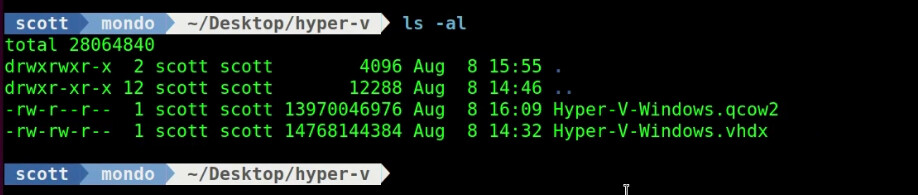
You need to copy the appropriate disk image from Windows over to your Linux Machine where virt-manager (KVM) is installed. I used a CIFS file transfer because I had Samba installed on my Linux machine.
On your Linux machine, the file should appear as type “.vhdx”:
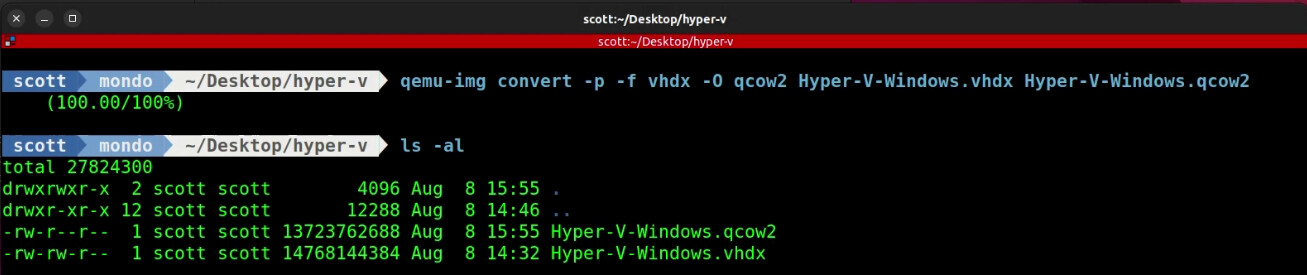
You will want to open a terminal in Linux and move to the folder containing the virtual disk image you copied in order to run qemu-img to convert the disk image from a “.vhdx” file type to a “.qcow2” file type. The command is as follows. Be sure to change your file names for your virtual machine disk file.
qemu-img convert -p -f vhdx -O qcow2 Hyper-V-Windows.vhdx Hyper-V-Windows.qcow2
The result should look like below:
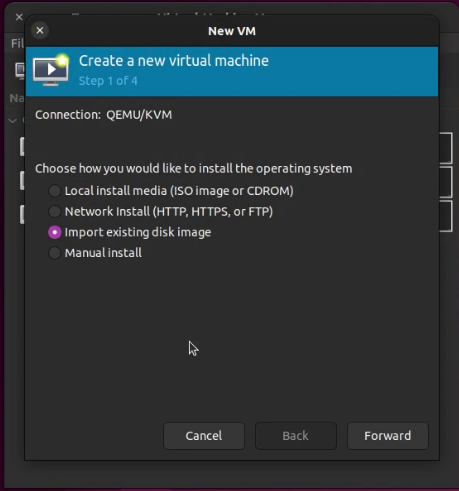
Next, open virt-manager (“KVM Virtual Machines 101”) and create a new machine with the option to import an existing disk image:
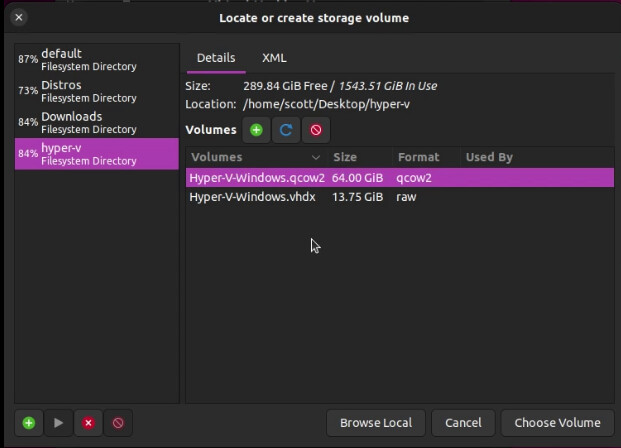
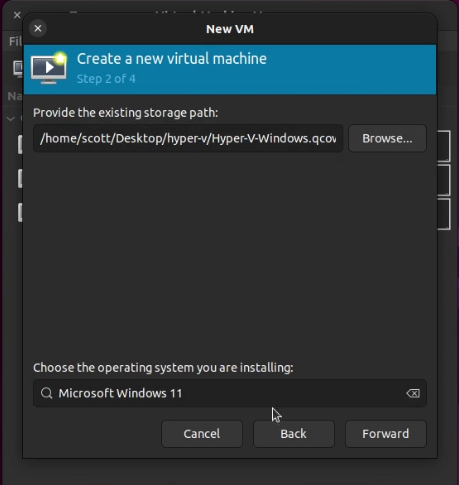
Browse for the disk image and select the “.qcow2” image that we just converted:
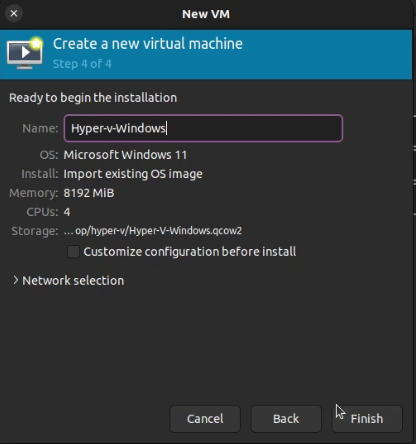
Be sure to designate your OS type. My virtual machine is Windows 11.
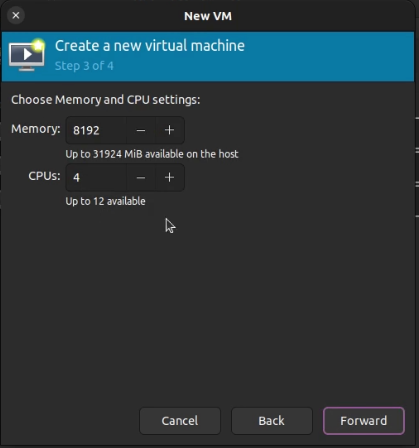
Designate your desired memory/vCPU values. Windows 11 must have at least two CPUs and a minimum of 4GB of memory.
Finally, name your KVM Virtual Machine on the next screen and press “Finish”:
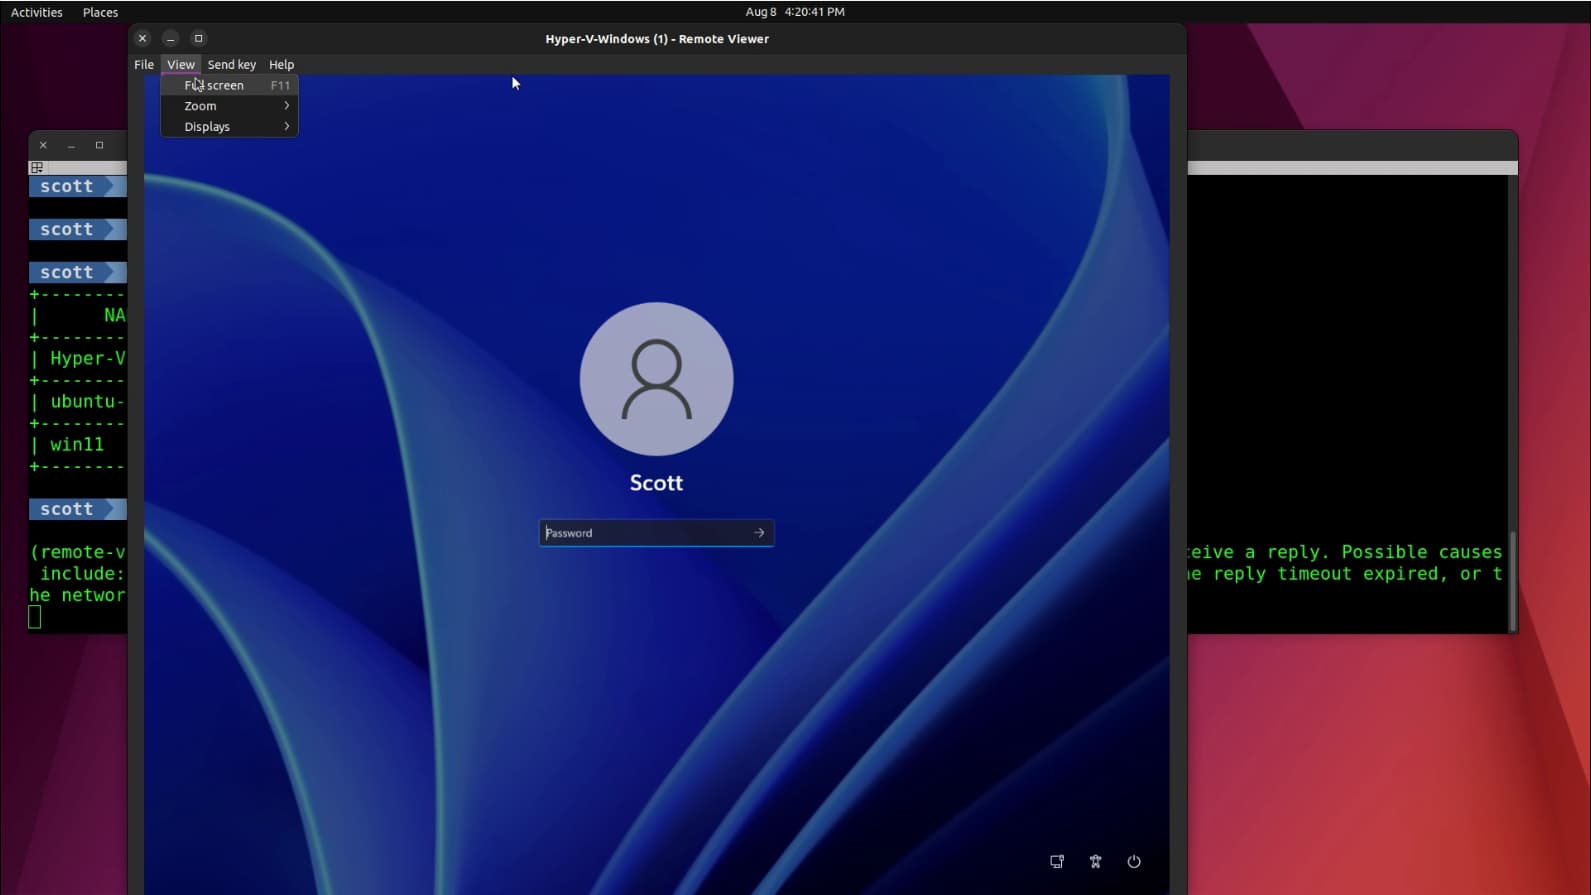
At this point the Virtual Machine viewer pops open and you the KVM VM will boot:
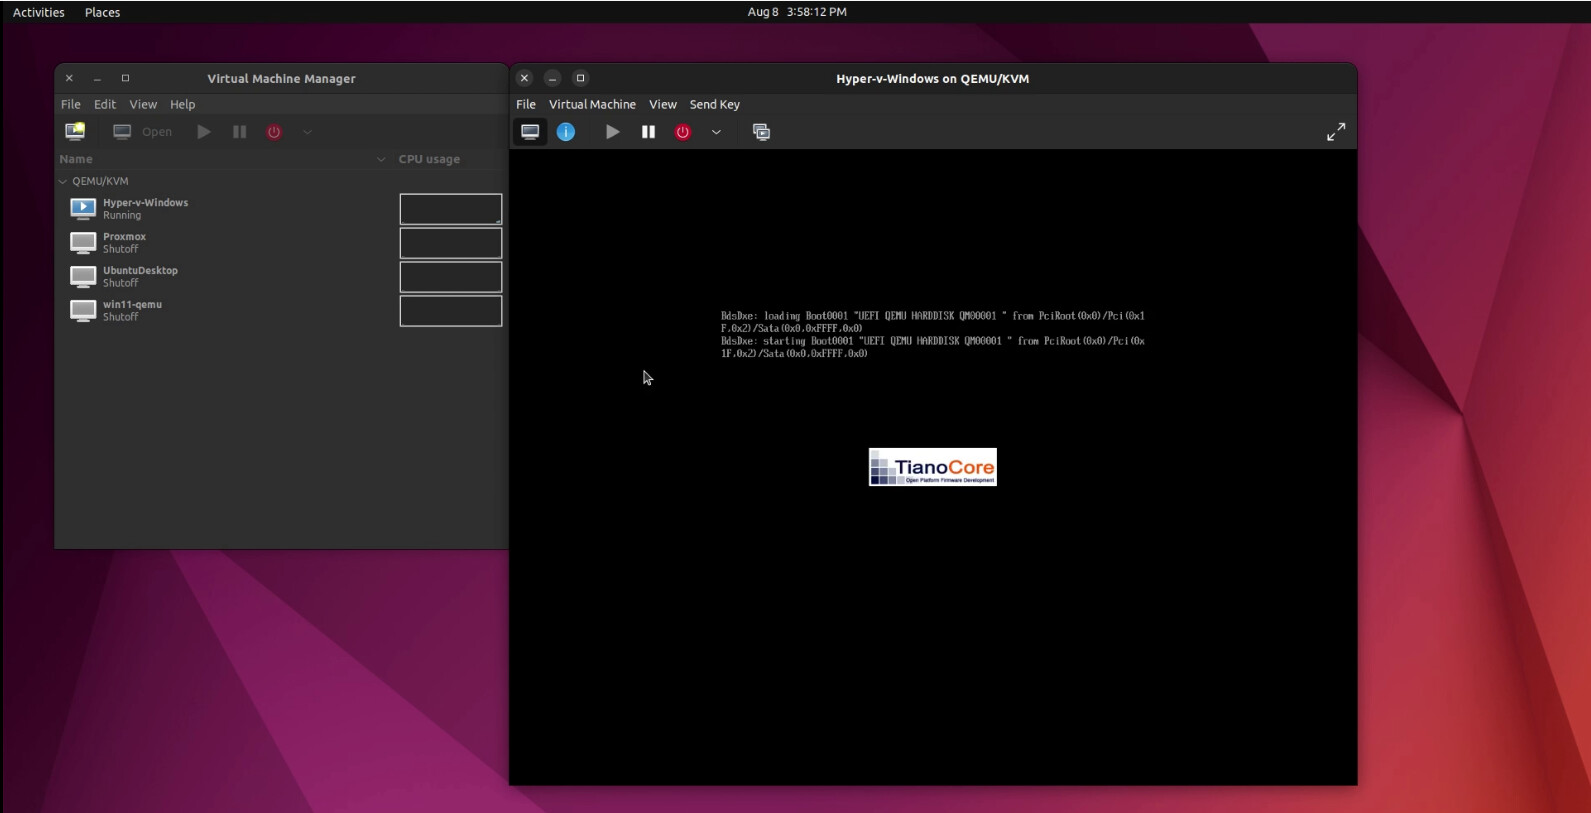
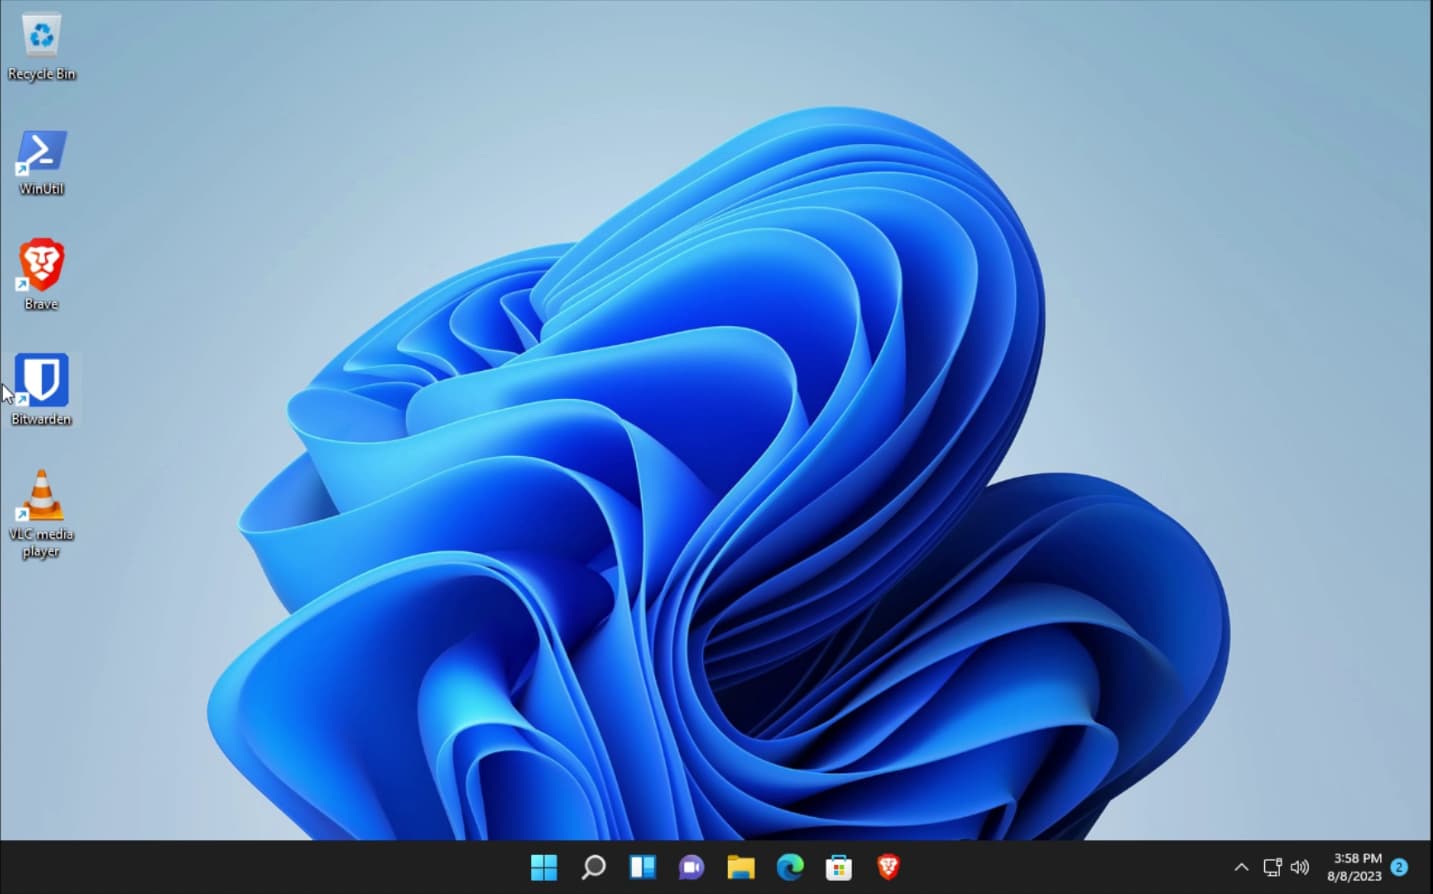
I switched my viewer to full screen and logged in using my username and password. At this point, the Hyper-V VM is now fully functional as a KVM VM. The next step will be to port it to a LXD VM.
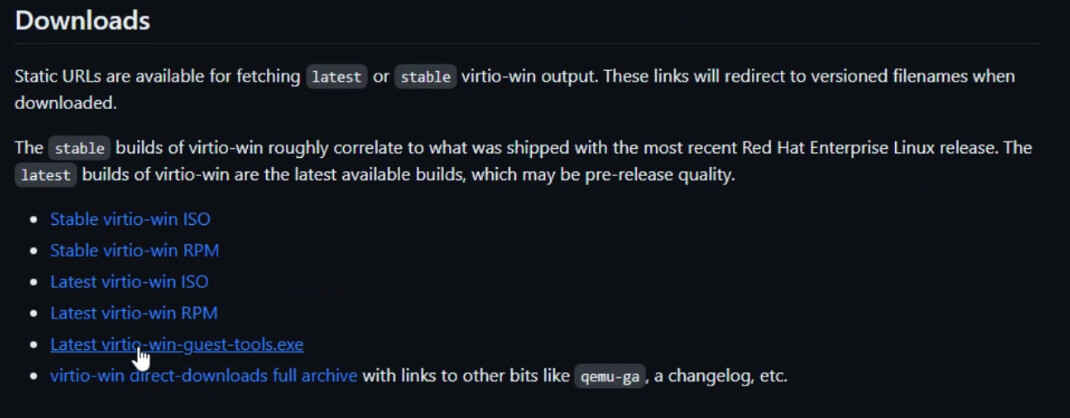
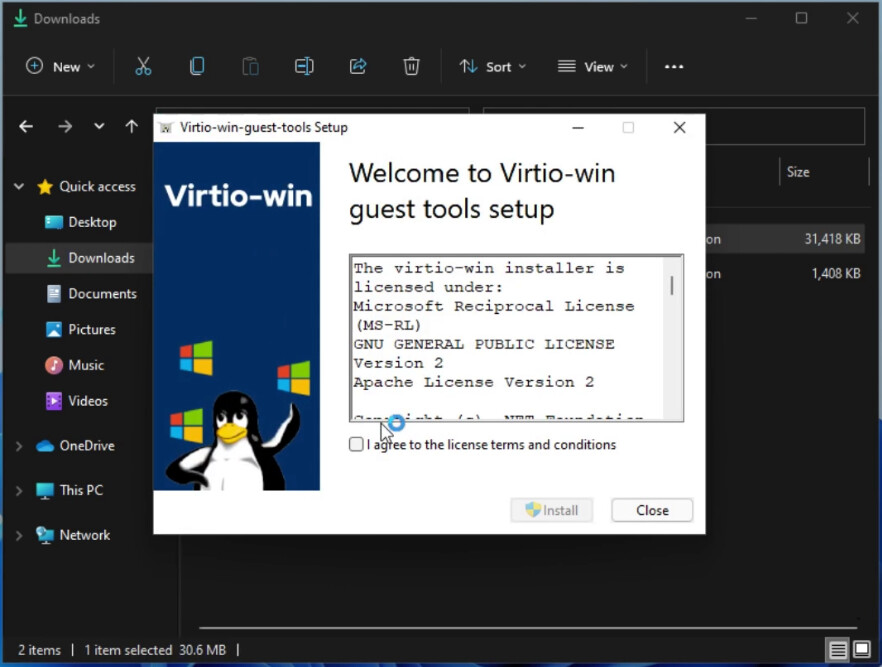
In a web browser in the KVM VM, head over to the virtio-win page at this URL:
https://github.com/virtio-win/virtio-win-pkg-scripts/blob/master/README.md
Scroll down the web page and download “Latest virtio-win-guest-tools.exe”.
Once downloaded, head over to your Downloads folder with Windows File Explorer and run the tools setup and accept all of the defaults during the installation.
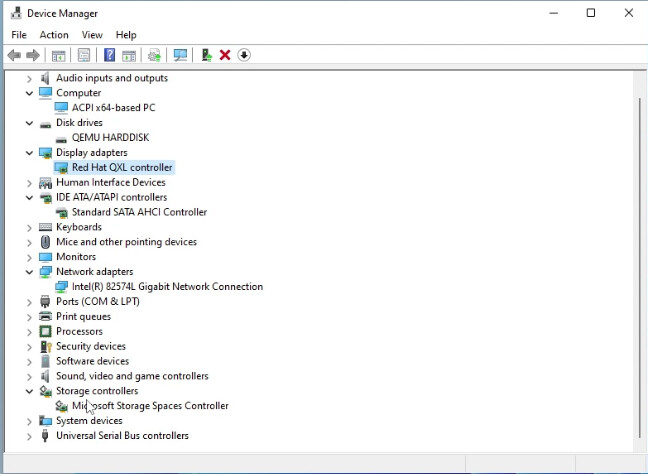
The installation of these Virtio drivers in the KVM VM are needed in KVM, but they are an absolute requirement in a LXD VM.
At this point, device manager has a few of the required updates, but we need to make a couple more changes.
Now, shutdown the KVM Windows 11 Virtual Machine. Change the KVM screen over to the information page ![]() and then choose “Add Hardware”. Specify that you want to add a new “Controller”.
and then choose “Add Hardware”. Specify that you want to add a new “Controller”.
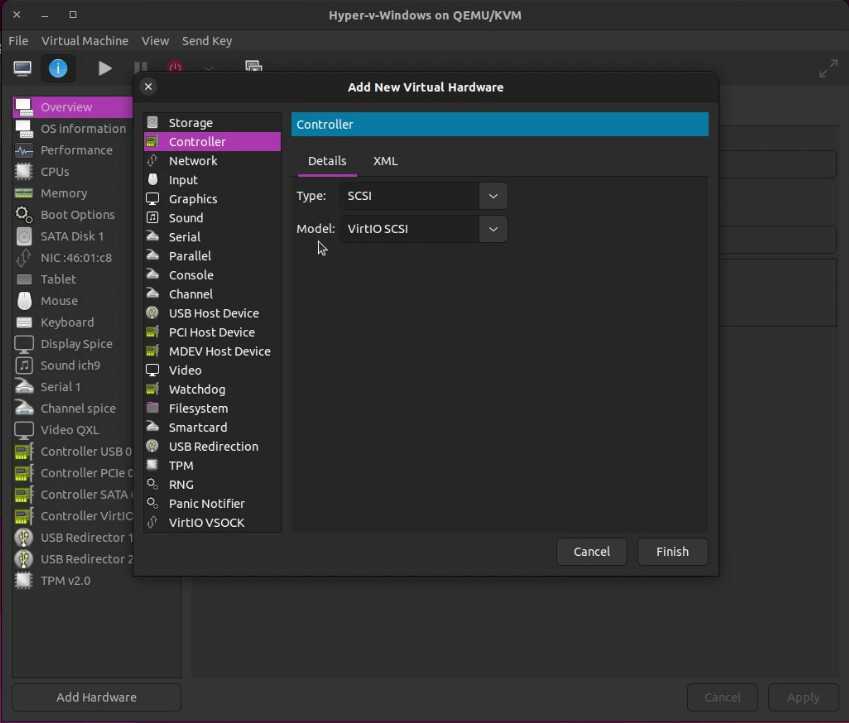
Make sure that the new controller type is “SCSI” and that the model is “VirtIO SCSI” as shown in the screenshot above. The VirtIO SCSI Controller is required once we migrate to a LXD VM or the LXD VM will not boot Windows.
Boot your Windows 11 KVM VM again so that Windows can process these updates. After you login, you should see the “Red Hat VirtIO SCSI pass-through controller” listed in device manager as a new Storage controller.
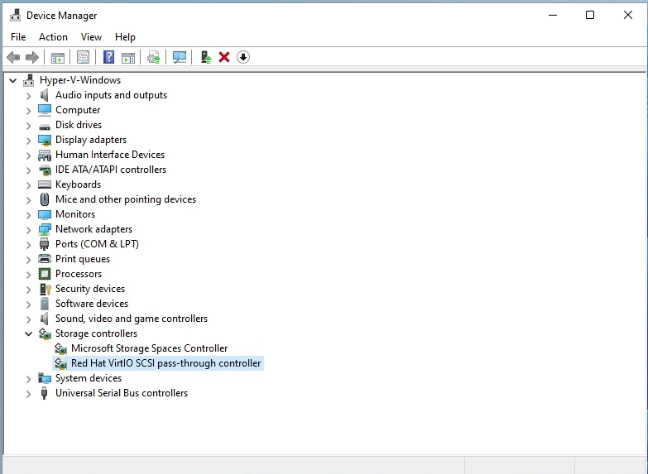
You can now shutdown the Windows 11 KVM VM once you have made this verification. All these operations have been making changes to the “.qcow2” disk image file in preparation for migration to LXD.
You will see in your Linux terminal that the disk image file has been updated by the time stamp.
We need to create a metadata file to import the disk image to LXD.
nano metadata.yaml
Paste the following into the editor making changes as appropriate.
architecture: x86_64
creation_date: 1324284563
properties:
  description: Hyper-V-Windows
  os: Windows
  release: 11
Do a CTRL O and press ENTER to write out the file and a CTRL X to exit the nano editor.
Put the “.yaml” file in a “tar” archive.
tar -czvf metadata.tar.gz metadata.yaml
Copy the resulting tar file and the “.qcow2” disk image file over to your LXD server. Next, import the image into LXD with the following command (your names will differ):
lxc image import metadata.tar.gz Hyper-V-Windows.qcow2 --alias Hyper-V-Windows-Image
At this point, you have a LXD Image from which you can create a LXD VM with a command like the following. NOTE: I am using “bridgeprofile” to offer my LXD VM on an address on my LAN which I cover in “LXD Step by Step”:
lxc init Hyper-V-Windows-Image Hyper-V-Windows -c boot.autostart=true --profile default --profile bridgeprofile
You can set your LXD VM CPU and memory with a command like this:
lxc config set Hyper-V-Windows limits.cpu=4 limits.memory=8GiB
Start your LXD VM:
lxc start Hyper-V-Windows
Connect to the LXD VM GUI interface with the following command (you can use RDP if that was configured):
lxc console Hyper-V-Windows --type=vga
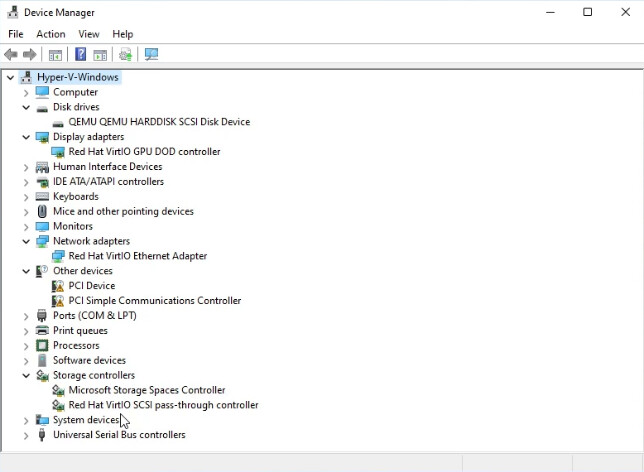
Once you login to the LXD VM, go into windows “device manager” and you should see that the disk drive is specified as a “QEMU QEMU HARDDISK SCSI Disk Device” which means it is using the Redhat VirtIO disk driver. This is what allowed the LXD VM to boot windows correctly.
In addition, you will note that the network adapter is using the VirtIO driver and the Display Adapter is using the VirtIO driver.
At this point, you can delete the KVM Virtual Machine because we only needed it for the migration process. Also, you can use the LXD Image we created to create more than once Windows 11 LXD VM or you can delete the image.
In any case, you now have a fully functional Windows 11 LXD VM that started as a Windows 11 Hyper-V VM.
An added benefit is that LXD VM’s can be exported and imported to other LXD servers easily. You also have the benefit of LXD Snapshots as a powerful configuration control & management function now that your Windows instance is a LXD VM. This is faster and more reliable than Windows restore points.