This is a follow on from “LXD Storage Pools & Volumes”. This time we learn how to move a container from one pool to another and as a bonus we see how to create a new zfs pool on an available block storage device.
This time, instead of creating a virtual storage pool inside of a file, I create a new zfs storage pool on an available/unused disk drive.
To begin with, I identified an unused block storage device (disk drive):
lsblk
I identified drive “sdf” as my target drive because it had no partitions created on it (meaning no sdf1, sdf2, etc.). The following command will format the target disk and so you should make sure that it has no data that you want to save:
sudo zpool create pool2 /dev/sdf -m none
The previous command creates a zfs storage pool on device sdf without specifying a mount point since the storage pool will be dedicated to LXD.
You can list your storage pools:
sudo zpool list

To connect this pool to LXD:
lxc storage pool create pool2 zfs source=pool2
Ask LXD about its storage pools:
lxc storage list

Unlike in “LXD Storage Pools & Volumes”, I am not creating a profile for pool2. Instead, I create two containers in the default storage pool using the “bridgeprofile” as covered in “LXD Step by Step”:
lxc launch ubuntu:22.04 container1 --profile default --profile bridgeprofile
lxc launch ubuntu:22.04 container2 --profile default --profile bridgeprofile

All containers, regardless of which storage pool they are in, must have unique names on the LXD server. For this reason, I must move, and then rename the container back to its original name. Be sure to stop the container first.
lxc stop container1
Move the container:
lxc move container1 container-temp -s pool2
Now that the container is in pool2, I can rename it back to its original name:
lxc move container-temp container1
We can also move container2:
lxc stop container2
lxc move container2 container-temp -s pool2
lxc move container-temp container2
List the contents of pool2:
lxc storage volume list pool2
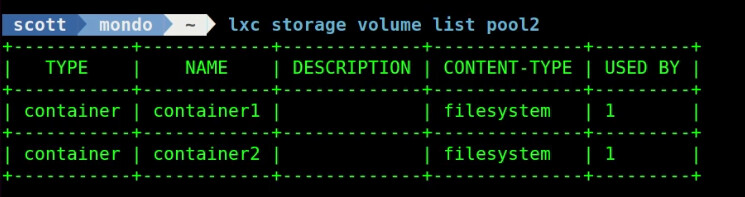
You can also see that pool2 has two objects in it:
lxc storage list

The Ubuntu 22.04 image is not in pool2 because I created container1 and container2 in the default pool and moved them. So, the Ubuntu 22.04 image used to create these containers is in the default pool. Also, we didn’t create a pool2 profile since we moved the containers rather than creating them initially in pool2 as in the last tutorial.
Assuming both containers are stopped and we are finished with them, they can be deleted:
lxc delete container1
lxc delete container2
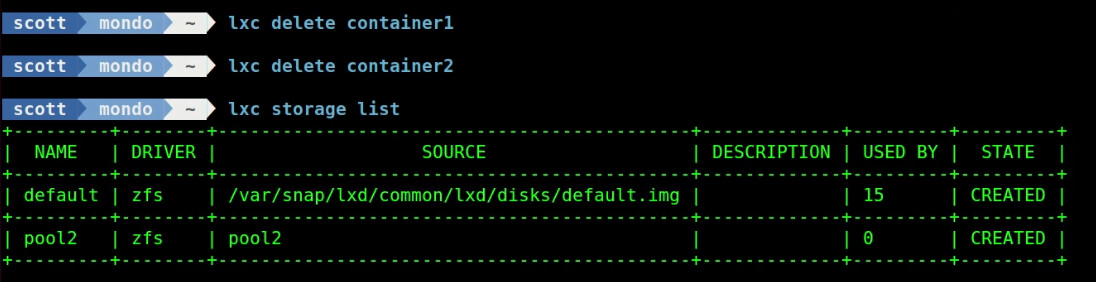
Since there are no longer any objects using pool2, it can be deleted if desired:
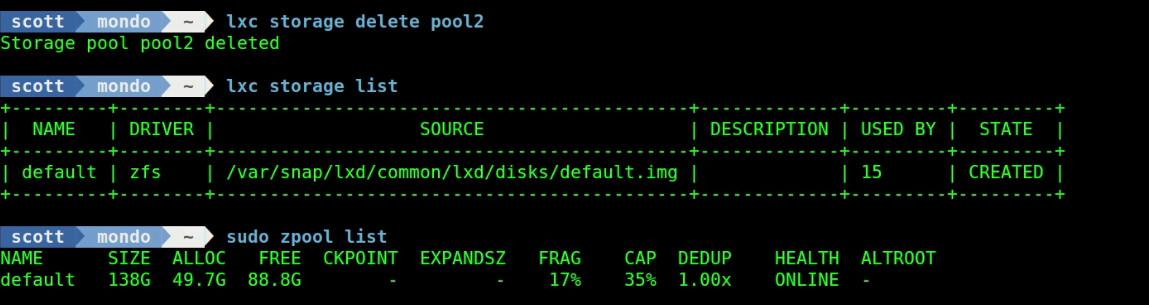
lxc storage delete pool2
At this point, the pool is deleted from the system:
At the time of this presentation, neither the LXD Dashboard or the LXConsole GUI interfaces provide an intuitive way to move containers to another pool.
Assuming that you created a “pool2” profile as in the last video, you could create a container using that profile or change to the pool2 profile and you that is how you would accomplish a creating a container in another pool or a move from within LXD Dashboard or LXConsole.