Network bridges have been around for almost 25 years and they are defined as any device that connects two ethernet segments together and forwards Layer two addresses (MAC addresses).
By default, a Docker or a LXD container communicate on a private address range and use a private Network Address Translation (NAT) network to allow communication between containers. LXD containers communicate on a private network through a bridge normally designated as lxdbr0 by default.
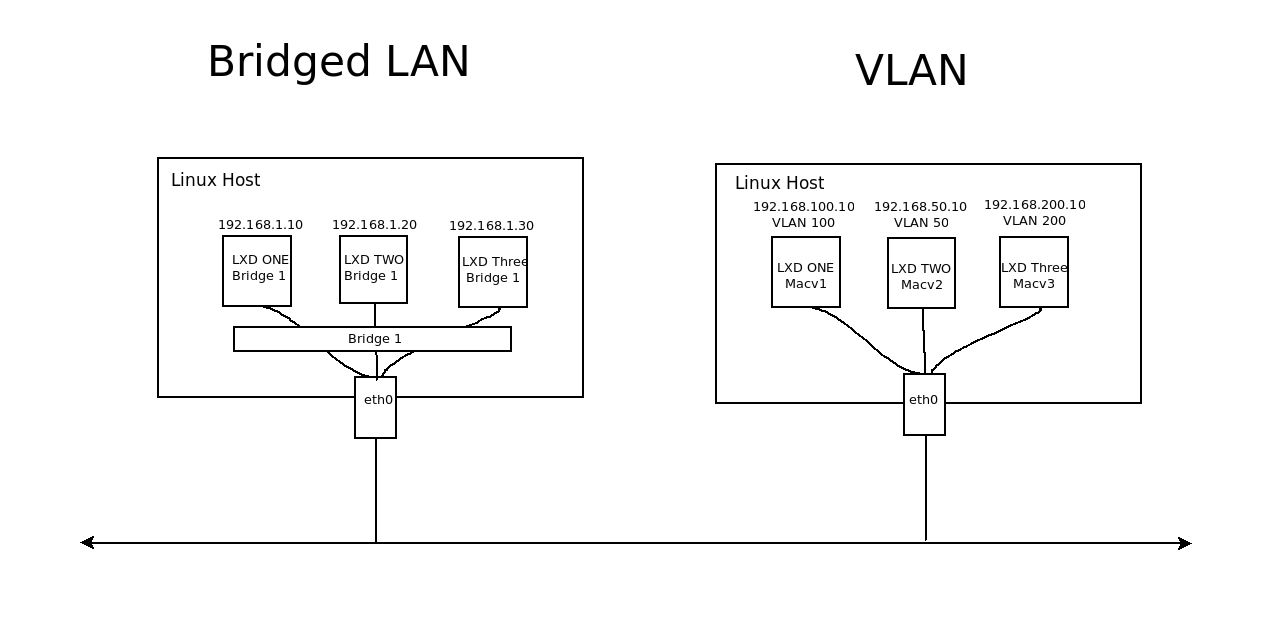
We are going to learn how to Bridge a LXD container to your LAN and also use macvlan to present a LXD container to your LAN. A LXD bridge has the advantage of allowing the container to communicate back to the LXD host if required. Whereas, a macvlan container cannot reach its parent host.
To create a Bridged profile (Change qvs0 to your host adapter name).
lxc profile create bridgeprofile
cat <<EOF | lxc profile edit bridgeprofile
description: Bridged networking LXD profile
devices:
  eth0:
    name: eth0
    nictype: bridged
    parent: qvs0
    type: nic
  root:
    path: /
    pool: default
    type: disk
EOF
To launch a container using this profile (change the “ubuntu-20.04” to an image you want:
lxc launch Ubuntu-20.04 bridgedhost --profile bridgeprofile -c security.privileged=true -c limits.memory=4096MB -c limits.cpu.allowance=20% -c boot.autostart=true
To create a macvlan profile (Change qvs0 to your host adapter name):
lxc profile create untagged
cat <<EOF | lxc profile edit untagged
description: Untagged macvlan LXD profile
devices:
  eth0:
    name: eth0
    nictype: macvlan
    parent: qvs0
    type: nic
  root:
    path: /
    pool: default
    type: disk
EOF
To launch a container using this profile (change the “ubuntu-20.04”) to an image you want:
lxc launch Ubuntu-20.04 macvlanhost --profile untagged -c security.privileged=true -c limits.memory=4096MB -c limits.cpu.allowance=20% -c boot.autostart=true
Enjoy!