Want a simple script to discover all of the systems on your network and list then by DNS Name, IP Address, and Mac address? This might be the tutorial for you.
Two presentations ago I presented the tutorial It’s Always DNS in Containers where I showed a simple way to get local DNS resolution to work on systems where it is not working.
Several times I have covered how DHCP works by assigning a TCP/IP address to a system as it boots up on your network. I have indicated that a best practice is to manage IP addresses at your DHCP server with DHCP Address Reservations rather statically addressing systems in each OS instance.
DHCP works because it records the unique hardware MAC address to systems it sees on your local area network and grants a unique IP address to the systems it sees.
IPv4 is broadcast based. This means that systems broadcast requests for the availability of a computer at a particular IP address. Systems use Address Resolution Protocol (ARP) to map IP addresses to Media Access Control (MAC) addresses on a local network.
MAC addresses are unique hardware addresses built into the network interface card (NIC) on your computer. Devices communicate using IP addresses, but the data link layer needs MAC addresses to deliver packets on your local network. In the past 20 years, the reference to a MAC address being a “hardware” address is somewhat of a misnomer because containers and virtual machines have virtual MAC addresses since their hardware is virtual in nature.
That being said, the first half of a MAC address (52:54:00) in my example in the slides, is referred to as the vendor code. Specific vendor codes are granted to manufacturers to assure that MAC addresses are not repeated. Linuxcontainers.org is granted a couple of vendor codes for Incus containers.
Here’s an interesting key fact: Devices communicate using IP addresses, but the data link layer (OSI Layer 2) needs MAC addresses to deliver packets to systems on your network. Your system checks its ARP cache to see if it already knows the MAC address associated with an IP address and if it does not, it sends a broadcast asking for the MAC address.
There are two ways to list the ARP cache on your system.
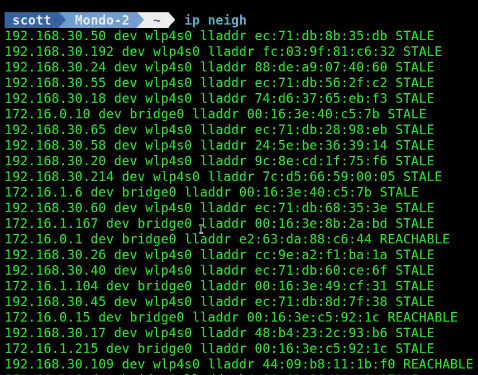
ip neigh
This command is short for “ip neighbors” and lists all the systems that it “hears”.
That’s one reason why dividing IPv4 networks into smaller subnets makes for a faster network. The fewer broadcasts that systems have to listen to, the faster that the network becomes.
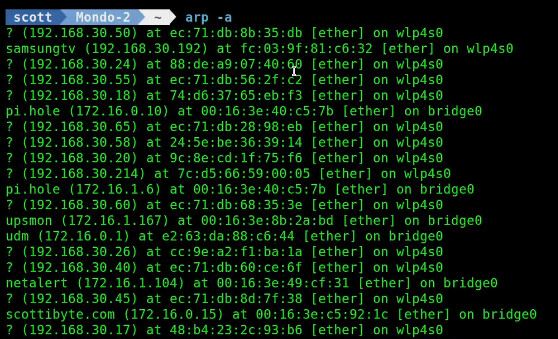
The other way to list the arp table is with the arp command. The arp command is part of the net-tools package.
sudo apt install net-tools
To list the arp table with the arp command:
arp -a
Sometimes clearing the arp table is a good way to clean up network communication problems. The arp table is rapidly rebuilt from the broadcasts it hears and so clearing the arp table does not really have any downsides. To clear or flush your arp table:
sudo ip -s -s neigh flush all

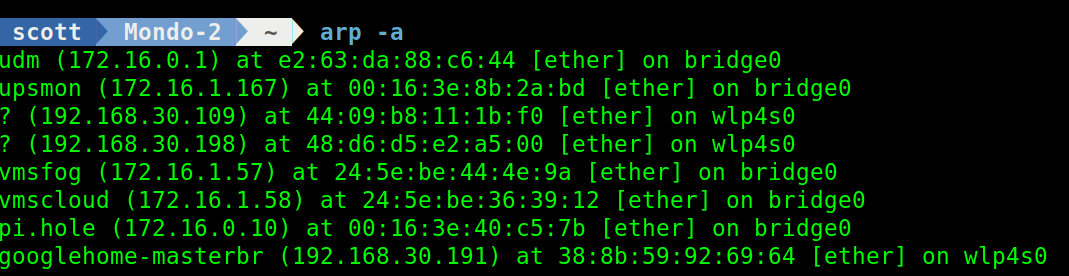
Listing your arp table immediately thereafter, you can see that it is already rebuilding.
arp -a
If you want to watch the arp table traffic realtime, you need to install tcpdump.
sudo apt install tcpdump -y
Use tcpdump to monitor the arp traffic:
sudo tcpdump -i "$(ip route get 1.1.1.1 2>/dev/null | awk '{print $5}')" arp
In the command above, I use “ip route get 1.1.1.1” to figure out the default route and you can see the resulting output in the video.
Around a year ago I did a tutorial entitled Home Lab Network Monitoring where I showed how to install and configure NetAlertX to monitor your network traffic & availability.
This time, I have developed a very simple script to listen to your network traffic and list discovered network nodes by DNS name, IP address and MAC address. This is a great way to document the systems on your network.
To create this script:
nano scan_subnet.sh
Paste the following into the editor.
#!/bin/bash

if [ -z "$1" ]; then
    echo "Usage: $0 <subnet> (e.g. 192.168.1.0/24)"
    exit 1
fi

SUBNET="$1"
echo "Scanning IPv4 subnet: $SUBNET ..."
echo

# Trigger ARP population
nmap -sn -4 "$SUBNET" > /dev/null

# Print header
printf "%-24s %-18s %s\n" "Hostname" "IP Address" "MAC Address"
echo "-----------------------------------------------------------------------"

# Parse ARP/neighbor entries
ip -4 neigh | grep -Ev 'FAILED|INCOMPLETE' | while read -r line; do
    # Extract IP and MAC
    IP=$(echo "$line" | awk '{print $1}')
    MAC=$(echo "$line" | awk '/lladdr/ {for (i=1;i<=NF;i++) if ($i == "lladdr") print $(i+1)}')

    # Skip if MAC is empty
    [[ -z "$MAC" ]] && continue

    # Attempt DNS resolution
    HOST=$(getent hosts "$IP" | awk '{print $2}')
    [[ -z "$HOST" ]] && HOST="(unknown)"

    printf "%-24s %-18s %s\n" "$HOST" "$IP" "$MAC"
done
Do a CTRL O and Enter to save the file and a CTRL X to exit the nano editor.
This bash script uses the network mapping program nmap and so you need to install it.
sudo apt install nmap
Before you can run the script, you must grant it execute privilege.
chmod +x scan_subnet.sh
To run the script you need to provide the IP subnet and mask to scan. Yours might be 192.168.1.0/24. I used 172.16.1.0/24 because that is one of my network ranges.
./scan_subnet.sh 172.16.1.0/24
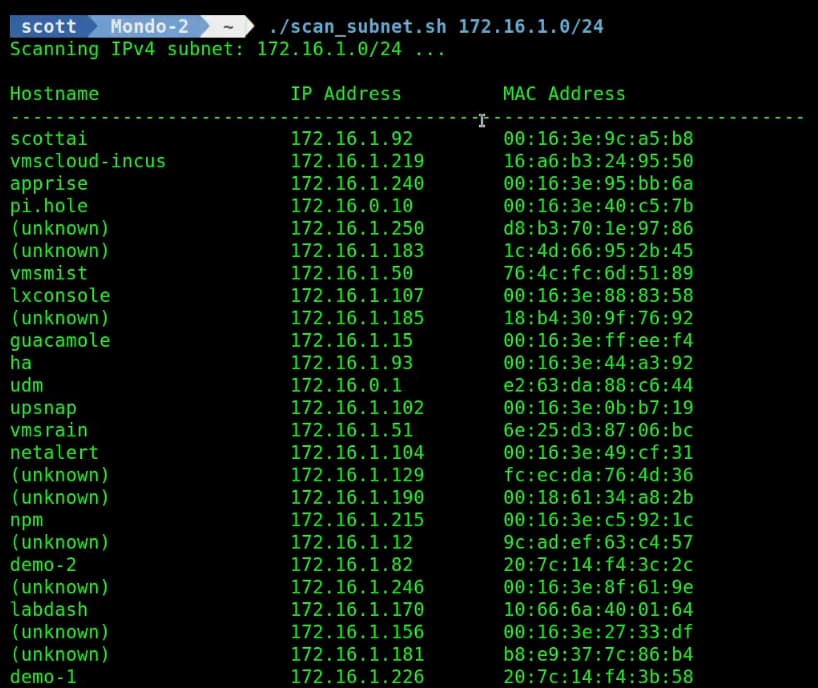
If you see (unknown) in the first column, that means that you have no local DNS name for the system at the indicated address. I have multiple tutorials showing how to use the local DNS feature in Pi-hole.
If you want to place this listing in a file:
./scan_subnet.sh 172.16.1.0/24 >network-listing.txt
The network-listing.txt would then have a listing of all of the systems discovered on your live network at the time of the scan by DNS name, IP address and MAC address. This is a great way to document your network.