Lab Dash is a new Home Lab Dashboard which can be configured completely via the GUI like Heimdall. I look forward to additional features as this project develops. Read about Lab Dash here on their GitHub page.
For the past few years, I have used Heimdall as my Homelab dashboard and I like it.
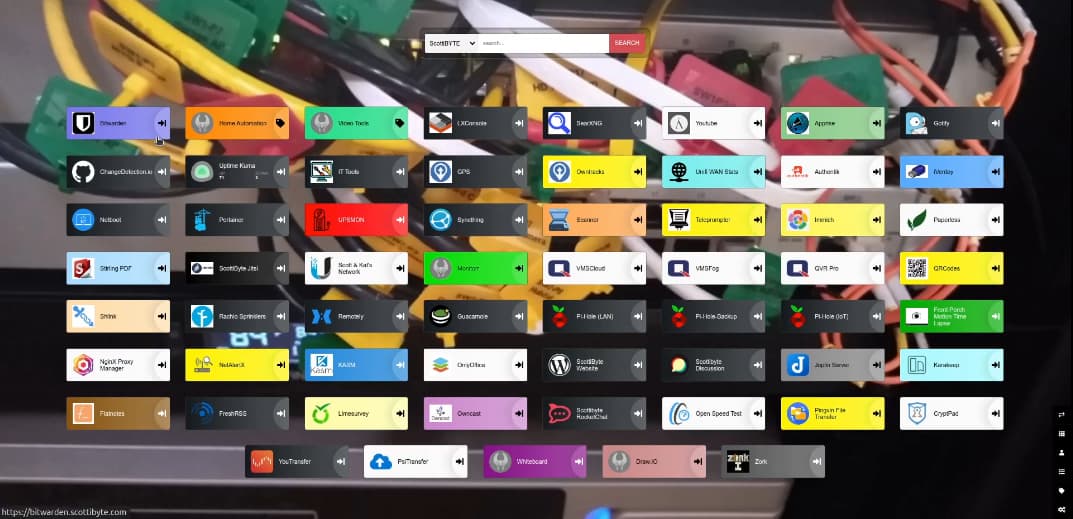
One of the key features that I appreciate about Heimdall is its feature to add & edit application icons completely from the GUI as opposed to having to use yaml or conf files.
Lab Dash is a new application that provides a similar user-friendly GUI interface. I am confident that the author may continue to add additional features in the future.
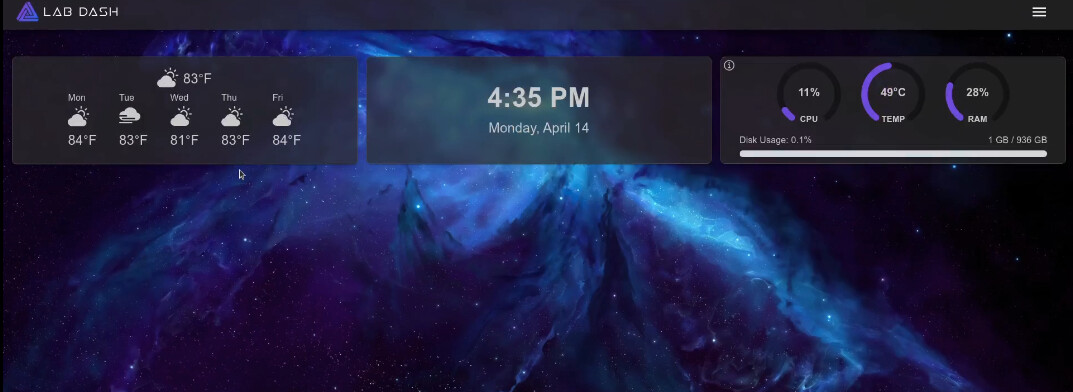
Here’s my Lab Dash dashboard that I created in just over an hour.
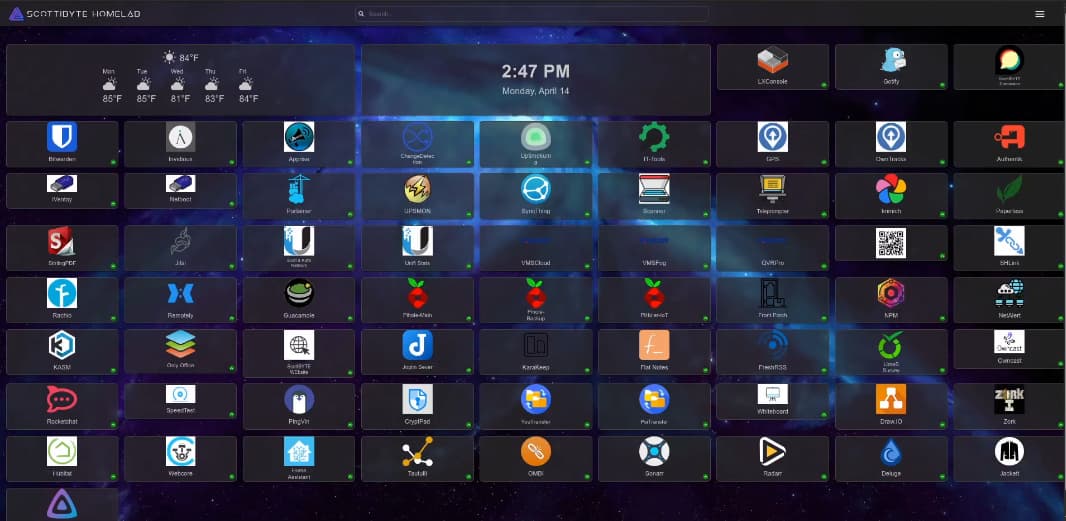
Lab Dash also monitors the availability of applications defined in the dashboard with an indicator in the lower right of each application shortcut tile.
Lab Dash also provides a weather widget, a date/time widget, and a system information widget that you can optionally configure. The top bar can be configured with popular search engines or even custom search engines. I configured my SearXNG self-hosted search in my Lab Dash web page.
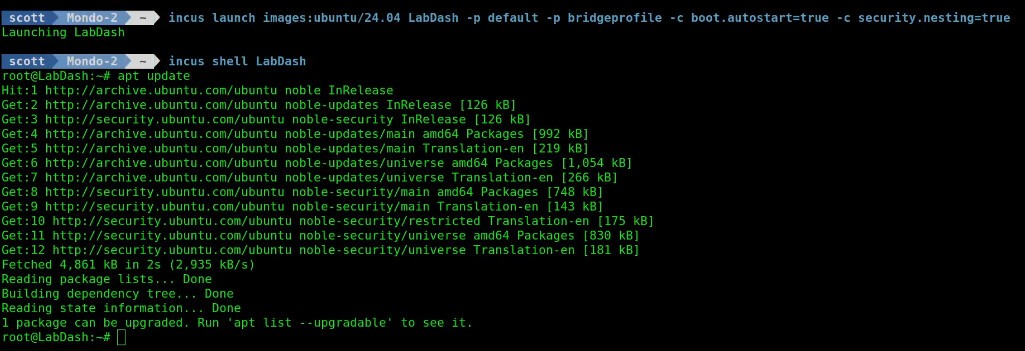
On your Incus server, create a container to install Lab Dash.
incus launch images:ubuntu/24.04 LabDash -p default -p bridgeprofile -c boot.autostart=true -c security.nesting=true
Move inside the Lab Dash container.
incus shell LabDash
Update the container repositories.
apt update
Install the dependencies.
apt install nano curl openssh-server net-tools -y
Install docker from the script on the docker website.
curl -sSL https://get.docker.com | sh
Add a user account and place it in the sudo and docker groups for management purposes.
adduser scott
usermod -aG sudo scott
usermod -aG docker scott
Move over to the new user account.
su - scott
Create a folder for the application and move inside it.
mkdir labdash
cd labdash
Generate a JSON Web Token to encrypt the application password.
openssl rand -base64 32

Copy the token generated above.
Edit the docker compose file.
nano compose.yml
Insert the following into the editor.
services:
  lab-dash:
      container_name: lab-dash
      image: ghcr.io/anthonygress/lab-dash:latest
      privileged: true
      ports:
        - 80:2022
      environment:
        - SECRET=YOUR_SECRET_KEY # any random string for jwt encryption
      volumes:
        - /sys:/sys:ro
        - ./config:/config
        - ./uploads:/app/public/uploads
        - /var/run/docker.sock:/var/run/docker.sock
      restart: unless-stopped
Replace YOUR_SECRET_KEY above with the encryption key you obtained with openssl.
Save the file with a CTRL O and enter and then CTRL X to exit the nano editor.
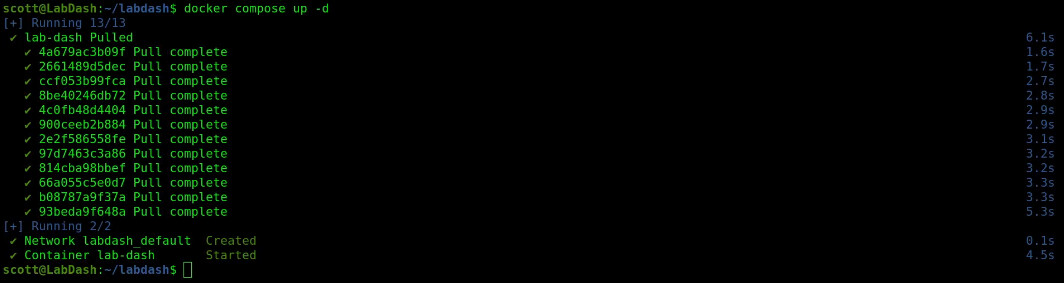
Start the application.
docker compose up -d
Find out the address of your incus container where the application is running by examining the address of eth0 in the container.
ifconfig
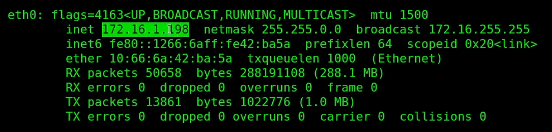
Your address will differ from mine. Now go into your web browser and enter the address you just found and you should see the Lab Dash setup page.
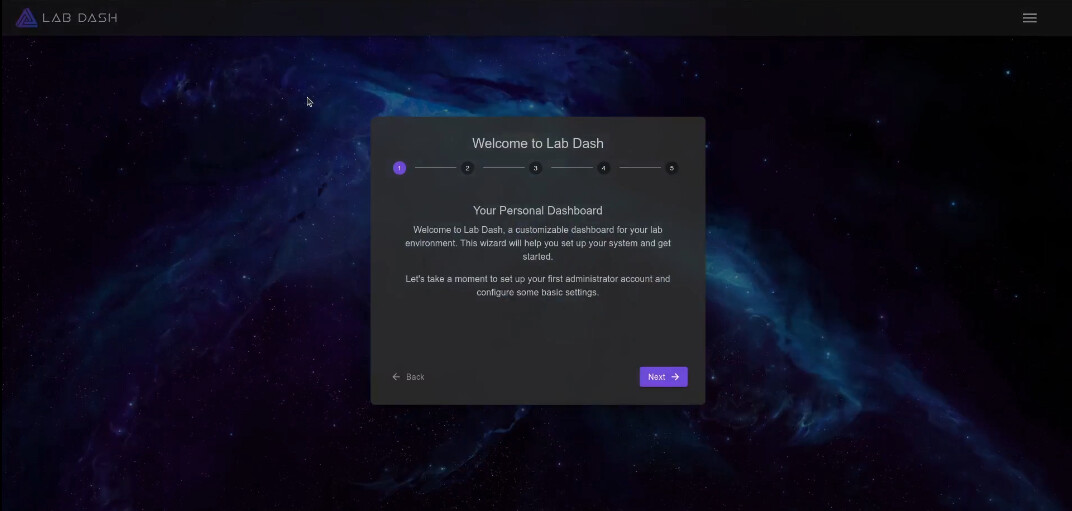
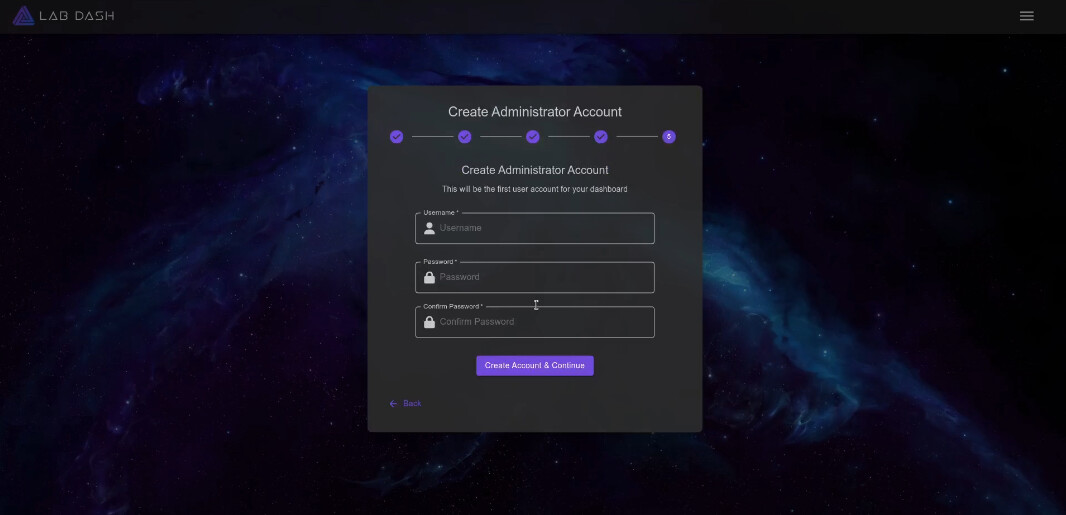
After you click “Next” four times you will be asked to create your admin account.
After you create your admin username, you will get a confirmation screen.
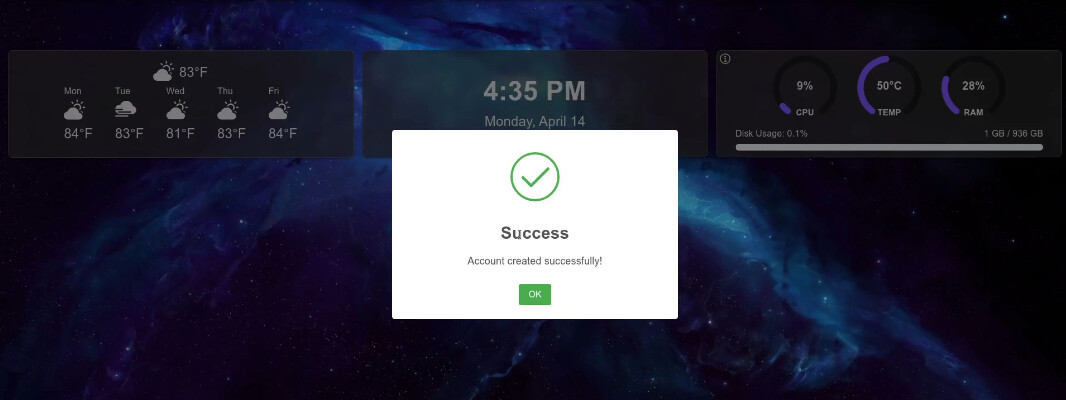
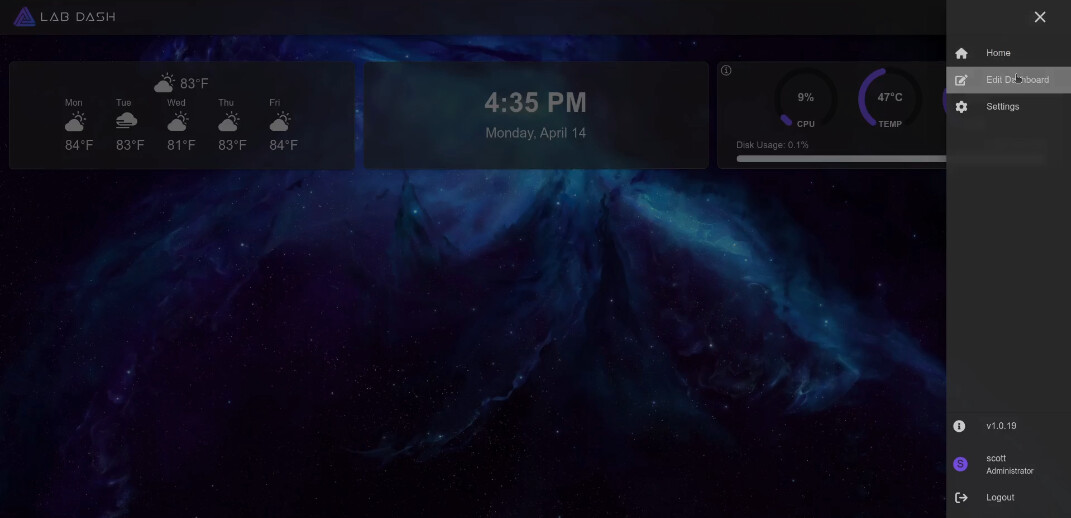
After you acknowledge the account creation, you will see a default dashboard with a weather widget, a clock widget, and a system widget.
If you click the hamburger menu in the upper right and select “Edit Dashboard” you can begin customizing your dashboard for your needs.
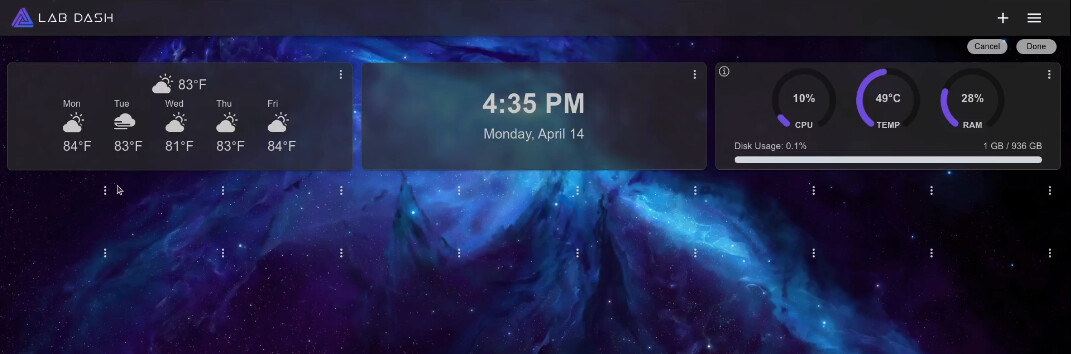
While in “edit” mode you will see hamburger controls on all of your widgets/app tiles which allow you to edit or delete them.
I really like Lab Dash and I encourage you to try it out and support the author.