“Incus Containers Step by Step” covered creating the default storage pool as a virtual file system. This tutorial shows how to migrate a block oriented zfs file system to a larger disk.
The “incus admin init” command we used in “Incus containers Step by Step” did not use a dedicated disk for the default storage pool. If you have a dedicated empty disk for your zfs storage pool, it is a higher performance alternate instead of the virtual file system.
“incus admin init” is only executed when building a new incus server. Here’s how we created the virtual default zfs pool originally.
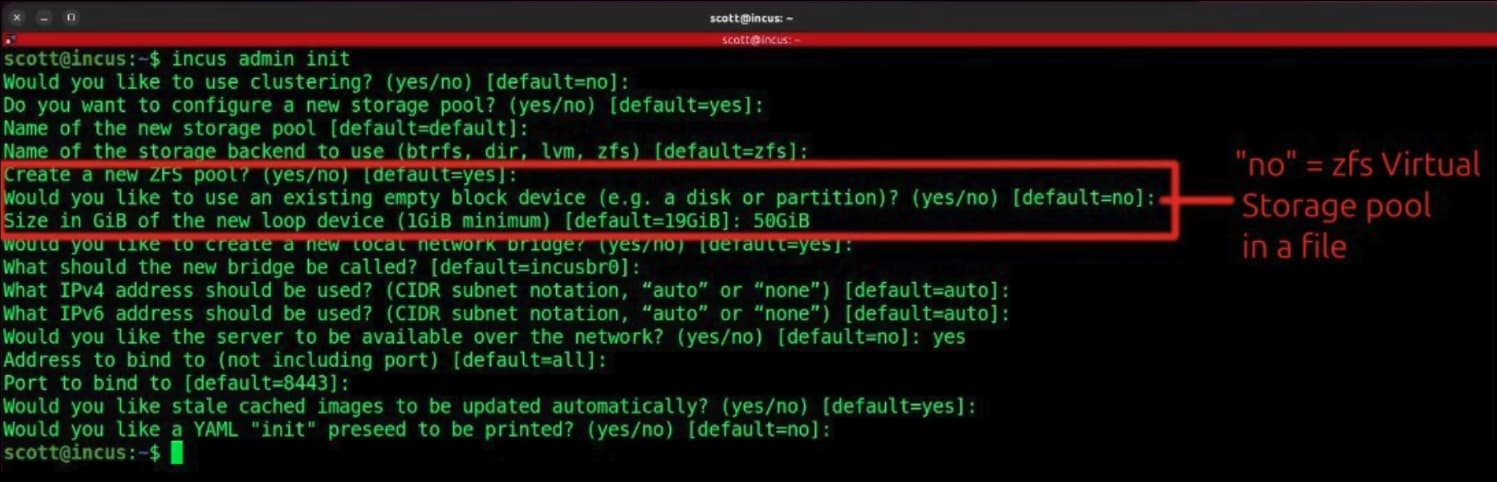
I created the virtual storage pool for simplicity. If you were creating a new incus server and you had a spare disk that you could dedicate to a storage pool you would proceed as follows:

An example disk might be:
/dev/sda
Just understand that the disk would be overwritten and dedicated to the zfs file pool.
The user I was helping had an existing 500GB NVMe device named /dev/nvme1n1 and it contained a zfs file system for the incus default storage pool. Our goal was to migrate everything on that drive to /dev/nvme0n1 which is a 2TB NVMe device.
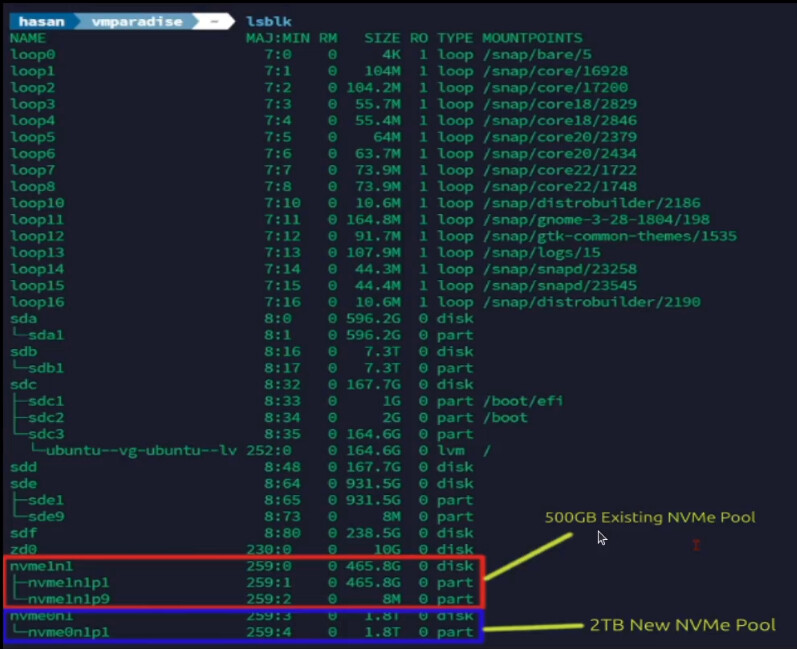
The existing system has two zfs storage pools (both on dedicated disks) and one dir storage pool (using the native ext-4 file system).
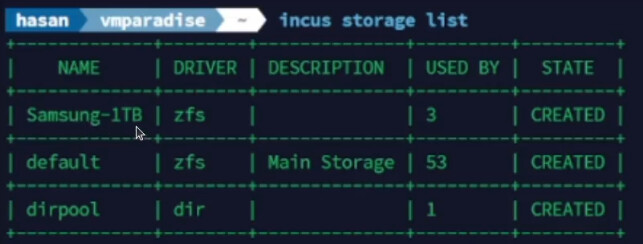
Samsung-1TB is a zfs pool on /dev/sde. default is a zfs pool on /dev/nvme1n1. dirpool is a native file system pool. Again, our goal is to migrate the default pool from /dev/nvme1n1 to /dev/nvme0n1.
Stop all of your containers.
incus stop --all
Stop the incus server.
sudo systemctl stop incus
This may result in a warning. Don’t worry about that.

Create a zfs pool on the new disk (this is irreversible). Make sure you are using the correct disk!
sudo zpool create -f default_new /dev/nvme0n1
Take a snapshot of your current default storage pool disk.
sudo zfs snapshot -r default@migration
Copy the snapshot to the new zfs pool on the new device.
sudo zfs send -Rv default@migration | sudo zfs recv -F default_new
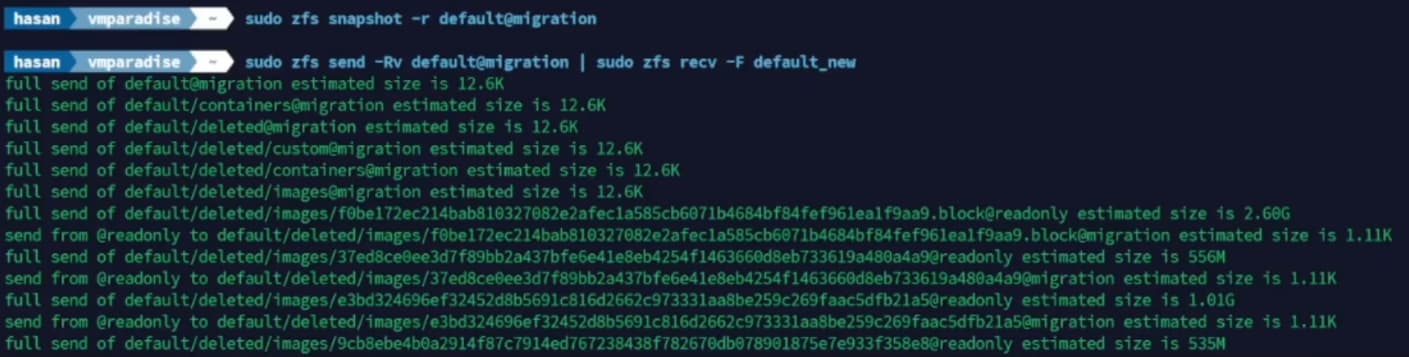
This migration might go on for several minutes depending on how many containers, snapshots, and profiles are in your storage pool.
Now we need to update incus to use the new storage pool.
First, unmount the old pool.
sudo zpool export default
Unmount the new pool.
sudo zpool export default_new
Now import the new pool and name it “default”.
sudo zpool import default_new default
Now restart incus:
sudo systemctl restart incus
I can see that the default pool is now on the larger disk.
sudo zpool list

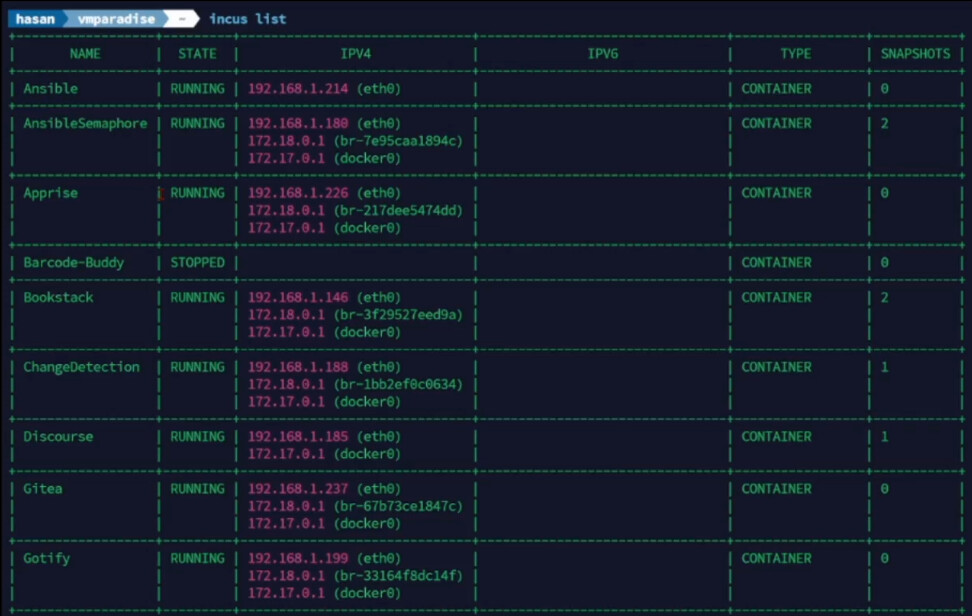
You should now see that all your containers are running.
incus list
At this point, you are done. However, you can re-purpose the old drive and make it a new incus storage pool if you like.
Wipe out the old drive. Again, be very careful that you are addressing the correct drive because this will destroy the contents of the drive you specify.
sudo wipefs -a /dev/nvme1n1
sudo sgdisk --zap-all /dev/nvme1n1
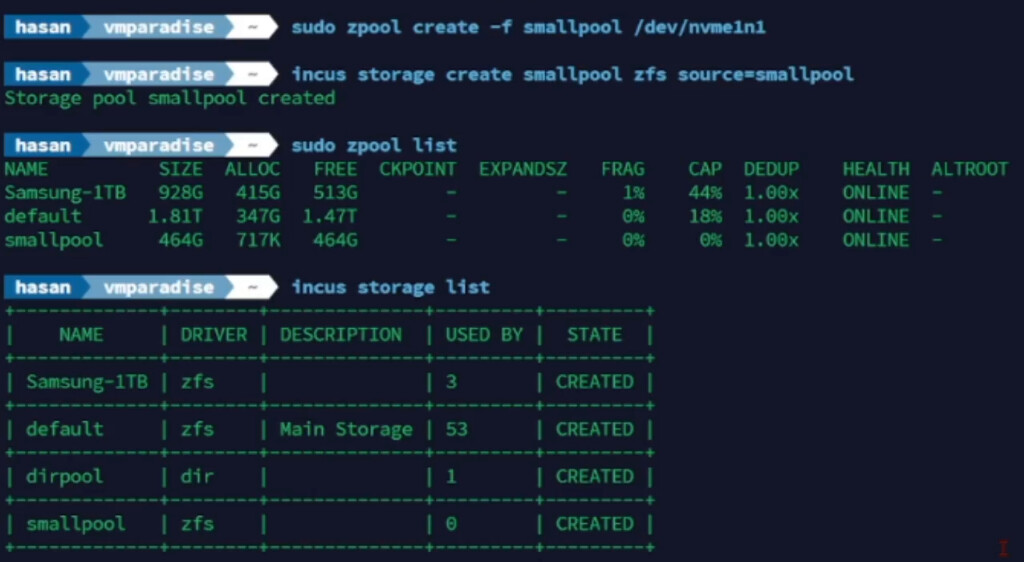
Create a new zfs pool on the same drive we wiped.
sudo zpool create -f smallpool /dev/nvme1n1
Create an incus pool to use this new zfs pool.
incus storage create smallpool zfs source=smallpool