This tutorial is a discussion about the use of both ssh keys to log into incus containers and ssh keys for Yubico hardware keys to log into incus containers as a way to enhance security in the Home Lab.
Software keys can be configured as the only login method and are more secure then passwords because they cannot be easily compromised. Beginning with OpenSSH 8.2 the public key type ed25519-sk supports Universal Second Factor Fast Identity OnLine (U2F/FIDO) hardware keys as open standards.
Both Yubikeys USB & NFC that have firmware 5.2.3 or higher support FIDO2 (WebAuthn) which I have discussed before in order to secure your web based access to Home Lab applications.
This time I focus on the use Yubikeys for ssh logins.
To begin with, lets review the basic use of openssh-server for logins. To start with, create an incus container on your LAN (this assumes you have the bridgeprofile created that I covered in "Incus Containers Step by Step):
incus launch images:ubuntu/24.04 Test -p default -p bridgeprofile -c boot.autostart=true
Connect to the “Test” container:
incus shell Test
After several seconds, your container should be granted an IP address on your LAN. The first thing to do is to take the repository updates:
apt update
Add a user account and put it in the sudo group:
adduser scott
usermod -aG sudo scott
Check the address of the eth0 device and then exit the container:
ip a
exit
Try to “ssh” to the container with its address. If the address of the container has been used before, it is possible that you may receive an error requiring you to remove the address from the local “ssh known hosts”. An example of this is below:
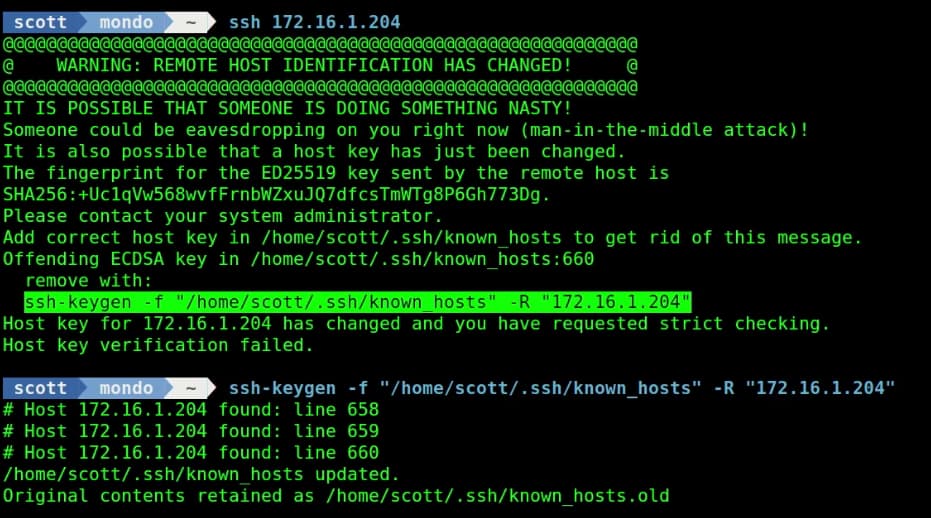
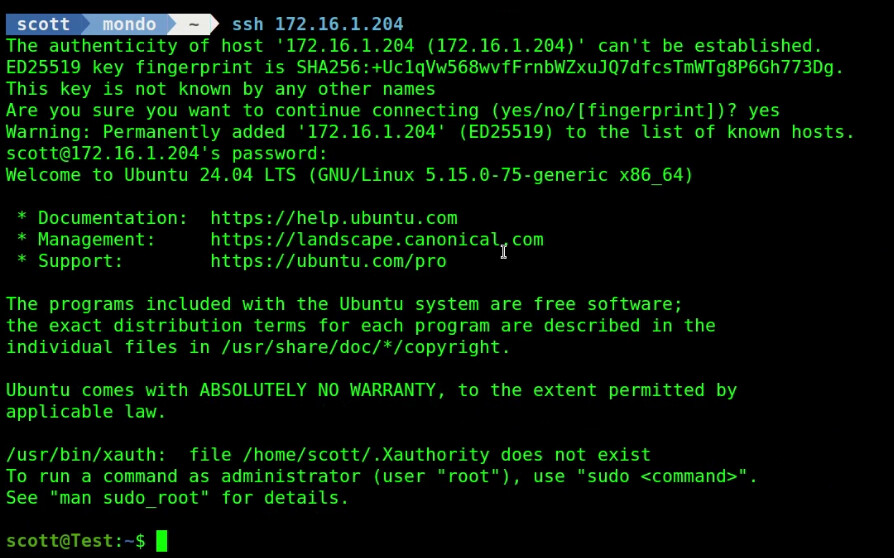
It is much more likely that when you “ssh” to your container that you will be asked if you want to add a new “fingerprint” and you should respond “yes”. At this point, you will be prompted for your password and you will be logged in.
If the username on the container is not the same as the username on the system where you issue the “ssh” command, you will need to specify the username to log into on the remote system or ssh assumes that both the local and the remote username are the same. In any case, it never hurts to provide the username.
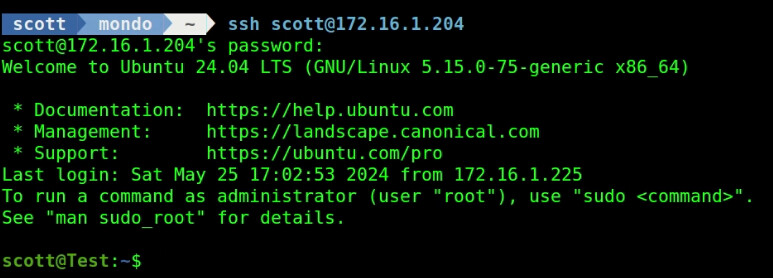
ssh scott@172.16.1.204
The ssh command can also log into a remote system such as an incus container without using a password. Instead, the login can be handled with the use of ssh keys. The idea is that “ssh keys” are shared with the remote system and then subsequent logins will recognize that a given user (scott) is logging in from a known system (mydesktop) and therefore they can be authorized without the use of a password.
This is secure because we trust that “scott” coming from “mydesktop” is a legitimate user. Later in the tutorial I show how to completely turn the use of passwords off and only accept ssh keys for logins. This is more secure because there are no passwords to hack.
Exit out of your Test container back to your incus server:
exit
Create another container:
incus launch images:ubuntu/24.04 Test2 -p default -p bridgeprofile -c boot.autostart=true
Connect to it and update the container:
incus shell Test2
apt update
Install the open-ssh server:
apt install openssh-server -y
Add a user account and add it to the sudo group:
adduser scott
usermod -aG sudo scott
Log out of the container:
exit
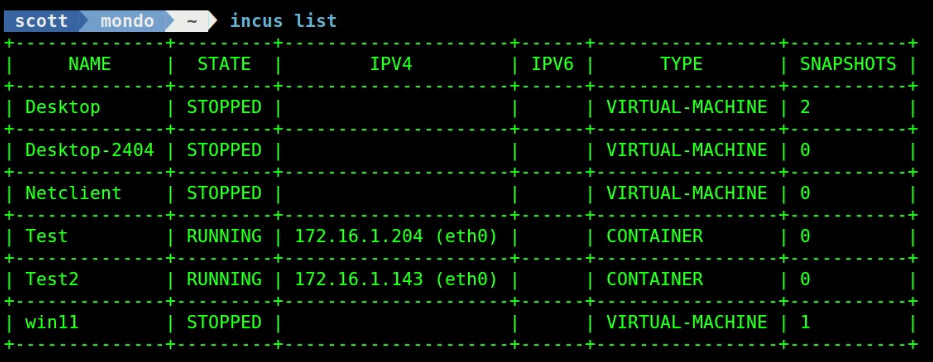
List your containers:
incus list
Connect to the original “Test” container and move to my user account on the container:
incus shell Test
su - scott
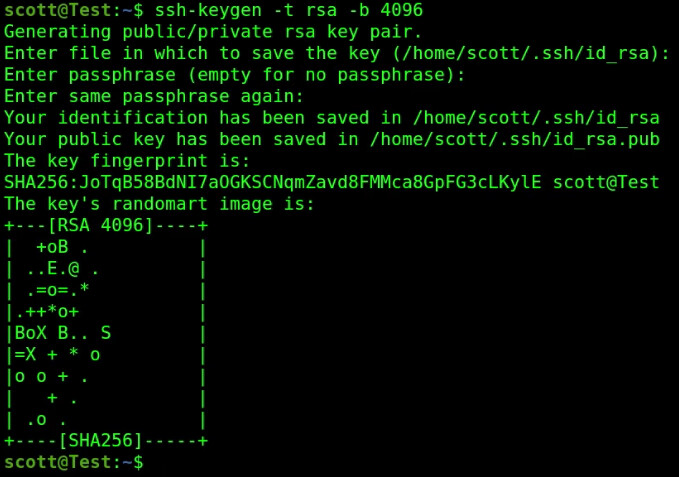
Let’s create software key pairs for this Test system using the ssh-keygen utility which we have done before on the channel. I am defaulting the filename and I am not providing any passphrase which is just an additional password for added security.
ssh-keygen -t rsa -b 4096
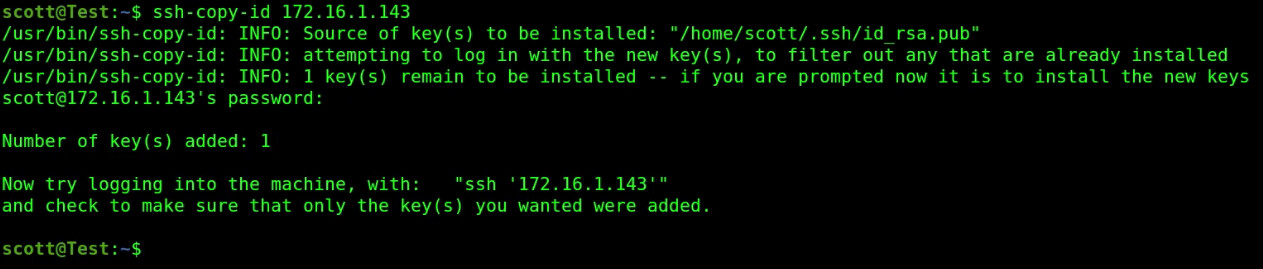
Let’s apply this key to the “Test2” container which I do by copying the new key over there with the following command and indicating my password in the process. Note: this assumes my username is the same on Test2 otherwise I would have to provide the remote username as indicated earlier.
ssh-copy-id 172.16.1.143
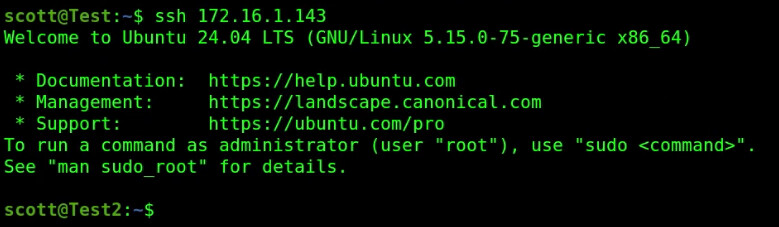
Now, I can log into Test2 without a password:
ssh 172.16.1.143
Now exit all the way back to your incus server:
exit
exit
exit
The use of ssh software keys are more secure than passwords, but if you want even more security, you can consider buying a hardware key. Look for a key that is FIDO2 certified for the maximum compatibility. I used this key in the video.
If you do secure your systems with a hardware key, consider having more than one key because if you lose or damage your key, you will lose access to your systems.
For this part of the demonstration, I create two incus containers:
incus launch images:ubuntu/24.04 Yubico-1 -p default -p bridgeprofile -c boot.autostart=true
incus launch images:ubuntu/24.04 Yubico-2 -p default -p bridgeprofile -c boot.autostart=true
Update Yubico-1, install openssh-server, add a user account and grant it sudo:
incus exec Yubico-1 -- apt update
incus exec Yubico-1 -- apt install openssh-server -y
incus exec Yubico-1 -- adduser scott
incus exec Yubico-1 -- usermod -aG sudo scott
Now for Yubico-2
incus exec Yubico-2 -- apt update
incus exec Yubico-2 -- apt install openssh-server -y
incus exec Yubico-2 -- adduser scott
incus exec Yubico-2 -- usermod -aG sudo scott
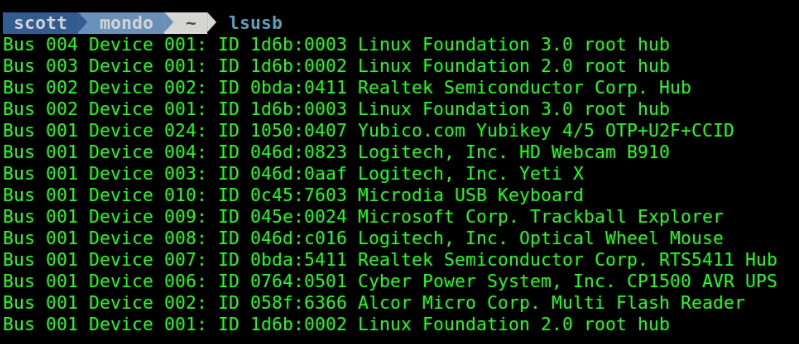
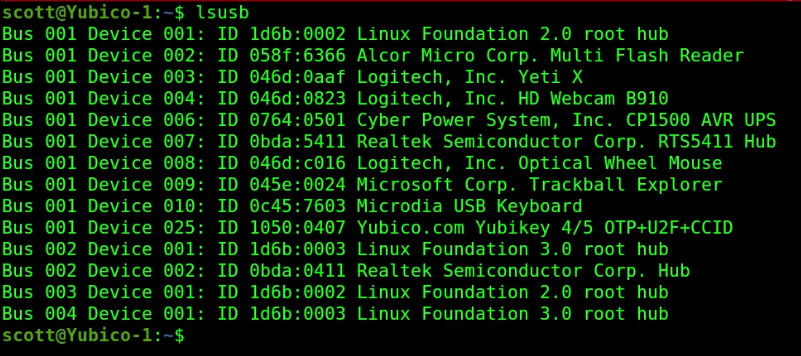
If you do an “lsusb” on your incus server and you have a Yubikey plugged in, you should see it listed. As shown in the video tutorial, make a note of the vendorid and the productid.
lsusb
You can use a hardware key like the Yubico to log into a container from your desktop and that’s really the most typical user case. In the video, I actually show how you can add support to use a Yubico key to sign in from one incus container to another.
Although this is not really a typical use case, it goes a long way to explaining how you can support connecting hardware such as a Yubico key to an incus container.
So, let’s add my Yubico key as a virtual device connection to the Yubico-1 Container. In the command below, “security-key” is just an arbitrary name for my Yubikey. The “unix-hotplug” is a type of device that incus supports and it means that once defined, the device needs to be physically unplugged and plugged in again to the incus server on which the “Yubico-1” container is hosted and will not be recognized until you do so.
So, based on the vendorid and the productid of my Yubico key (yours will differ) here’s the command:
incus config device add Yubico-1 security-key unix-hotplug vendorid=1050 productid=0407 mode=0666
In the command above, “mode=0666” is required to allow the user account proper privilege to access the Yubikey.
Connect to the container:
incus shell Yubico-1
At this point, unplug and re-plug the Yubico key in the incus server or what follows will not work.
Now move to your user account.
su - scott
Install the usb utilities just so that we can see the device. This is not required though.
sudo apt install usbutils
Show the USB devices:
lsusb
Although “lsusb” lists all of the USB devices on the incus server, it doesn’t mean that we have access to them. Our “incus config device add” command on the Yubico-1 container granted access to just the Yubico key as required. Watch my other videos to learn how to provide access to other devices on the incus host.
Although not required, let’s add the Yubico utilities to your container to give us commands to access your Yubico key. These utilities are not required to use the Yubico key for login access. They are just for maintenance purposes.
To install the utilities, perform the following commands. In the video, I had not added the signing key for the repository, but I added that command below:
sudo apt install software-properties-common -y
sudo apt-add-repository pps:yubico/stable
sudo apt-key adv --keyserver keyserver.ubuntu.com --recv-keys 32CBA1A9
sudo apt update
sudo apt install yubikey-manager -y
Now that the utilities are installed, try the following command to list the credentials that are installed on your key. (Yours will differ):
ykman fido credentials list
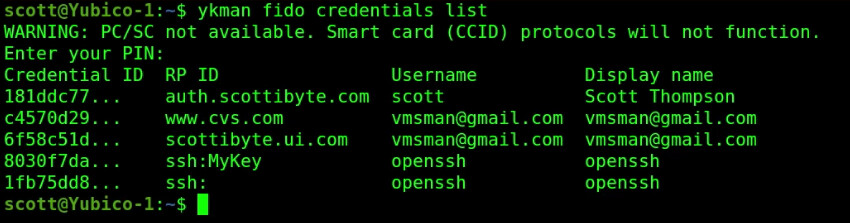
Note above I was prompted for the pin code I created when my Yubikey was originally configured. The fact that I got this prompt and that data was returned, we know that we have full access to the Yubikey from the incus container. I showed an example of deleting a “resident” key from my Yubico in the tutorial just to show another command.
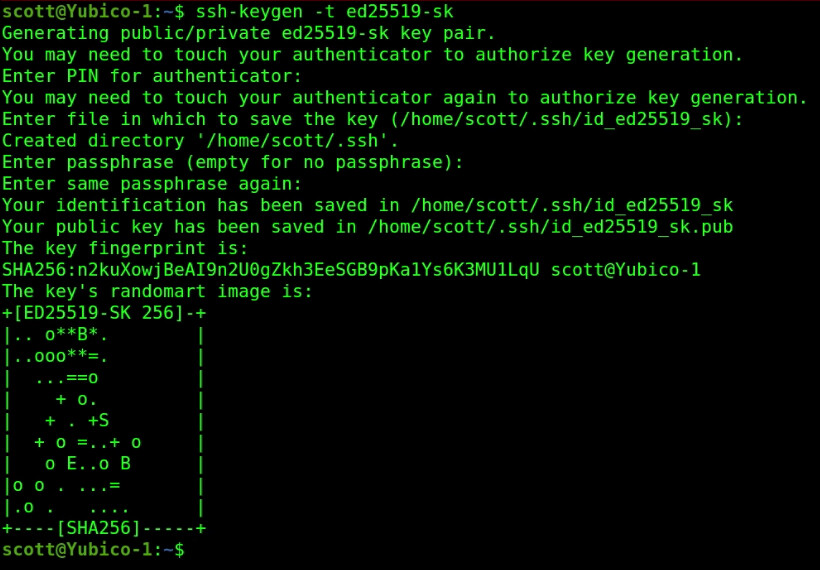
Now that we know that we can access the Yubikey plugged into the incus server from this incus container, let’s create an ssh keypair for the Yubikey. The “-sk” on the command below is a designation for a hardware key like a Yubico:
ssh-keygen -t ed25519-sk
After you enter your pin code for your key, you should see the following:

At this point, you will need to touch your Yubikey to complete the authorization to add the keys. Once you have done so, complete the process by defaulting the filename and then just press enter for the passcode to not provide a passcode since we don’t really need one.
At this point, I “ssh” over to my Yubico-2 container and log in with the password:
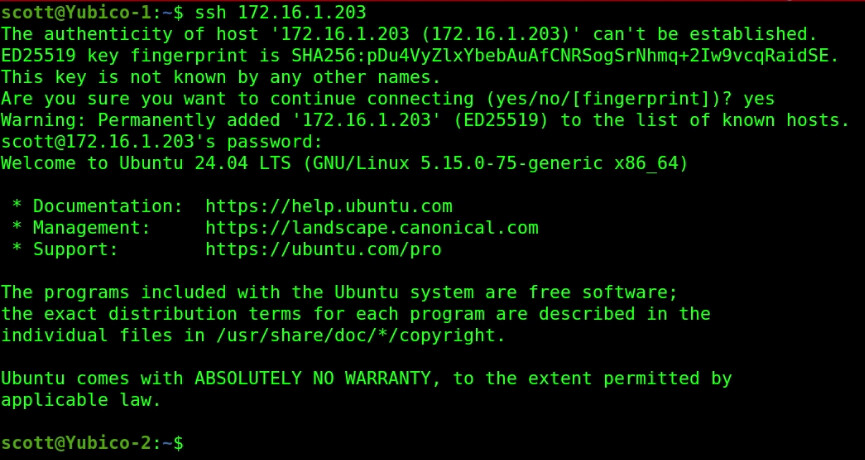
Now, I exit back to my Yubico-1 system since all I wanted to show is that I could do simple password login at this point:
exit
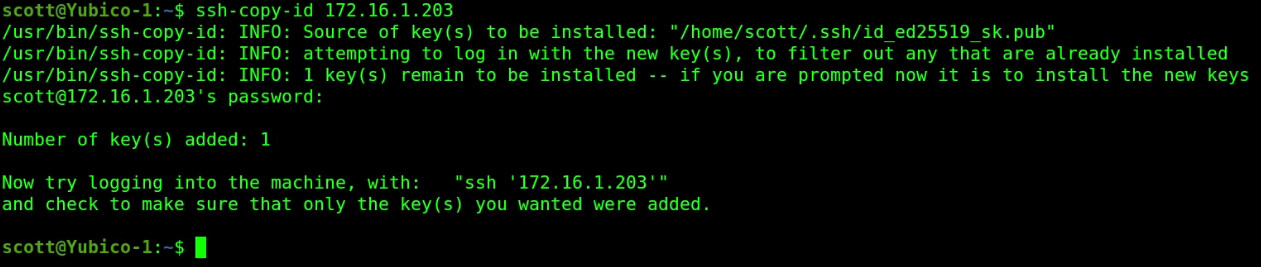
Now I copy the new key to use the hardware key from Yubico-1 to Yubico-2 and provide my password for the Yubico-2 container in the process.
ssh-copy-id 172.16.1.203
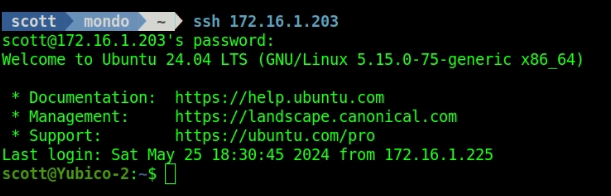
Now, when I ssh over to Yubico-2 from Yubico-1, login takes place with the Yubico hardware key:
ssh 172.16.1.203

In the display above, the system waits until I touch the Yubico key that is plugged into the incus server on which the Yubico-1 container is hosted. Once I touch the key, it completes the login process:

If I create a terminal on another system on my network, I can still log into Yubico-2 with my password:
We can restrict all logins to the Yubico-2 container to require the Yubico key ONLY and not authenticate via a password.
BIG GLARING WARNING:
If you restrict login to any of your servers or containers to the Yubikey only, if you lose or damage the key, you will be locked out. It is HIGHLY recommended that when you buy one Yubikey, buy TWO instead and authorize both keys to all systems that you restrict to Yubikey only access. Store the other key in a SAFE place. Also, test both keys to make sure they properly access your systems before turning off password access. Don’t say I didn’t tell you so.
This tutorial is for “ssh” access only. There are different procedures to enable and restrict Yubikey login for interactive GUI login. Those are out of scope for this video.
Now that you read ALL of the disclaimers CAREFULLY and you are good with them, let’s restrict access to login on Yubico-2 to be via the Yubikey ONLY. On Yubico-2, install the nano editor and edit the sshd configuration file:
sudo apt install nano
sudo nano /etc/ssh/sshd_config
At the bottom of the file, enter the following lines:
ChallengeResponseAuthentication no
PasswordAuthentication no
UsePAM no
Do a CTRL O and Enter to save the file and a CTRL X to exit the nano editor.
Restart the “openssh-server”:
sudo systemctl restart ssd
Now exit all the way back to your incus server:
exit
exit
Since only the Yubico-1 container has the keys to sign into Yubico-2 using the Yubikey, I cannot log into Yubico-2 from anywhere else even with the Yubikey.

So, if I remove the Yubikey from the incus server and try to ssh from Yubico-1 (which is authorized) to Yubico-2 it fails because the Yubikey is not found.

This is the highest level of security, because even having the keypair on the Yubico-1 instance cannot login without having the Yubikey.
I showed how to do this from one incus container to another. That required the “incus config device add” command to allow Yubico-1 to see the Yubico key. In reality, you are more likely to configure your Yubikey on your desktop machine to access incus containers which won’t require adding the virtual hotplug device to your container.
So, using a Yubikey for required ssh login to a container or server is the ultimate security. The reason is that you MUST have the hardware key for a successful login. Consider configuring critical servers and particularly Virtual Private Servers (VPS) on the public internet in this way for the highest security.