When you install an Incus server you get the “default” profile and in “Incus Containers Step by Step” we created the bridgeprofile. Today we learn how to use profiles as shortcuts to create containers and much more.
The default profile defines the eth0 device to be bridged via incusbr0 (or lxdbr0 if you upgraded from a LXD Server). The bridge places containers on an internal NAT network and that’s one reason we created the bridgeprofile to offer containers on your LAN with their own addresses. The default profile also defines the root file system for your containers and the storage for them to be in the default storage pool.
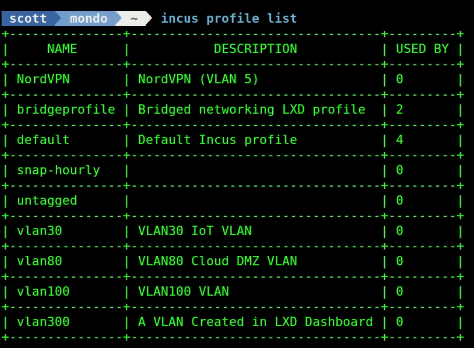
You can list the profiles that you have defined on your incus server. I have several profiles.
incus profile list
You can edit an existing incus profile.
incus profile edit default
Let’s launch a new container named “test1” that will have an internal NAT address. This means that this container is normally unreachable from other computers on your LAN.
incus launch images:ubuntu/24.04 test1 -c boot.autostart=true
Let’s go perform the updates on this new container. Note that this is another way to execute commands in a container without going into the shell.
incus exec test1 -- apt update
Let’s install the Apache Web Server in the container:
incus exec test1 -- apt install apache2 -y
Since the test1 container has a NAT address, it is not reachable by other computers on your network.
We can fix that by adding a proxy from a port on your incus server to the port for the Apache Web server running inside the container. This is similar to port mappings used in docker containers.
Lets create a new profile.
incus profile create proxy-8080
Next, I am adding the mapping from the Apache web server inside of the container which is running at TCP port 80 to listen on the incus server at port 8080.
incus profile device add proxy-8080 hostport8080 proxy listen=tcp:0.0.0.0:8080 connect=tcp:127.0.0.1:80
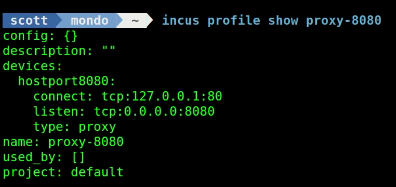
You can list out this profile with this command:
incus profile show proxy-8080
At this point, the Apache Web Server is only reachable from the NAT address while on the Incus server. This means that Apache cannot be accessed by other computers on your network.
To fix this, add the profile we just created to the test1 container:
incus profile add test1 proxy-8080
![]()
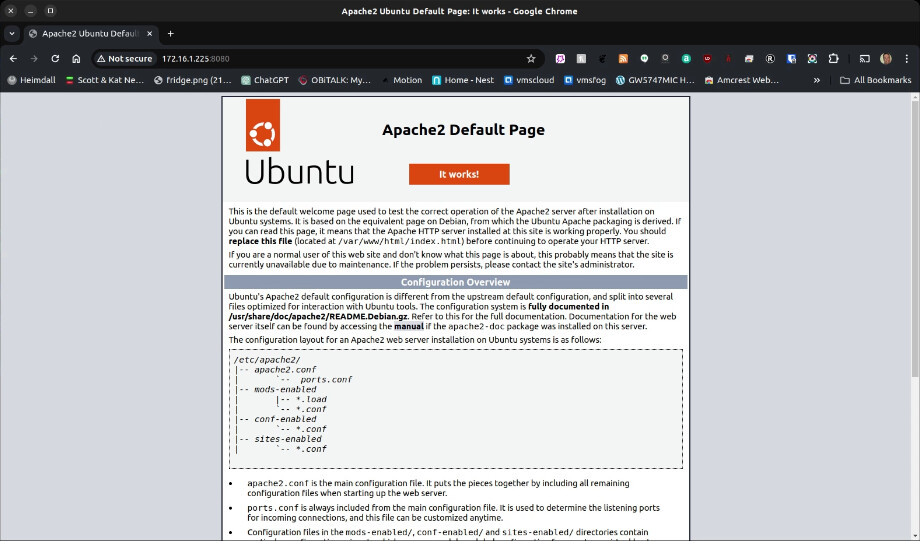
So now, I can reach the Apache server at the address of my server (172.16.1.225) at port 8080 in virtue of the proxy even though my container does not have its own LAN address.
Next, we are going to create a profile that:
- Creates a Container in a pool named pool2.
- Creates that container bridged to the LAN with its own address.
So, this effectively does what the bridgeprofile does but also adds using this new pool.
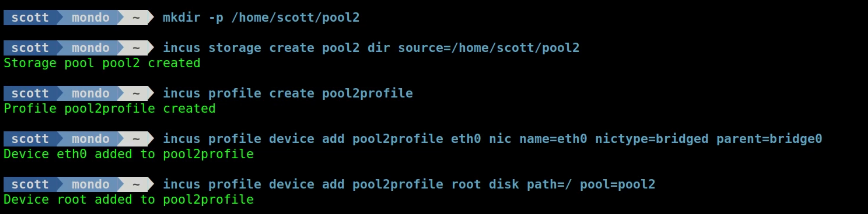
Create a folder for a files based storage pool:
mkdir -p /home/scott/pool2
Create a new storage pool:
incus storage create pool2 dir source=/home/scott/pool2
Create a new profile.
incus profile create pool2profile
Add the “bridging” definition to the profile:
incus profile device add pool2profile eth0 nic name=eth0 nictype=bridged parent=bridge0
Add the definition to use pool2 for any containers that use this profile:
incus profile device add pool2profile root disk path=/ pool=pool2
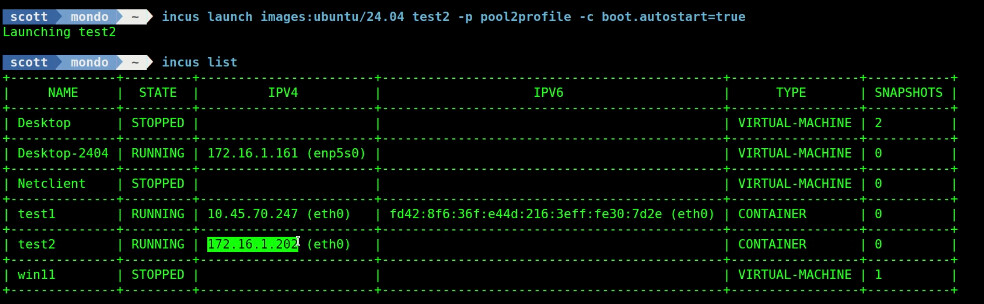
Now I can launch a new container named “test2” that is bridged to its own LAN address and the container is created in the new pool2 storage pool.
incus launch images:ubuntu/24.04 test2 -p pool2profile -c boot.autostart=true
The value of using profiles to accomplish this is that you don’t have to remember all of the separate commands.
The “incus list” command shows that the new container test2 has an address on my LAN.
The “incus storage list” command and the “incus storage show pool2” command show that pool2 has two objects in it and one of them is the container test2 and the other is the pool2profile.
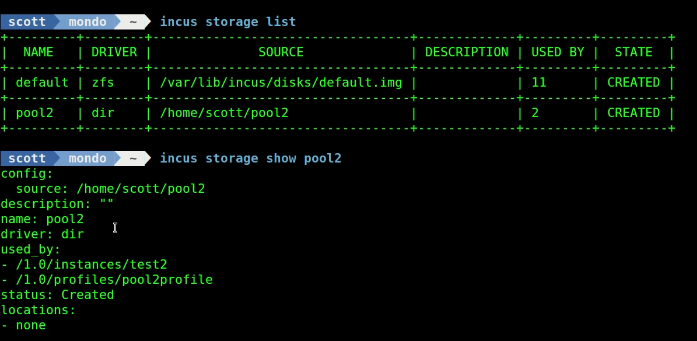
This means that all new containers that you apply this profile to will have a LAN address and be stored in pool2.
The device “eth0” inside your incus containers is a virtual network interface card (NIC). Let’s create a new profile to add a NIC named eth1.
incus profile create newnic
Let’s add the attributes to bridge the new eth1 device to an address on the LAN.
incus profile device add newnic eth1 nic name=eth1 nictype=bridged parent=bridge0
Create a shell to the test2 container:
incus shell test2
Install net-tools.
apt install net-tools -y
List the network interfaces.
ifconfig
Exit back to the incus server.
exit
Add the newnic profile to the test2 container.
incus profile add test2 newnic
![]()
Shell back into the container and move to the netplan folder.
incus shell test2
cd /etc/netplan

Edit the netplan configuration file.
nano 10-lxc.yaml

Add a section for the eth1 device as follows:
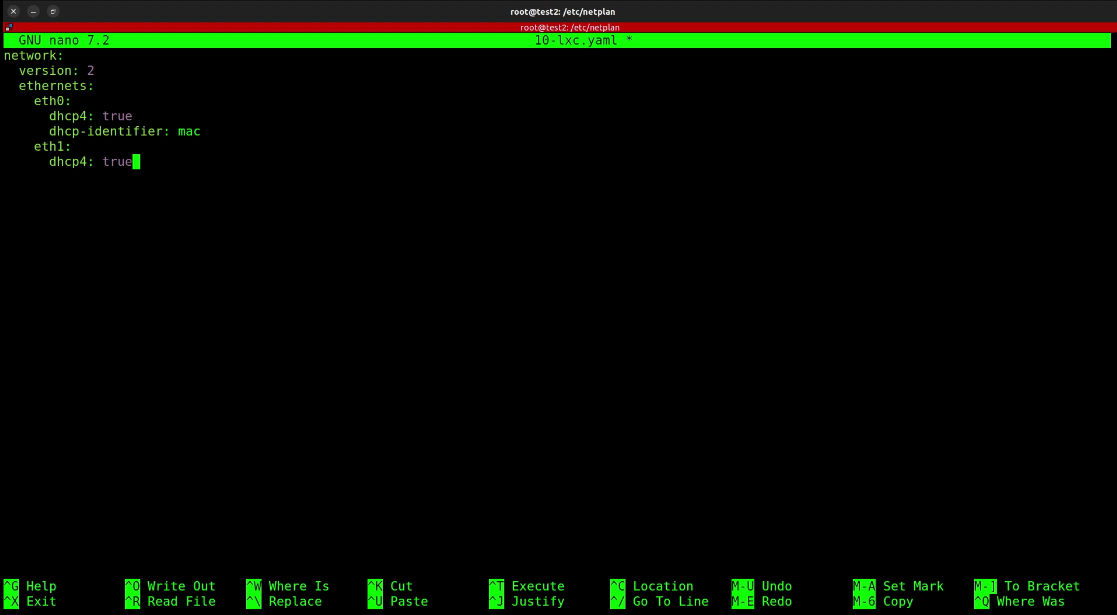
Do a CTRL O and Enter to save the file and a CTRL X to exit the nano editor.
Apply the new settings:
netplan apply
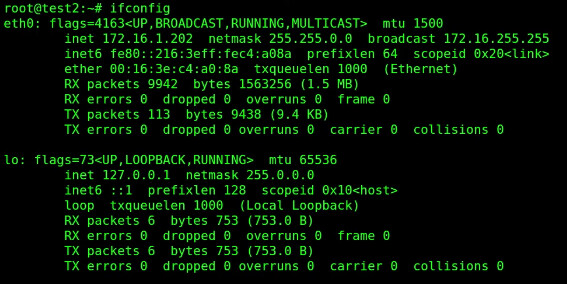
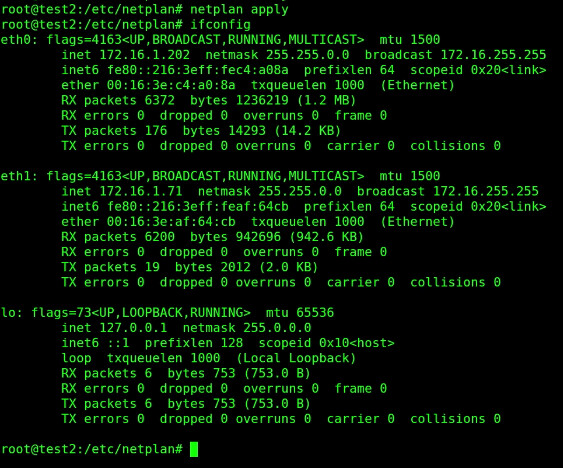
Examine the new network settings and you should now have an eth1 device.
ifconfig
Exit the container.
exit
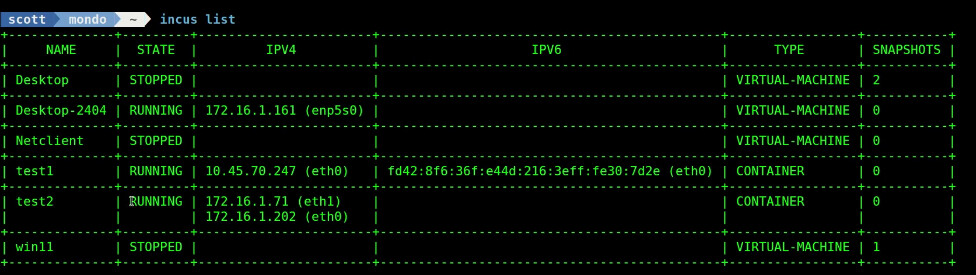
List your containers and note that the test2 container has an address for both eth0 and eth1.
incus list
We can remove the eth1 command also.
incus profile remove test2 newnic
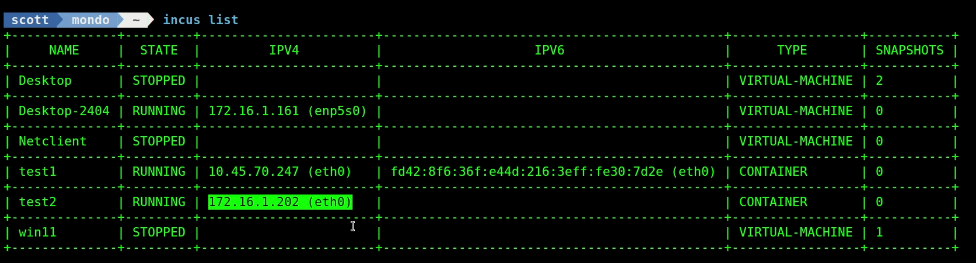
If we list the containers again, note that test2 no longer has an eth1 device.
incus list
On my router, I have VLAN 80 being managed. Let’s create a profile for vlan80.
incus profile create vlan80
Assign the attributes to the vlan80 profile to assign an address in VLAN 80.
incus profile device add vlan80 eth0 nic name=eth0 nictype=macvlan vlan=80 parent=bridge0
Add the vlan80 profile to the test2 container:
incus profile add test2 vlan80

List the containers and see that the test2 container has an address on VLAN 80:
incus list

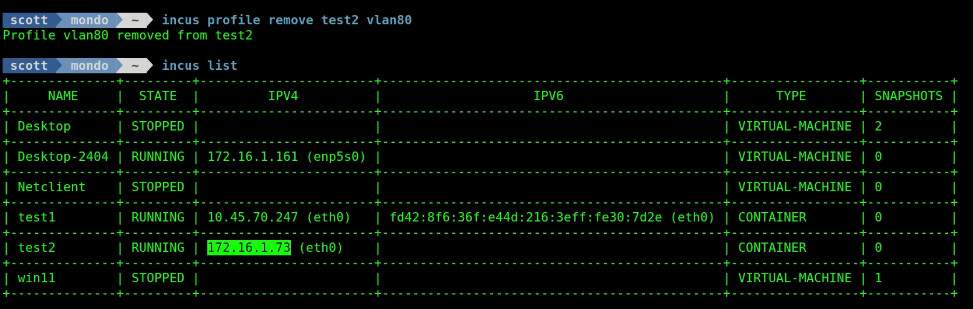
Likewise, if we remove the vlan80 profile from the test2 container, it reverts back to its LAN address.
incus profile remove test2 vlan80
Now, for something completely different, create a new profile:
incus profile create snap-hourly
Let’s apply the attributes to perform hourly container snapshots for any container using this profile.
incus profile set snap-hourly snapshots.schedule "@hourly"
Let’s add a pattern template for naming our Snapshots with the prefix “Hourly-” followed by a date/time stamp.
incus profile set snap-hourly snapshots.pattern "Hourly-{{ creation_date|date:'01-02-2006_15:04' }}"
Let’s set our Snapshots to expire every four hours meaning that we will have at most four (4) snapshots.
incus profile set snap-hourly snapshots.expiry "4H"

Let’s apply these rules to our test2 container:
incus profile add test2 snap-hourly
![]()
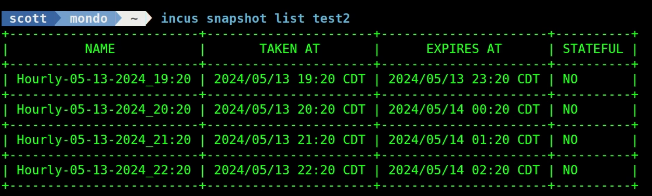
After I waited five hours, I had the most recent four snapshots named according to my pattern definition.
incus snapshot list test2
Profiles are very handy to apply complex settings to containers simply.