When you execute an “incus export” command to create a backup, you are really executing two commands which create two copies of the backup archive file. In this tutorial we learn how to better manage this data which can fill your incus server.
When you execute a command such as:
incus export test1
You are creating a backup of the “test1” container and the backup file is stored in:
/var/lib/incus/backups
and then a copy of that backup is copied to the folder where you executed the command and you effectively have two copies of the file “test1.tar.gz”.
In the LXConsole web interface for Incus, when you execute a backup in the GUI, the backup is created in /var/lib/incus/backups.
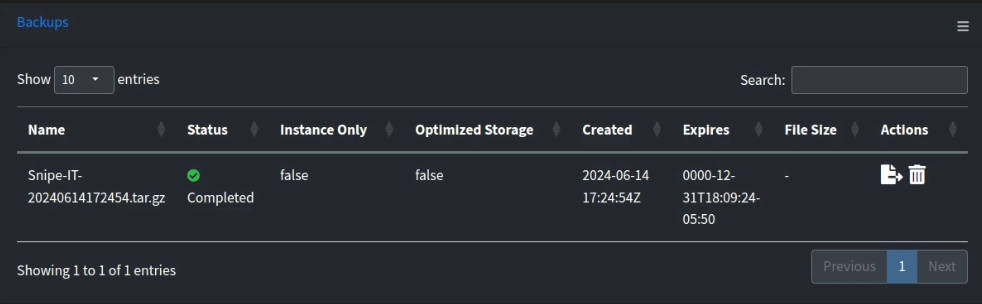
Specifically, here is the location on the incus server where the export (backup) is created.
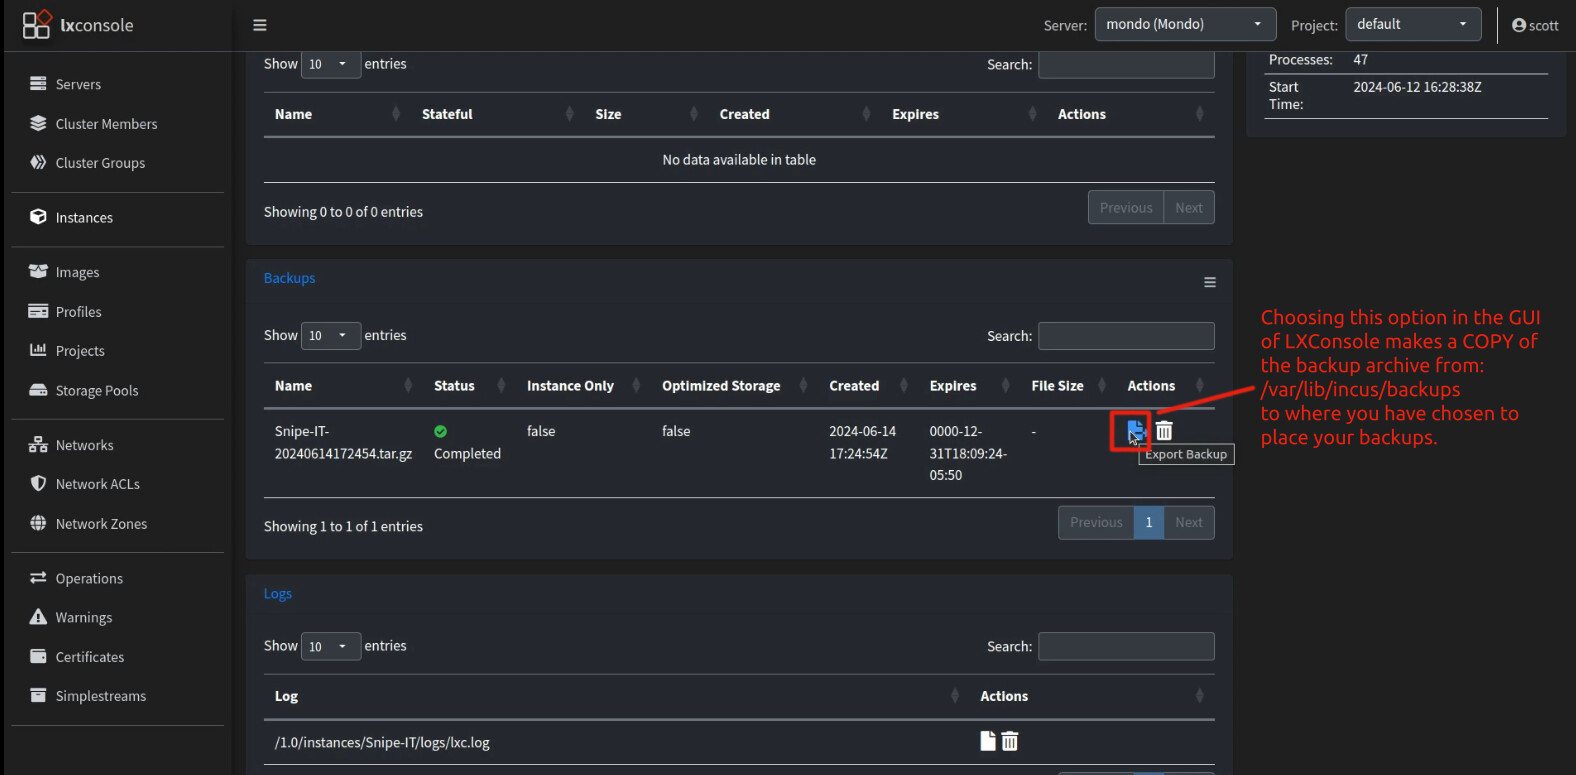
Back in LXConsole, if you choose the icon that “exports” the backup, what you are really doing is making a copy of the backup that is created in /var/lib/backups.
If you instead execute the command line command to perform the same backup, you are creating the /var/lib/incus/backups copy of the archive and that command is also copying the backup archive to your current foler. So, you effectively have two copies of your backup by executing the single command.
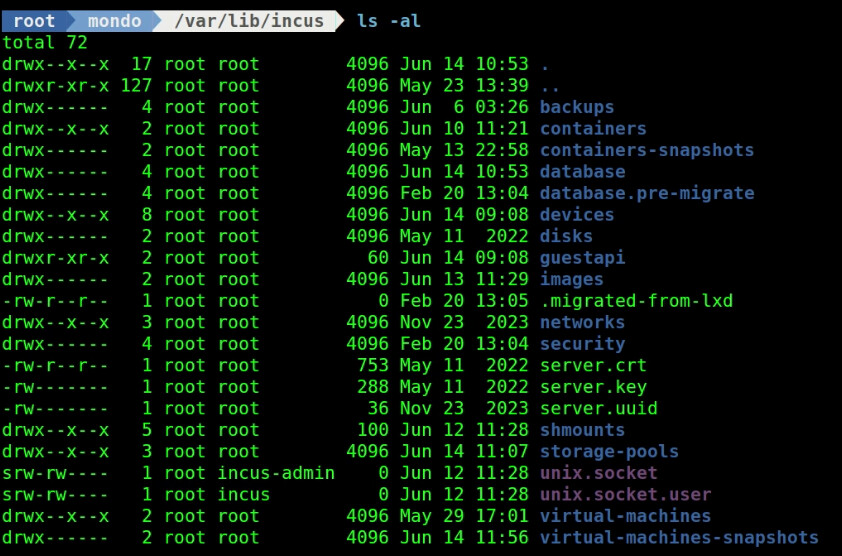
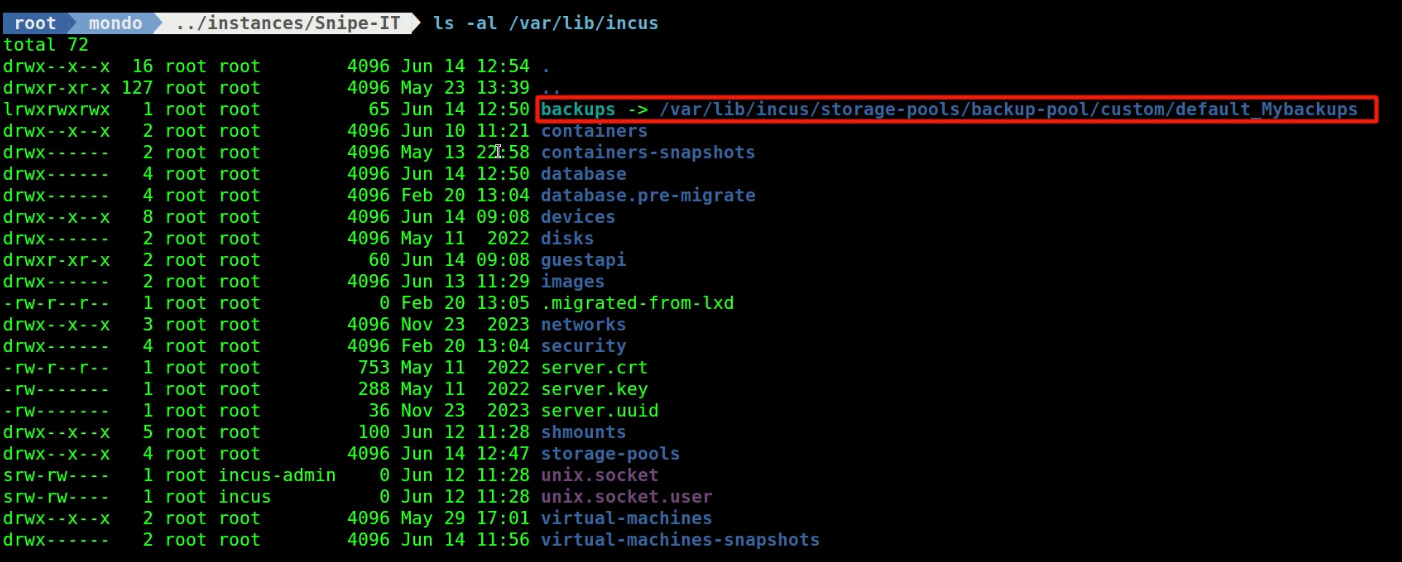
Here is a view of the incus configuration file tree. Notice that “backups” is a folder in this structure.
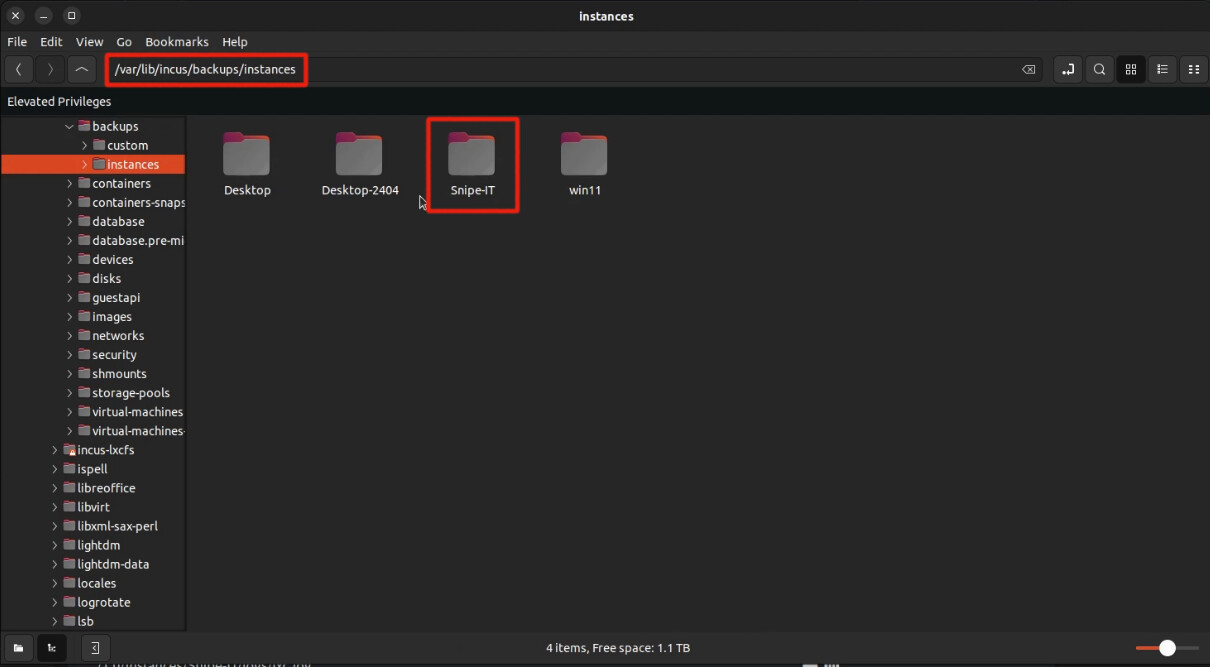
The actual backups are stored in folders named according to your container names in the location:
/var/lib/incus/backups/instances

We are going to move this location off your Incus server storage location to a place where you most likely have more storage. Realize that multiple backups (exports) can readily fill the storage on your incus server.
Recall that in Incus Containers Step by Step that the “incus admin init” creates the default storage pool. The default storage pool stores things such as your containers, profiles, images and custom volumes.
We can “re-direct” the location for backups to an incus volume instead of the “/var/lib/incus/backups” folder.
We want the new volume to not be on the system disk. So, it can be on another disk or even a mount point for a folder on another server.
In my case, I have a large spinning drive on this server and so I want to direct the volume to that location.
The first step is I created a mount point folder on my spinning disk which we will use in the following steps.
mkdir /mnt/MondoSeagate/incus-backups
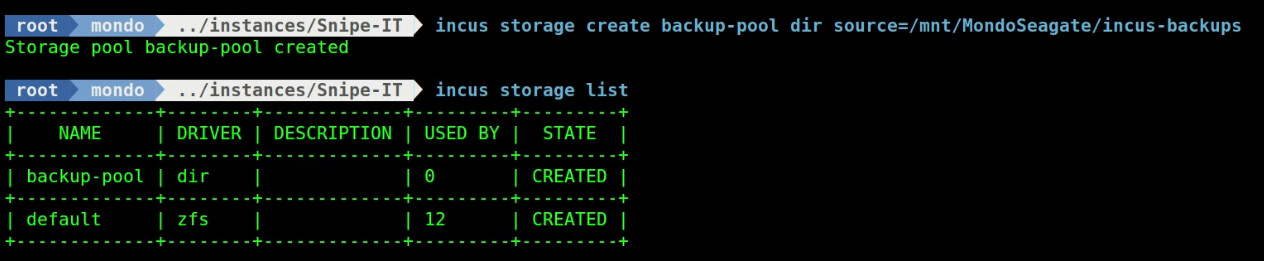
Before we can create an incus volume for the backups, we need to create a storage pool on the other disk that uses the mount point we just created.
I have chosen to create a storage pool of type “dir” which simply means that the files are stored in the native file system (ext-4) rather than making the pool zfs, btrfs or other type. I named the pool “backup-pool”.
incus storage create backup-pool dir source=/mnt/MondoSeagate/incus-backups
We now create a custom volume named “Mybackups” on the new storage pool.
incus storage volume create backup-pool Mybackups
We can re-point the backups to the new disk location. This command not only moves current backups to the new location, but it also results in all new backups being stored there as well. This may take some time if you have a lot of backups.
incus config set storage.backups_volume backup-pool/Mybackups
A file listing of the incus file tree shows that the location for backups is re-pointed via a symbolic link.
ls -al /var/lib/incus
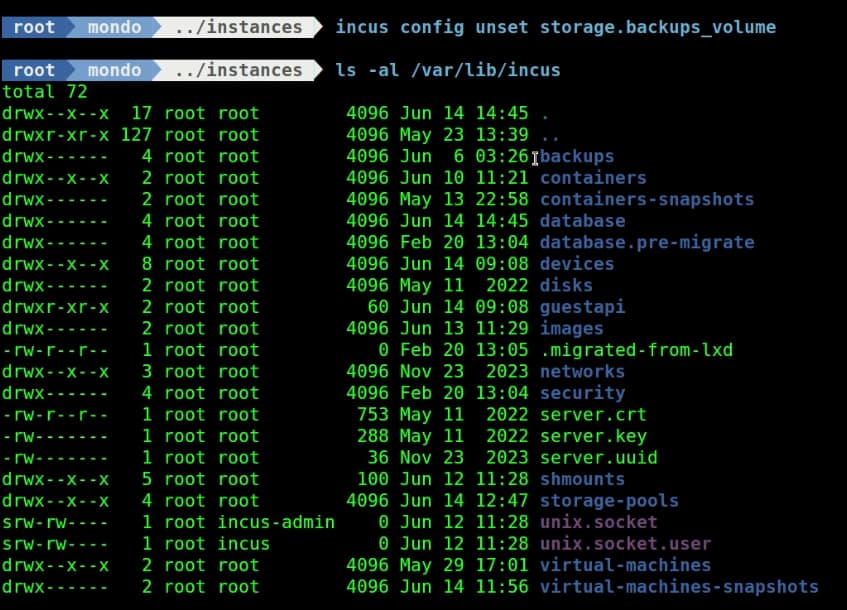
If you decide at a later date that you want to move your data back to the default location on the incus server, you can do so with:
incus config unset storage.backups_volume
If I do choose to execute the command above, a listing for the folder structure reveals that the symbolic link has been removed indicating that the data is not re-pointed.
Any time that you create a container, you are creating the root file system (rootfs) for the new container from an image. These images are downloaded from linuxcontainer.org and I have also had previous videos that discussed how to “publish” your own custom images.
Images take up space just like backups and are stored on the incus system disk as well.
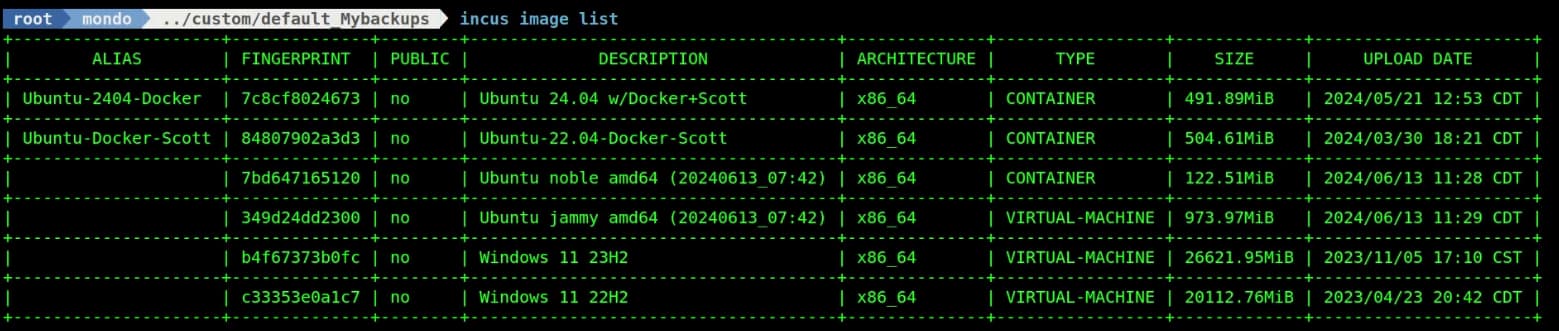
To list your images:
incus image list
We can also move the images to our custom volume on our new storage pool (and all future images) with this command:
incus config set storage.images_volume backup-pool/Mybackups
You can “undo” this command with:
incus config unset storage.images_volume
If you move both your backups and your images to a custom volume as described above, you can offload the storage requirements of your incus server greatly.
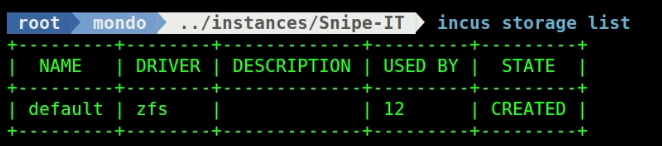
We can list the storage pools on the incus server.
incus storage list
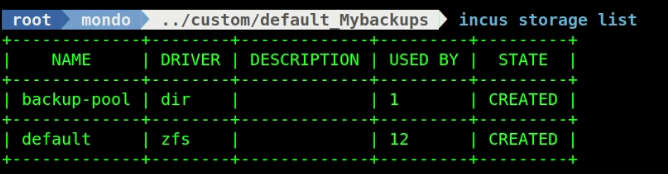
Notice that backup-pool has one object in use inside it. If you decide to remove a storage pool, you cannot do so until all obects in that pool have first been removed.
To see what is using the space in the pool you can use this command:
incus storage volume list backup-pool

If we are no longer using the “Mybackups” custom volume and you would like to delete it.
incus storage volume rm backup-pool Mybackups
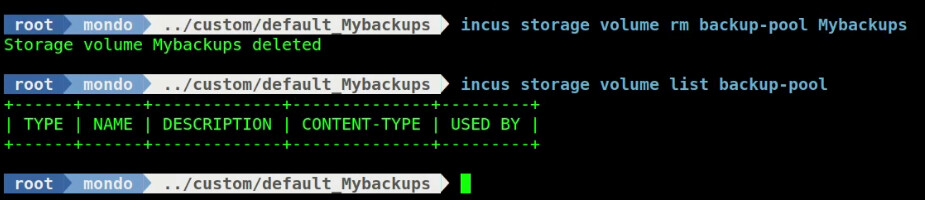
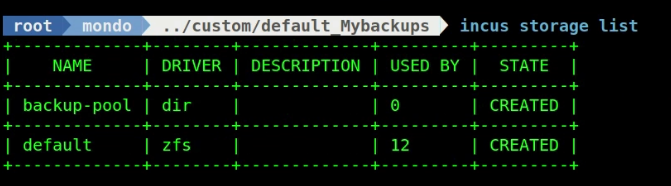
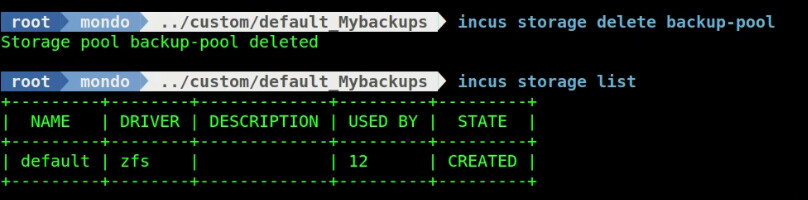
If we now list the storage pools you will see that there are no objects in the backup-pool.
incus storage list
We can even go further now and delete the storage pool if desired.
incus storage delete backup-pool
Finally, since we stopped repointing backups, deleted the custom volume and deleted the storage pool there is no data in our mount point on the other disk:
ls /mnt/MondoSeagate/incus-backups

We could of course delete the mount point since it is no longer needed.
rmdir /mnt/MondoSeagate/incus-backups
I am not really sure why incus retains copies of backups in /var/lib/incus/backups, but they certainly take up significant space. If you have space constraints on your incus disk, then perhaps the techniques I have shown here will help.