When you create containers, you are using the “default” profile which uses storage in the default storage pool and also assigns device eth0. In this video, we learn how to create other storage pools and custom volumes.
The “default” profile for LXD can be viewed or edited with the following command from your LXD host:
lxc profile edit default
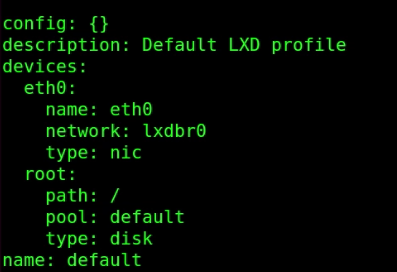
The default profile will appear as follows:
We can list our storage pools:
lxc storage list
By default, you will have only the “default” storage pool.

The default profile and the default storage pool are a part of the configuration that you get with the “lxd init” command that I covered in the “LXD Step by Step” tutorial.
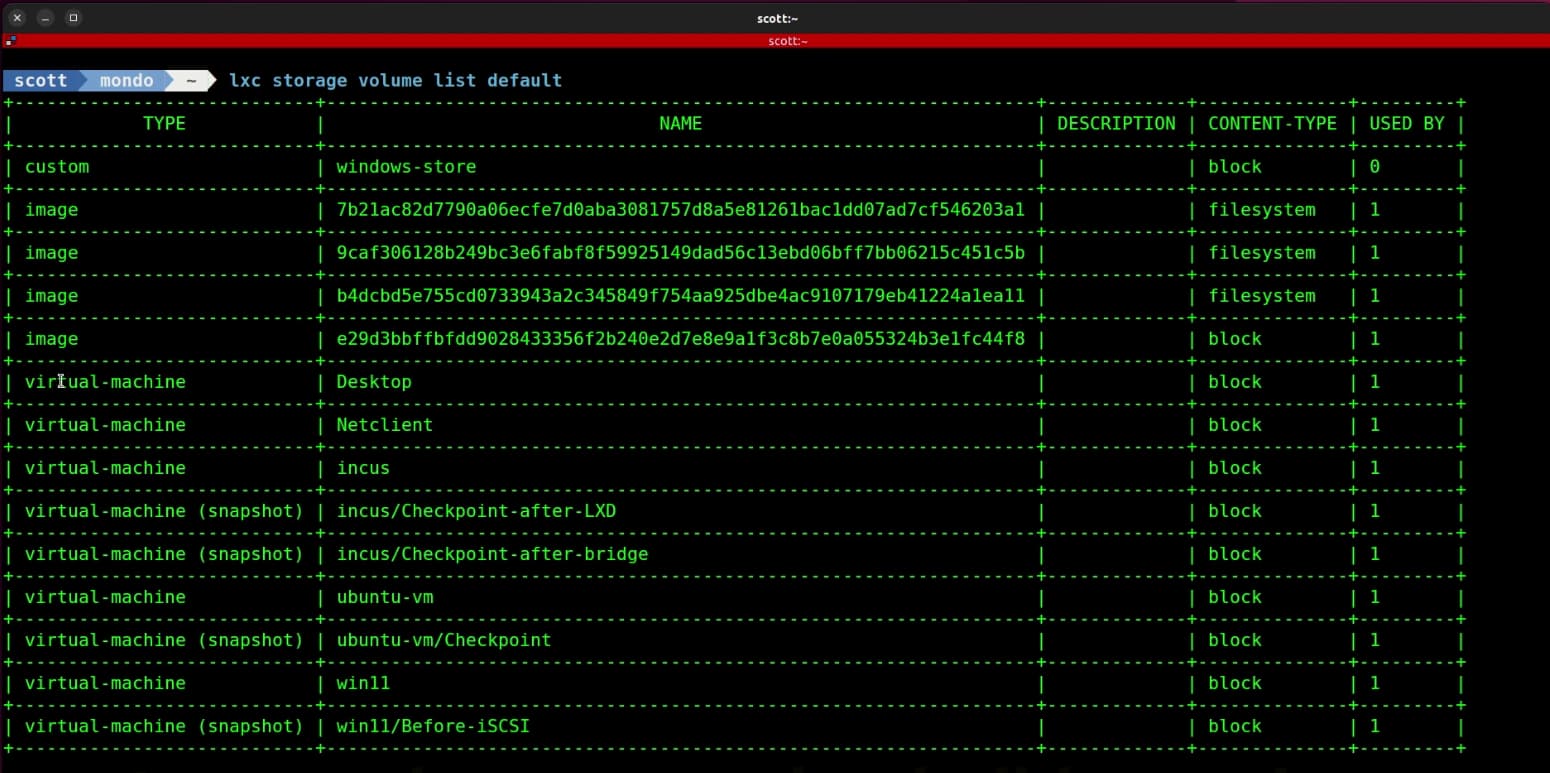
The default storage pool contains images downloaded from linuxcontainers.org, block storage devices for each container, snapshot storage, and also custom volumes. You can see the content of your default storage pool with the following command:
lxc storage volume list default
My output from this command looks like this:
When you initially configured your LXD server with the “lxd init” command as shown in the “LXD Step by Step” tutorial, we created the default storage pool as a virtual zfs file system inside of a file.
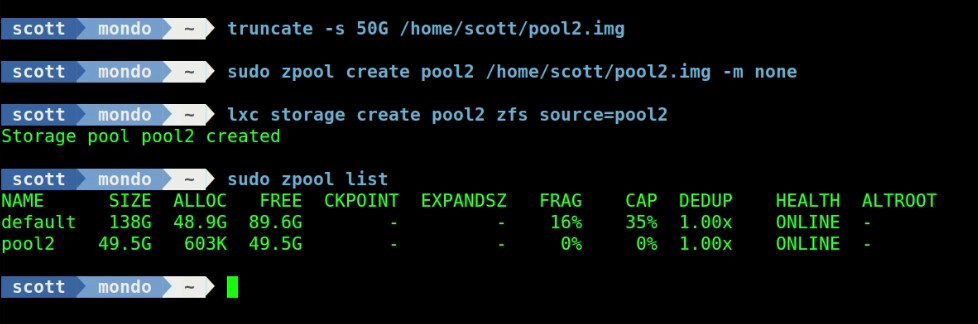
This time, I created another virtual file for another LXD Storage Pool which I arbitrarily configured at 50GB just for the demo.
truncate -s 50G /home/scott/pool2.img
Create a zfs pool from this raw file space:
sudo zpool create pool2 /home/scott/pool2.img -m none
Make this zfs pool a new storage pool on the LXD server and call it pool2.
lxc storage create pool2 zfs source=pool2
Show the list of zfs pools:
sudo zpool list
Before we can create containers in the new pool, we need to create a profile to use the pool:
lxc profile create pool2
Edit the new profile.
lxc profile edit pool2
Clear out all the lines in the file using the CTRL K command in the nano editor and then paste in the following lines:
config: {}
description: Pool2 LXD profile
devices:
  eth0:
    name: eth0
    network: lxdbr0
    type: nic
  root:
    path: /
    pool: pool2
    type: disk
name: pool2
Do a CTRL O and enter to save the file and a CTRL X to exit the nano editor.
Create a couple containers in pool2 using the following commands:
lxc launch ubuntu:22.04 container1 --profile pool2
lxc launch ubuntu:22.04 container2 --profile pool2
The command:
lxc list
will list all of your containers with no indication which pools they are in.
To get an idea of what is stored in pool2:
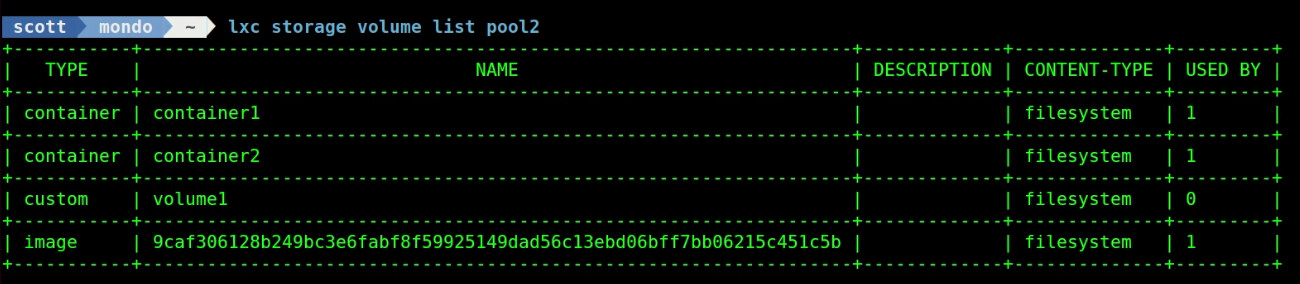
lxc storage volume list pool2
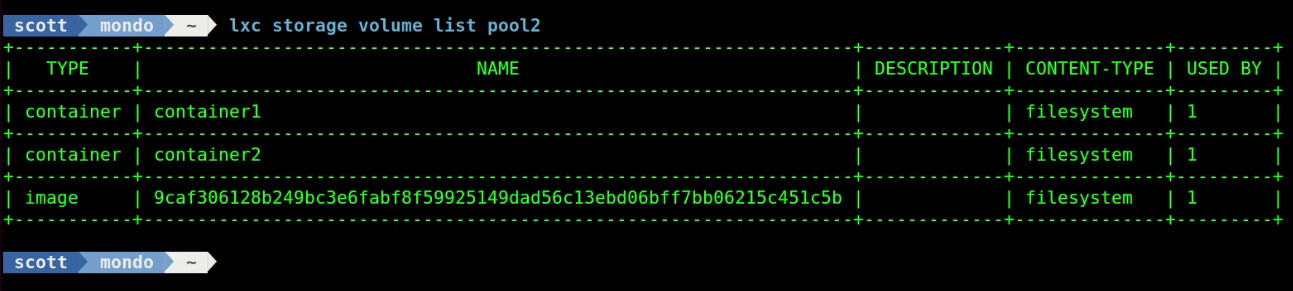
The “image” with the long name above is the Ubuntu 22.04 image downloaded from linuxcontainers.org used to create container1 and container2.
Volumes can be used just like an additional disk drive or storage space for LXD. We can create a custom volume in pool2 named volume1 with the following command:
lxc storage volume create pool2 volume1
You can list the contents of pool2 and you will now see volume1 has been added:
lxc storage volume list pool2
We can attach this new volume to to container1 as a mount point named /volume1:
lxc storage volume attach pool2 volume1 container1 /volume1
We can move inside of the container:
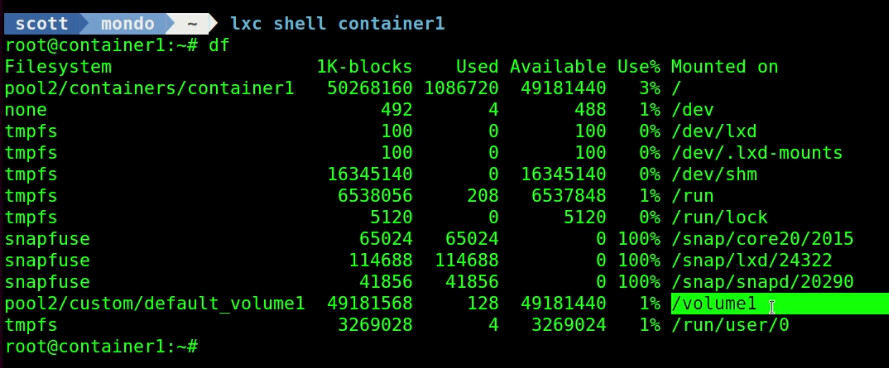
lxc shell container1
We can list the storage in the container:
df
Below you will see that /volume1 is present.
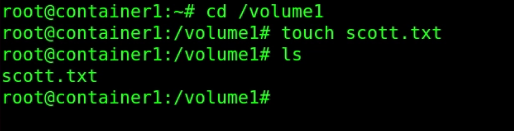
Notice in the following screen shot that you can move over to /volume1 and create a file inside it with the touch command:
Exit the container1 shell to logout and return to your LXD server:
exit
Let’s attach container2 to volume1 as well:
lxc storage volume attach pool2 volume1 container2 /volume1
When you log into container2 as follows, you will see that the data in /volume1 is also accessible in container2 as shown below:
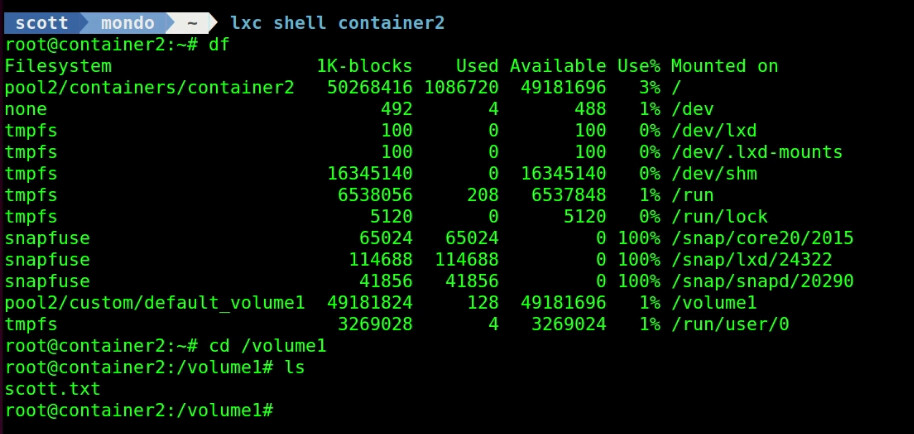
This is great for sharing data between multiple containers easily. Just note that no file locking is done. This means that your application will need to keep this in mind.
To detach volume2 from both containers:
lxc storage volume detach pool2 volume1 container1
lxc storage volume detach pool2 volume1 container2
To stop both containers:
lxc stop container1
lxc stop container2
We can delete both containers:
lxc delete container1
lxc delete container2
To delete volume1:
lxc storage volume delete pool2 volume1
Before you can delete a storage pool, you must delete everything using the storage pool. List the pool2 contents:
lxc storage volume list pool2

Notice above that the Ubuntu image used to create the two containers is still in pool2.
Delete this image:
lxc image delete 9caf306128b249bc3e6fabf8f59925149dad56c13ebd06bff7bb06215c451c5b
If you list your pools:
lxc storage list

Notice that pool2 is still in use by one object in the screen shot above.
We have to delete the pool2 profile which is stored in pool2.
lxc profile delete pool2
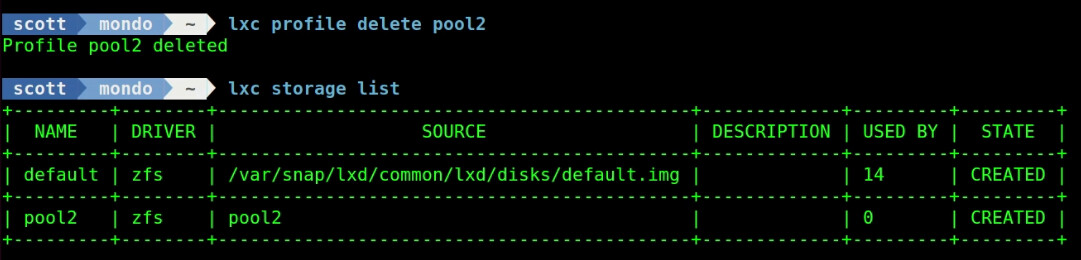
We can now delete pool2:
lxc storage delete pool2

At this point, you can delete the virtual file since it has been removed as a zfs file system.
