A Site to Site VPN is a means of virtually extending the on-premise network to include cloud based servers such as those offered through AWS EC2. Amazon calls this a Virtual Private Cloud (VPC).
Here are the essential steps.
- Create a Virtual Private Gateway (VGW) on AWS
- Create a customer gateway (CGW) (local LAN on UDM Pro)
- Create a VPN tunnel to connect the CGW and VGW
The steps to do this is:
- Create a Customer Gateway
- Create a Virtual Private Gateway
- Create a VPN Tunnel
- Test the configuration
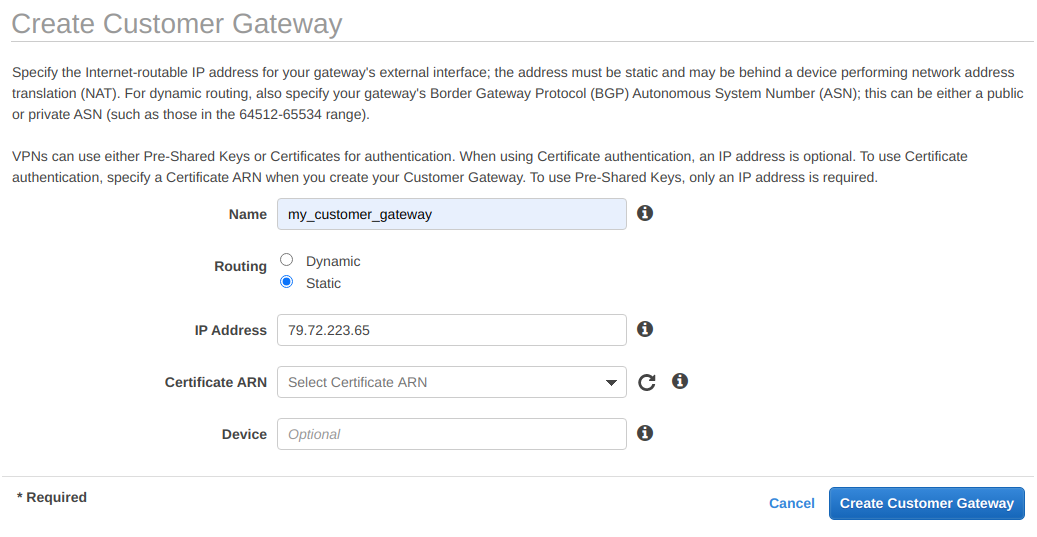
Create the customer Gateway
Specify your ISP Public address of your router WAN address.
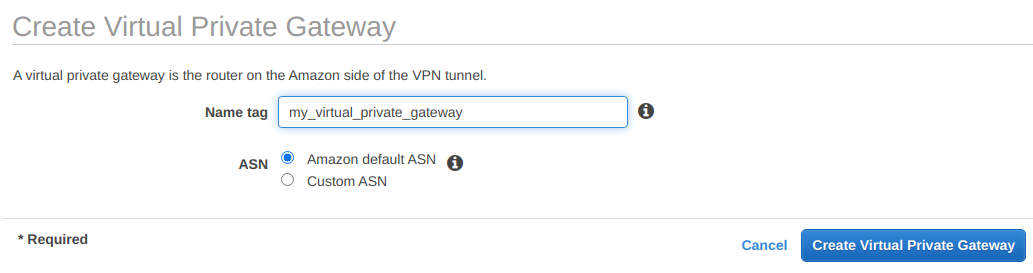
Create a Virtual Private Gateway
Go to VPC – Virtual Private Network (VPN) – Virtual Private Gateways,. Click on Create Virtual Private Gateway, give it a name tag and under ASN select Amazon default ASN
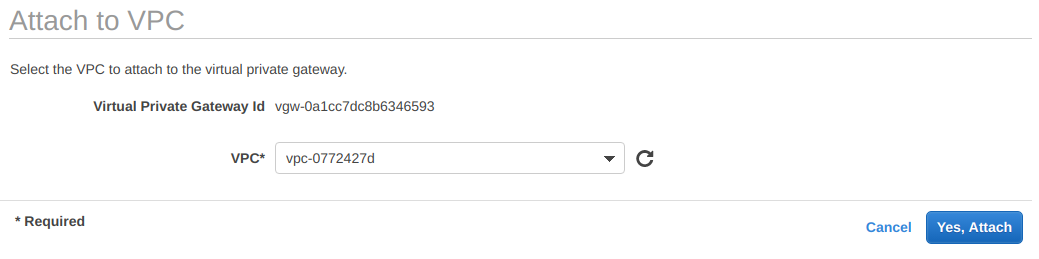
Attach to VPC
Create a VPN
We now need to create a VPN tunnel linking the customer gateway with the virtual private gateway. Navigate to VPC → Virtual Private Network (VPN) → Site-to-Site VPN Connections and click on Create a VPN connection. Give it a name tag, choose Virtual Private Gateway under Target Gateway Type, and under Virtual Private Gateway select from the drop-down menu the virtual private gateway we created in the previous step.
In the customer gateway settings under Customer Gateway select Existing and under Customer Gateway ID select from the drop-down menu the customer gateway we created in the first step. On the Routing Options select Static and under Static IP Prefixes select the IP address of your local network (Example; 79.22.223.65). Note that this is the same IP address we used in the first step. We keep the default tunnel options, so that two separate VPN tunnels are automatically created for redundancy.
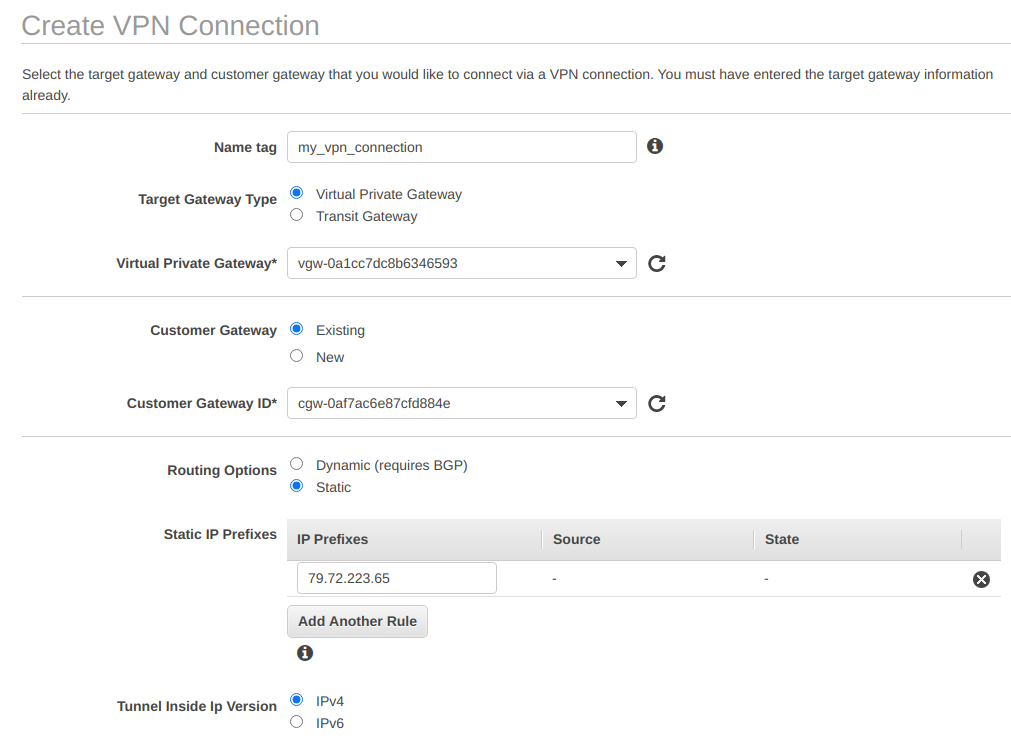
Finally, click on Create VPN Connection and wait several minutes until the VPN connection is created and displays the state as available.

Download Configuration
