With AWS, you can create a free account and a free server instance to host your application in the public cloud. The first step is to create an account. Go to https://aws.amazon.com/ and click on “Create an AWS Account”.
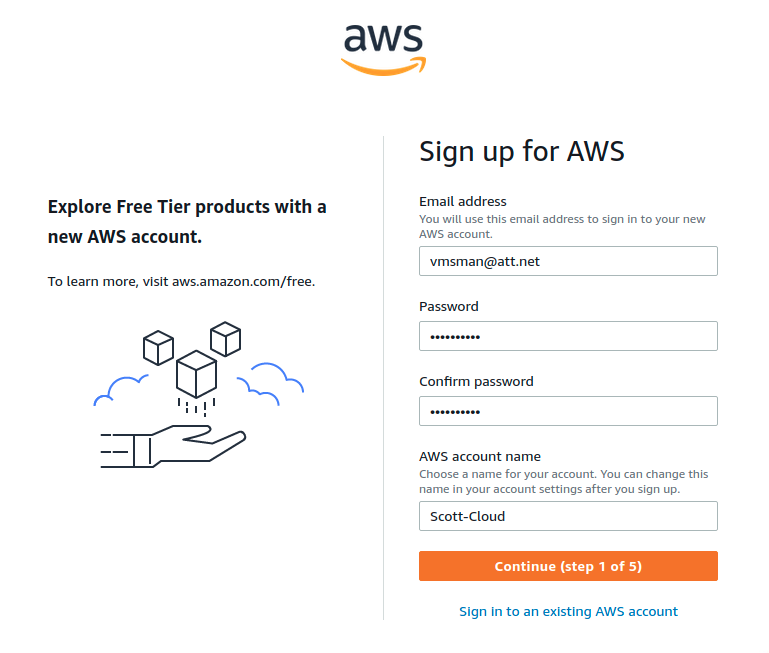
Go to the second page and enter your details.
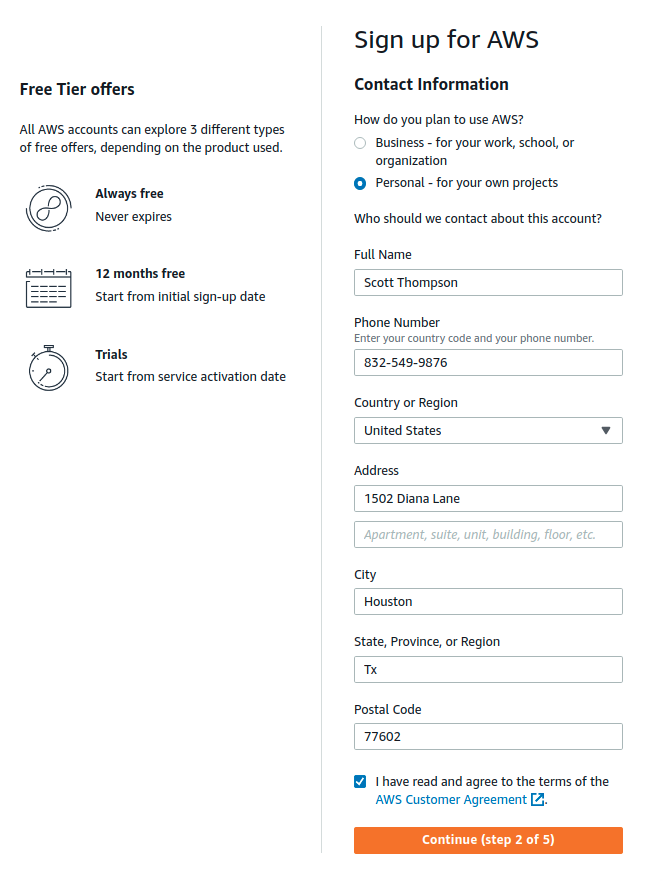
Finally, enter your billing information. Although AWS asks for account information, you can create a server in the “free” tier and you will never be charged.

On the fourth screen you confirm your identitiy with an SMS text verification.
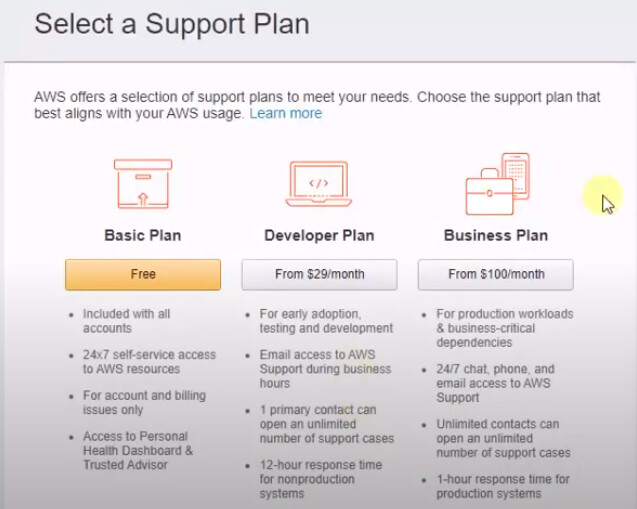
Finally, on the fifth screen you will select a support plan. Choose the “Free” basic plan.
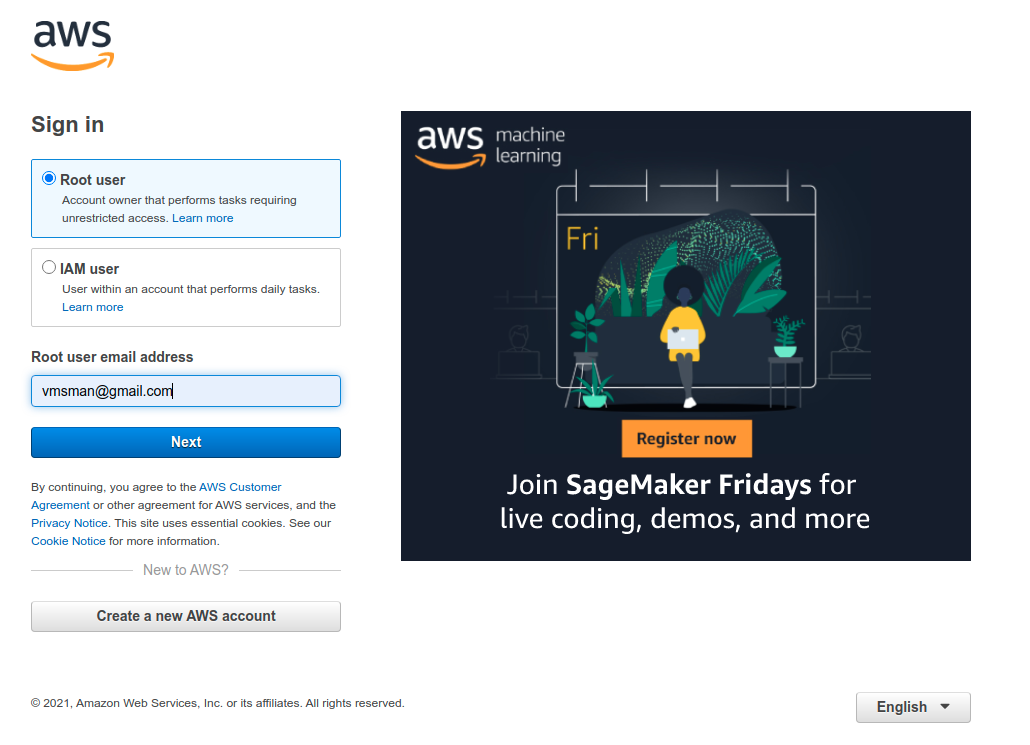
Now, choose the “sign into the AWS console” option.
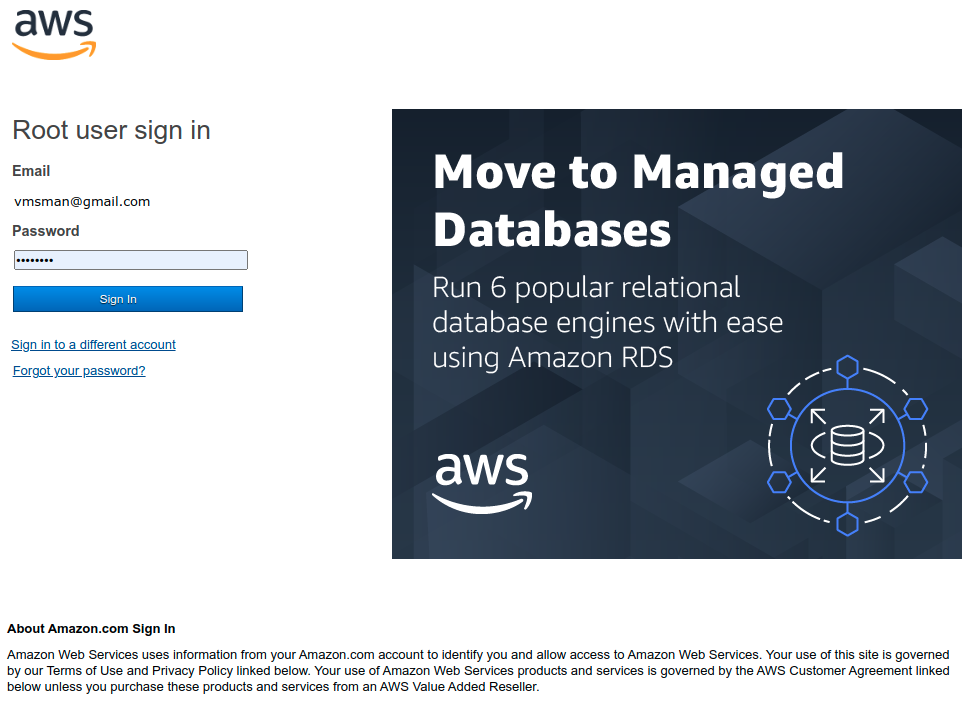
On the next screen, choose “Root user” for now and type in the registered email for your amazon account.
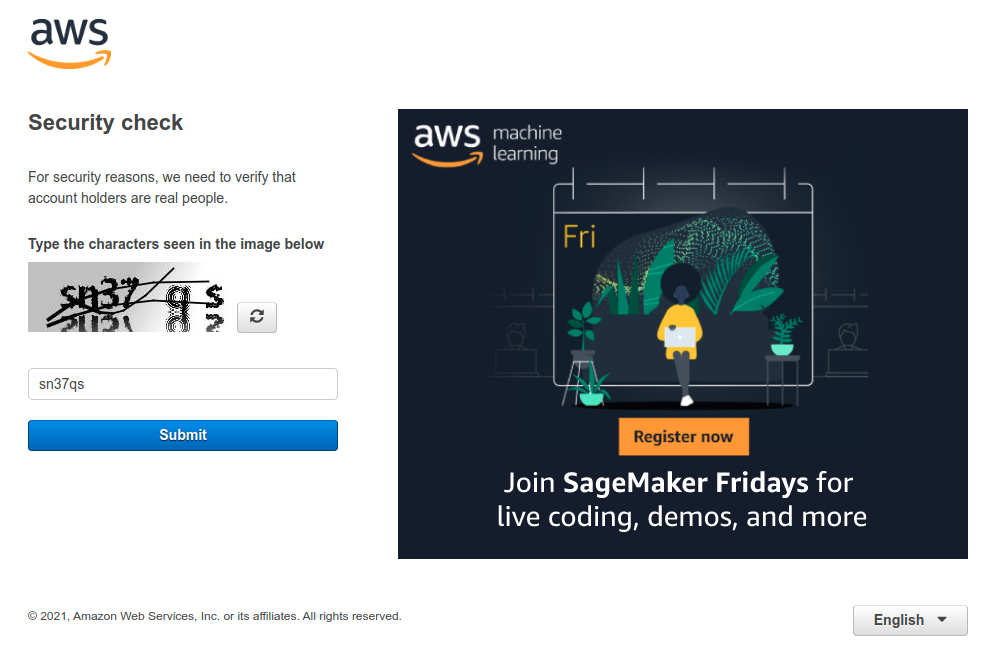
Click “Next” and type in the “Captcha” challenge.
Type in your Amazon password on the next screen.
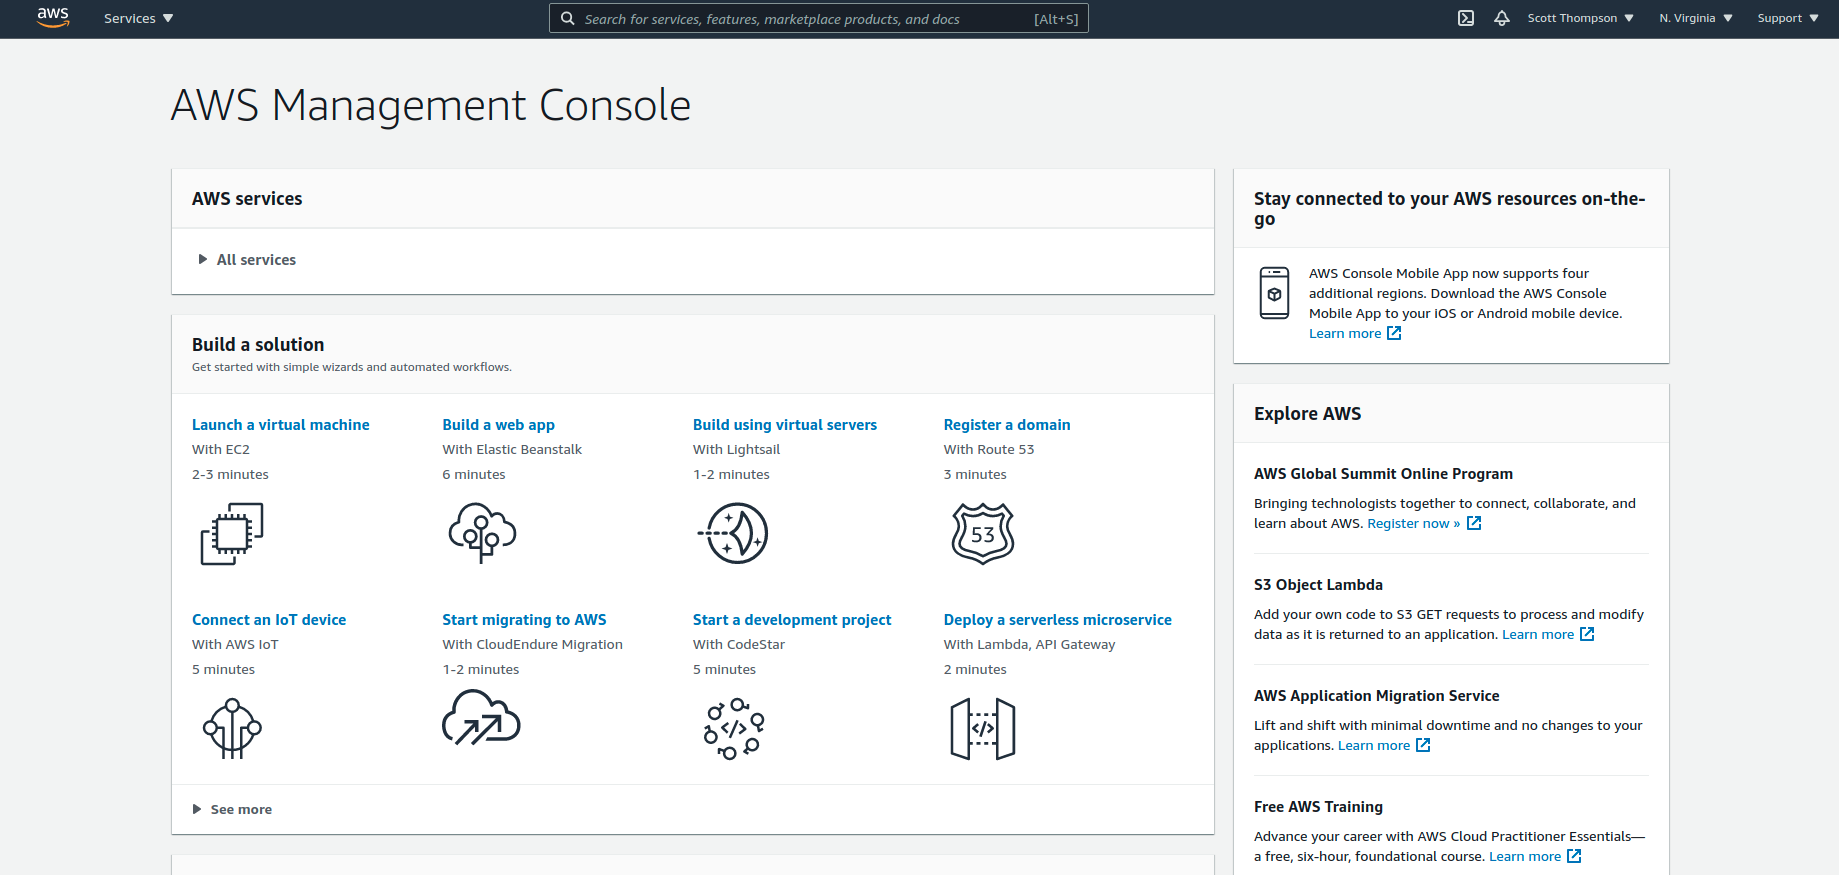
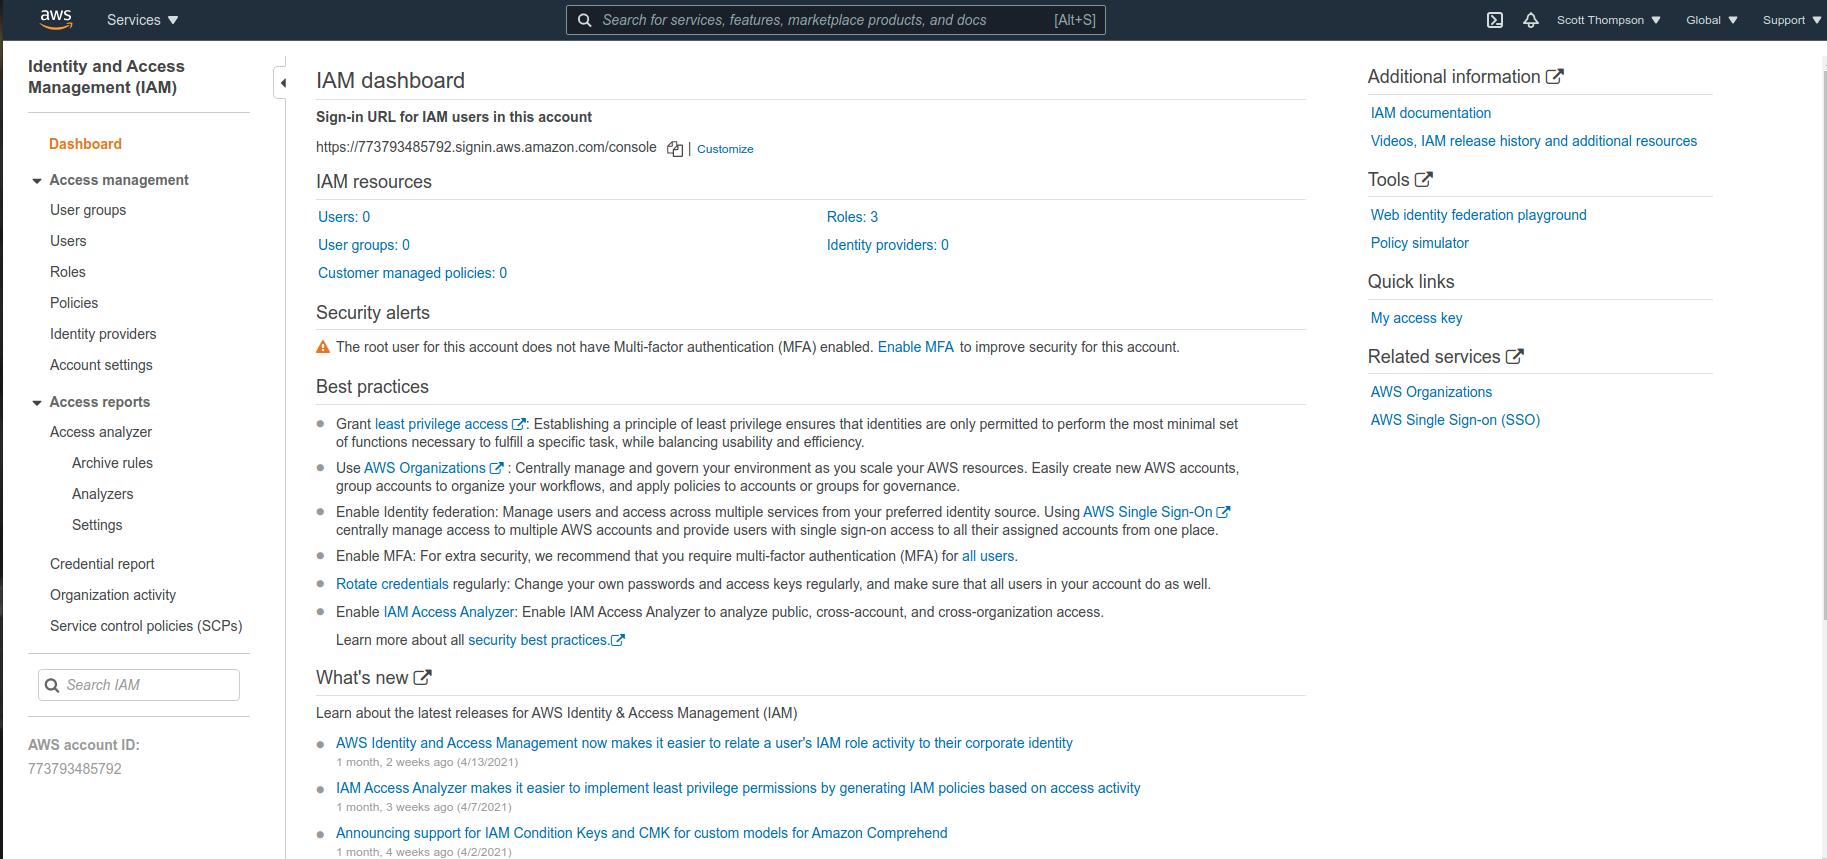
You should now be on the AWS Management Console dashboard.
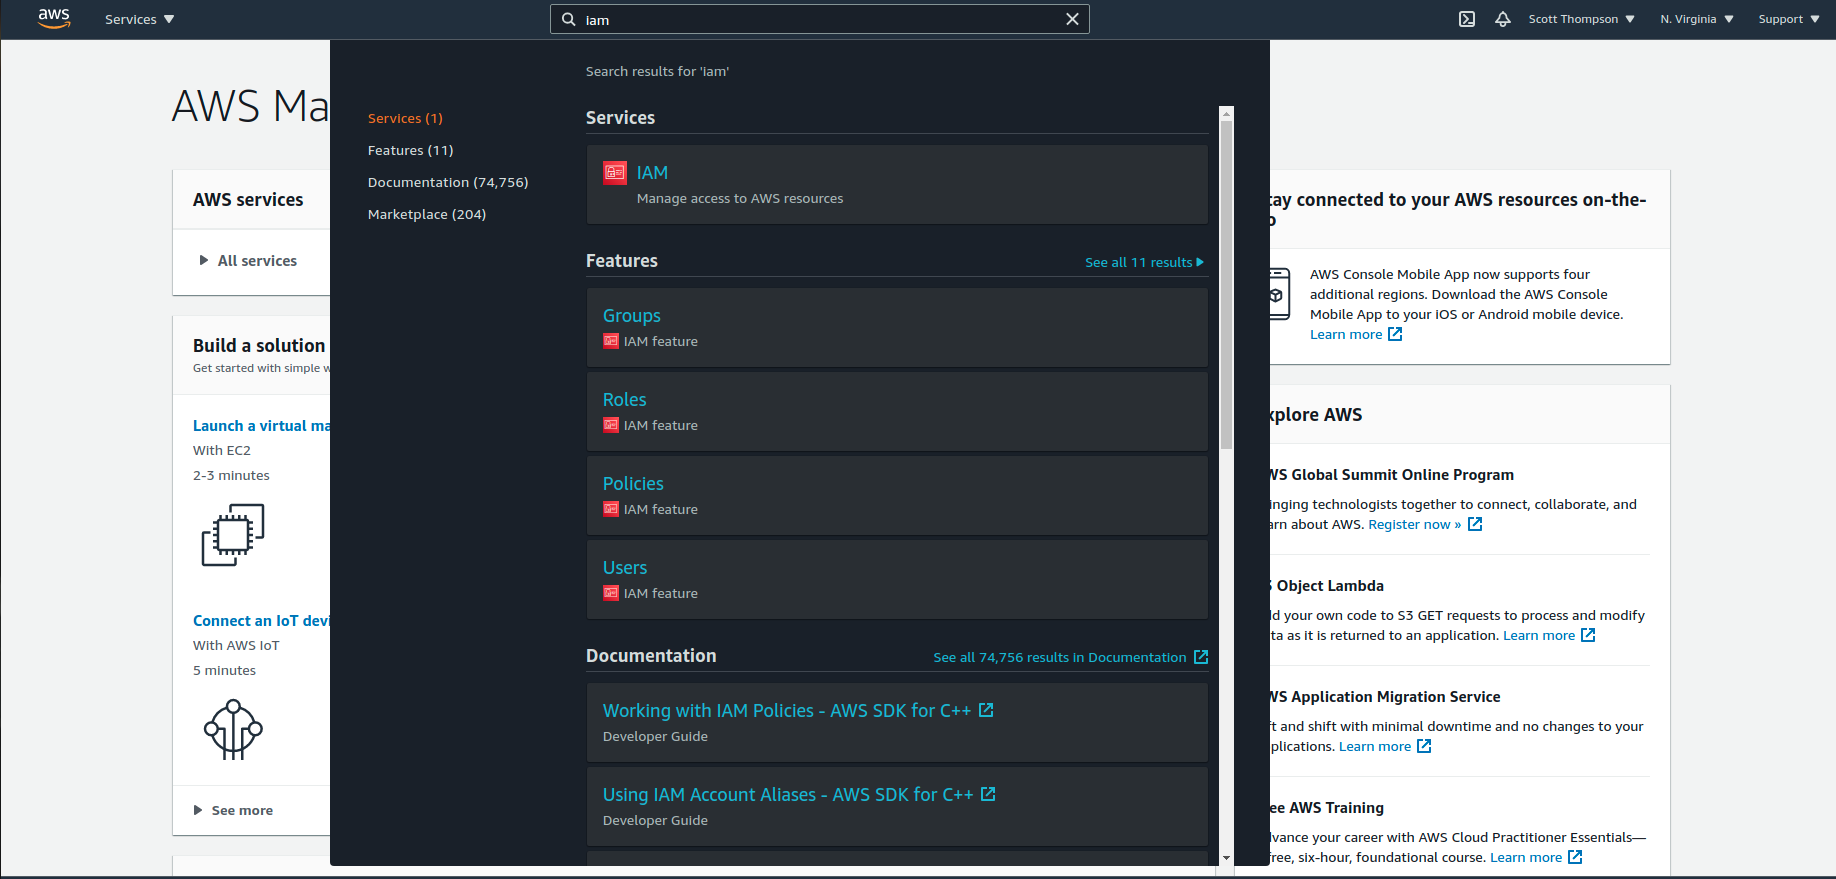
Once you get logged into the AWS console, we want to manage access to AWS resources, so go to the top bar and type in “IAM”
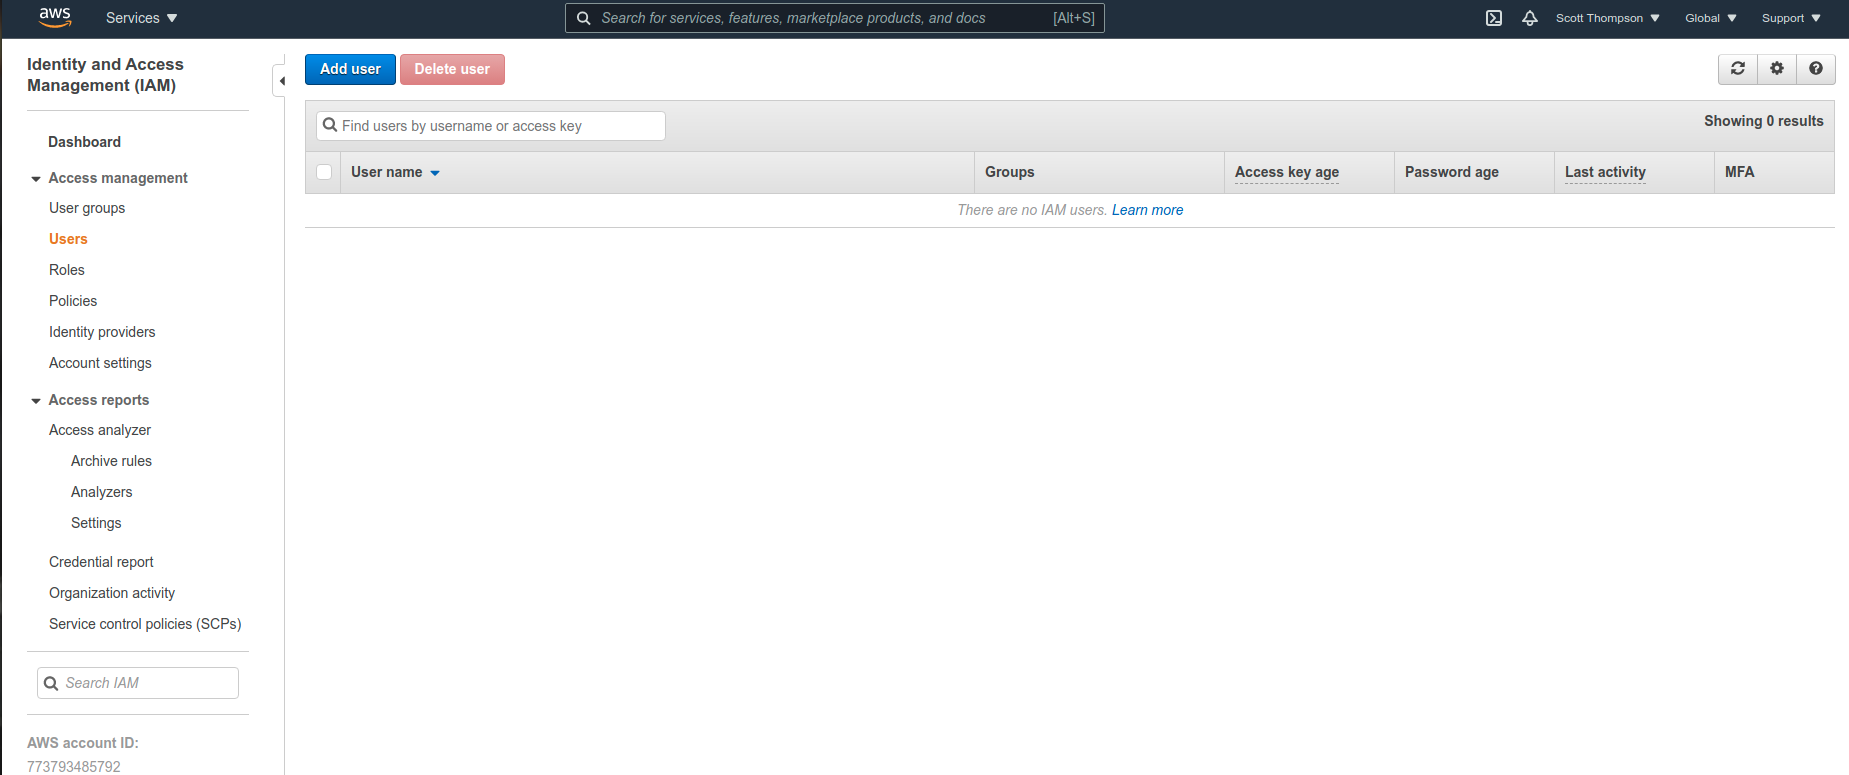
On the IAM screen, click on users to create a new user.
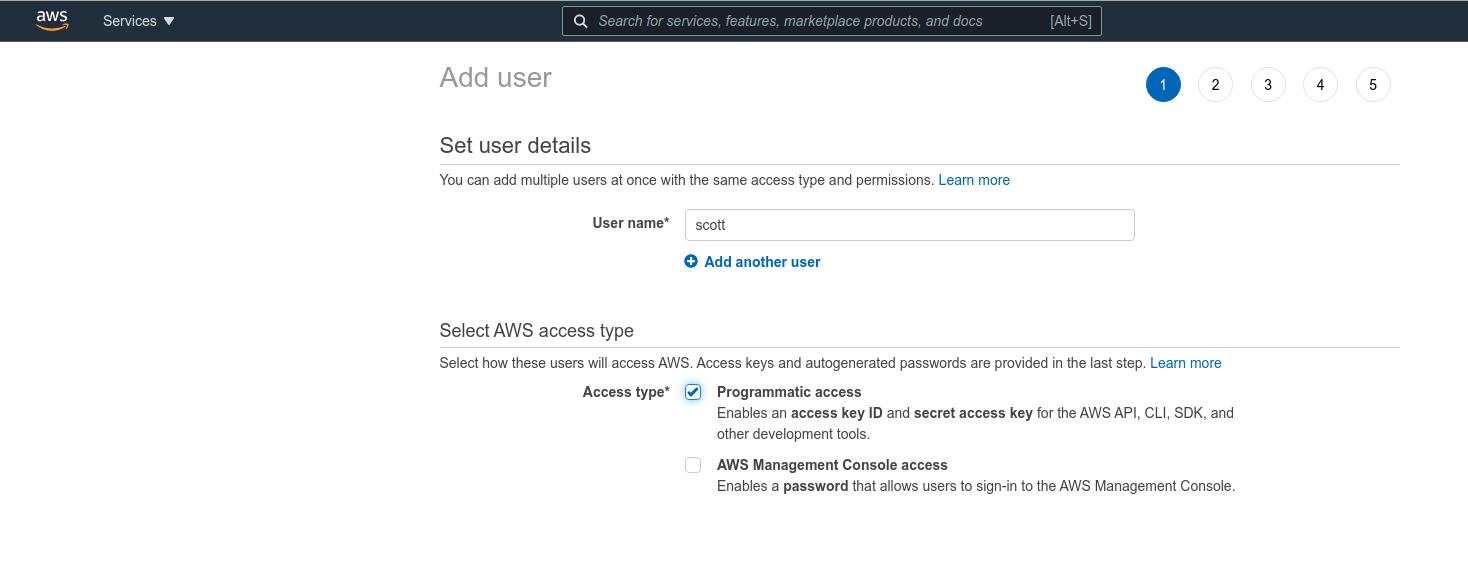
You will then be on the user screen where you want to click on “Add user”. We are creating a username for potential management of EC2 resources in the future.
Create an account.
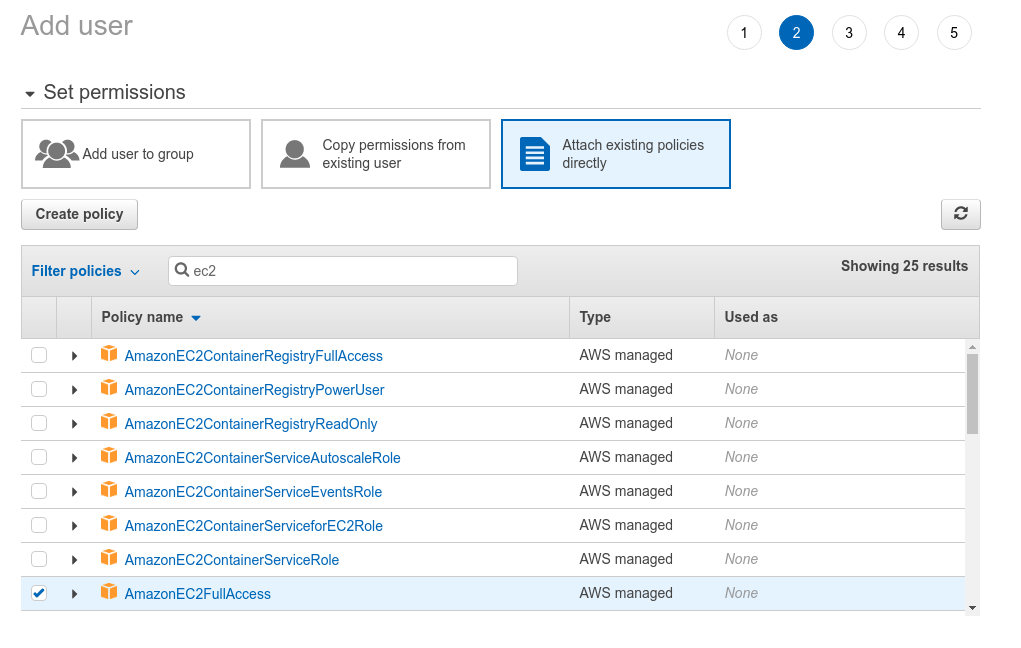
On the permissions screen choose “Attach exiting policies directly”. Type “EC2” to search for the “Elastic Console” service which is Amazon’s hosting service and select “AmazonEC2FullAccess”.
Click on “Next” and skip the tags screen, On the review screen click on “Create User” to create a user.

You will get a confirmation screen.
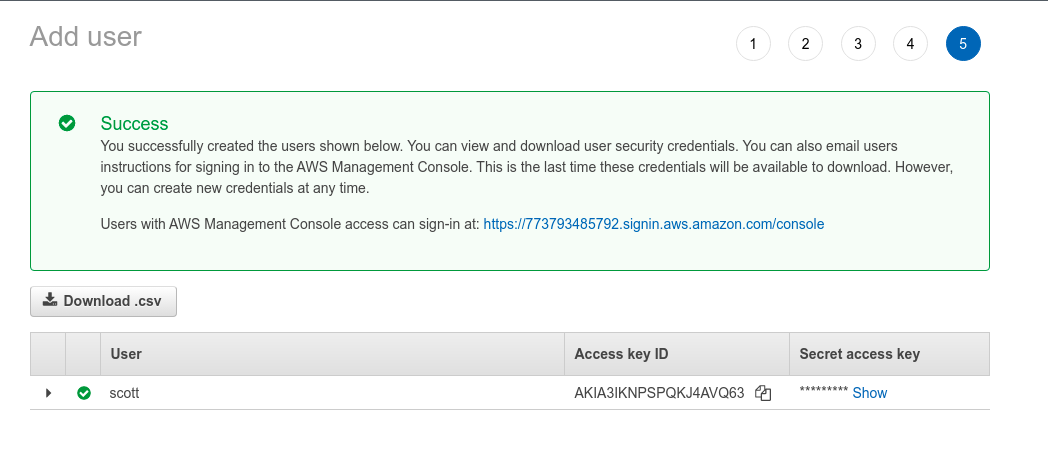
Click download .csv to make a copy of your crendentials.
Now that the user is created, we are going to create our EC2 server instance. At the top of the screen, type EC2.
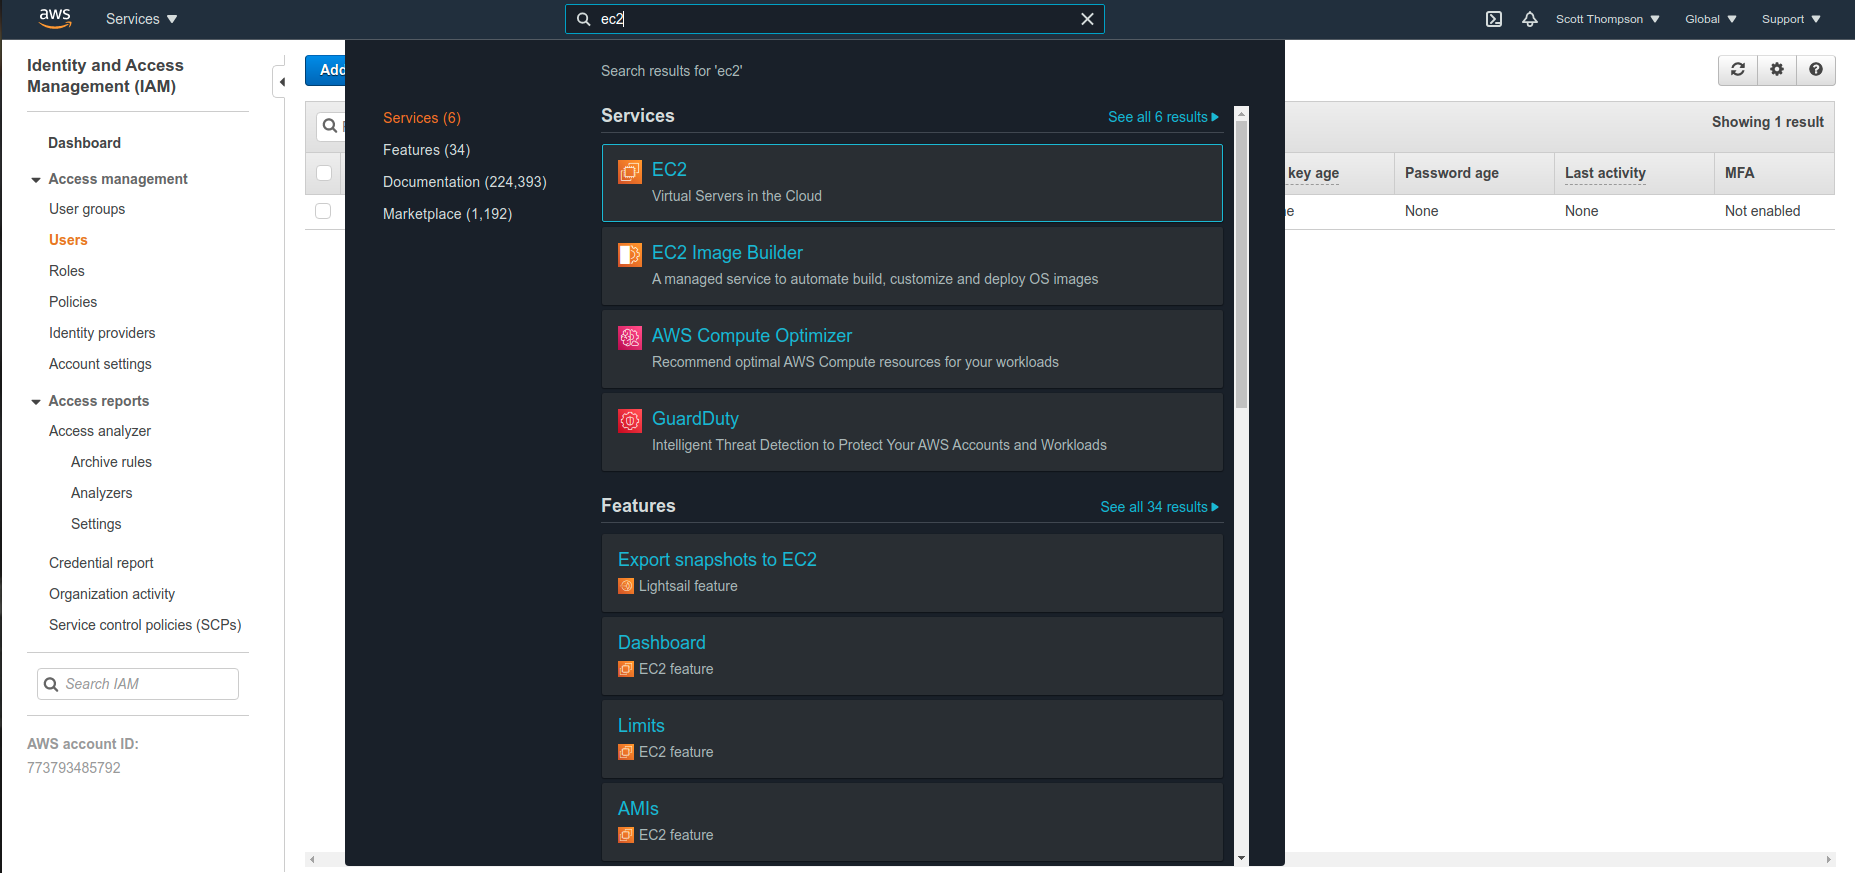
Click on the EC2 link and you are on the EC2 console.
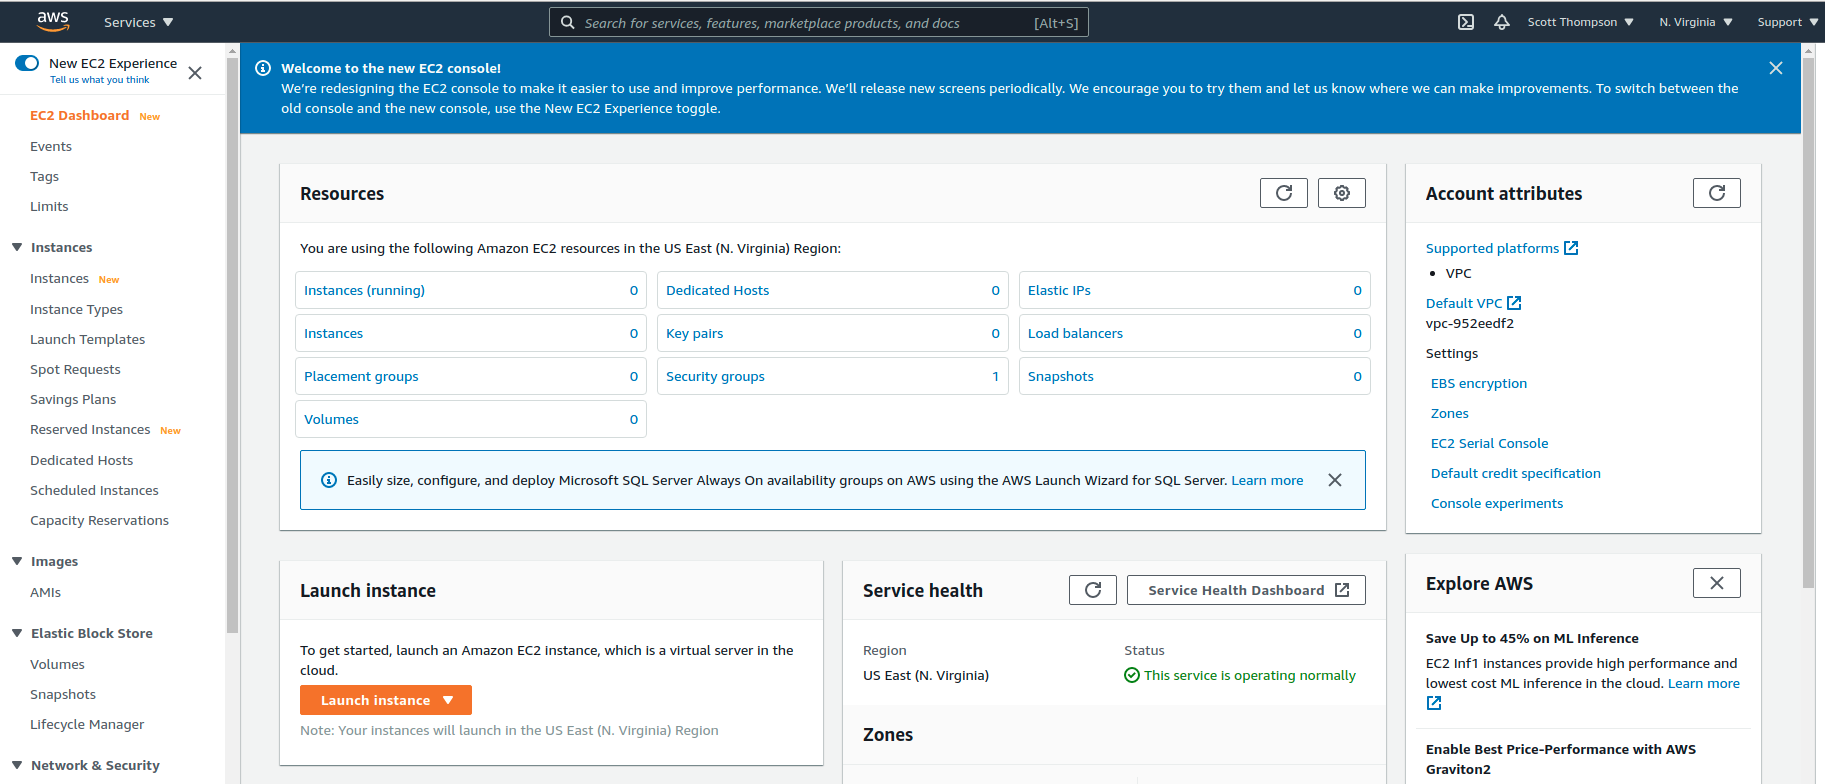
Note the AWS data center location, because you will need it later. On my screen, it is “N. Virginia”. Now click on “Key Pairs”.

Choose Create key pair on the upper right. Give your keypair a name and choose the format as PEM. We are creating an SSH secure key as opposed to a username/password.
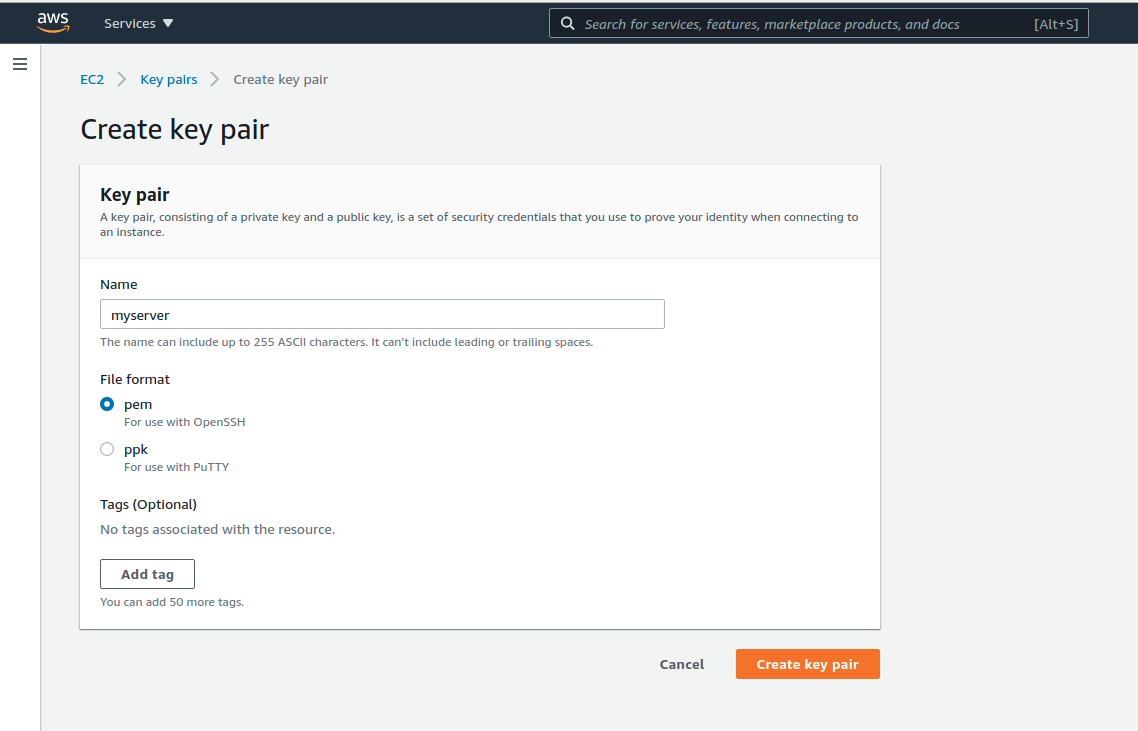
Notice it downloaded a “PEM” file which is this login keypair. Go to the service bar at the top of the screen and type “market”.
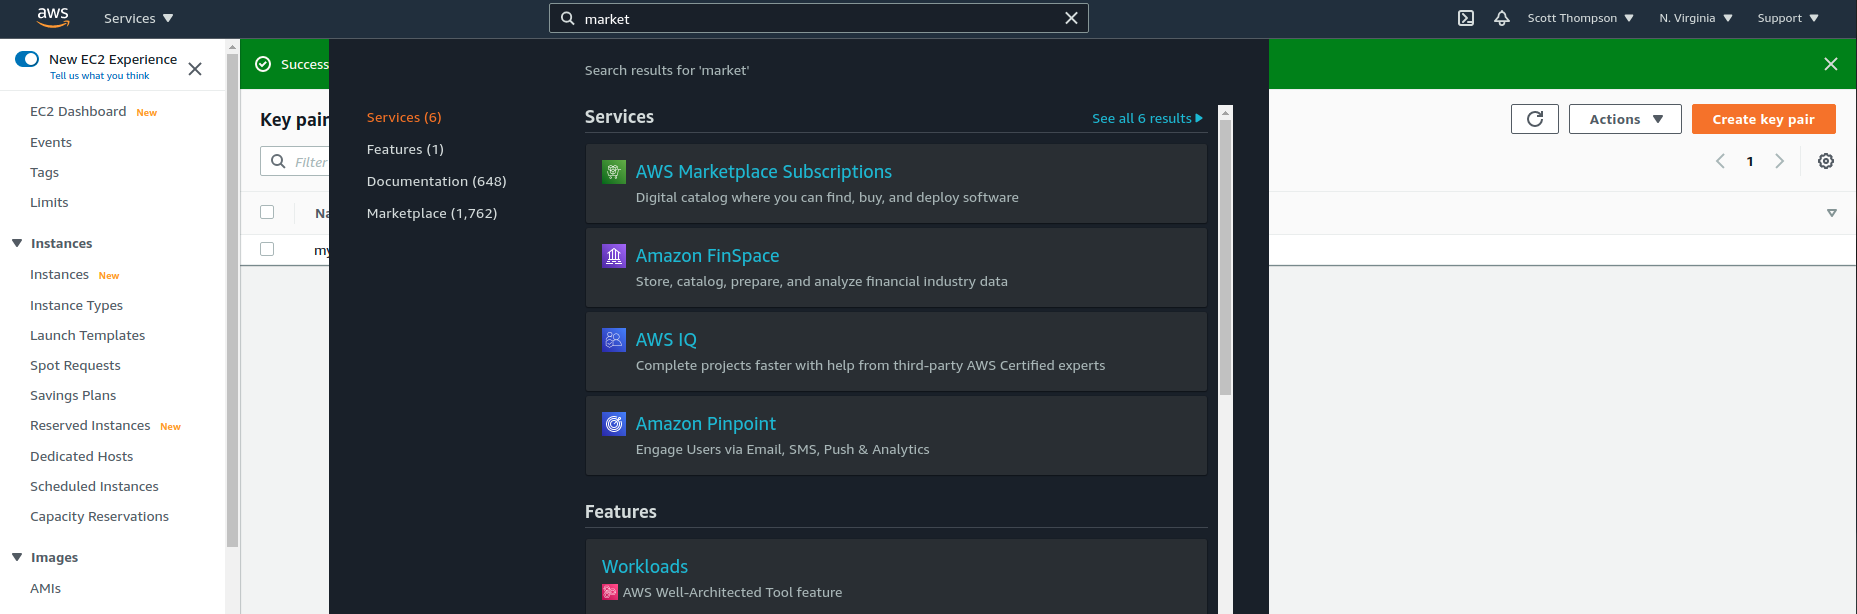
Choose AWS Marketplace Subscriptions.
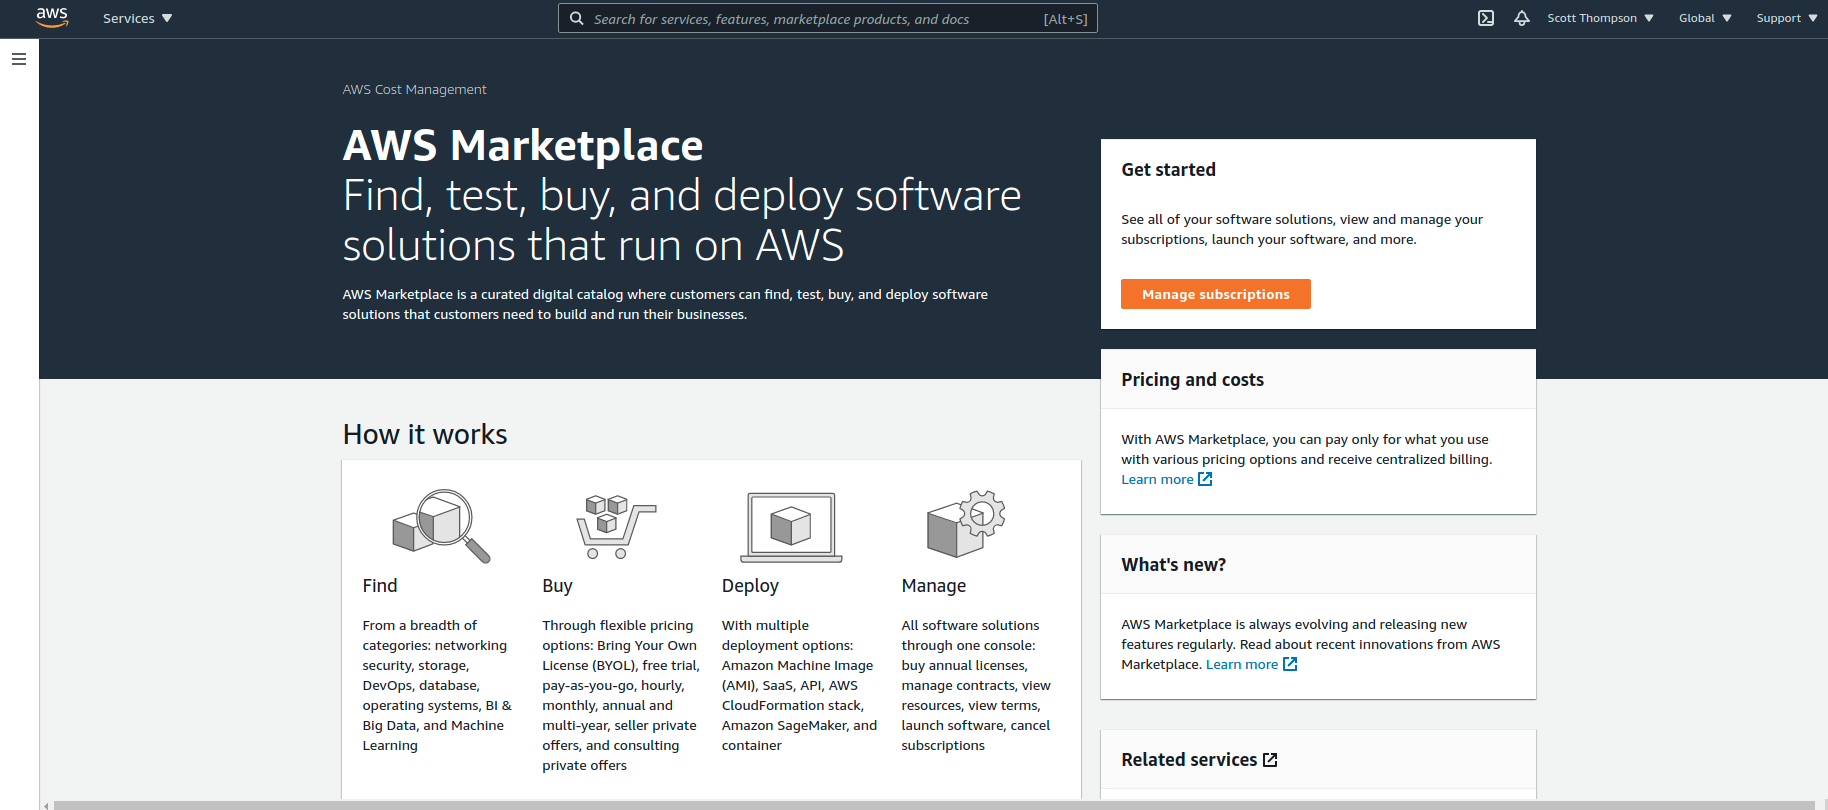
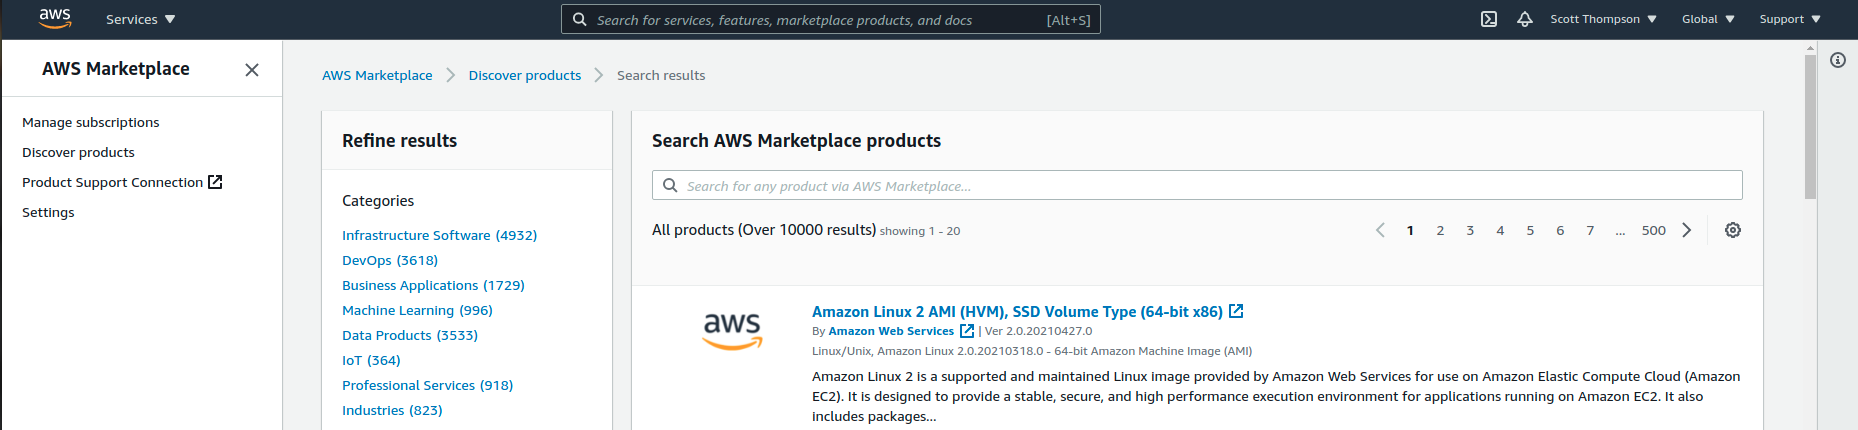
Click on “Manage Subscriptions” and then click on “Discover Products”.
In the search bar, type in “Ubuntu”.
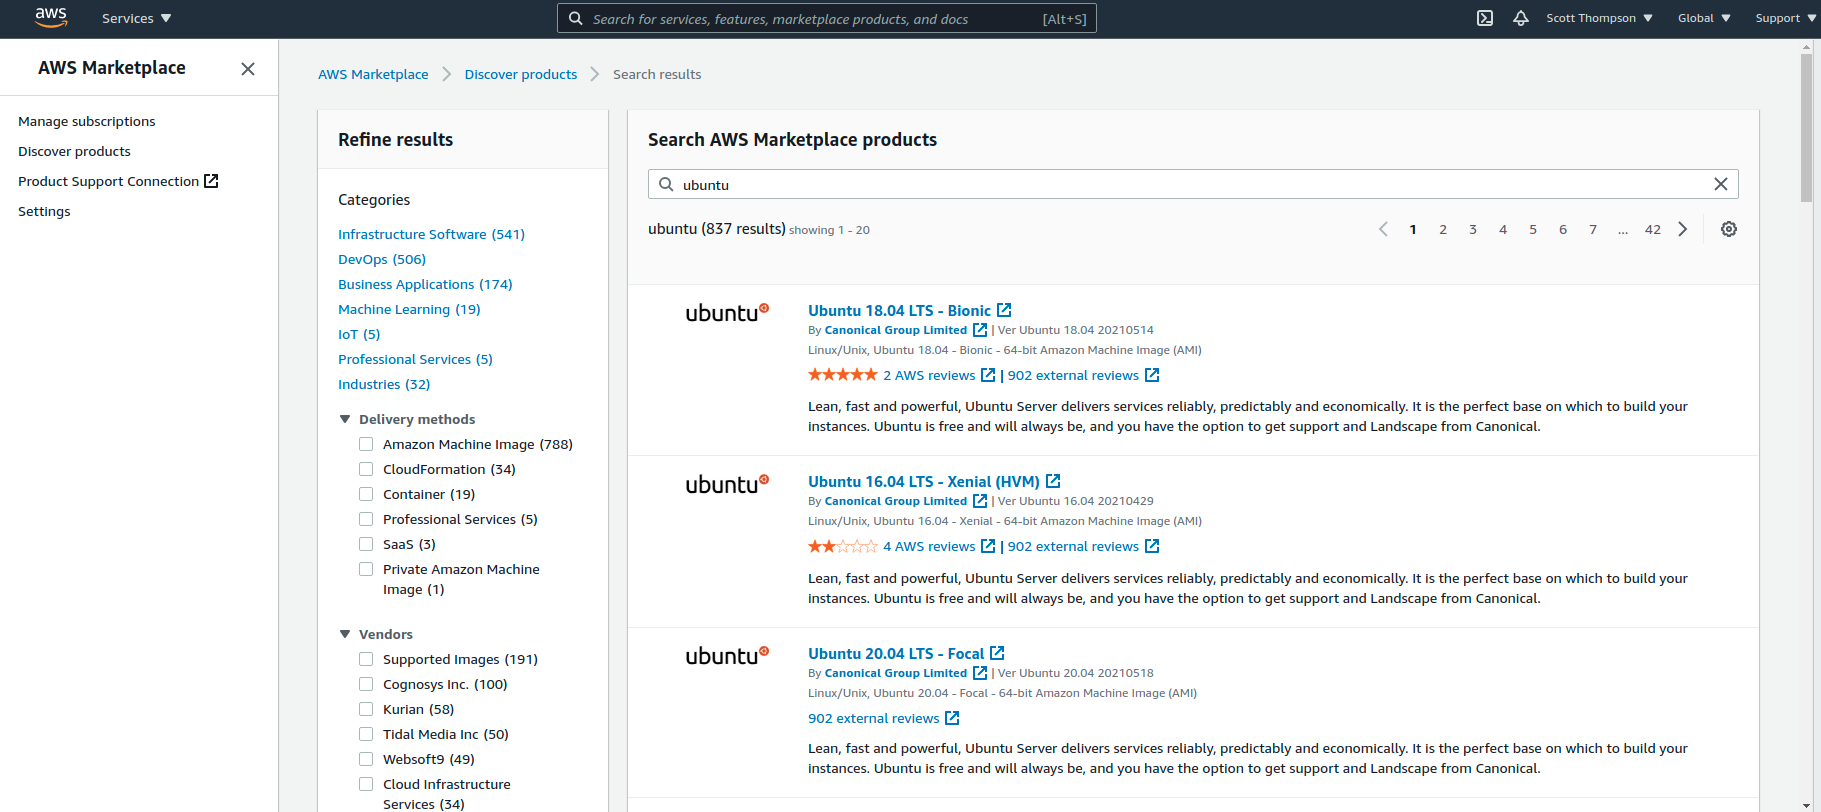
Click on “Ubuntu 20.04 LTS”.
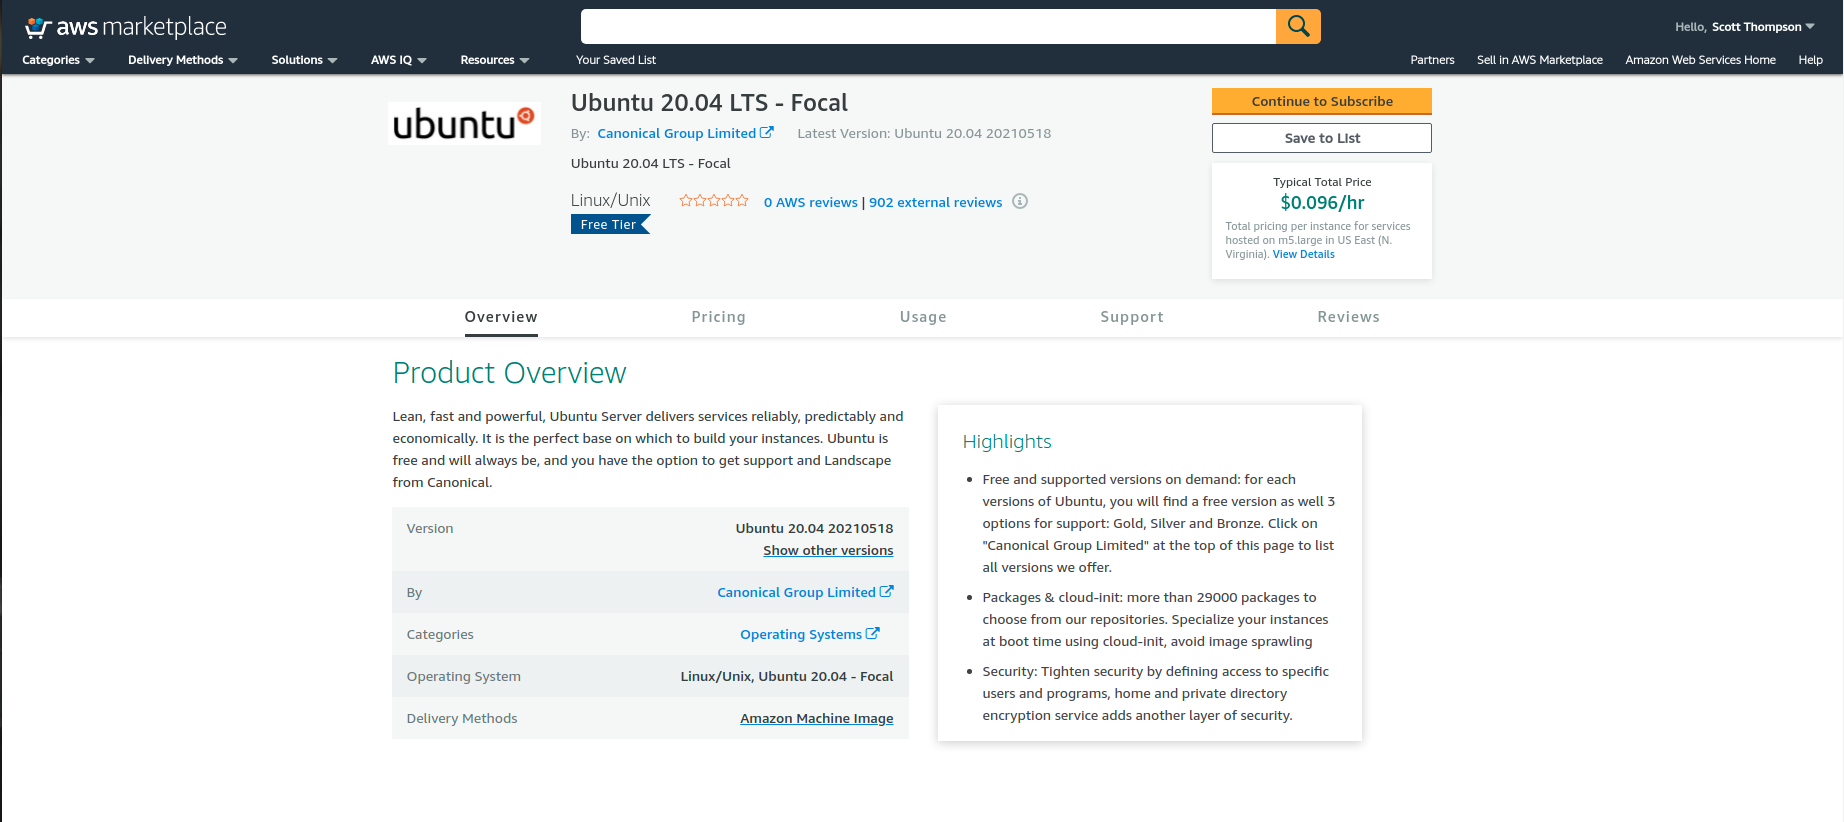
Scroll down to the bottom of this screen.
Choose T2.nano as the size. This “hardware size will be free as you will see later.
Click on “Continue to subscribe”. This is a free linux distro.
Click on “Accept Terms”.
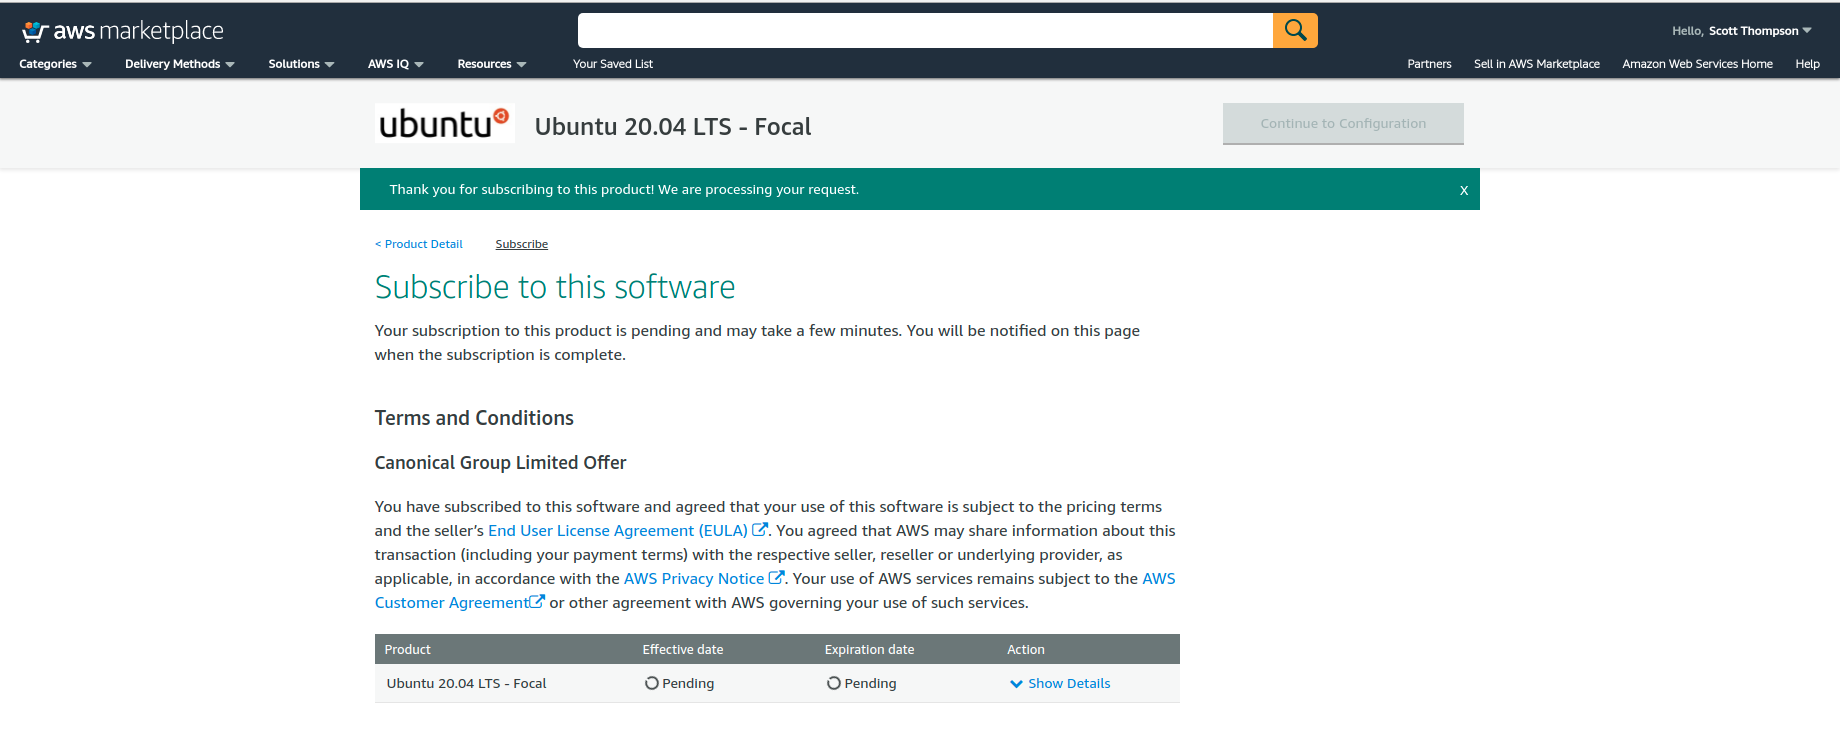
Your server is now getting created in the free tier.
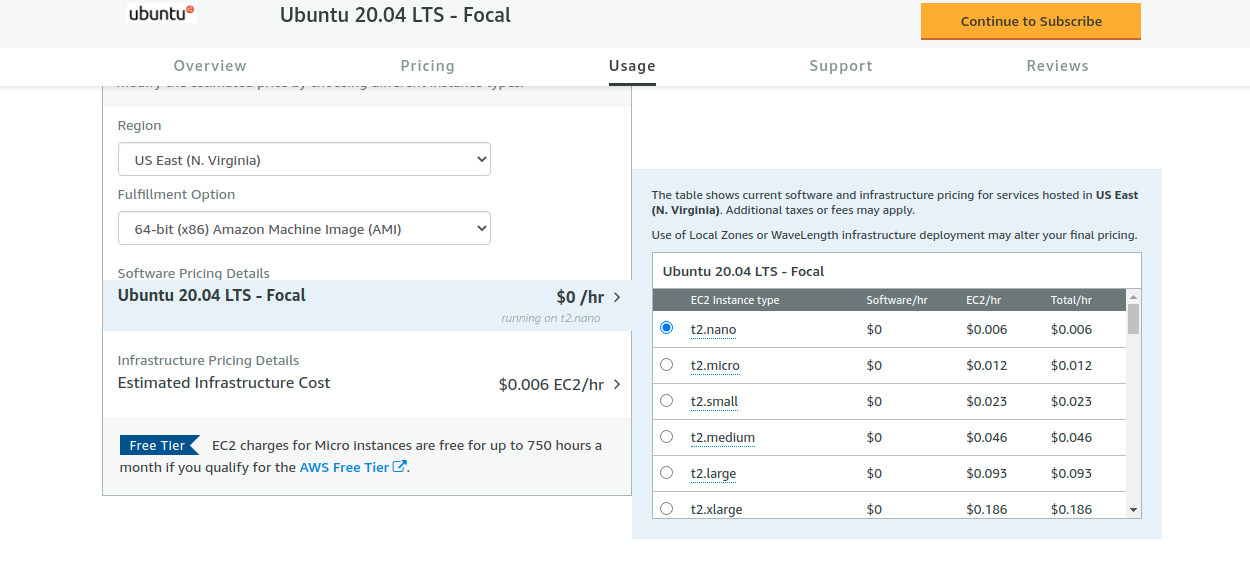
To prove that it is free, click on Show details.
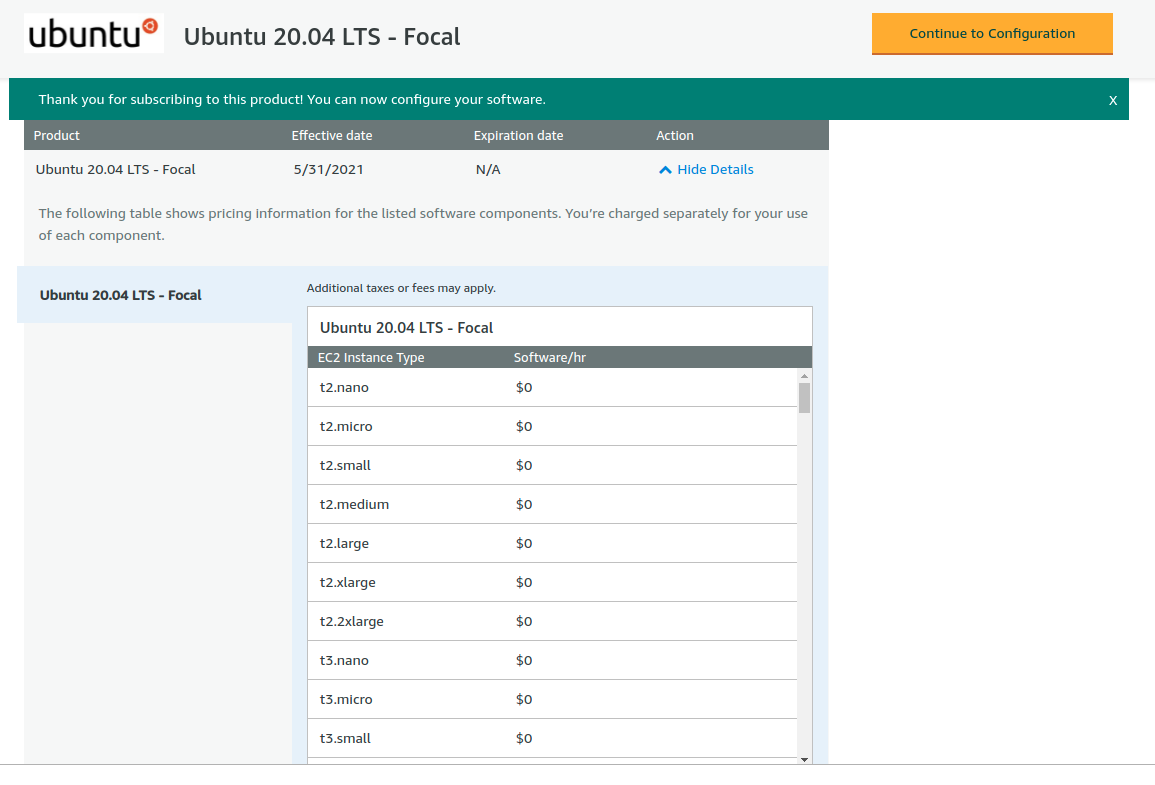
Once it is done creating, click on “Continue to Configuration”.
Click 'Continue to Launch” on the next screen.
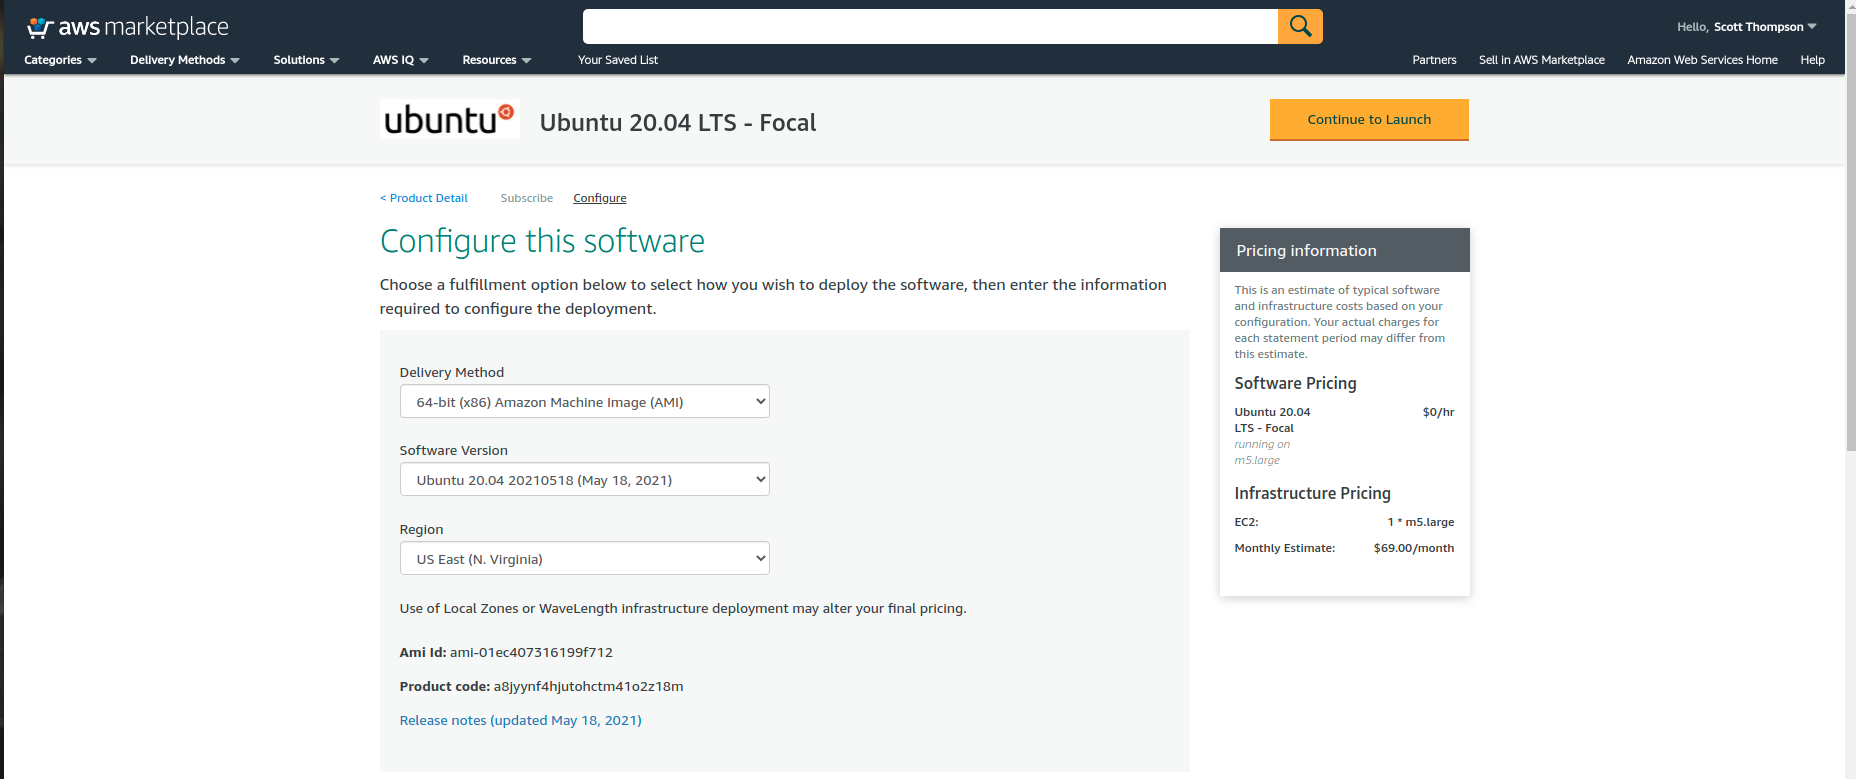
At this point it looks like it is billing for the m5.large server, continue to launch anyway.
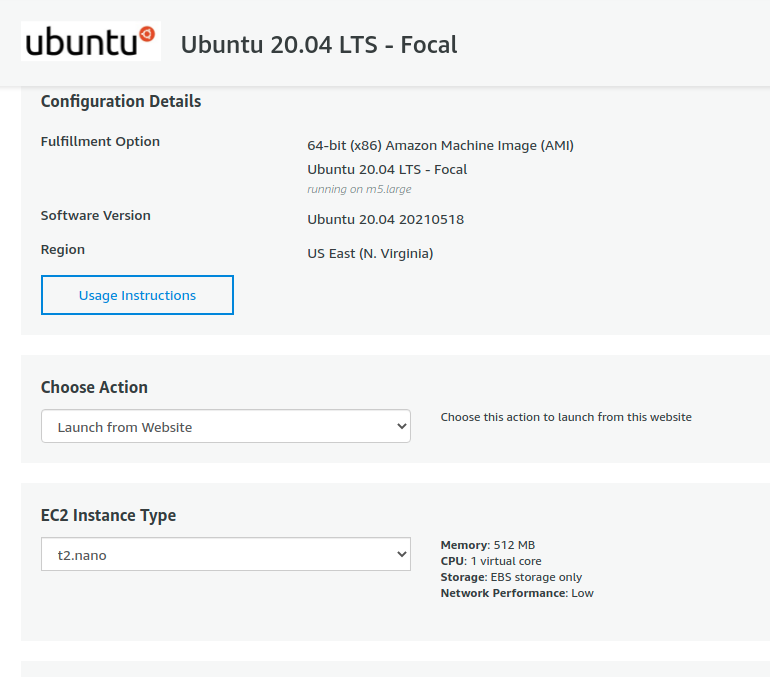
On this screen set to “t2.nano” once again. Also select “default” security settings and click “launch”. The keypair should have selected the one we created earlier.
If you did everything right, you should see a screen as follows:
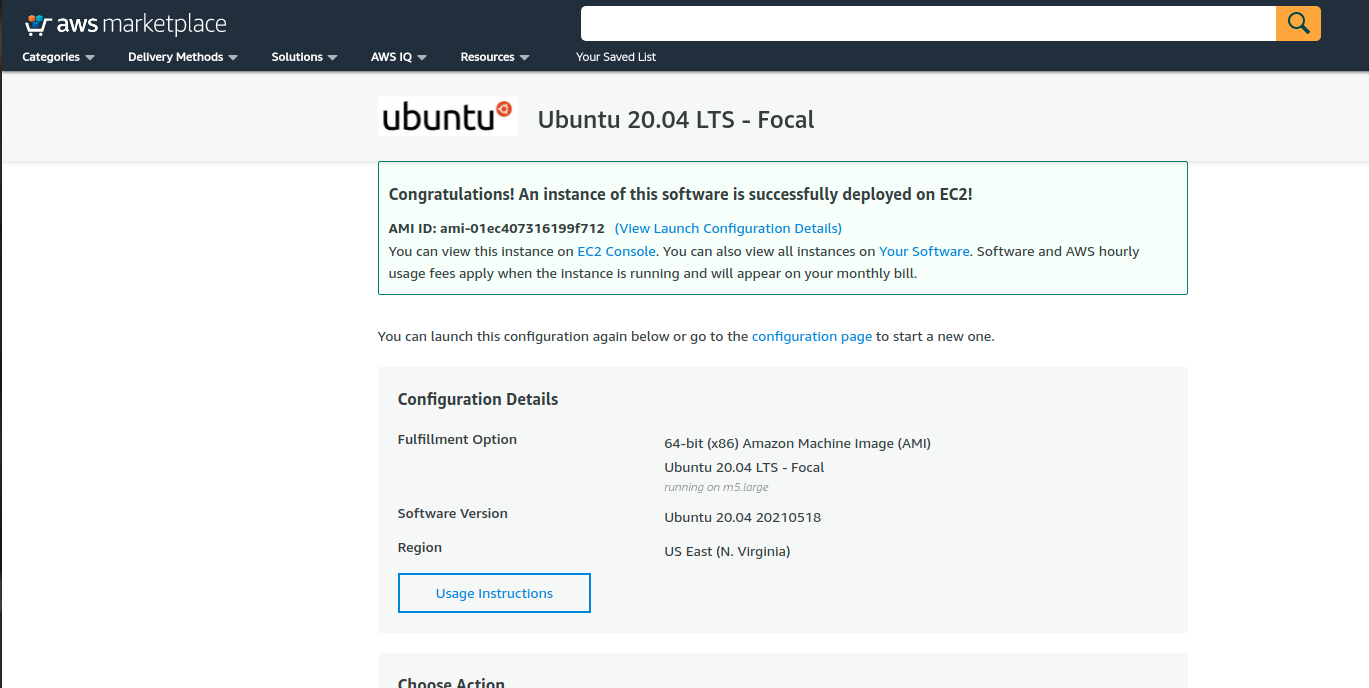
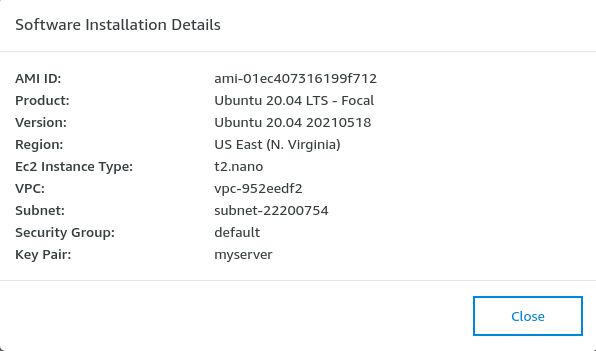
If I view configuration details, I can see that this machine is a t2.nano.
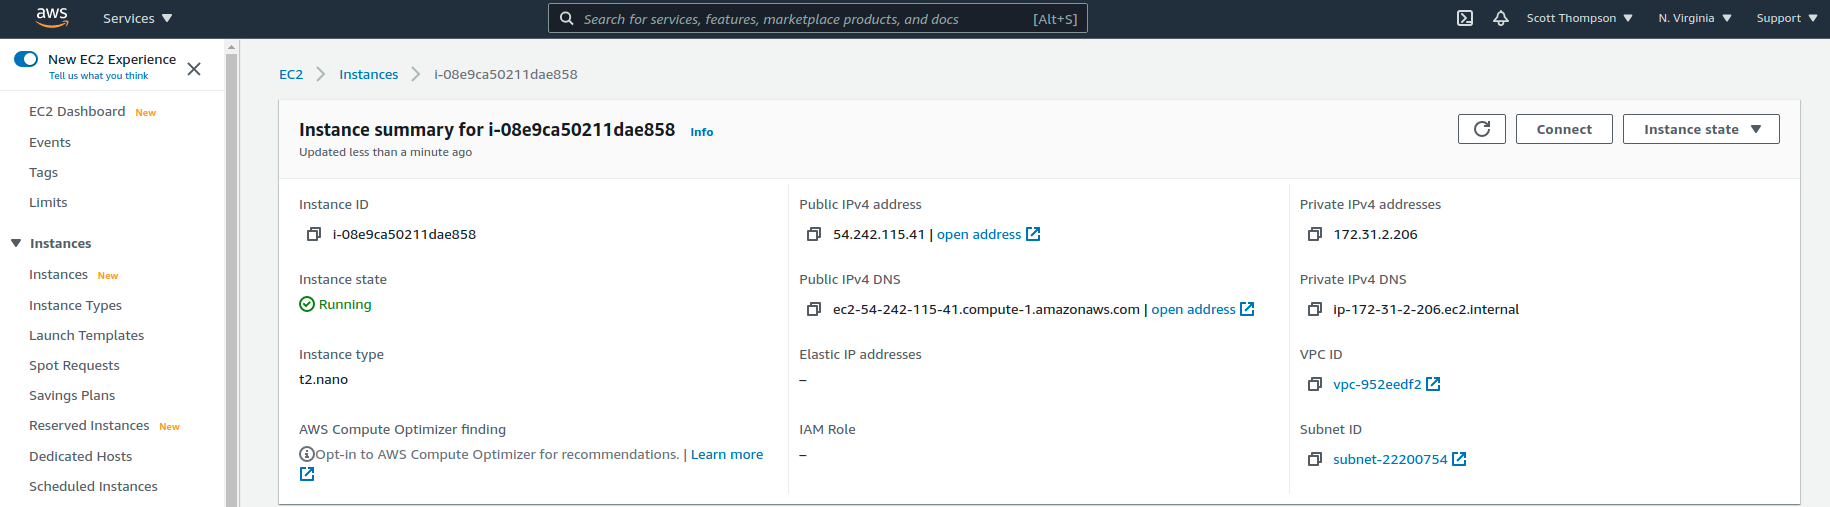
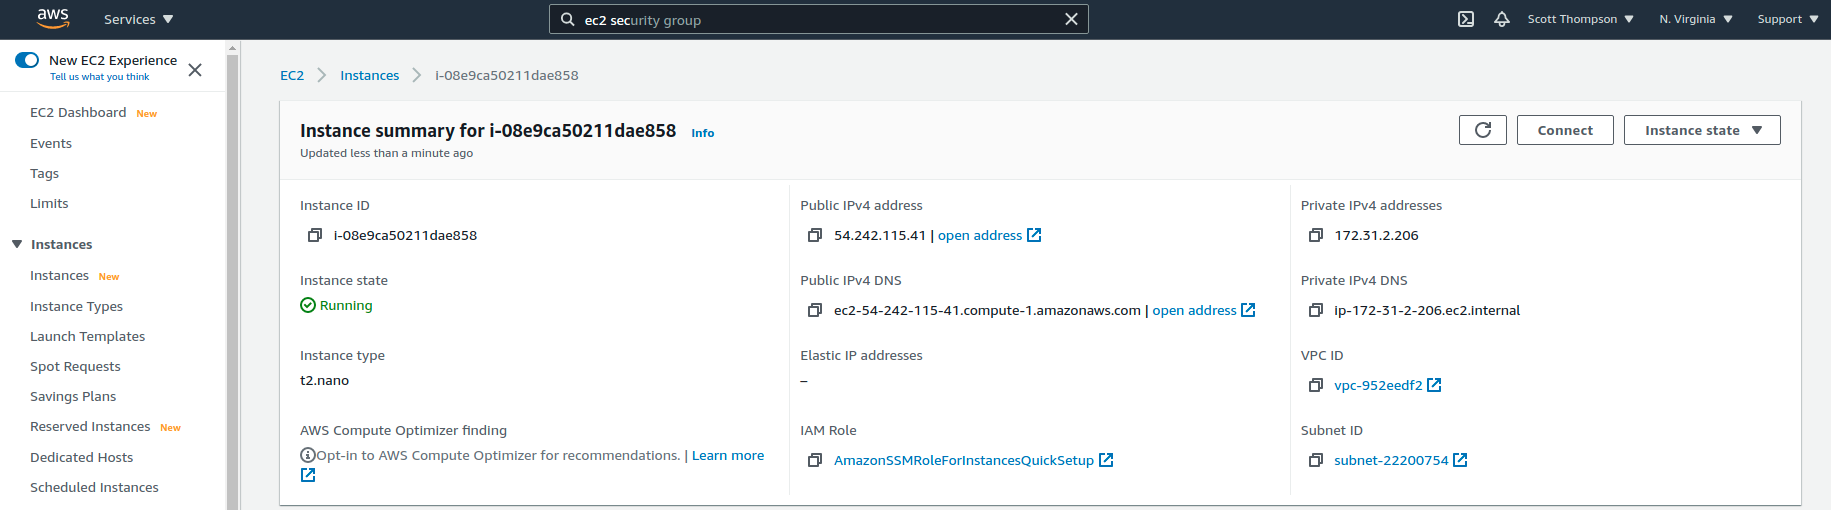
If you now go back to the EC2 Console, you should see your new server.

If you click on the instance id, you will be on the instance summary screen.
You can then click on Connect to instance.
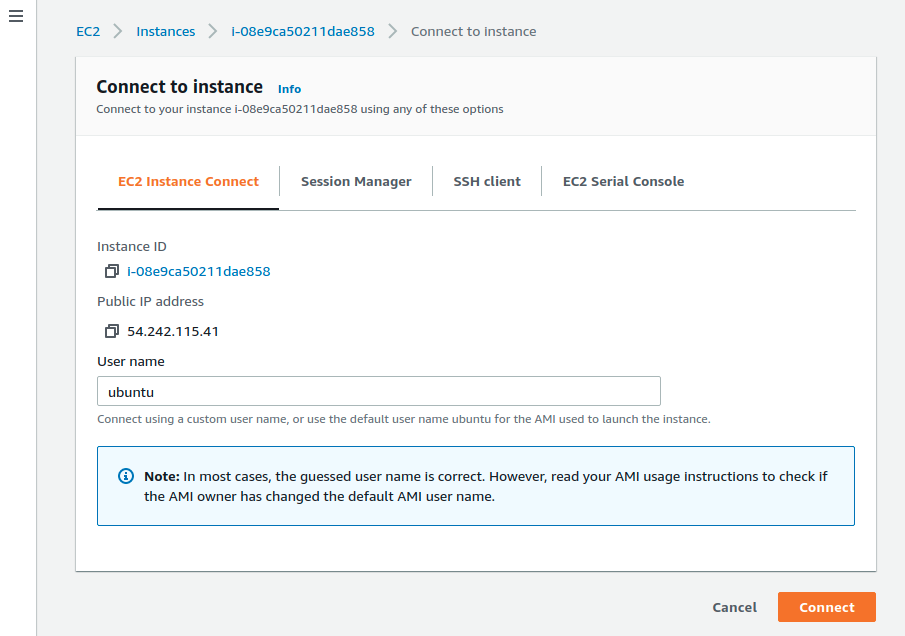
At this point, you will not be able to connect to your instance. At the search bar at the top of the screen, you will need to type in “EC2 Security Group”.
Select Security Groups. If you don’t have one, create one.

Click on the security group id.
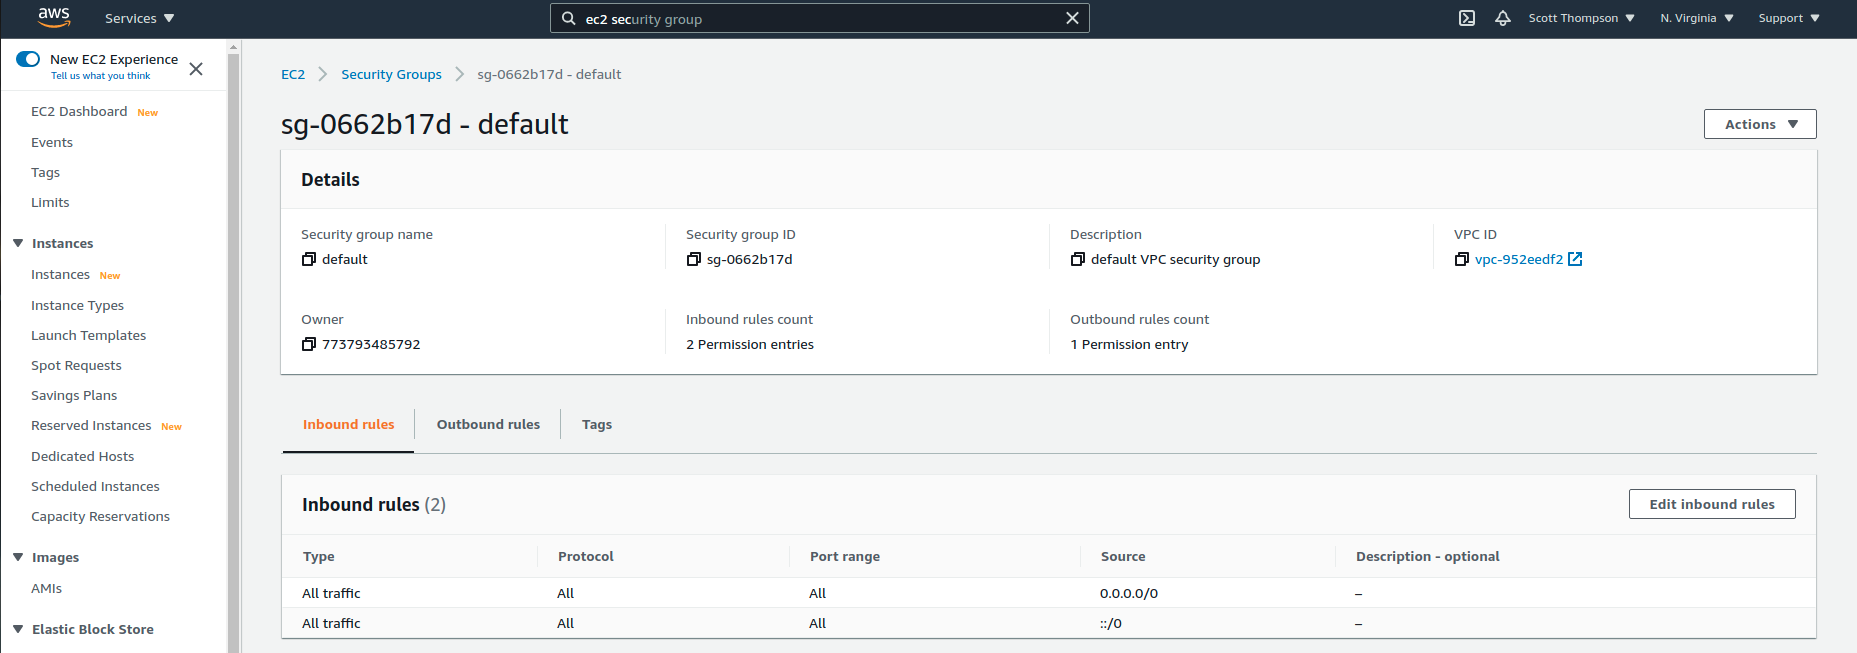
Edit the inbound rules. Change the source to either include your WAN address or open it up to all. Don’t worry about having it opened up since the login is set via the keys we created earlier.
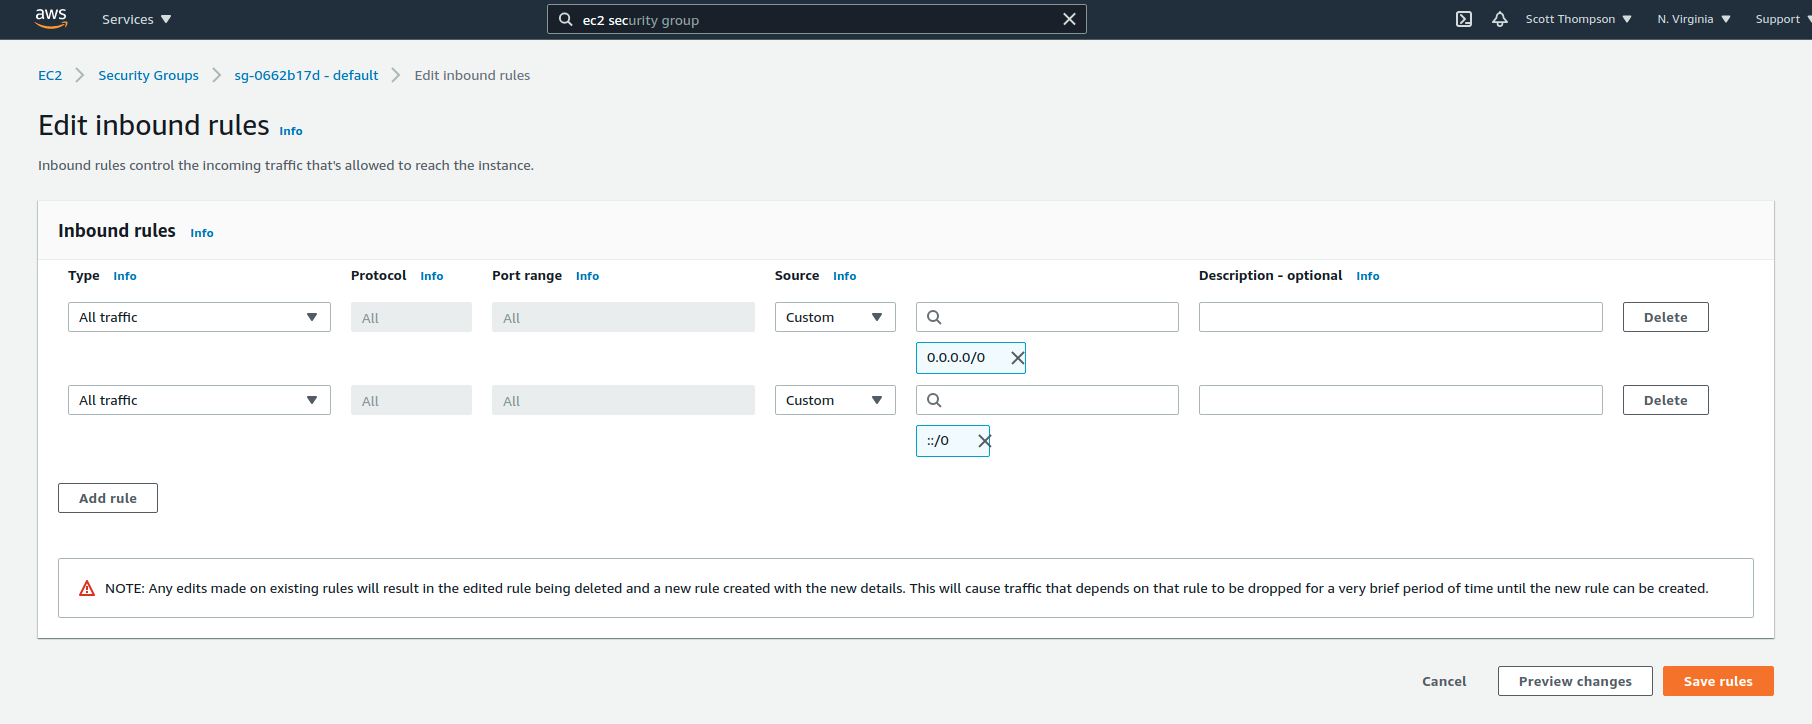
Finally, Save rules.
You should now be able to login.
Navigate back to the EC2 Dashboard and choose your running instance.
Click on the instance ID.
Click on Connect and then click on the “SSH Client” field.
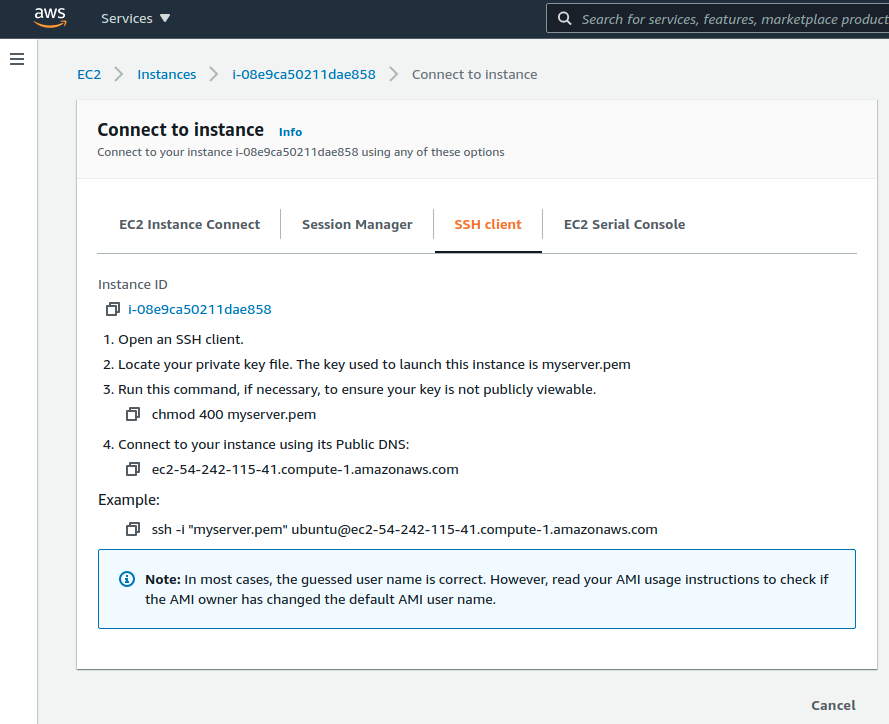
Copy the “example”. That is your login command. Open a Linux terminal. Change to the folder where you downloaded the PEM file and paste the command.
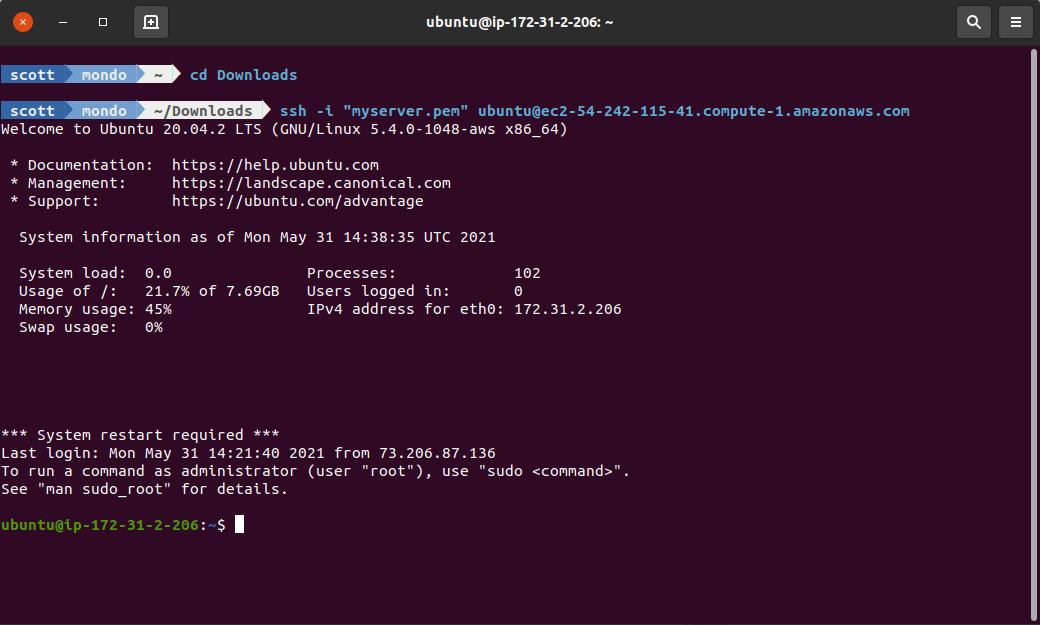
Congratulations! You have a FREE working EC2 Server instance.