By default, Ubuntu 20.04 desktop allows you to create L2TP, OpenVPN, PPTP VPN, and Cisco VPNC VPN connection profiles.
With the increasing popularity of Wireguard (https://www.wireguard.com/), it would be nice to have the ability to both create and import Wireguard profiles from the Ubuntu GUI Network manager.
Wireguard is very fast, efficient and secure. That being said, Wireguard is a protocol and lacks a user friendly GUI. Configuring Wireguard amounts to manually creating configuration files. In fact, Wireguard only has a loose concept of the idea of a server. All Wireguard nodes are really just client peers.
So, I am going to show you how to create the GUI for Ubuntu 20.04 Network Manager to support Wireguard. It will look like this:
Before we can create the GUI, we need to install Wireguard. This is very simple. Wireguard support is in the hardware kernel for Ubuntu 20.04. We just need to install the application to make use of it.
sudo apt update
sudo apt install wireguard
Wireguard installs some tools. The “wg” and “wg-quick” tools allow you to configure and manage the wireguard interfaces from a command line.
Each client system in a Wireguard VPN network needs to have a private and a public key. Run the following command to generate this key pair:
wg genkey | sudo tee /etc/wireguard/privatekey | wg pubkey | sudo tee /etc/wireguard/publickey
The keys are generated in the /etc/wireguard directory.
Wireguard also supports a pre-shared key which adds another layer of symmetric-key cryptography. This is optional, but must be unique for each pair of peers on the network,
Create a new file name:
sudo nano /etc/wireguard/wg0.conf
At a minimum, it should contain:
[Interface]
Address = 10.0.0.1/24
SaveConfig = true
ListenPort = 51820
PrivateKey = SERVER_PRIVATE_KEY
Wireguard uses UDP packets and you can set the listen port to any high numbered unused port. The 51820 port is just a default. The address field is for a private network range for client peers. You can use anything in the 10.0.0.0/8, 172.16.0.0/12 or the 192.168.0.0/16 range.
The private key is the private key we generated above (/etc/wireguard/privatekey)
Once done, you should protect the files:
sudo chmod 600 /etc/wireguard/{privatekey,wg0.conf}
You can bring the interface up with:
sudo wg-quick up wg0
You can see the status of your wireguard device with:
sudo wg show wg0
There’s a lot more that can be done if we planned to make this system a server, but that’s not our goal. We want to simply have a client GUI to easily connect to a Wireguard server.
Let’s install the GUI on your ubuntu 20.04 desktop:
cd ~/
sudo apt install wireguard git dh-autoreconf libglib2.0-dev intltool build-essential libgtk-3-dev libnma-dev libsecret-1-dev network-manager-dev resolvconf
git clone GitHub - max-moser/network-manager-wireguard: NetworkManager VPN Plugin: Wireguard
cd network-manager-wireguard
./autogen.sh --without-libnm-glib
./configure --without-libnm-glib --prefix=/usr --sysconfdir=/etc --libdir=/usr/lib/x86_64-linux-gnu --libexecdir=/usr/lib/NetworkManager --localstatedir=/var
make
sudo make install
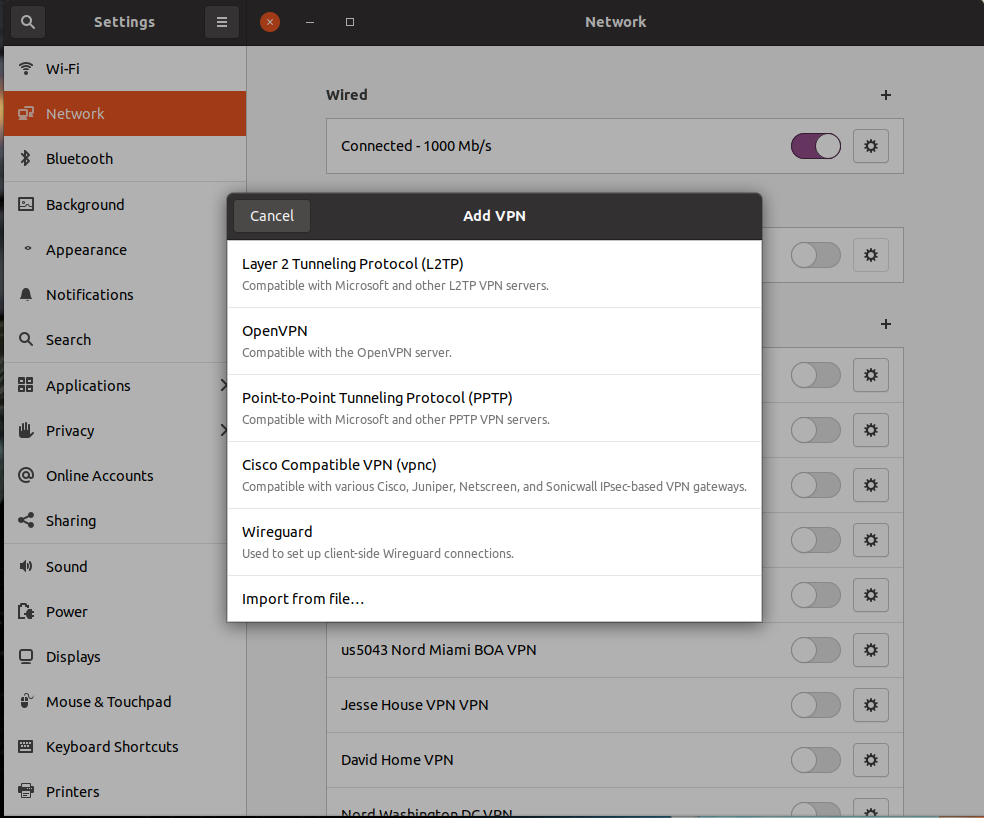
Now the Network VPN Menus have Wireguard as an option
Usually, you will have a Wireguard “conf” file that looks something like this:
Interface]
PrivateKey = cITUz0UBmk9hDweS7ERSRO22zqc3ae23N0n0SaaQ/Vs=
Address = 10.8.0.3/24
DNS = 1.0.0.1
[Peer]
PublicKey = VQNc4FepuZeveAmZWaTRB6gt1etagqa9y1Oz0uwF+zY=
PresharedKey = ZFV1AwVvON6Fj/8XXN52cix5503NAREyq633g+s+Hjc=
AllowedIPs = 0.0.0.0/0, ::/0
PersistentKeepalive = 0
Endpoint = wireguard.mydomain.net:51820
The above can be added as a VPN connection with the new Interface simply by using the “Import from File” option. The above means that on the target wireguard network, this client will get the address 10.8.0.3. It also means that the DNS used will be Cloudflare at 1.0.0.1. The allowed IPs are all zero meaning that the user will be able to connect to anything on the target network and will also be able to go out on the WAN from that network. The endpoint is the FQDN and port number for the Wireguard server that you are contacting.
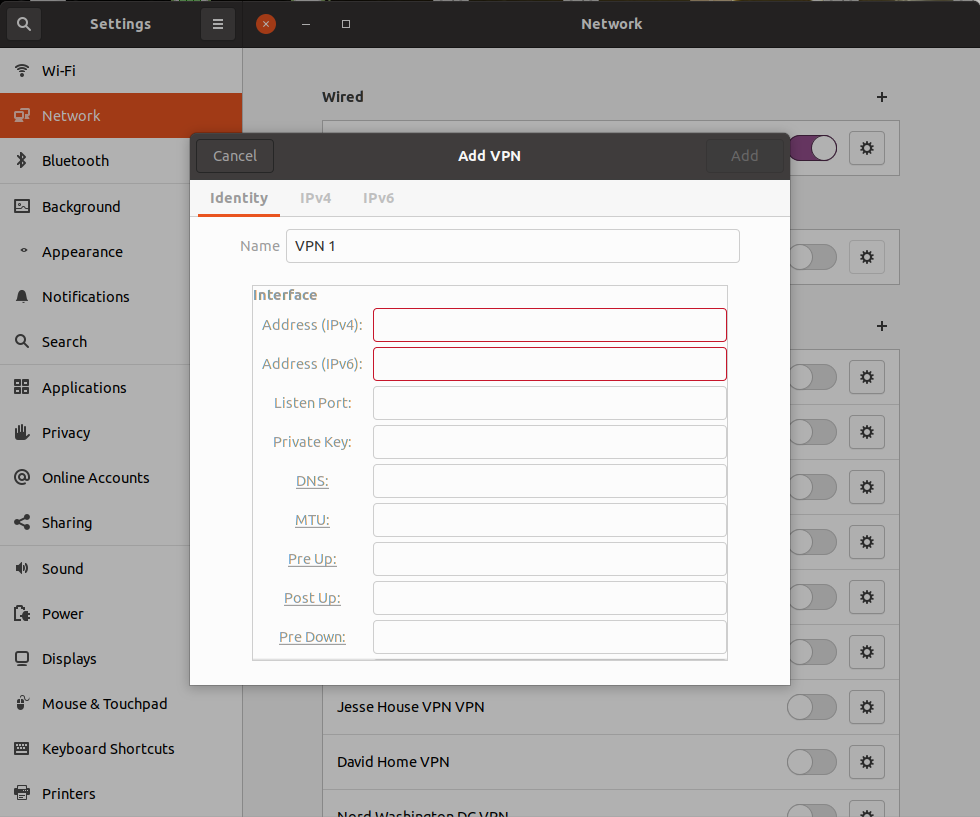
If you don’t choose the “import from file” option and instead choose the “Wireguard” option, you will be able to enter all the wireguard parameters by hand.
You can see from this tutorial that Wireguard is certainly more complex than OpenVPN. You get much better performance and slightly better security with Wireguard. Both Wireguard and OpenVPN are open source protocols. There are Wireguard clients available for Windows, MacOS, Android and IoS in addition to Linux.