The majority of the time I create tutorials that may show how to install or configure a self-hosted application in your home lab. Many times subscribers focus on the end target of getting a particular application running.
If you read and then re-read my notes for most of my topics you will see that my goal is to teach a particular skill or the use of a technique or tool which you can apply to other tasks in your home lab.
In this tutorial you will learn how to replicate local DNS entries between Pi-holes. You will also learn how to have a local DNS on two Pi-holes which will automatically fail-over in the event one Pi-hole goes down.
Many people regard Pi-hole as a network-wide ad-blocker. To achieve this functionality, Pi-hole is simply a DNS resolver that you run on your local network. Whenever a DNS entry cannot be resolved on your local network, it is passed on to your specified “upstream” servers which would be the typical public DNS resolvers such as the Google, Cloudflare and others.
However, Pi-hole intercepts your DNS lookups on the local network and checks them against lists of “known adware/malware” sites and if the user on your LAN is going to one of these sites, Pi-hole simply will not pass the request to upstream servers.
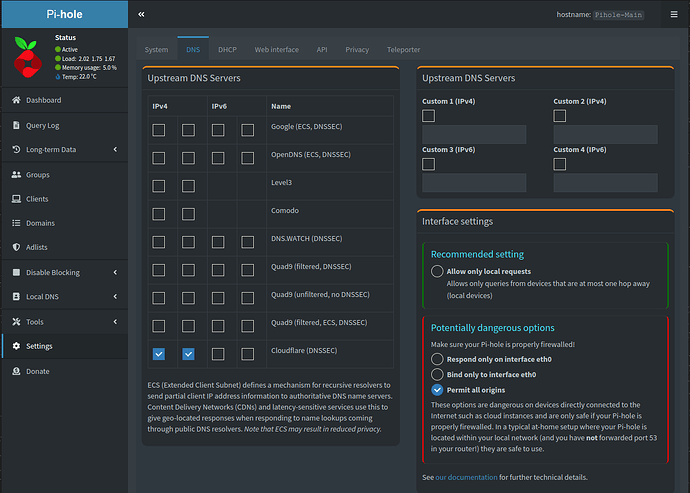
In my example above, my upstream servers are Cloudflare. In order to allow Pi-hole to perform this function, your DHCP server configuration (normally on your router) is set to designate your Pi-hole as your DNS.
Since Pi-hole is a DNS resolver, the real power comes in not just blocking advertisements, but in creating DNS A/AAAA records and CNAME records to point to all your server instances on your local network. This means you wouldn’t have to remember all those blasted IP addresses!
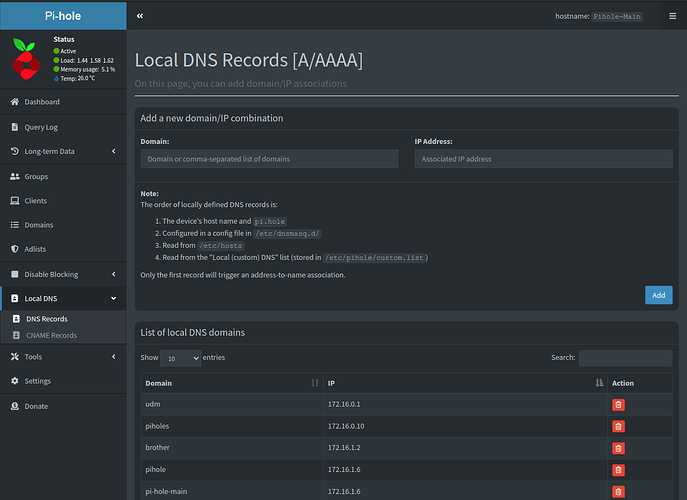
Above, you can see some of the A records I have defined on my network. I have hundreds! Yes, I have a lot running on my network.
I also have two Pi-hole servers in incus containers which run on different Incus servers. Up till now, the main purpose was backup. In this tutorial we see how to replicate these DNS record entries and how to configure for automatic fail-over in the event that your primary Pi-hole goes down.
In February of 2023, I presented a tutorial entitled NginX Proxy Manager & Local DNS where I showed how to resolve your subdomain named services on your local network even when your ISP connection is down. In May of 2023 I presented another tutorial entitled Mirrored Pi-holes where I showed how to use gravity-sync to replicate two or more pi-holes.
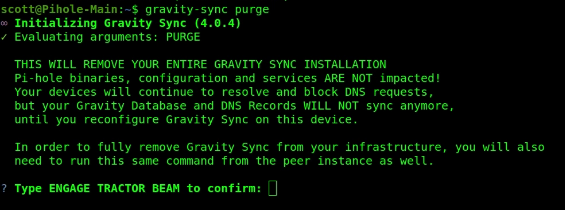
Gravity-sync was retired as of July 26, 2024. If you installed gravity-sync on your Pi-hole servers, you will want to log onto each of them and issue the following command to uninstall gravity-sync:
gravity-sync purge
In November 2024, as I do these notes, Pi-hole is at v5.18. Pi-hole v6.0 is coming soon and has an entirely new API which will render gravity-sync BROKEN.
To see what version of Pi-hole you are running, log into your Pi-hole instance and issue this command:
pihole -v

Upgrade your Pi-hole instances with this command:
pihole -up
Unlike gravity-sync which was installed on each Pi-hole, the newer pi-hole sync programs install on a docker instance which should be on another server instance for better configuration control.
In my video, I installed nebula-sync first and discovered that it ONLY WORKS ON PIHOLE 6.0. However, since 6.0 is close to release, I think installing and configuring it is a great idea. Just don’t start it if you are still on Pihole v5.x.
Since I use incus often on the channel, I created a nebula-sync container. If you have an existing docker server on a VM or Raspberry Pi that will work fine too.
incus launch images:ubuntu/24.04 Nebula-sync -p default -p bridgeprofile -c boot.autostart=true -c security.nesting=true
Connect to the new container and take the updates, install dependencies, and install docker:
incus shell Nebula-sync
apt update && apt upgrade -y
apt install curl nano net-tools openssh-server
curl -sSL https://get.docker.com | sh
Create a user account, put it in the sudo & docker groups, move to the new account, create a nebula-sync folder and move inside it:
adduser scott
usermod -aG sudo scott
usermod -aG docker scott
su - scott
mkdir nebula-sync
cd nebula-sync
Edit a compose file for nebula-sync:
nano compose.yml
Put the following data in the file.
services:
  nebula-sync:
    image: ghcr.io/lovelaze/nebula-sync:latest
    container_name: nebula-sync
    environment:
    - PRIMARY=http://172.16.1.6|password
    - REPLICAS=http://172.16.2.1|password
    - FULL_SYNC=true
    - CRON=*/15 * * * *
Change the addresses above and the passwords to match your Pi-holes. The cron entry I have runs every 15 minutes. Save the file with a CTRL O and enter and exit the nano editor with a CTRL X.
At this point unless you are running Pi-hole 6.0, DO NOT RUN The following to start the app:
docker compose up -d
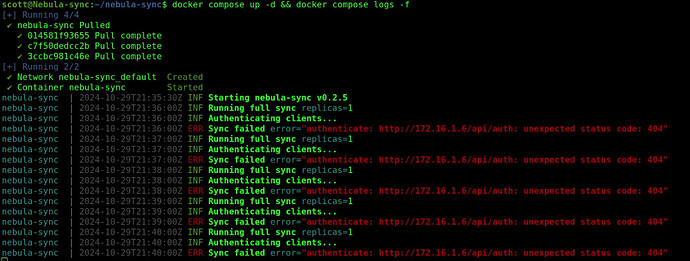
Nebula-sync will break with Pi-hole v 5.x. The breakage occurs because the API path is different and the log file will show the following errors if you run it anyway as shown in the video. If you leave the nebula-sync configuration on your system, you will be prepared for when you do update to Pi-hole v6.0. Anyway, here’s what the breakage looks like:
Move back to your home folder:
cd ..
For Pi-hole v5.x, we need to install orbital-sync instead of nebula-sync.
Create a folder for orbital-sync and move inside it.
mkdir orbital-sync
cd orbital-sync
Edit a compose file for orbital-sync:
nano compose.yml
Put the following data in the file.
services:
  orbital-sync:
    image: mattwebbio/orbital-sync:1
    environment:
      PRIMARY_HOST_BASE_URL: 'http://172.16.1.6'
      PRIMARY_HOST_PASSWORD: 'your_password1'
      SECONDARY_HOSTS_1_BASE_URL: 'http://172.16.2.1'
      SECONDARY_HOSTS_1_PASSWORD: 'your_password2'
      INTERVAL_MINUTES: 15
Change the addresses above and the passwords to match your Pi-holes. The INTERVAL_MINUTES entry I have above runs every 15 minutes. Save the file with a CTRL O and enter and exit the nano editor with a CTRL X.
Launch orbital-sync with the following command:
docker compose up -d
After a couple minutes, all of the DNS records on your secondary Pi-hole should match all of the DNS record entries on your primary Pi-hole.
In the video, I stopped my primary Pi-hole and then tried to use a DNS name to connect to a server. This failed because my primary DNS is my primary Pi-hole and it is down.
You would think this would work since I have my secondary Pi-hole listed as my second DNS server in my DHCP server configuration. It does not and the reason is that this only works when the DHCP lease is renewed. So, no automatic failover!!
The way around this problem is using Virtual Router Redundancy Protocol (VRRP) which assigns a “virtual” address across more than one server/system where it is configured.
Linux doesn’t really do clusters in the strictest sense. I come from the Digital Equipment Corporation OpenVMS world where clustering is an art form.
Although we can define more than one system to use the VRRP Virtual address, this relies on the fact that the data required is either mounted or replicated to the secondary node. If it were a single copy that was simply mounted across multiple nodes than we would need something called a “distributed lock manager”. Linux doesn’t do that. Instead, applications that share data in the same location must do their own file locking.
We are not going to worry about any of that. The reason is that we have already used orbital-sync to copy our DNS records to the backup Pi-hole. In addition, VRRP assigns the virtual address to EXACTLY ONE system at a time. That means that VRRP gives us one virtual address that will point to the Pi-hole that is working.
Begin by logging into your primary Pi-hole.
ssh pihole
Install the keepalive daemon:
sudo apt install keepalived
Create a configuration file for the VRRP Master.
sudo nano /etc/keepalived/keepalived.conf
Insert the following data:
vrrp_instance pihole {
        state MASTER
        interface eth0
        virtual_router_id 7
        priority 255
        advert_int 1
        authentication {
              auth_type PASS
              auth_pass 12345
        }
        virtual_ipaddress {
              172.16.0.10/16
        }
}
You will need to find out the name of your ethernet interface for your Pi-Hole (ip a). The interface name of my Pi-hole is eth0 since it is in an incus container. The other piece of information you MUST change is the virtual IP address. Yours might be 192.168.1.15/24. The “24” is the address mask. Be sure to choose a virtual IP address that is NOT within your DHCP scope since we don’t want anything else using it.
Watch the video for other details on this file. Save the file with a CTRL O and enter and a CTRL X to exit the nano editor.
Restart the service to use the new configuration file.
sudo systemctl restart keepalived
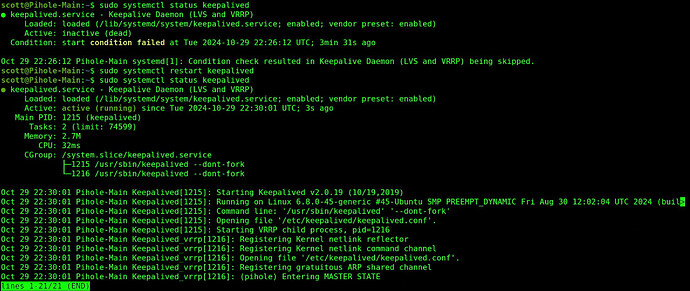
You can see it running.
sudo systemctl status keepalived
Now log off your primary Pi-hole and log into your backup Pi-hole. The DNS name of your Pi-hole will differ from mine.
exit
ssh pihole-backup
Once again, install the service.
sudo apt install keepalived
Create a configuration file:
sudo nano /etc/keepalived/keepalived.conf
Insert the following into the file.
vrrp_instance pihole {

        state BACKUP
        interface eth0
        virtual_router_id 7
        priority 254
        advert_int 1
        authentication {
              auth_type PASS
              auth_pass 12345
        }
        virtual_ipaddress {
              172.16.0.10/16
        }
}
Note that the secondary and all other additional systems participating in a VRRP configuration are designated as “BACKUP” state. Once again, change your interface device name if necessary and be sure that the virtual IP address that you chose for the master is the same as the one you select here. Do not change the virtual_router_id because it must be the same as the master. Note that the priority is 254 which is one lower than the master at 255. Make sure if you changed the password, that it is the same. If you had a tertiary Pi-hole it would have a priority of 253 and so on.
Save the file with CTRL O and Enter and then CTRL X to exit the nano editor.
Restart the service.
sudo systemctl restart keepalived
To make our Pi-hole automatic failover work, you must change your DHCP configuration on your router to use the new VRRP virtual address as opposed to the direct addresses of the Pi-holes.
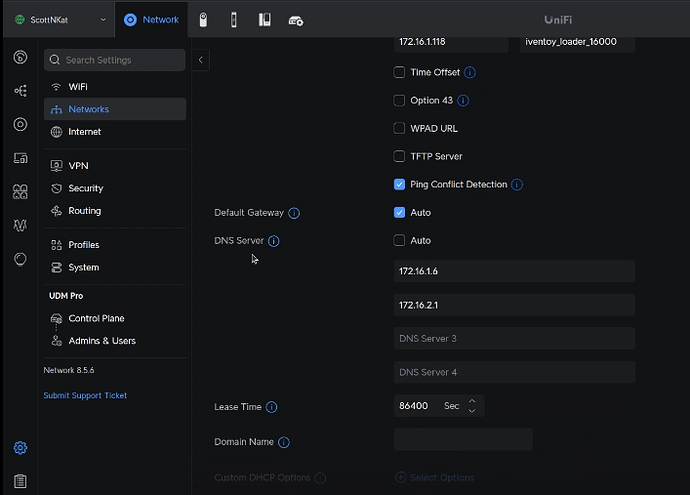
Here’s a screenshot of my initial configuration of my UDM Pro where I had my two Pi-holes listed (172.16.1.6 & 172.16.2.1) as primary and secondary DNS servers as shown in the video.
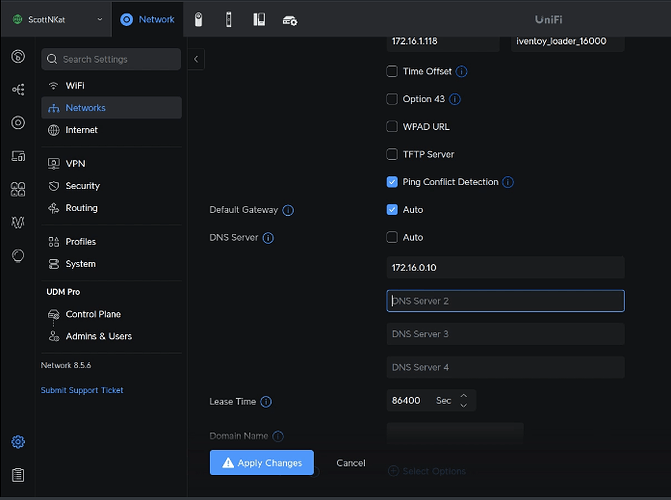
I changed these entries to only point to the VRRP Virtual address (172.16.010) as shown below.
This single address points to both Pi-holes in virture of VRRP and they use Cloudflare as their upstream servers. You could certainly add additional Pi-holes to this configuration, replicate them with orbital-sync/nebula-sync (dependent on Pi-hole version) and then add them to the VRRP configuration.
In the video, I shutdown the main Pi-Hole while pinging the VRRP Virtual address and there was no service interruption as well as no disruption to my ability to perform DNS resolution.
This presentation showed just one possible application for VRRP Virtual Addresses. I think that automatic DNS failover is a great service for your local network.
