Gryt-Chat is a self-hosted chat server for text chat, file transfer, voice & video calls and high resolution screen and system audio sharing. This new self-hosted application is a free alternative to Discord.
Gryt-Chat is a new application under active development, so expect lots of changes. I like communications programs and this one was too good to pass up. I hope you enjoy it as much as I do.

One of the really impressive things about Gryt-chat is that it allows screen sharing from 30 - 120 frames per second provided you have a sufficient network connection. This makes it suitable for watching real-time gaming or video playback remotely from another user.
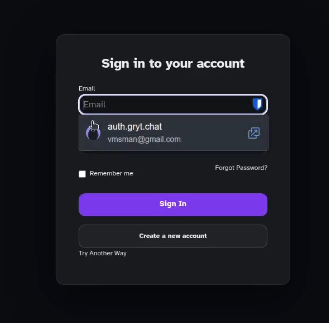
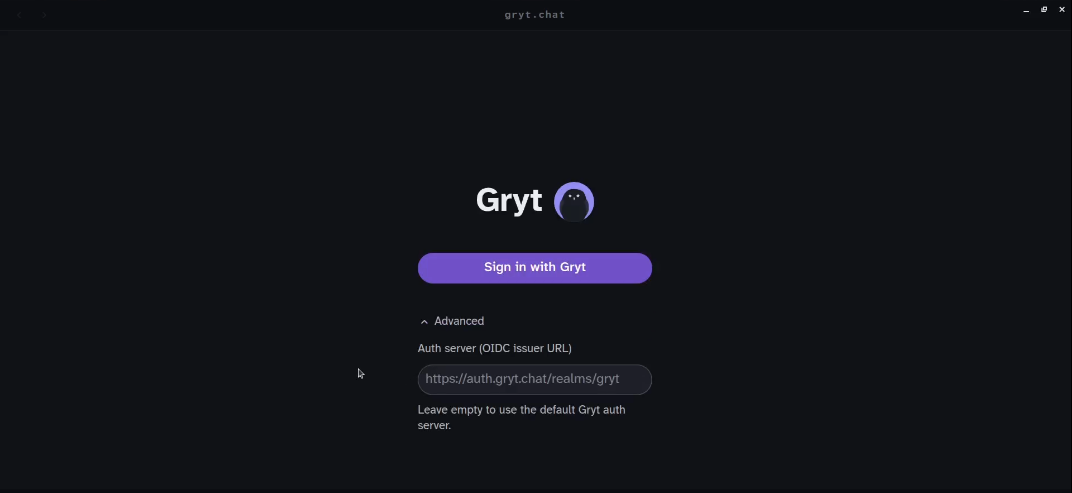
By default, Gryt-Chat uses an authorization system hosted by the developer. In the latest release on March 9, 2026 an option has been added to allow for your own OIDC compatible authorization server. This means that you could use something like a self-hosted instance of Authentik or Authelia as an authorization server. That’s beyond the scope this video.
It is worth noting that having an account on the public auth.gryt.chat server does not gain access to your server because the server owner grants access via personal invite codes sent to the people they want on their Gryt-chat server. So, there’s really no privacy compromise by using the default authorization server.
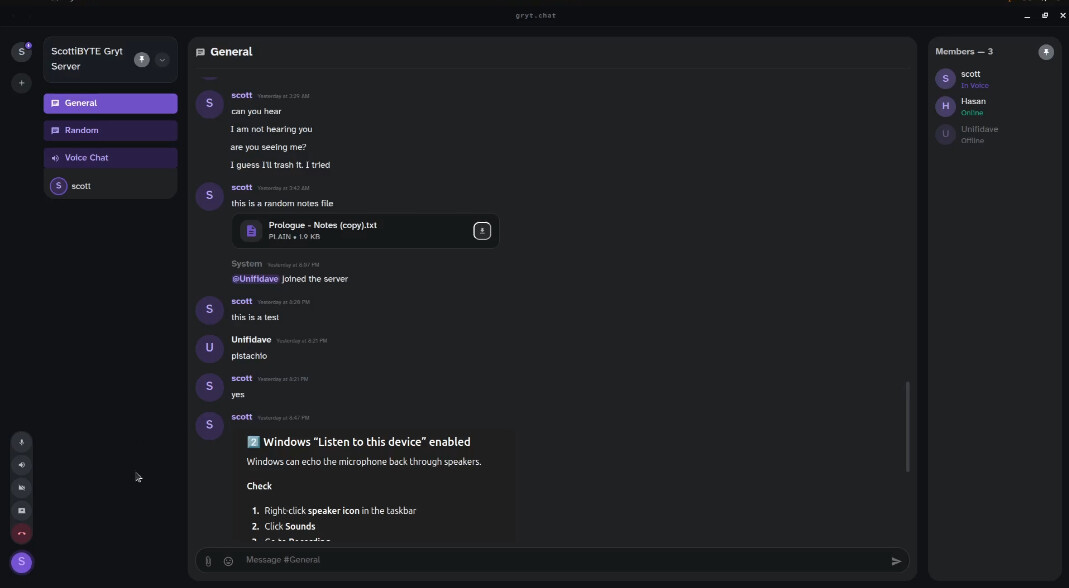
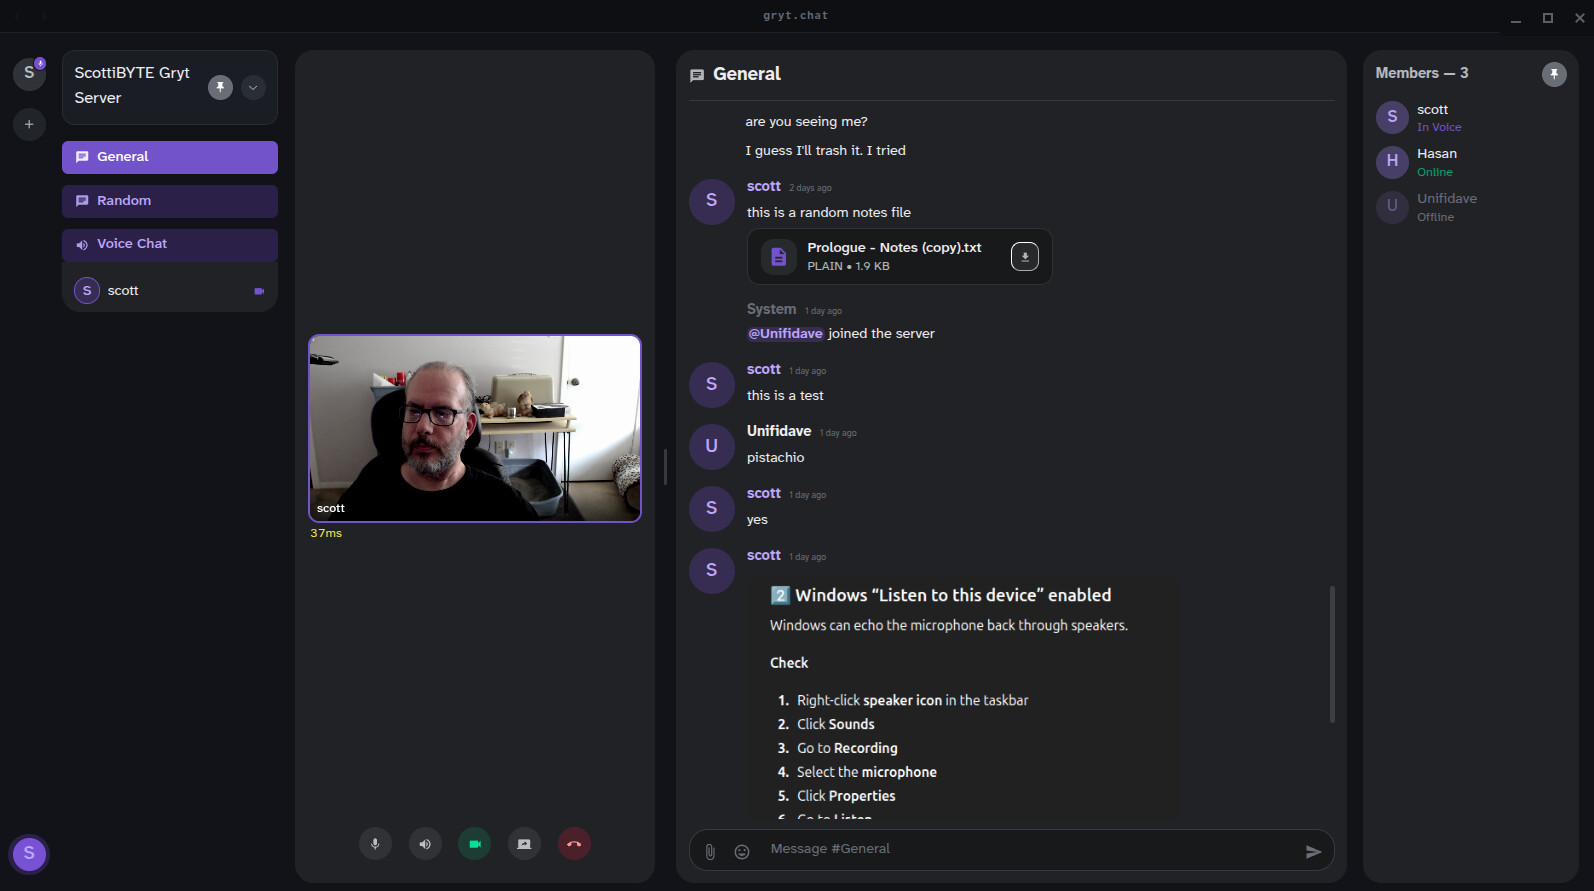
Once you are signed in, you are presented with the chat window listing your server as well as other servers from friends which you may have added to your account.

Observe that there is a plus (+) sign on the extreme left to add other servers and all users joined to your server are listed in the right panel as well as their status.
The chat window persists the conversation history and supports text, image pasting and file transfer. Conversational text, images, and files can be downloaded by anyone you have added to your server.
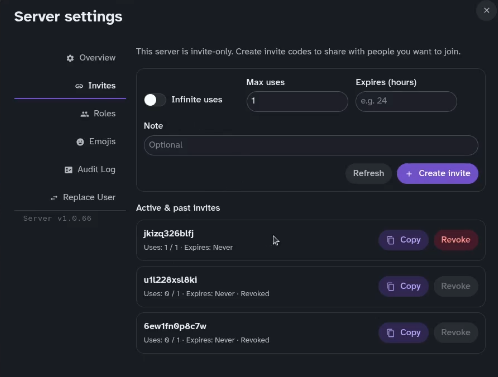
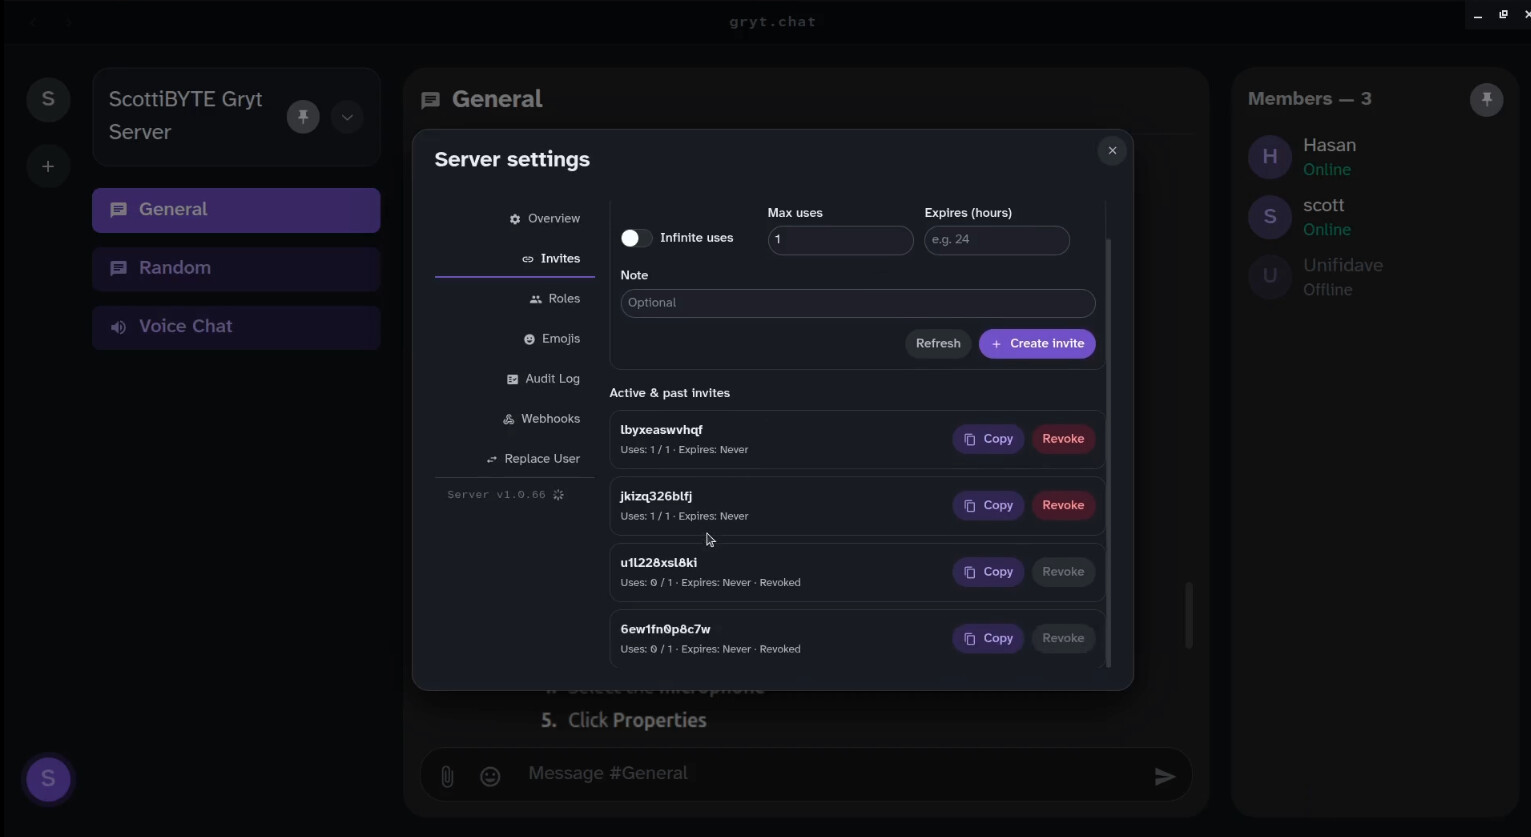
On a new server, you would be the only user until you send someone an invite code via the server settings menu.
Voice chat is broadcast to any users that are online to your Gryt-chat server. You can mute the mic or speaker at any time.
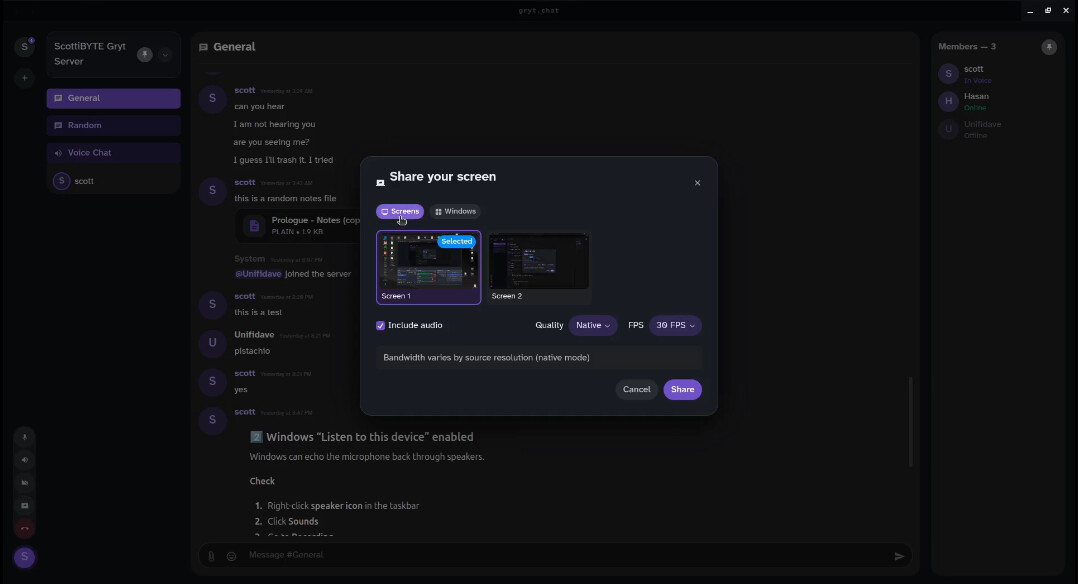
The screen sharing option allows sharing any screen or application window and also supports many screen resolutions as well as an adjustable frame rate. Realize that your Internet bandwidth may not handle higher frame rates.
When screen sharing is active, you will see a miniature of the shared content. Many users may share at once.
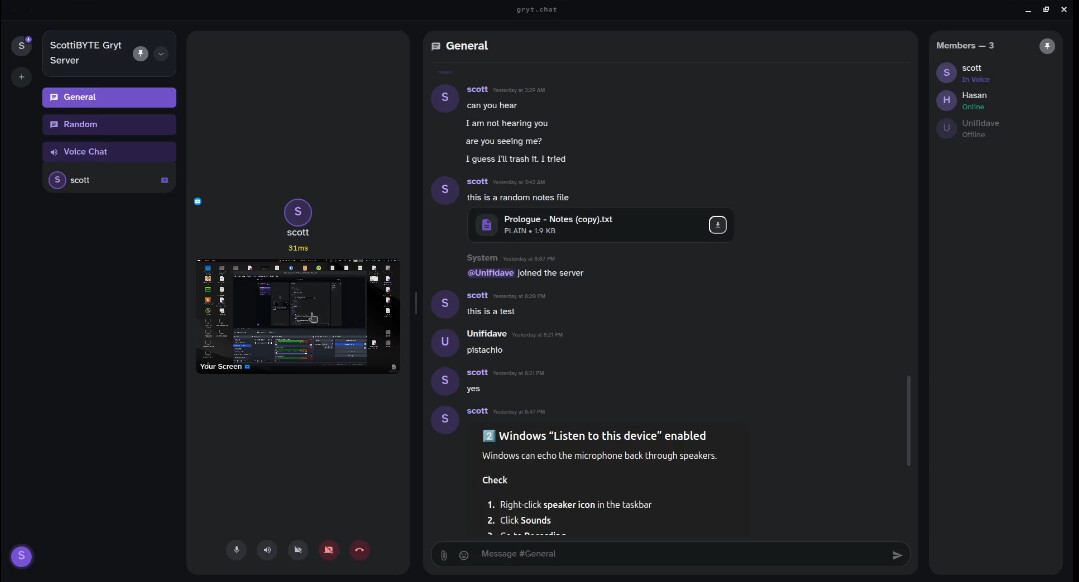
When you click on a screen that is being shared, it appears in a larger display.
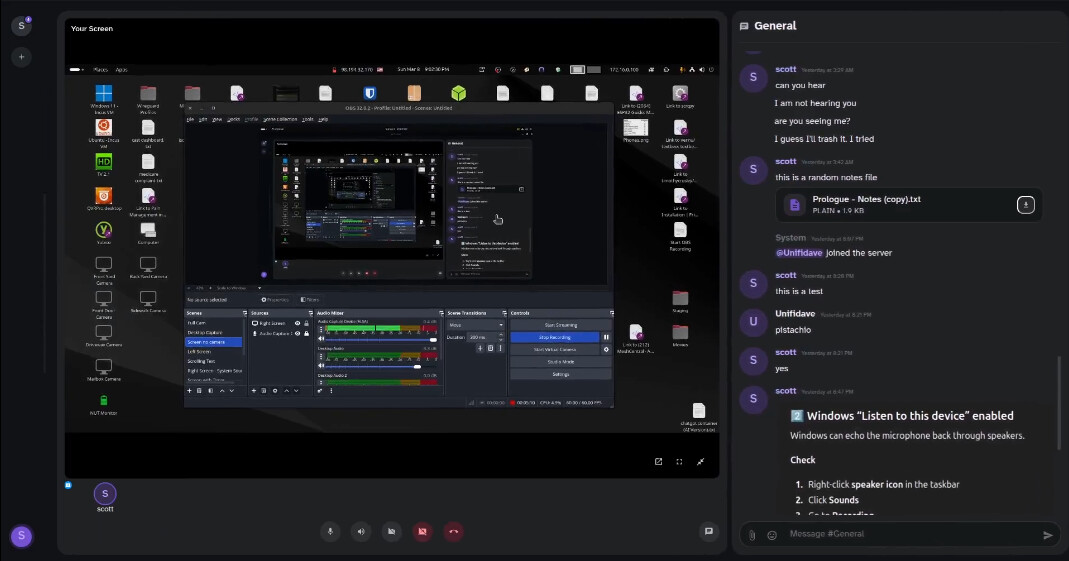
There is also an option to full screen the shared screen. To back out of full screen and displaying the larger shared screen you use successive ESC keys. Sharing allows the option to share not only the video but the system audio to the remote users if desired. I shared a YouTube video remotely and remote users reported that the experience was equivalent to viewing locally.
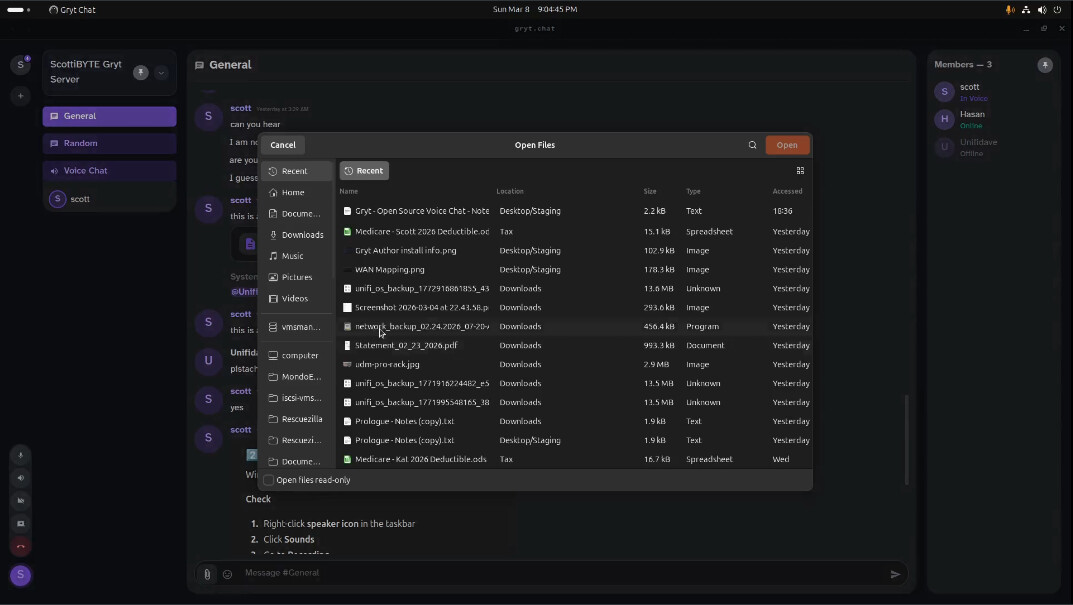
At the left of the messaging window in the chat there is an emoticon option as well as a paperclip to initiate a file transfer.
You can also add your camera to a voice chat by clicking on the camera icon.
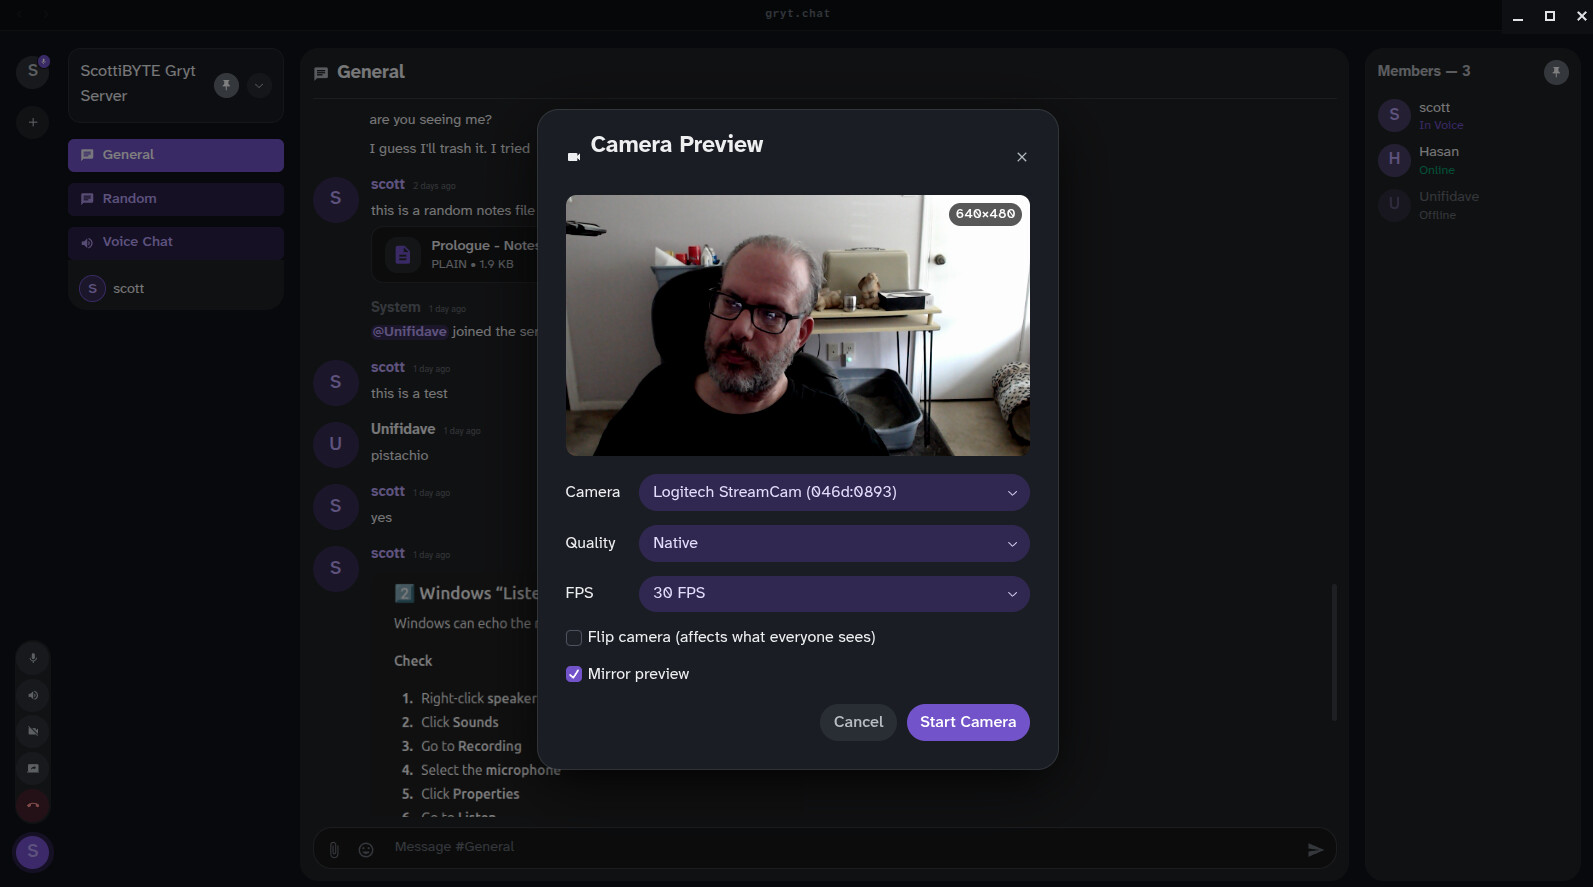
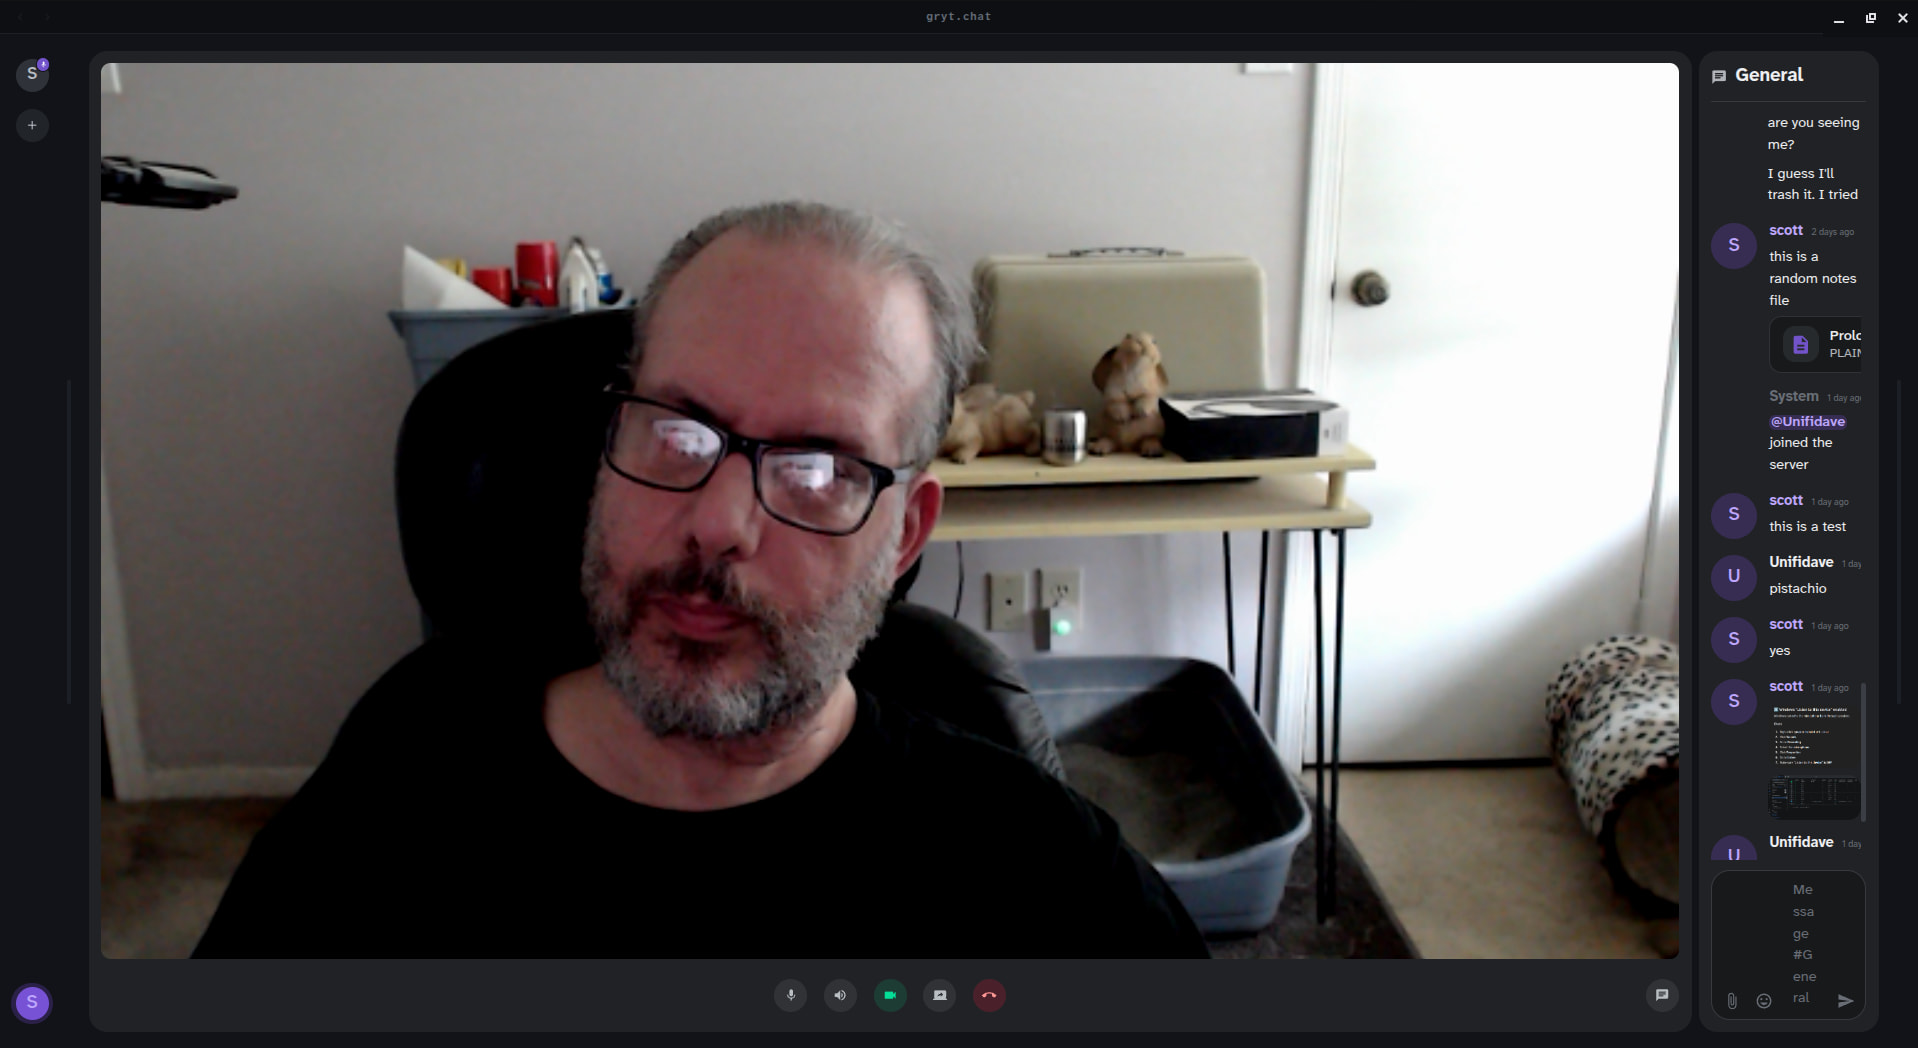
Once I start my camera it will appear in the window.
Clicking your video image will allow it to maximize.
After I was nearly done with the video, the author added an advanced option in the desktop client to authenticate with your own OIDC server. That’s beyond the scope of this tutorial, but realize that you could use a self-hosted instance of Authentik to perform your own authentication for your self-hosted Gryt-chat server.
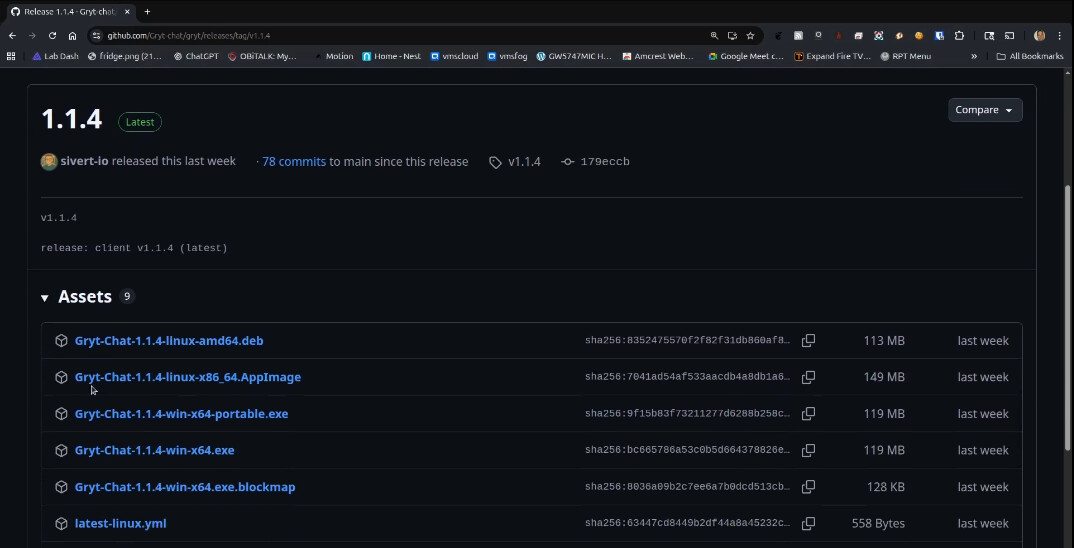
The Gryt-chat Github page is here. In the installation process that I am demonstrating, we will be using a desktop client which you can download from the link. There are desktop clients for Linux and Windows.
I created an incus container in which I am installing Gryt-Chat. You can use a virtual machine or other server that you have available. Here’s the container I created.
incus launch images:ubuntu/24.04 Gryt -p default -p bridgeprofile -c boot.autostart=true -c security.nesting=true
Move inside the container and take the updates.
incus shell Gryt
apt update && apt upgrade -y
Install some dependencies.
apt install openssh-server nano net-tools curl -y
Install Docker using the script at the Docker website.
curl https://get.docker.com | sh
I added myself a user account, granted sudo and docker and logged in.
adduser scott
usermod -aG sudo,docker scott
su - scott
Make a folder and move inside it.
mkdir gryt && cd gryt
Download the docker-compose.
curl -Lo docker-compose.yml https://raw.githubusercontent.com/Gryt-chat/gryt/main/ops/deploy/compose/prod.yml
Download the environment variable template file.
curl -Lo .env https://raw.githubusercontent.com/Gryt-chat/gryt/main/ops/deploy/compose/.env.example
Edit the environment variable file.
nano .env
I am including a copy of my template file below so you can see my settings as I demonstrated in the video.
# ─────────────────────────────────────────────────────────────────────────────
# Gryt — All-in-One Docker Compose Environment
# Copy this file to .env and edit the values below.
# ─────────────────────────────────────────────────────────────────────────────

# ── Image versions ──────────────────────────────────────────────────────────
# Pin to a specific release (e.g. 1.2.3) or leave as "latest"
SERVER_VERSION=latest
SFU_VERSION=latest

# Web client (dev/local only — won't work with auth.gryt.chat in production)
# Only used with: docker compose --profile web up -d
CLIENT_VERSION=latest

# ── Server settings ─────────────────────────────────────────────────────────
SERVER_NAME=My Gryt Server
SERVER_DESCRIPTION=My voice chat server
# Optional server-to-SFU shared secret (NOT a user join password).
# Leave empty unless you need to restrict SFU registrations.
SERVER_PASSWORD=

# ── Networking ──────────────────────────────────────────────────────────────
# Allowed origins for the API (comma-separated).
# Include http://127.0.0.1:15738 to allow the Electron desktop app.
# Include https://app.gryt.chat to allow the hosted web client.
CORS_ORIGIN=http://127.0.0.1:15738,https://app.gryt.chat

# Public URL(s) of the SFU that browsers connect to (ws:// or wss://).
# Comma-separated for multi-network (e.g. LAN + public). The client
# pings each endpoint and picks the fastest one automatically.
SFU_PUBLIC_HOST=wss://YOUR-SUBDOMAIN-NAME/client
# ── Ports ───────────────────────────────────────────────────────────────────
CLIENT_PORT=3666
SERVER_PORT=5000
SFU_PORT=5005

# SFU UDP range for WebRTC media — open these ports in your firewall
SFU_UDP_MIN=10050
SFU_UDP_MAX=10070

# Recommended: run WebRTC over a single UDP port (better on restrictive networks).
# Open/allow this UDP port to the SFU host (e.g. AWS Security Group + host firewall).
ICE_UDP_MUX_PORT=4443

# Public IP to advertise in ICE candidates. Required if the SFU is behind NAT.
# For LAN setups: use your server's local IP so clients connect directly.
# For mixed LAN + internet: comma-separate both IPs (e.g. 203.0.113.10,192.168.1.100).
ICE_ADVERTISE_IP=0.0.0.0  # YOUR WAN ADDRESS GOES HERE!!!!

# ── STUN servers ────────────────────────────────────────────────────────────
# STUN lets the SFU discover its real public IP:port via server-reflexive
# candidates.  Only disable when the SFU has a direct, port-preserving path
# to the internet (host networking, bare metal, 1:1 NAT).  On most cloud/
# Docker setups the NAT remaps UDP source ports, so STUN is required.
DISABLE_STUN=false
STUN_SERVERS=stun:stun.l.google.com:19302,stun:stun1.l.google.com:19302

# ── Security ────────────────────────────────────────────────────────────────
# IMPORTANT: Change this in production! Generate with: openssl rand -base64 48
JWT_SECRET=THESECRETGOESHERE

# ── Authentication ──────────────────────────────────────────────────────────
# "required" — users must sign in with a Gryt account (via auth.gryt.chat).
# "disabled" — server is locked; all join attempts are rejected.
GRYT_AUTH_MODE=required
GRYT_OIDC_ISSUER=https://auth.gryt.chat/realms/gryt
GRYT_OIDC_AUDIENCE=gryt-web
GRYT_AUTH_API=https://auth.gryt.chat
# Only relevant if running the web client locally or with your own Keycloak
GRYT_OIDC_REALM=gryt
GRYT_OIDC_CLIENT_ID=gryt-web

# ── MinIO (S3-compatible storage) ───────────────────────────────────────────
MINIO_ROOT_USER=minioadmin
MINIO_ROOT_PASSWORD=minioadmin
S3_BUCKET=gryt
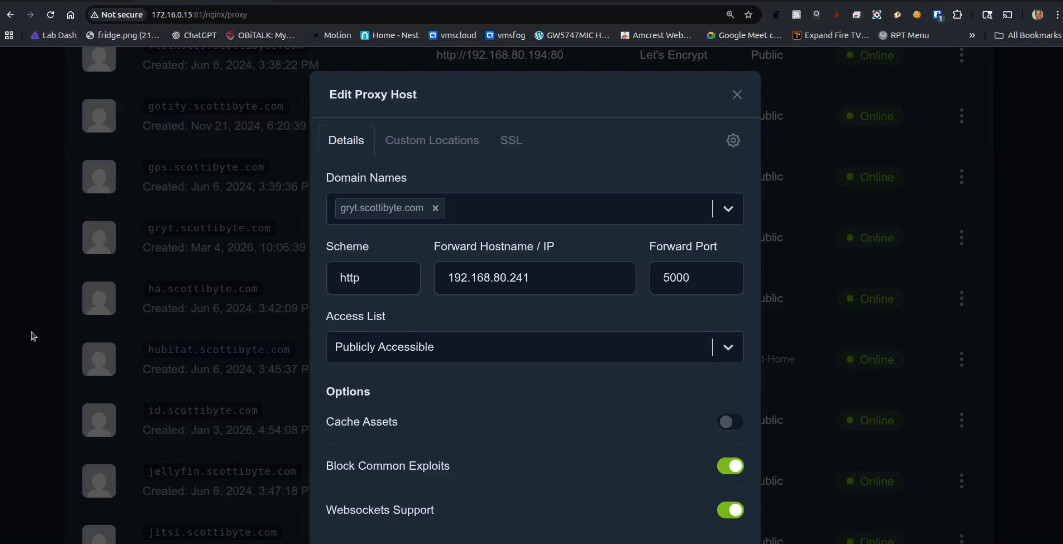
You will want an NginX Proxy Manager record for the subdomain you created at your DNS service provider. That should use the http scheme and point to the address of your Gryt-chat server at port 5000 as seen below. That means use your address and not 192.168.80.241. Be sure to request a new SSL certificate as shown in the video.
You will also need to hit the gear in NPM and add the following custom code:
location /server {
    proxy_pass http://192.168.80.241:5005/server;
    proxy_http_version 1.1;
    proxy_set_header Upgrade $http_upgrade;
    proxy_set_header Connection "upgrade";
}

location /client {
    proxy_pass http://192.168.80.241:5005/client;
    proxy_http_version 1.1;
    proxy_set_header Upgrade $http_upgrade;
    proxy_set_header Connection "upgrade";
}
In the code segment above that you pasted, change the address 192.168.80.241 to the address of your gryt server.
Note that once the application is running, going to the domain https://yourdomain/ in your web browser will not connect to the server. We are using the desktop client you downloaded earlier to make the connection.
We need to set up port forwards on your router. I show how this is done on my Ubiquiti UDM Pro, but this is router dependent.
There are three port forwards that should point to the address of your Gryt-chat server.

These port forwards are needed to accept traffic from your WAN interface and route them accordingly to your Gryt-chat server address inside your network. The 192.168.80.241 address is my LAN address for my Gryt-chat server, yours will differ.
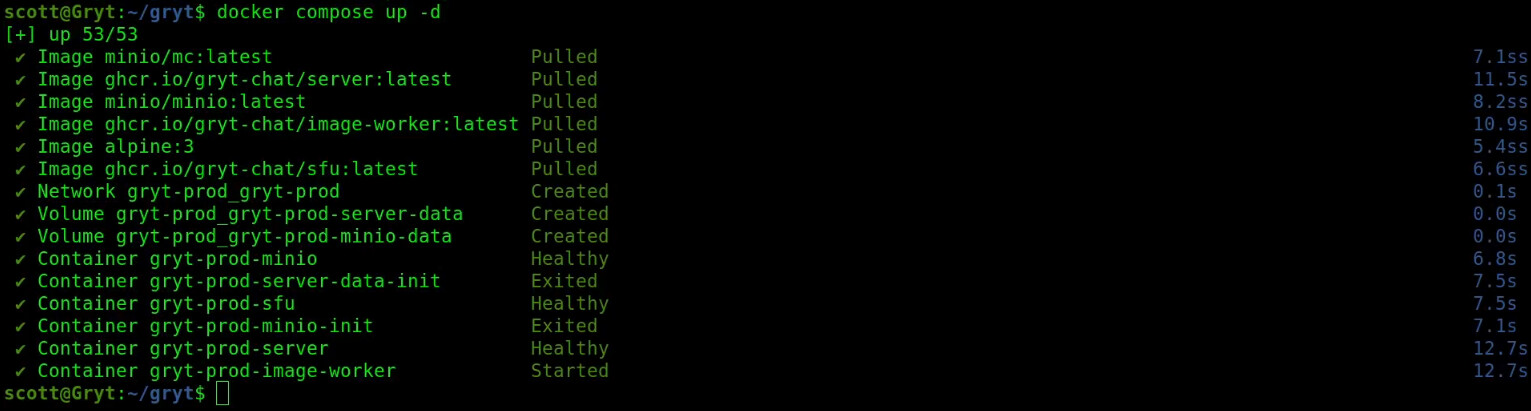
We are now ready to start the application by downloading the container overlays, building the containers and launching the application.
docker compose up -d
In the live video I encountered an error which appeared to be a typo in the docker-compose file.

In the video, I edited the docker-compose and fixed that.
nano docker-compose.yml
I had to add a missing $ as shown in the video so that there is a $$.
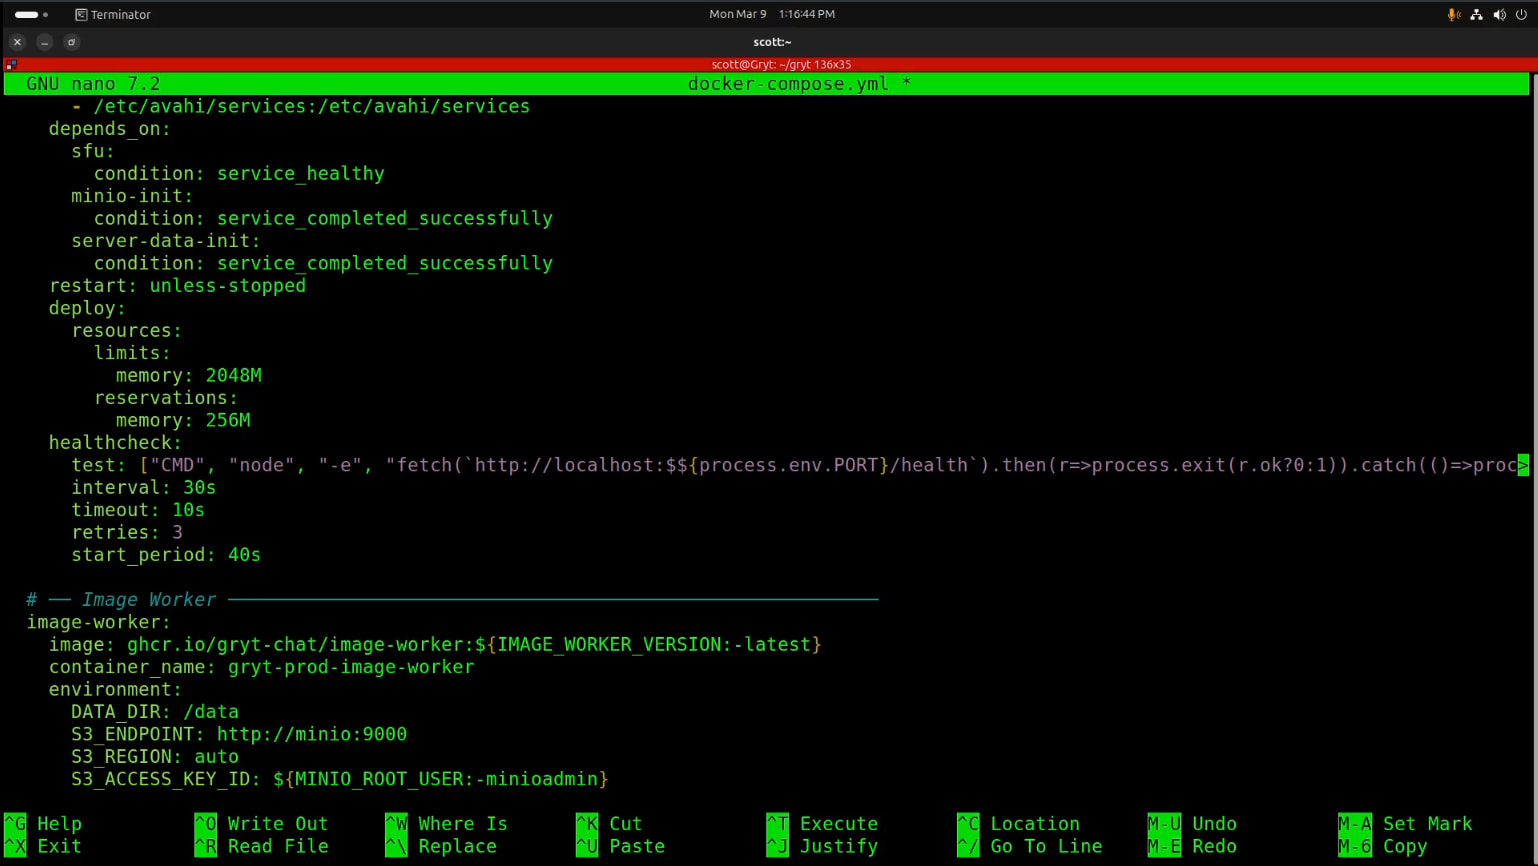
docker compose up -d
Now, go run the desktop client that you should have downloaded and installed on your desktop computer (not on the Gryt-chat server) earlier.
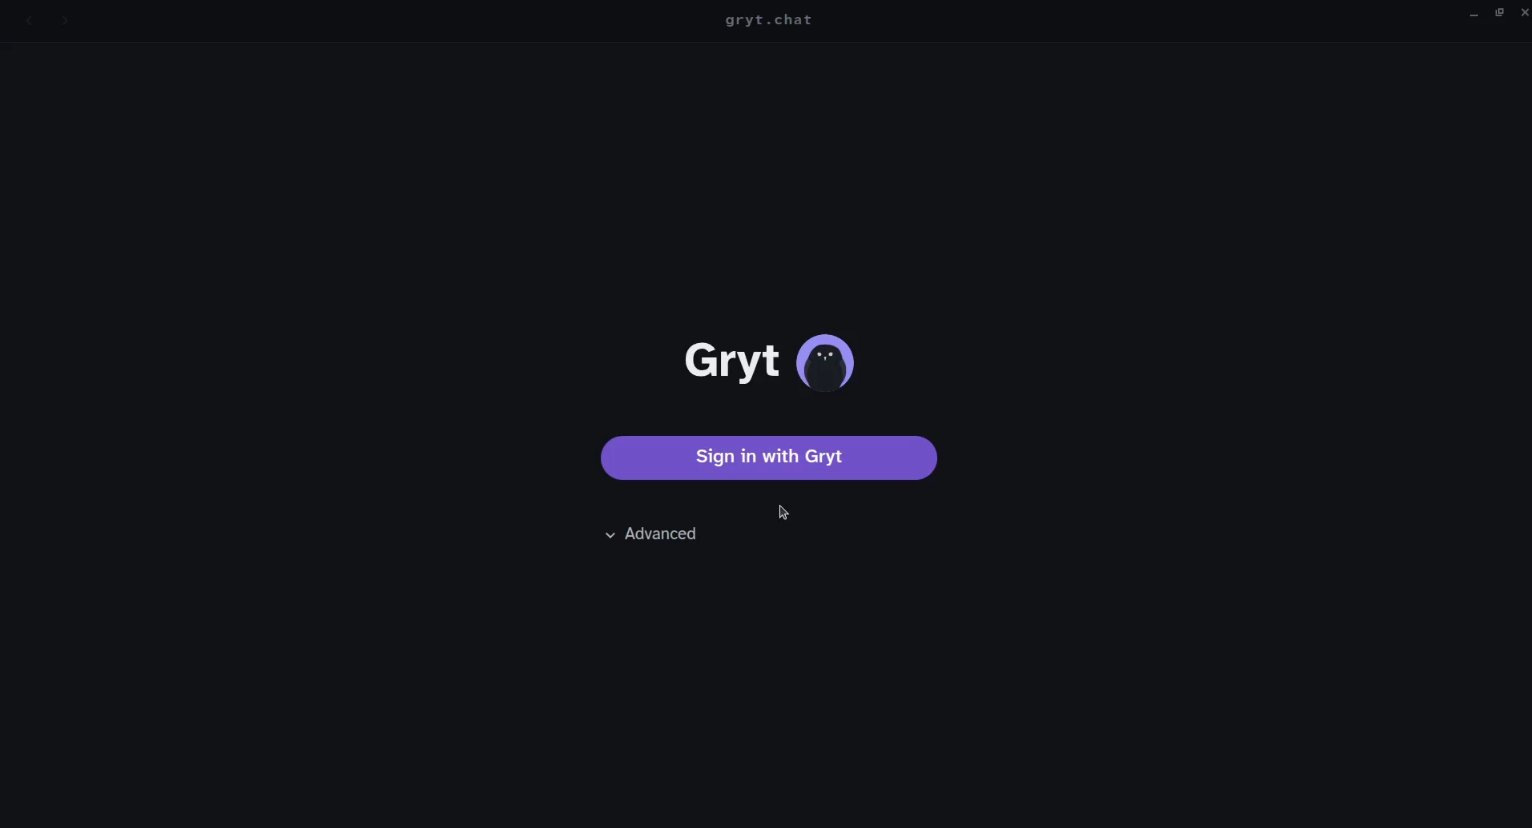
Click on “Sign in with Gryt” and choose the option to register/create a new account.

Once you sign in, at the left side of the screen is a plus (+) sign to create a new server.
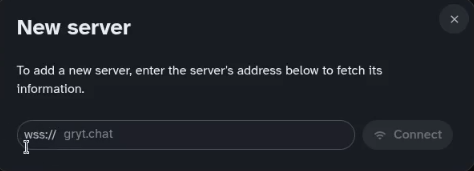
You add your server by entering wss://your-gryt-subdomain. You will use the domain name you entered when you created the NginX Proxy Manager entry.
You will get an email to verify your account on your new server to get started. Once, you are logged in you will need to create invites that you send to other users to add them to your server.
Gryt-Chat is brand new and is undergoing active development, so there may be breaking changes. Please support the great work that Sivert-io is doing on this great project.