Both LXD & Incus containers are assigned dynamic TCP/IP addresses from a DHCP server by default. It is my recommendation that fixed addresses be managed on your router with DHCP address reservations. It is also possible to set a fixed address by configuring it on an individual system.
DHCP assigns an IP address, a subnet mask, DNS resolvers and a gateway and optionally many other parameters.
DHCP works by providing an “address lease” via a range of addresses called a “DHCP scope” and it tracks which addresses it leases out by the hardware MAC address of the computer making the DHCP request.
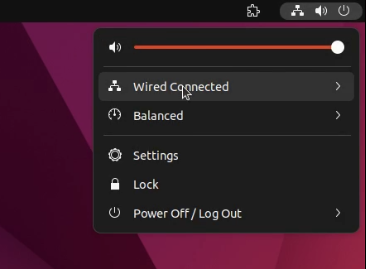
A basic Linux user might manage TCP/IP settings on a desktop via the GUI. However, sometimes the GUI is not configured to manage the network settings in which case you will see the following on the right side of the top panel in the case of Ubuntu.
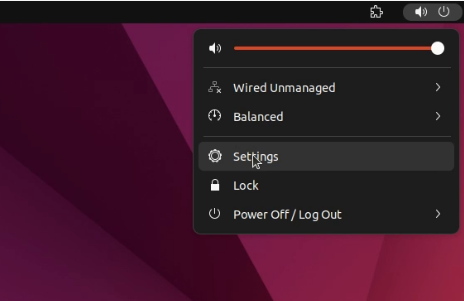
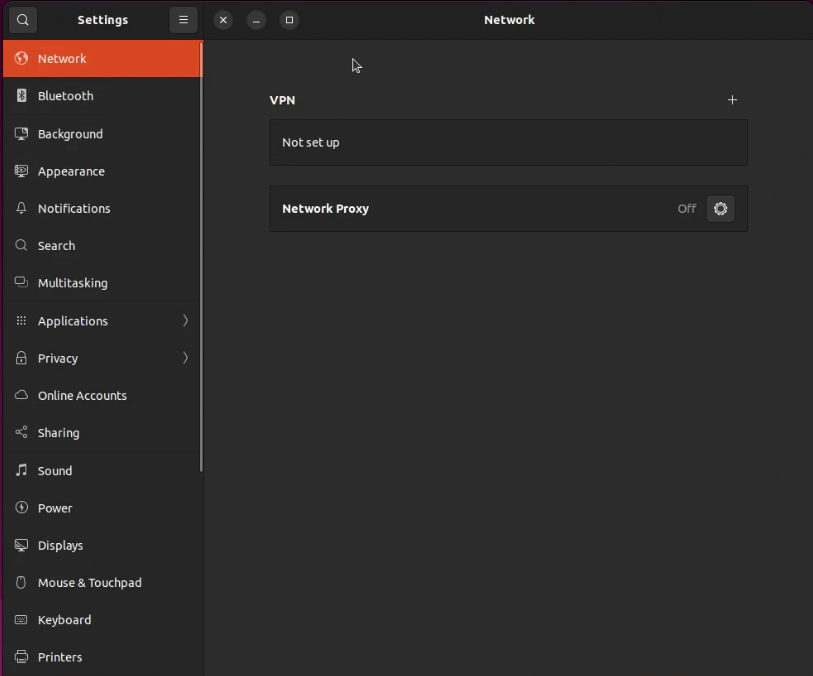
Likewise, the network settings menu lacks settings for the network.
This condition can be caused by a variety of things. First, make sure that network-manager is installed with:
sudo apt install network-manager -y
By default, a program called “networkd” is installed to manage the network. You need network-manager to have the graphical configuration options.
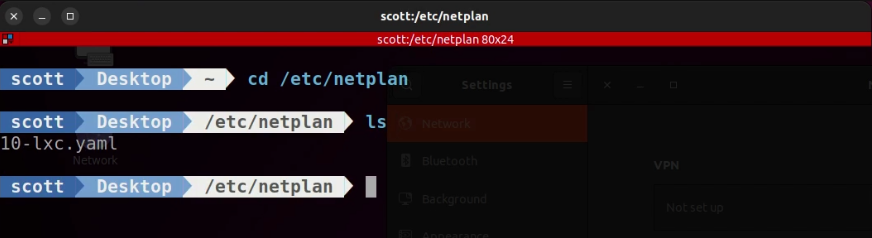
Netplan is a program used to configure the network in Ubuntu. Move to the netplan folder:
cd /etc/netplan
List the files in this folder and normally you will have a single file beginning with a number and ending in “.yaml”. The number indicates the order of execution if there is more than one file. Generally, you are safe in backing these files up by renaming them to a different file extension and starting from scratch:
In my example, I edited the existing file:
sudo nano 10-lxc.yaml
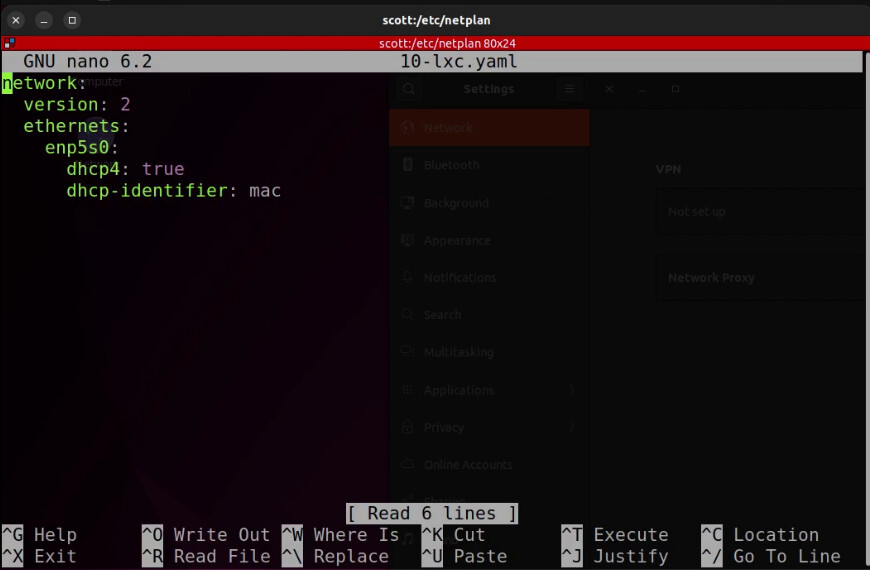
The above file is very simple. Note the name of your Ethernet device. Mine is “enp5s0” in this example. You will want to add a line for network manager to the file or in my case, I simplified it and made it look like the following which you can copy and adjust your Internet device name.
network:
    renderer: NetworkManager   # add this line
    ethernets:
        enp5s0:
          dhcp: true
    version: 2
Save the file with a CTRL O and Enter to write the file out and a CTRL X to exit the nano editor.
Netplan likes to also have the virtual switch component installed and so you should do that too:
sudo apt install openvswitch-switch -y
To make this all take effect:
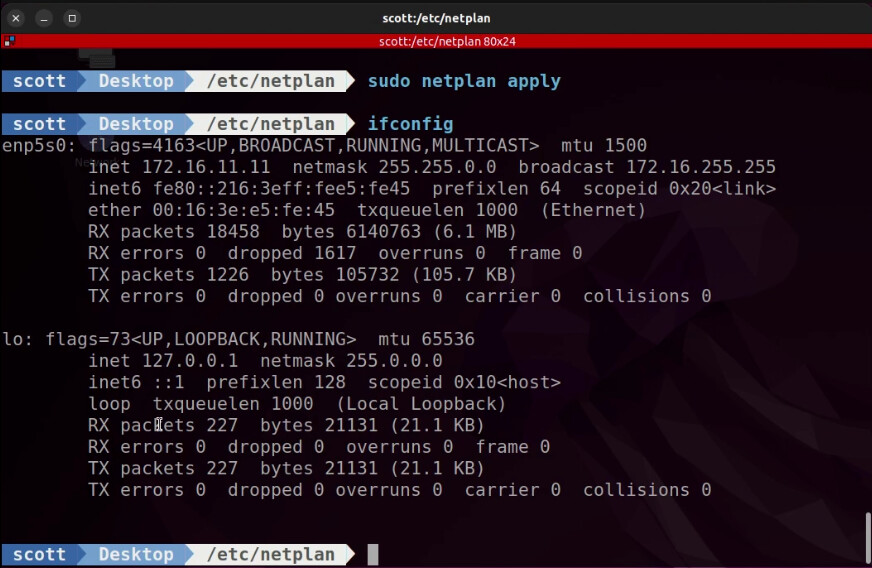
sudo netplan apply
You will now notice that the “settings” menu will now allow you to configure your network device in the GUI.

The system menu on the top panel now shows “Wired Connected” instead of “Wired Unmanaged”:
Edit the netplan file again:
sudo nano 10-lxc.yaml
In the following netplan file, I configure a static (fixed) address for my device. You will want to change the device from enp5s0 to the name of your Ethernet device. You will also want to change your address to an address that you know is unused on your network (eg: 192.168.1.75/24). Change your default route to be the address of your router (eg: 192.168.1.1) and change your nameserver addresses too.
network:
  version: 2
  renderer: NetworkManager
  ethernets:
     enp5s0:
        dhcp4: false
        addresses: [172.16.11.11/16]
        routes:
             - to: default
               via: 172.16.0.1
        nameservers:
            addresses:
                 - 1.1.1.1
                 - 1.0.0.1
After making your changes, save the file with CTRL O and Enter and then CTRL X to exit the nano editor.
Then apply the file.
sudo netplan apply
In my case:
There are other ways to see your current connection using the network manager CLI:
nmcli connection show

Also we have:
nmcli device status

Here’s a way to view the details about your connection:
nmcli dev show enp5s0

You can list just your current DNS servers:
nmcli dev show | grep 'IP4.DNS'

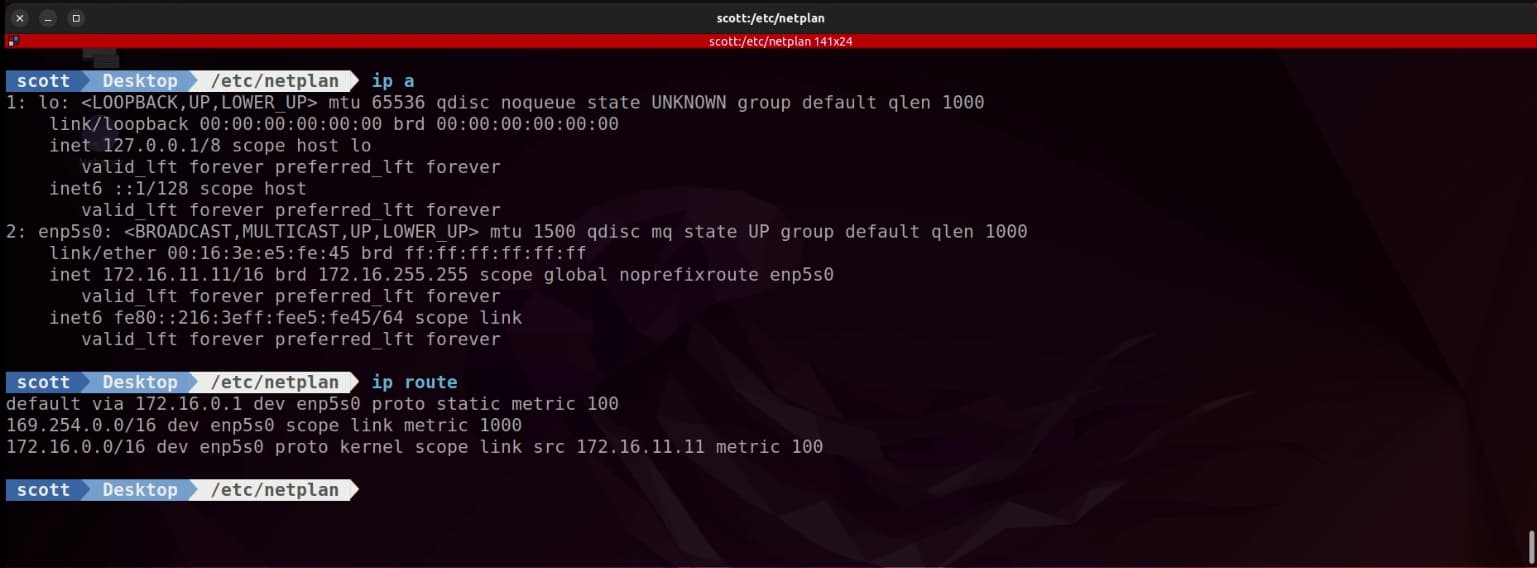
The command “ip a” shows all of the addresses of your network devices and “ip route” shows your default routes.
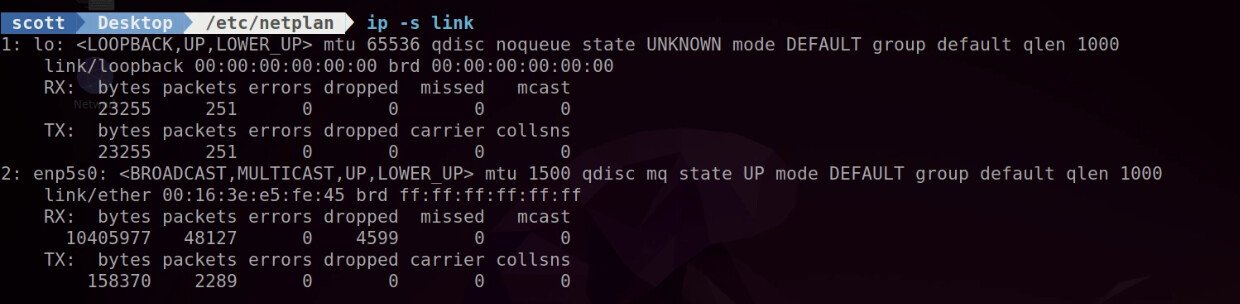
You can list the statistics on your network traffic:
ip -s link
List all your IPv4 addresses:
ip -4 addr

You can use the “curl” command to find out your WAN IP address granted by your Internet Service Provider.
curl ifconfig.me
I recommend always using DHCP to address all of your systems, LXD, Incus, and VM containers. Go back and edit your netplan file:
sudo nano 10-lxc.yaml
Change it to be the following and don’t forget to change your device name.
network:
    renderer: NetworkManager   # add this line
    ethernets:
        enp5s0:
          dhcp: true
    version: 2
Save the file with a CTRL O and Enter to write the file out and a CTRL X to exit the nano editor.
Apply it:
sudo netplan apply
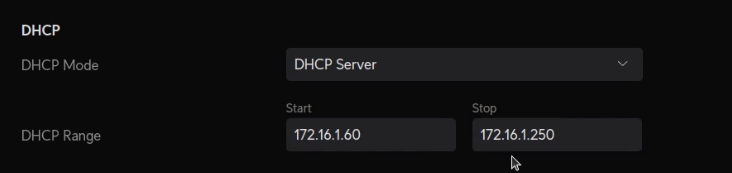
This will get in address within your DHCP scope (range). On my router this is defined as follows:

All routers depict this information differently.
Normally, there is a place on the router where you set this. In my case:
There is also a section in my router DHCP configuration where I can set my DNS Servers.
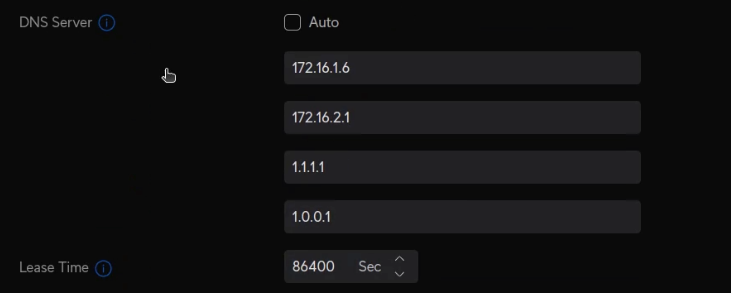
My first two DNS servers are Pi-holes on my network and the other two are Cloudflare servers.
The lease time is a time whereby a client computer receiving a DHCP address has to renew the granted address or get a new one if their previous address has been leased to another system on your network.
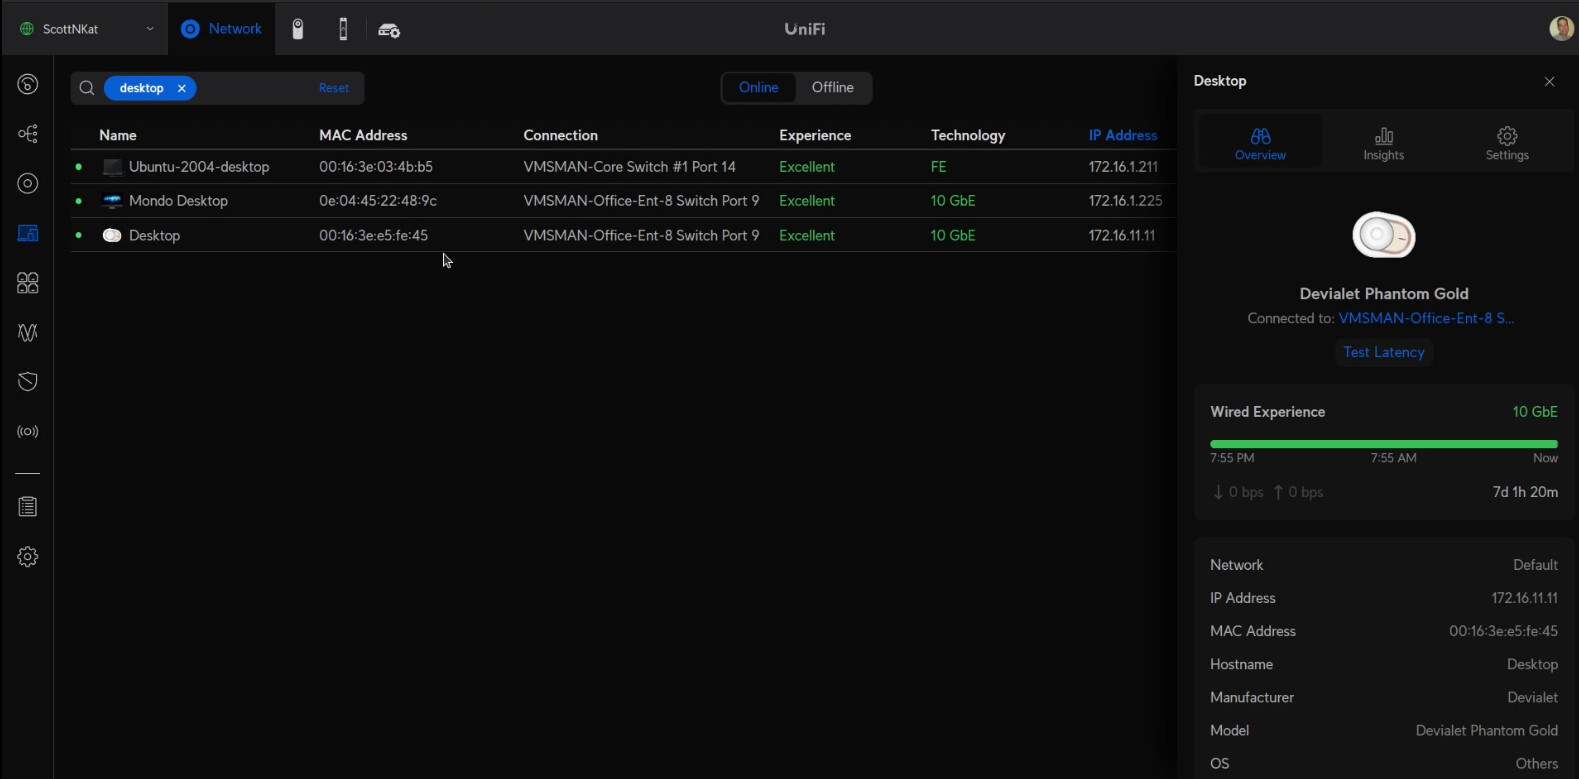
On my Ubiquiti UDM Pro, I located my system called desktop:
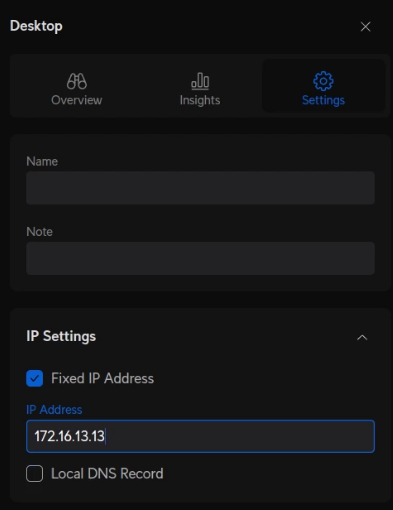
On my router, I have an option to set a DHCP Address Reservation otherwise known as a fixed address that a DHCP router will grant. This works by always granting the same IP address to a particular hardware MAC address. Virtual Machines, LXD/Incus containers also have hardware MAC addresses that are granted when they are created.
Here’s an example on my router setting a DHCP address reservation for that desktop system.
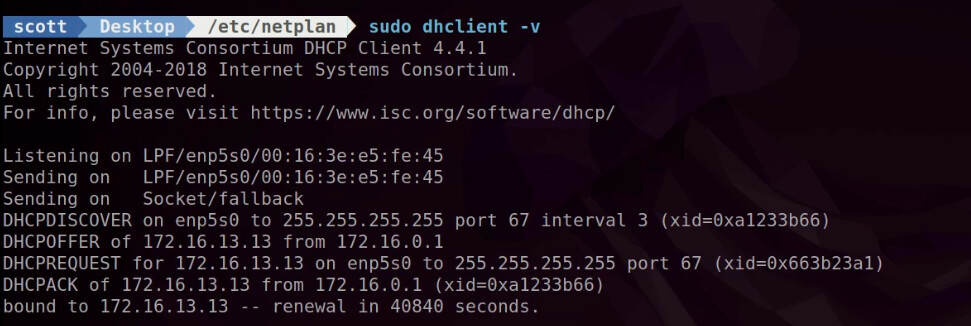
You can release a DHCP address on the Ubuntu desktop:
sudo dhclient -v -r
Update the desktop to the DHCP address assigned at the router (my DHCP Address Reservation):
sudo dhclient -v
Using DHCP address reservations on your router gives you one place to manage all of your fixed or static addresses. You must just remember to backup your router configuration or keep a copy of all the addresses you have assigned. This is preferable to setting static addresses on each and every system or container individually.