This is a follow-on from my “Docker in Incus is Awesome” tutorial. This time we show how to move the persistent data from Brian’s “Get my” application to an incus volume. Incus volumes are a way to add storage to any container, but in this example we are using them for Docker OCI application containers.
We start with creating the MongoDB incus OCI container the same way as last time:
incus create docker:mongo:4.4 get-my-db
Create the incus OCI container for the “Get my” application:
incus create docker:bmcgonag/get_my:latest get-my -c environment.MONGO_URL=mongodb://get-my-db
Last time we created a folder on the incus host to contain the database persistently. Then we provided a “disk” mapping in incus which works like the volume mapping in docker compose. This command WHICH WE WON’T USE THIS time was:
incus config device add get-my-db mongodb disk source=/home/scott/get-my-data path=/data/db shift=true
Instead, this time we will be creating an incus storage volume in the incus default storage pool and mapping it to the MongoDB OCI container we created above.
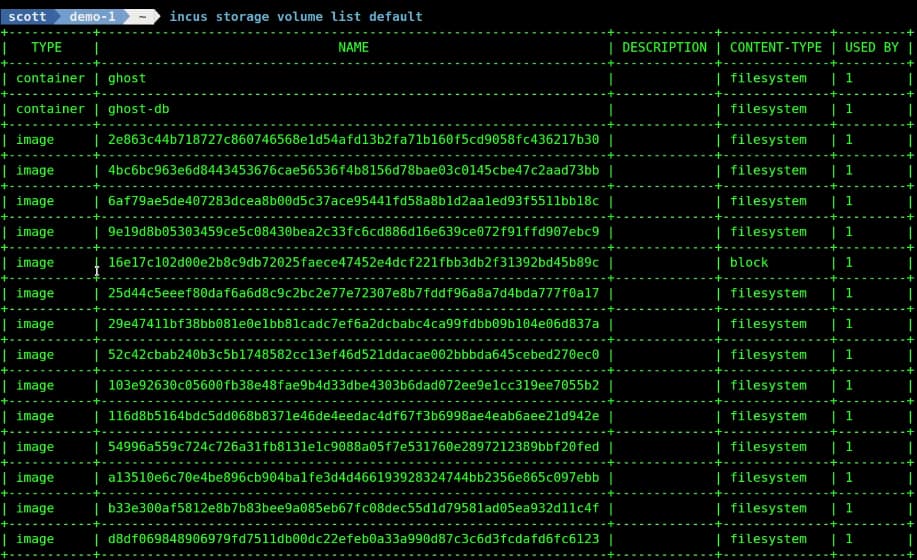
Whenever you create an incus container, you are creating a volume. That means that incus containers, incus virtual machines, and these new incus OCI (Docker) containers are all volumes in your storage pool. You can list all of the volumes in your default storage pool:
incus storage volume list default
Since each time you create a container, incus reaches out to linuxcontainers.org to download an image to create the container, you may have many image volumes that are not being used. This is by design to speed the creation of future containers by using locally cached copies in your storage pool rather than having to do a download each time.
These images take up some space in the storage pool, but is not generally a major concern.
We are now going to create the storage volume to store the “Get my” database in our default storage pool with this command:
incus storage volume create default get-my-data

If you now do another listing of the storage volumes, you will see the get-my-data volume as well as the get-my and get-my-db container volumes:
incus storage volume list default
To associate the custom volume get-my-data with the incus OCI database container:
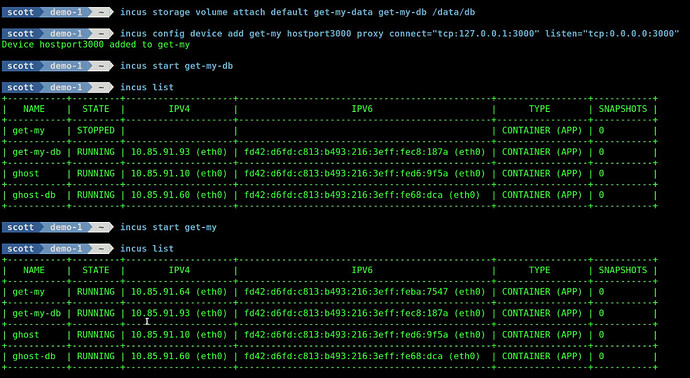
incus storage volume attach default get-my-data get-my-db /data/db
Recall that the path /data/db is where MongoDB places its database files. That path is mapped to the volume making the data persistently stored between runs.
In order to make the application reachable from your LAN, we need to set up a port proxy which is the incus equivalent of a port forward. This command makes the application accessible from the address of the incus server on port 3000. You can change the “listen” port to any port your prefer, but you cannot change the “connect” port because that is what the application expects:
incus config device add get-my hostport3000 proxy connect="tcp:127.0.0.1:3000" listen="tcp:0.0.0.0:3000"
You can now start the database:
incus start get-my-db
Wait a few moments and start the application:
incus start get-my
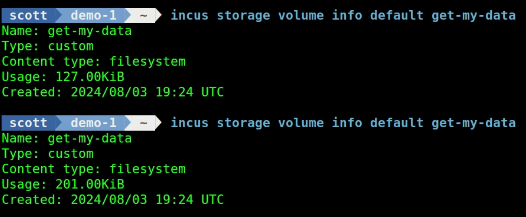
You can examine the storage utilization of the custom volume to see how much data is being used for the database:
incus storage volume info default get-my-data

In the video, I accessed my get-my application at the address of my incus server on port 3000.
I registered my admin account in get-my and I created a list named “grocery” and I put a couple items in my grocery list.
If we then go back to the terminal and list the volume info, you will see the increase in the storage utilization of the volume:
incus storage volume info default get-my-data
There is another command you can use to list information about the custom volume:
incus storage volume show default get-my-data
You can also edit the volume data:
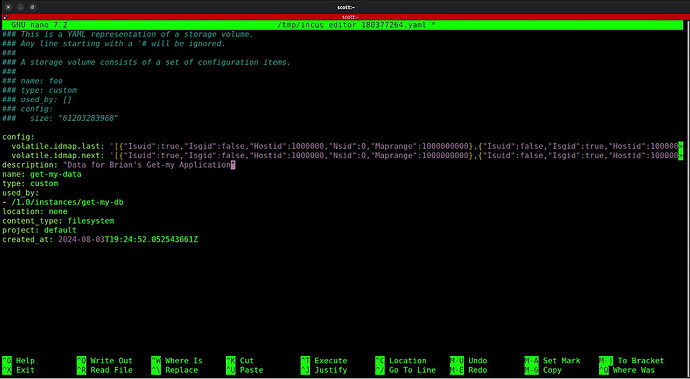
incus storage volume edit default get-my-data
As shown in the video, this will enter the nano editor and you can create a description for the volume:
Do a CTRL O and enter to save the file out and a CTRL X to exit the nano editor.
Now if you do a listing of the volumes, you will see the new description:
incus storage volume list default
You can connect more than one container to a custom volume. Just be aware that there is no file locking unless the application has it built in. In the video I created an Ubuntu container:
incus launch images:ubuntu/24.04 Test
Next, connect the container “Test” to our volume:
incus storage volume attach default get-my-data Test /data/db
If you do a shell command into the new Test container, you can see the database data in the /data/db folder:
incus shell Test
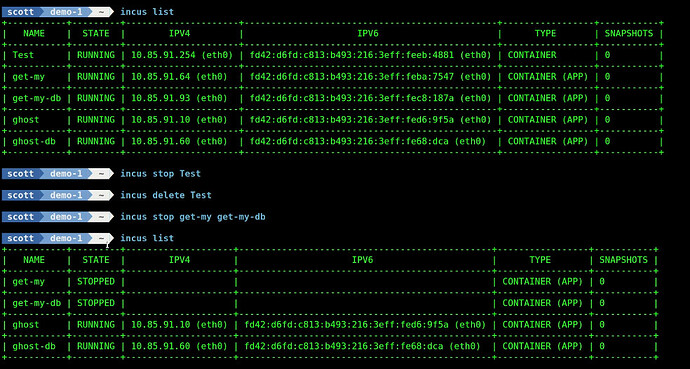
If you exit out of the Test container and do a listing of your incus containers, you will see the Test container, the get-my container and the get-my-db container.
You can backup a custom volume just like a container with an incus export command. This backup can be moved to another incus server with an import command or just kept for archival/backup purposes.
incus storage volume export default get-my-data get-my-data.tar.gz

We can import the backup as well. Note that you cannot import to the same volume name unless you delete the volume of the same name first.
incus storage volume import default get-my-data.tar.gz get-my-data-2
Now, if I list the volumes:
incus storage volume list default
Note above that the “get-my-data” volume has two connections. One of them is get-my-db and the other is Test.
You can delete a storage volume, but it must not be used by any container or deletion is not allowed.
incus storage volume delete default get-my-data-2

Incus custom volumes can be snapshotted to provide point in time backups.
incus storage volume snapshot create default get-my-data my-snapshot
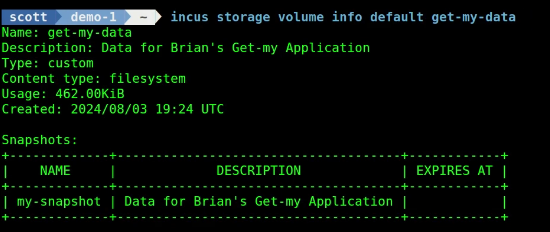
To see what snapshots you have on a custom volume:
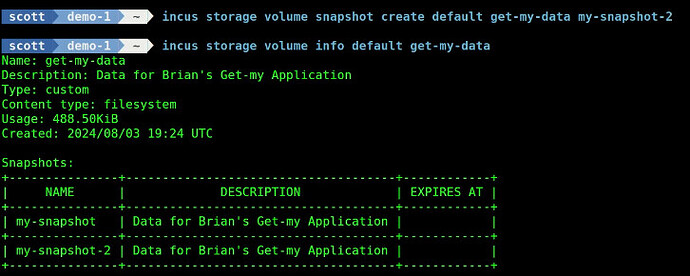
incus storage volume info default get-my-data
Let’s create a second snapshot on the volume.
incus storage volume snapshot create default get-my-data my-snapshot-2
Keep in mind that volume snapshots store their data inside of the volume just like container snapshots store their data inside of the container thus making the volume or container much larger.
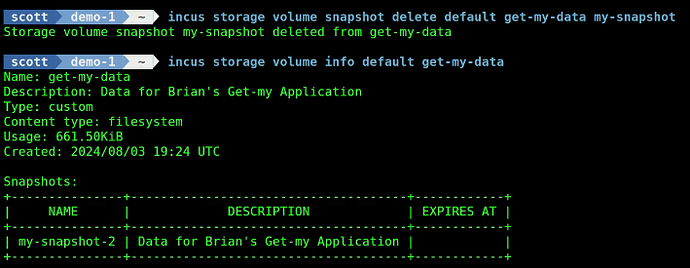
You can delete a snapshot with the command:
incus storage volume snapshot delete default get-my-data my-snapshot
If we want to delete a custom volume that is being used, you must first either delete or disassociate any containers from the volume.
If I try to delete the custom volume:
incus storage volume delete default get-my-data
I get an error because although get-my-data is stopped, it is still associated with the container.

I can either delete the container or detach it from the volume.
incus storage volume detach default get-my-data
In my example, I deleted the get-my-db container and then I deleted the custom volume.
Incus custom volumes might be a better way to manage persistent data for Incus docker OCI containers as opposed to persistent folder mappings to the incus server as shown in my last video.
