Brian, the Open Source Advocate, presented an application on his YouTube channel that he has been developing that he calls “Get my”. It’s a simple application for shopping lists and task tracking for families. In this presentation, I show how to deploy “Get my” with the new Incus OCI docker container type. To learn about his application be sure to watch his video.
Beginning in Incus 6.3, the new Docker OCI container type has been introduced. In the majority of my videos, I advocate and demonstrate nesting docker applications inside of an incus container. The new OCI container type provides a way to have an incus container that directly runs a docker application.
In my last video Incus Docker Containers, I demonstrated how to deploy OCI containers in Incus for Draw.IO and for the Ghost blogging application. This time we deploy “Get my” with Incus OCI containers.
If you are not familiar with Incus, watch my tutorial Incus Containers Step by Step.
Be sure that you are running incus 6.3 prior to this tutorial.
incus version
Once you have updated to at least incus 6.3, add the docker repository to your incus server if you have not already done so.
incus remote add docker https://docker.io --protocol=oci
When Brian presented “Get my” in his video, the installation was via a docker-compose.yml file which I present below only as a point of reference for those of you that would like to compare that to our Incus OCI deployment. This docker-compose.yml file is not used in any way in this video other than as a reference:
services:
  get_my:
    container_name: get_my
    image: bmcgonag/get_my
    ports:
      - "3000:3000"    # you can change the left side to a less common port number if needed
    healthcheck:
      test: curl --fail -s http://localhost:3000/ || exit 1
      interval: 30s
      timeout: 10s
      retries: 3
    links:
      - mongo
    depends_on:
      - mongo
    restart: unless-stopped
  mongo:
    container_name: get_my-mongo
    image: mongo:4.4
    volumes:
      - ./data:/data/db    # this will store the application data in the same directory where you have the compose.yaml file.
    restart: unless-stopped
Note above that the docker compose file utilizes the “get_my” application container and the “mongo” database container. The way that the application references the database container is via:
    links:
      - mongo
We don’t have a directive like that in Incus OCI containers and so we will make that connection with an environment variable later. Incus OCI is in a very early release and so it also doesn’t have a way to delay the starting of one container to wait for another as in:
    depends_on:
      - mongo
Also, there is no restart policy switch as of Incus 6.3.
restart: unless-stopped
I know that the restart policy option is under development and the other options will likely follow as well.
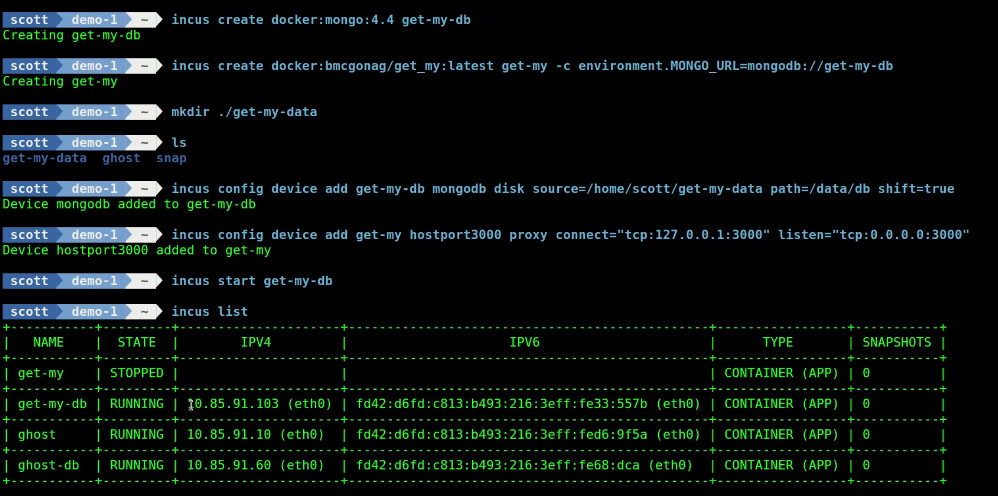
Lets create an incus OCI container to run the mongo database. I gave it the name “get-my-db” to make it more apparent which application this database container is supporting. The “incus create” command creates the container without starting it.
incus create docker:mongo:4.4 get-my-db
Next we create the application container and I chose the “latest” tag to grab the most recent iteration of the application from the docker hub.
incus create docker:bmcgonag/get_my:latest get-my -c environment.MONGO_URL=mongodb://get-my-db
Incus OCI containers allow passing docker environment variables to them with the
-c environment.<environment variable definition>
switch. Multiple “-c” command options may be used to pass multiple environment variables to a docker OCI container in incus.
We are using the MongoDB environment variable “MONGO_URL” to pass the MongoDB connection string to the application container. The “get-my-db” is the exact name of the database container we created and it is also a DNS name. This is what tells the application how to find and connect to the database container.
So the environment variable:
MONGO_URL=mongodb://get-my-db
is logically equivalent to the docker-compose.yml directive:
    links:
      - mongo
Docker containers do not store data between runs. We need to create a folder on the incus host to store the database date persistently between runs. I create this folder in my home folder on my incus server.
mkdir ./get-my-data
We now need to create a persistent volume mapping from the database container to the folder we just created with the following command. Note that I used “/home/scott” and this path must be a complete (absolute) file path all the way to the folder location.
incus config device add get-my-db mongodb disk source=/home/scott/get-my-data path=/data/db shift=true
The “shift=true” option on the command above provides write access from the container to the folder outside the incus OCI container on the incus server. The persistent volume mapping above does the same thing as the section in the docker-compose file:
    volumes:
      - ./data:/data/db
Both containers we created will not be reachable outside of the incus internal NAT network. That’s just like docker. In the docker compose command we have a port mapping to expose the application to your LAN so that users can connect to it:
    ports:
      - "3000:3000"    # you can change the left side to a less common port number if needed
With our incus OCI container, we create a “port proxy” that does the same thing:
incus config device add get-my hostport3000 proxy connect="tcp:127.0.0.1:3000" listen="tcp:0.0.0.0:3000"
The “connect” directive refers to the port that the developer defined inside of the application and cannot be changed. The “listen” port is the port number where your application will be available at the address of the incus server and just like docker you have to make sure that each application uses a port that does not conflict with another application.
Start the database container:
incus start get-my-db
You can then list your containers and I have my ghost containers here from the last video also.
incus list
Now I can start the application since the database is up and ready.
incus start get-my
I found out the address of my incus server by looking at my bridge0 device.
ifconfig
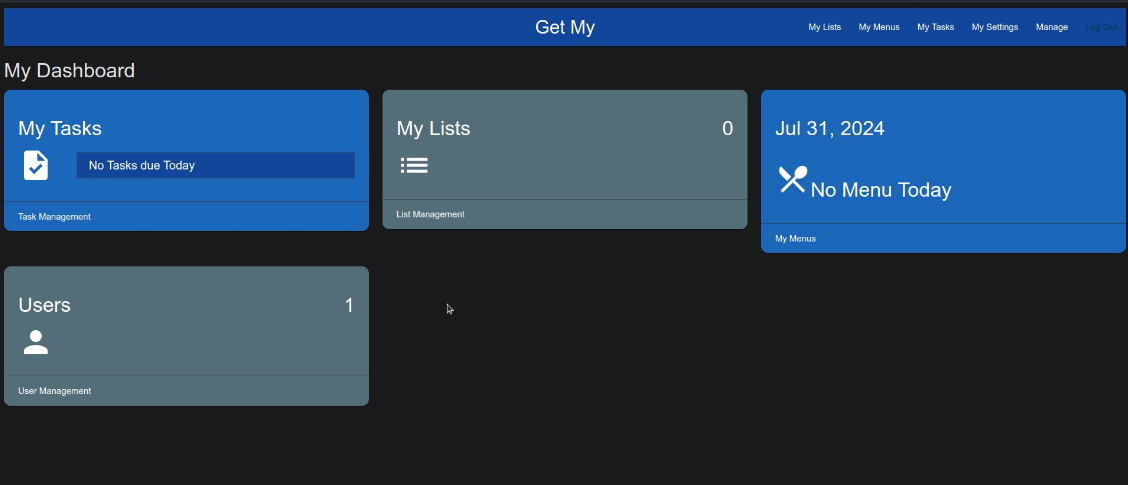
In my web browser, I go to the address of my incus server at port 3000 and the “Get my” application is available.

If you want to see how to use the application, go watch Brian’s video linked at the top of this tutorial.
In order to upgrade to the most recent version of the app as Brian continues to add features, first stop the container:
incus stop get-my
Update the container:
incus rebuild docker:bmcgonag/get_my:latest get-my
This does the same thing as the docker compose command:
docker compose pull
Then, simply restart the container.
incus start get-my
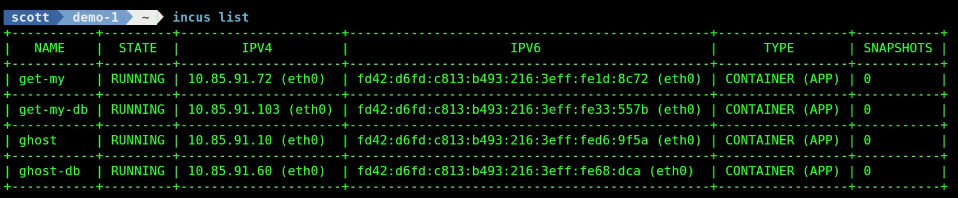
Here’s both the ghost blogging app from my last video and the “Get my” app.
incus list
Although I did not explicitly mention it, command switches like “-c boot.autostart=true” are applicable on Incus OCI containers as well.