This video is a teaching moment on configuring a live USB for Rescuezilla for persistent data in order to bake in support for iSCSI backups in Rescuezilla. There is much more in this blog regarding the details beyond what was covered in the video.
Although this has immediate application for adding iSCSI storage access to a Rescuezilla boot disk, this is meant to be about how to add and use persistent storage on any live boot USB.
If you are not familiar with iSCSI, watch my tutorial here. I also have three other iSCSI videos that teach how to use iSCSI storage with Windows and how to use iSCSI storage with Incus.
In the course of the video I mention Balena Etcher, Unetbootin, MKUSB, the Linux dd command, and Ventoy. Ventoy and MKUSB do have good support for creating bootable USB’s from an ISO image with persistent data, but the process is overly complex and I try to make things as easy and straightforward as possible.
Rescuezilla represents the continued development of another GUI image backup program named RedoRescue which was discontinued about five years ago. I think Rescuezilla is the best open source solution for cloning or imaging an entire disk no matter what the installed OS might be.
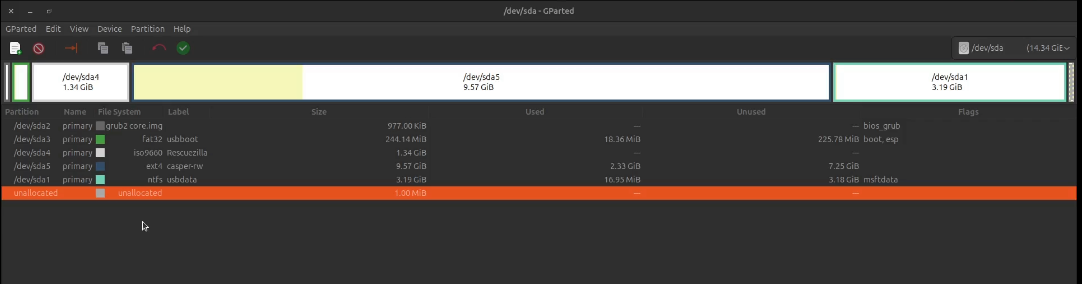
I created a bootable USB image with persistence using MKUSB, but it was quite difficult to tweak the result to make it work. One key issue is that three of the partitions were bootable, but only one worked properly. I ended up cleaning off the disk and starting over, but here’s the resulting partition table shown in Gparted.
Since we are going to use “Rufus” to create the Rescuezilla bootable USB with persistence, I needed to do this next part from Windows since Rufus is a Windows program.
My Windows 11 is an Incus Virtual Machine on my desktop and so I start by listing my USB devices on my Ubuntu desktop where my Sandisk USB is connected. You can use any size USB, but I suggest a 16GB USB because that provides a nice balance between cost and size.
lsusb
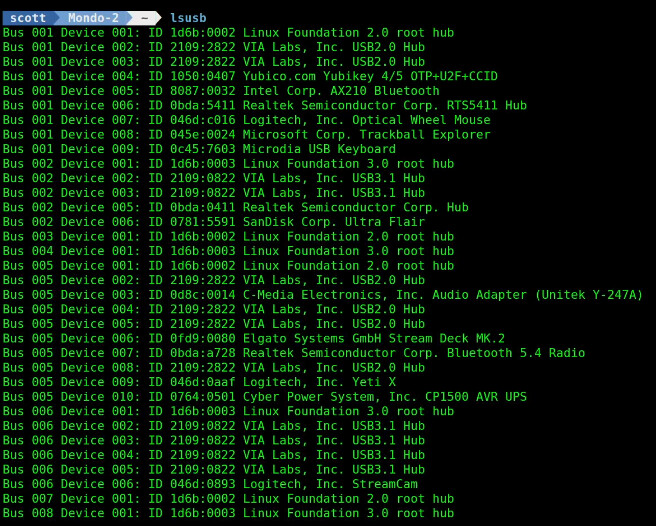
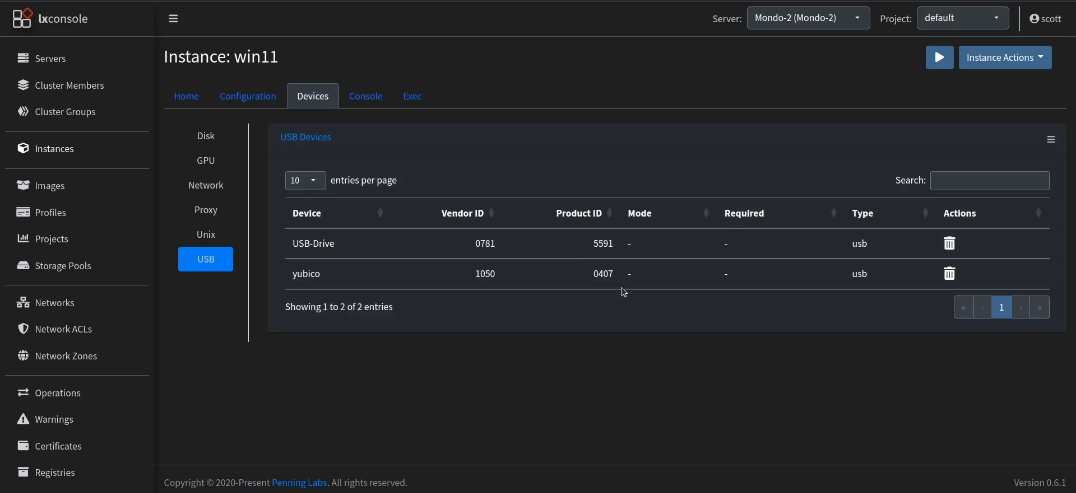
You will notice from the listing above that my Sandisk USB shows up with vendor ID 0781 and product ID 5591. For simplicity, I went to my LXConsole instance and defined a USB device with the Vendor and Product ID to make the USB device accessible to the Incus VM.
With the USB device defined, I start my Win11 Incus VM with a console to access the GUI.
incus start win11 --console=vga
Once you are in your Windows 11 (and it doesn’t have to be an Incus VM like mine), go into your web browser and visit the following URL and download rufus:
https://rufus.ie/en/
I suggest the portable version of rufus that does not require an installation and here’s the link to the current version as I am writing this.
https://github.com/pbatard/rufus/releases/download/v4.6/rufus-4.6p.exe
Next, go download the Rescuezilla ISO image from:
https://github.com/rescuezilla/rescuezilla/releases/download/2.5.1/rescuezilla-2.5.1-64bit.noble.iso
Now launch rufus in your Windows machine.
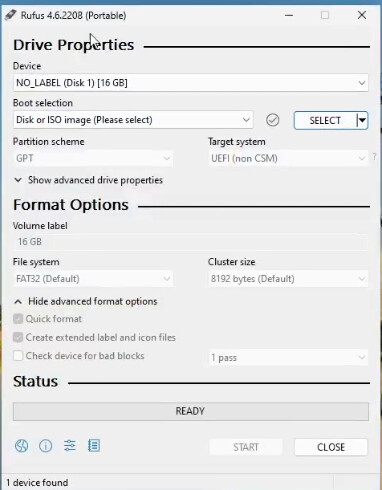
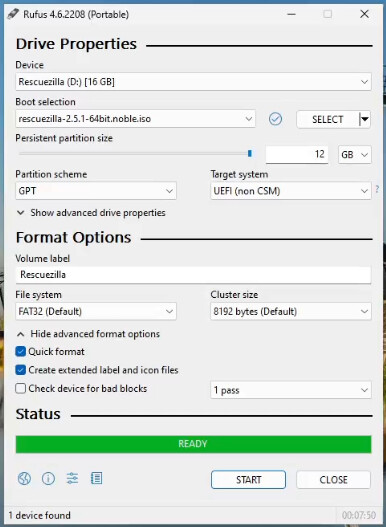
- Select your USB in the device field.
- Be sure it is the right one because this will wipe out everything on the USB.
- Select the Rescuezilla ISO image as I demonstrate in the video.
- Change your partition scheme to GPT.
- Max out the “Persistent partition size”.
Here is what it should look like:

When you click “Start” you will get a warning reminding you that you need to have Secure Boot disabled in your BIOS before the resulting USB can boot.
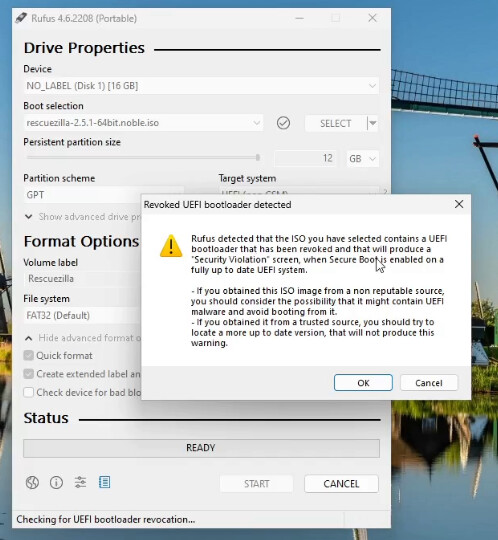
Once you acknowledge the warning screen, you will get another warning that you are getting ready to wipe out the USB device completely. Double check and make sure you have the right device.

Once the process is completed, you should get a screen like this:
You can now shutdown your Windows machine.
Since the USB device has likely been logically ejected, remove and reinsert it into the USB port again.
In Ubuntu, when you access the newly created USB device in gparted, you will notice a very simple partition structure which is what we want.

Now, boot your new Rescuezilla USB. You may have to remove and insert the USB device before your system will see it at reboot time.
You can either access your boot menu in the BIOS of your machine or you may have a key you can press during the boot process that will present a device boot menu.
On my Minisforum UM 890 Pro, I press the F7 key right after the splash screen is displayed and I get the device boot menu.
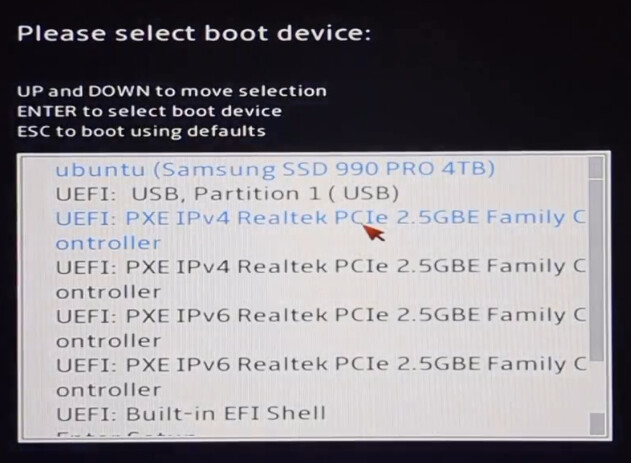
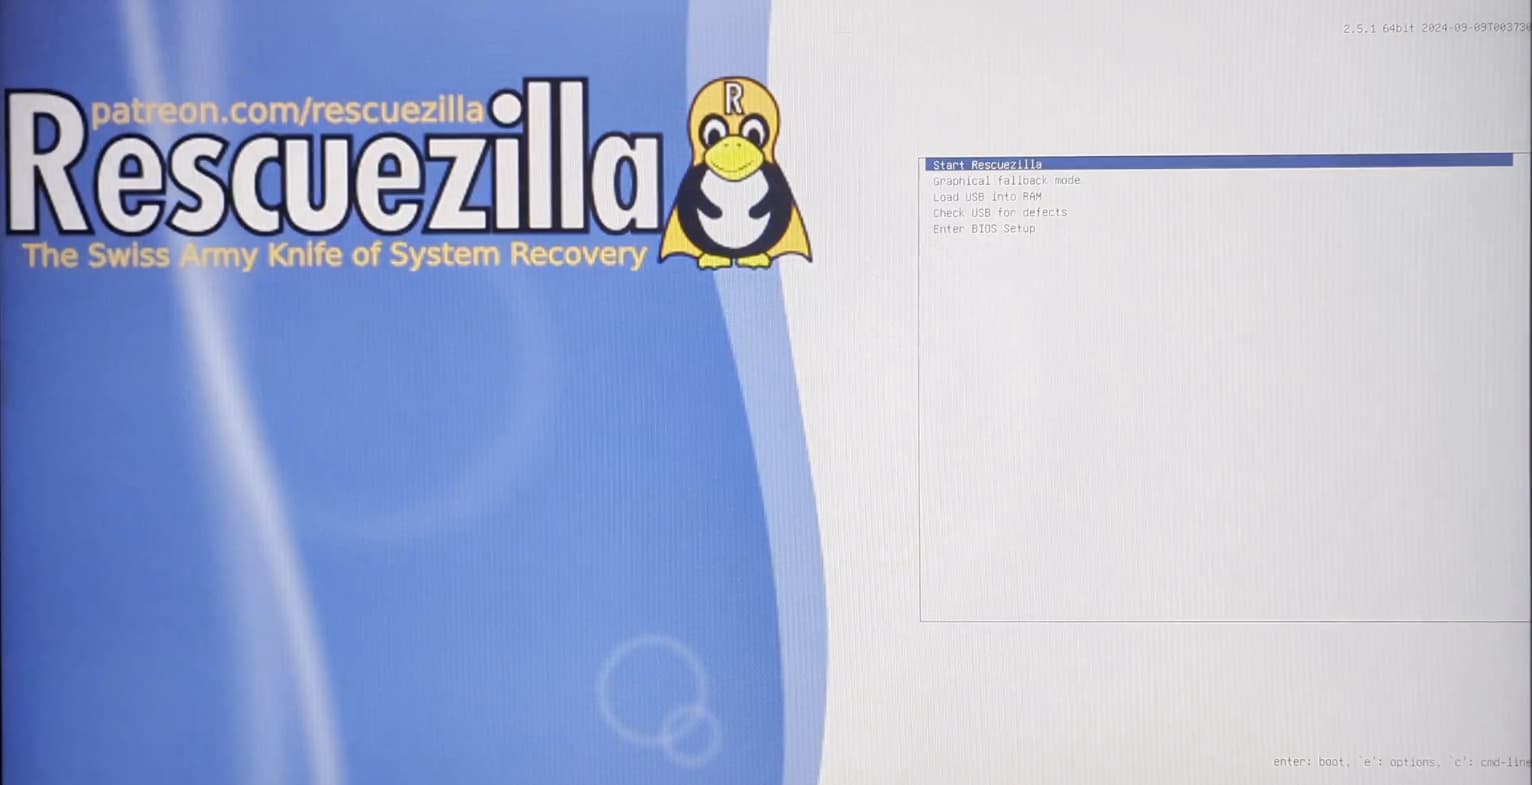
My Rescuezilla shows up as UEFI: USB, Partition 1 (USB). When I select it, it goes immediately to the Resuezilla startup screen for language selection.
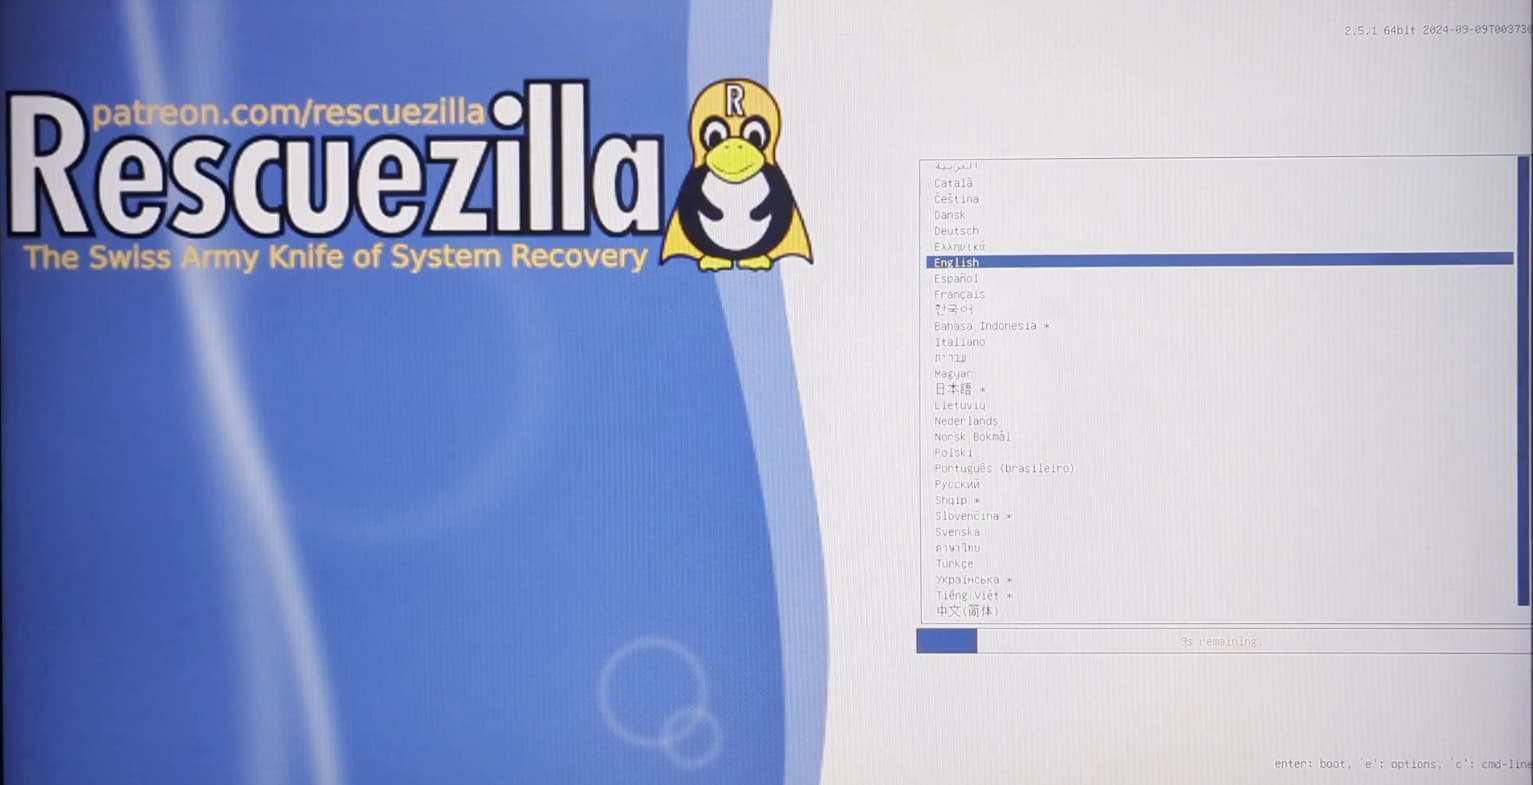
After selecting the language, I get the following screen and I select “Start Rescuezilla”.
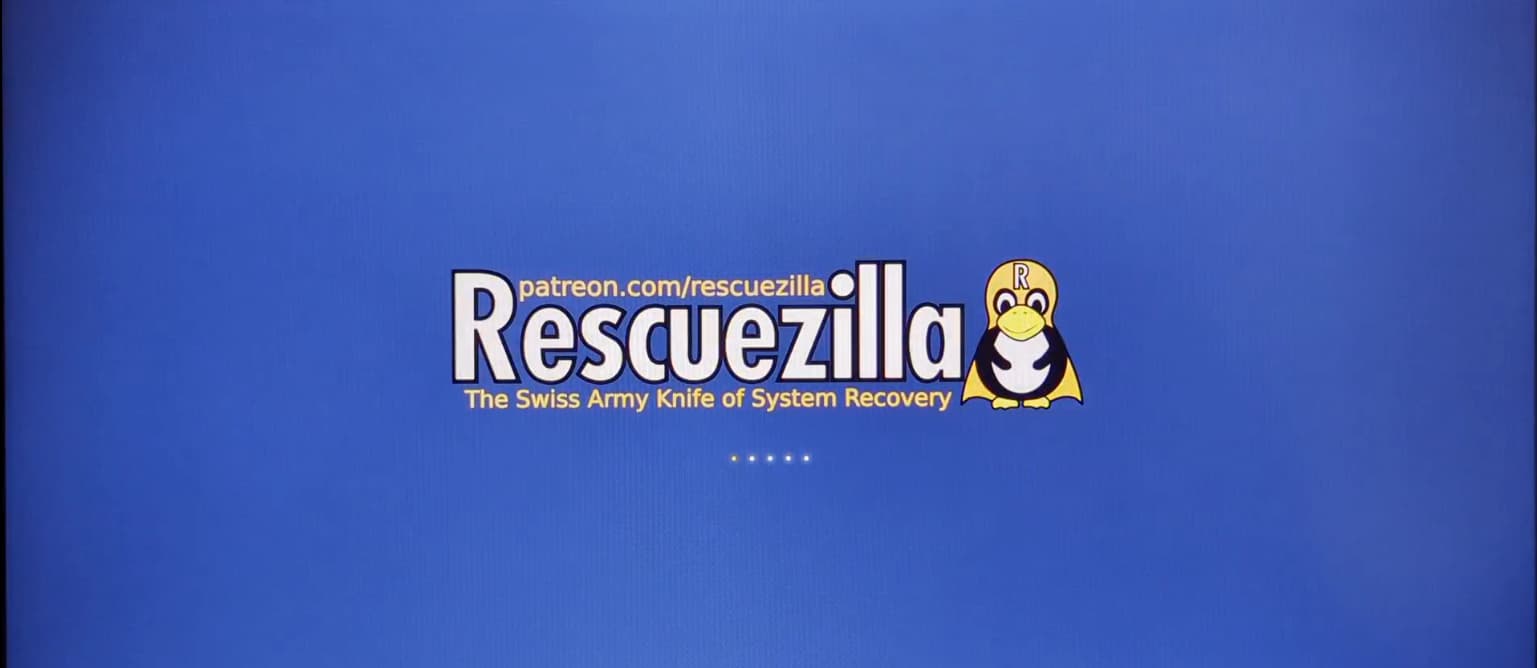
Next you will see the splash screen as the boot process continues.
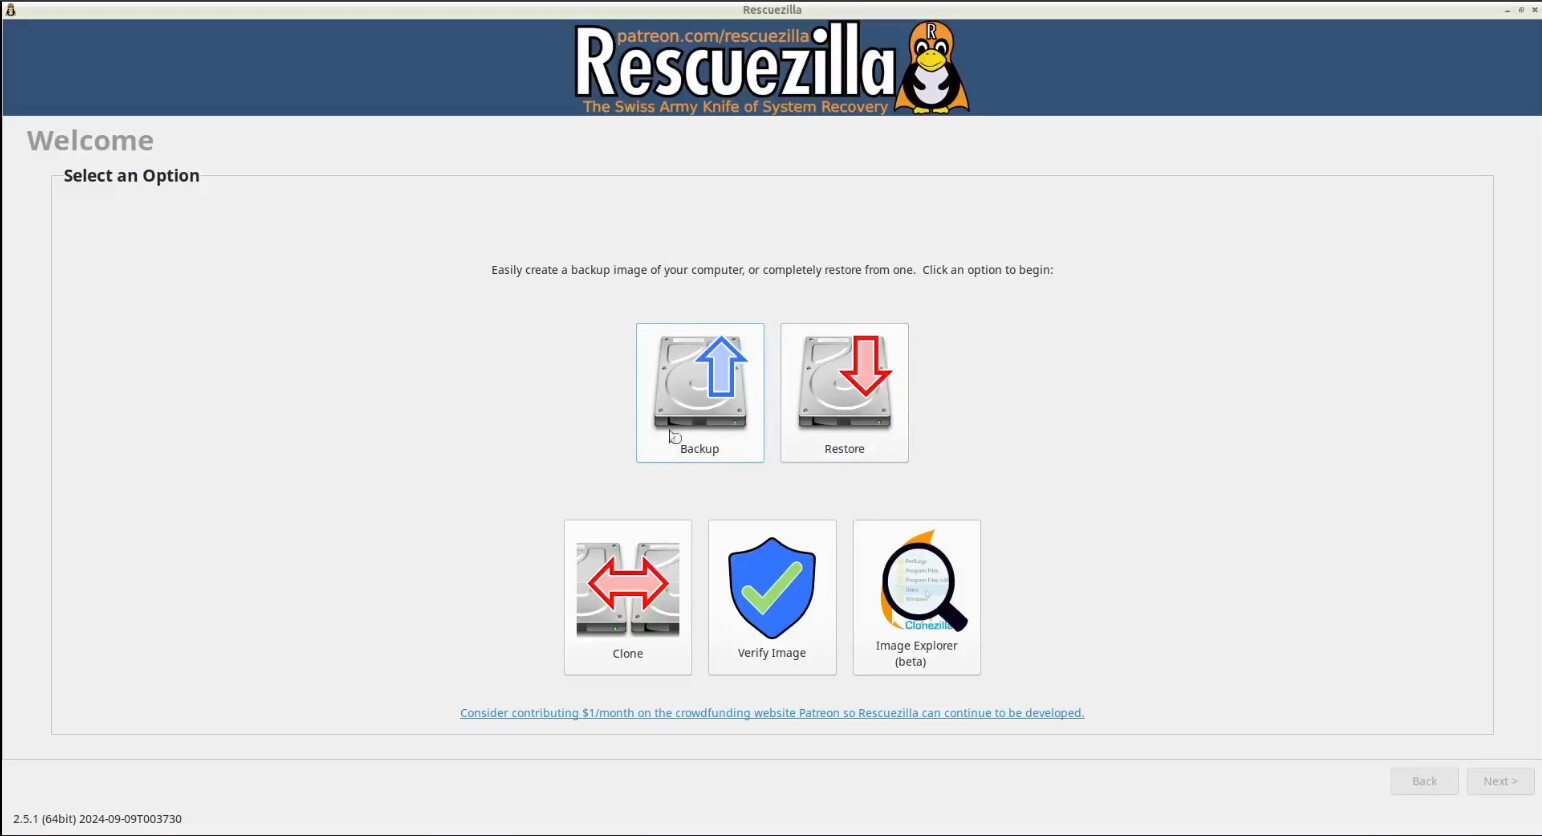
After booting, Rescuezilla launches its application screen which I explain the in video. You can exit this screen for now.
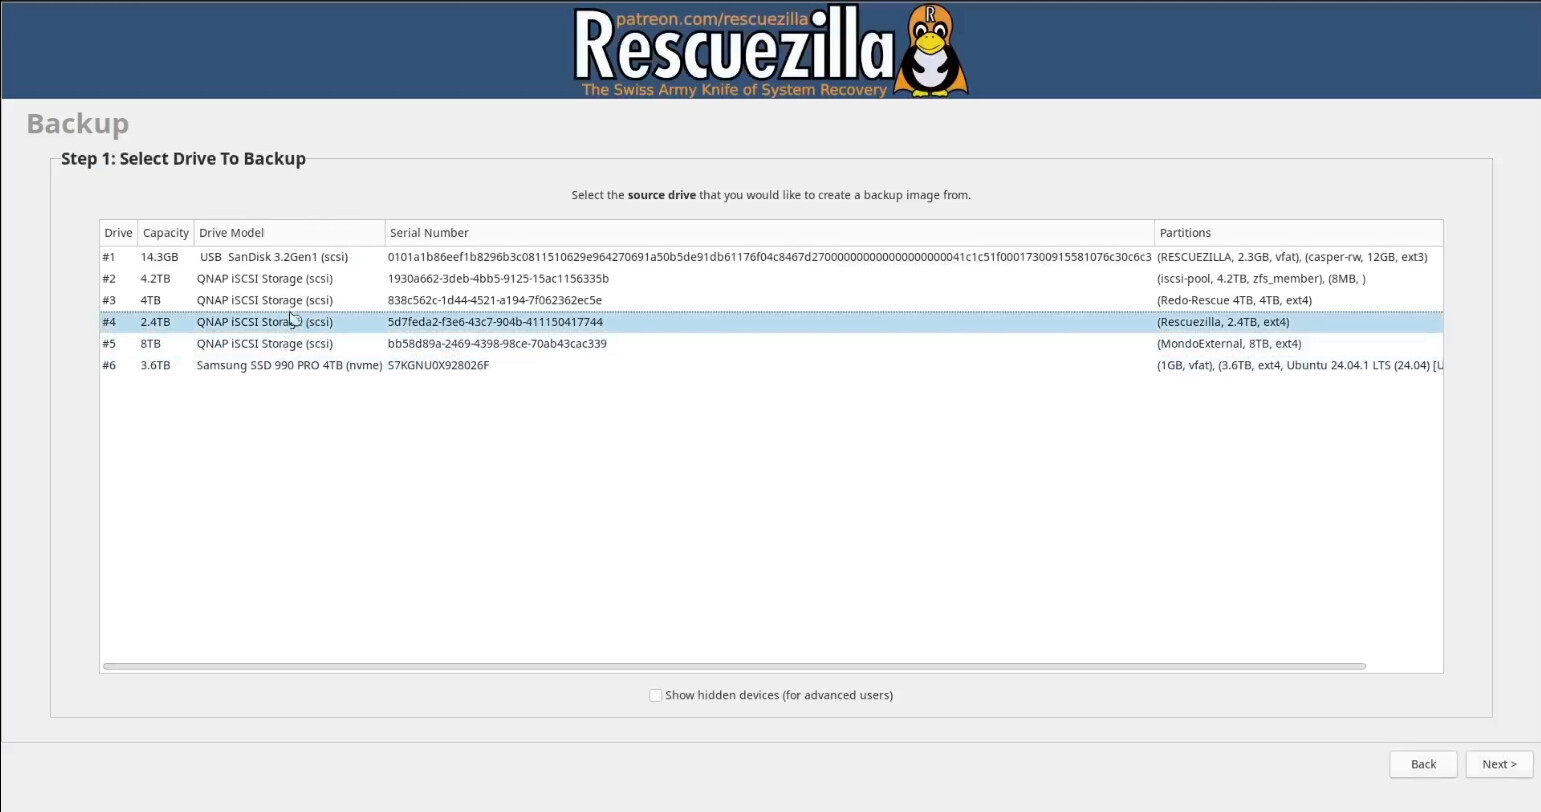
I demonstrated how I could only see local drives on my system. Rescuezilla does provide access to both SMB/CIFS (Microsoft shares) and NFS (Linux Network File System), but they are both lower performance than iSCSI.
I tested persistence by opening a terminal on the desktop and creating a folder and a file. I rebooted and both the folder and file were still present in my Rescuezilla confirming that persistence was working.
Open the Xfce Terminal from the Rescuezilla desktop.
First update the cache:
apt update
Now install the iSCSI server daemon in Rescuezilla from the same terminal.
apt install open-iscsi -y
Assuming you have iSCSI targets configured on your network (watch my iSCSI video linked above) you can now discover the targets with a command like the following. Note my iSCSI targets are configured on 172.16.1.58. Your address will differ.
iscsiadm -m discovery -t st -p 172.16.1.58
I need to edit the iSCSI daemon startup file, but I need to install the nano editor first since the Rescuezilla disk does not include it.
apt install nano
Now edit the configuration file.
nano /etc/iscsi/iscsid.conf
Put a “#” in front the the node.startup=manual line.

Then remove the “#” from in front of the node.startup=automatic line.
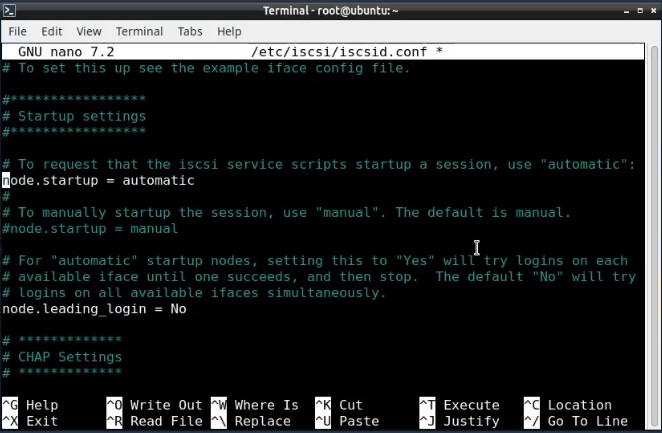
Save the file out with a CTRL O and Enter and a CTRL X to exit the nano editor.
At this point, if you run the Rescuezilla app, you will see that your iSCSI targets are listed on both the source and destination backup screens.

I rebooted and discovered that my iSCSI targets were not automatically connected. To assure they are connected, execute this command from the terminal.
iscsiadm -m node -o update -n node.startup -v automatic
This time when I rebooted (and remember you may have to remove and reinsert the USB key), Rescuezilla could see all of my iSCSI targets without any actions on my part.
As mentioned earlier, Rescuezilla is a great open source imaging tool. I prefer iSCSI targets for my image backups because they are faster and super reliable.
This tutorial is a good example of how to add persistence to any bootable ISO image. If you noticed carefully in the video, I even installed OBS studio in my Rescuezilla USB in order to do the recordngs for this video.
BONUS:
You can make a copy of your completed bootable Rescuezilla USB with persistence. For the procedure that follows, you need to be booted from your Linux machine and not from the USB device that you are trying to copy.
Identify your USB device by listing all the block storage devices.
lsblk
It is usually easy to identify which is the USB you want by the size. In my example below, I will assume that your USB is /dev/sda. If your device is different, be sure to change it below or you WILL OVERWRITE something that you do not want to.
Make sure the USB is not mounted:
sudo umount /dev/sda*
To watch the progress of your copy, you can use “pv”.
sudo apt install pv
Make an image file copy of your current USB that you created in this tutorial assuming it is /dev/sda. Change the drive letter accordingly:
sudo bash -c 'cat /dev/sda | pv > Rescuezilla-bootable.img'
The above command may take a couple minutes depending on the size of your USB device.
Once the copy has completed, remove the original USB device and replace it with a USB device you want to copy to. Make sure that you have the correct drive:
lsblk
Be sure the drive you inserted is dismounted (again, make sure it is /dev/sda or change that below):
sudo umount /dev/sda*
Copy the image back to the drive making sure that you specified the /dev/sdX or whatever letter your new USB is because there is no coming back from overwriting the drive:
sudo bash -c 'pv Rescuezilla-bootable.img > /dev/sda'
The command above will proceed to 100%. However, it will appear hung for perhaps 5-10 minutes. Wait for the copy to complete. You will get a prompt back eventually. Once you see the prompt:
sync
You can then test boot from the copy and it should work. The image we made can be used to create as many copies of the USB as you want.