NginX Proxy Manager (NPM) is a single point of failure in most Home Labs. If/when it goes offline, access to all of your subdomain hosted services are inaccessible as well.
If you are not familiar with NPM and are new to hosting, consider using an Incus server as the core of your hosting Infrastructure and watch my Incus Containers Step by Step tutorial. In April of 2024, I presented NginX Proxy Manager in Incus. NPM, simply stated, is how to host multiple services on one ISP granted WAN address in the Home Lab.
In this tutorial, I show how to create an automatic fail-over for NPM. I leverage this “higher availability NPM” to provide a self-hosted service with fail-over expanding on my “SearXNG: Privacy Respecting Self Hosted Search”.
In my last two videos entitled “High Availability Pi-hole & Local DNS” and “Add a New Pi hole to the Homelab” I showed how to provide a highly available local DNS in your Home Lab with multiple Pi-holes. These tutorials didn’t require any interaction with NPM because the Pi-hole application runs completely locally.
That being said, a well-functioning and resilient local network DNS, goes a long way to a highly functional network. Pi-hole is regarded as an adware/malware blocker and it works by scrutinizing requests to URLs and if they are known to be harmful/annoying, they are simply not passed on to upstream servers and thus ignored/blocked.
Pi-hole is much more than this though. Pi-hole is a local DNS resolver where you can define all of your IP addresses for locally hosted servers as DNS A-records. This is convenient because you can use DNS names rather than IP addresses on your network to ssh or ping your server/container instances.
In addition, as pointed out in my NginX Proxy Manager and Local DNS you can define an “A-Record” for your domain name that points to the address of your NPM and CNAME aliases for your various subdomain named services. This has the effect of locally resolving access to your services and works even if your ISP connection is down.
In a nutshell, If you self host services with NPM, and if NPM goes offline, none of your services will be reachable. In this video, I show one possible solution to how you can run a backup NPM instance that can take over if your primary NPM instance goes down.
We start by adding an incus container for a backup instance for NPM. You can certainly achieve the same with LXD, a VM or even a bare metal machine.
incus launch images:ubuntu/24.04 NPM-Backup -p default -p bridgeprofile -c boot.autostart=true -c security.nesting=true
Connect to the new container:
incus shell NPM-Backup
Take the updates and install dependencies (note that we don’t use “sudo” because the shell runs in root by default):
apt update && apt upgrade -y
apt install curl nano net-tools openssh-server rsync
During this video I received an installation error that prevented installing openssh-server. This was due to how the previous day’s updates were processed into the Ubuntu 24.04 image at linuxcontainers.org. I simply removed the ssh-client image and then I was able to install the updates.
apt purge openssh-client
Since NPM is a docker application, we install docker from the script on the docker website:
curl -sSL https://get.docker.com | sh
Add a local user on the container instance.
adduser scott
Place the user in the sudo & docker groups.
usermod -aG sudo scott
usermod -aG docker scott
Move over to the newly created user account.
su - scott
Find out the IP address of the eth0 device in the container.
ip -br -4 a
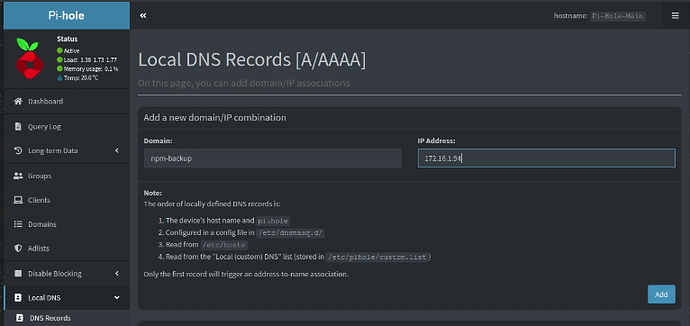
Go over to your Pi-hole instance and add an “A-record” for the new server being sure to enter the address that you found above.
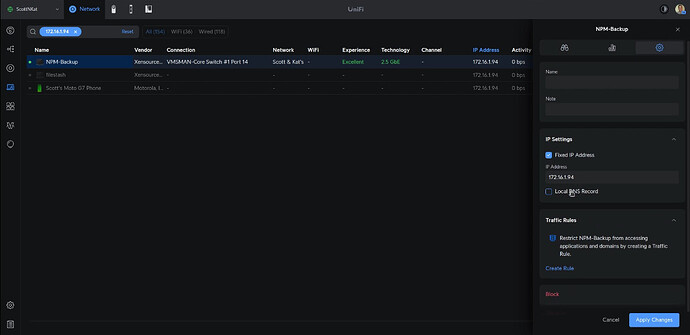
Head over to your router (mine is a Ubiquiti UDM Pro) and define a DHCP Address reservation for your new container so that it has a fixed address.
Back at the terminal for your NPM-Backup instance, run the following command to define SSH keys for your account.
ssh-keygen -t rsa -b 4096
Log off the backup container and login to your production NPM instance. If you don’t yet have an A-Record for your NPM production instance, create one in Pi-hole as we did for the backup container above.
exit
ssh npm
Install the “rsync” command on the NPM production server.
sudo apt install rsync
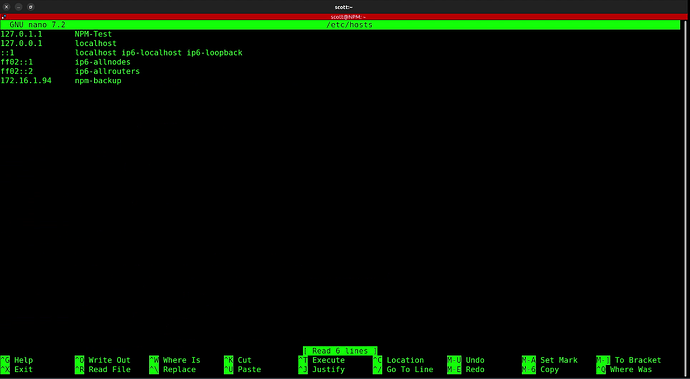
Even though we created a record for npm-backup in the local Pi-hole DNS, for extra safety we are going to define it also in the local host table of the NPM server instance.
sudo nano /etc/hosts
Be sure to enter your address for npm-backup and then do a CTRL O and enter to write the file out and a CTRL X to exit the nano editor.
Copy your ssh public key to the remote npm-backup server (be sure to change “scott” in the command below to the username that you chose when you created your NPM production server).
ssh-copy-id -i /home/scott/.ssh/id_rsa.pub scott@npm-backup
Now move inside of your NPM folder on this production NPM server.
cd NPM
We are going to create a bash script to replicate the configuration of your NPM server to the backup NPM server, but first we need to have NPM run under your user account.
docker compose down
Now change the ownership of all your files in the NPM file structure:
sudo chown -R 1001:1001 *
Now edit your docker-compose file and add an environment variable for your user account:
nano docker-compose.yml
Here’s an example.
services:
  app:
    image: 'jc21/nginx-proxy-manager:latest'
    restart: unless-stopped
    ports:
      - 80:80
      - 81:81
      - 443:443
    environment:
      PUID: 1001
      GUID: 1001
    volumes:
      - ./data:/data
      - ./letsencrypt:/etc/letsencrypt
After you edit your docker-compose accordingly, do a CTRL O and enter to write the file out and a CTRL X to exit the nano editor.
Now we are going to create a script to replicate this NPM server to the npm-backup server.
nano replicate.sh
Insert the following lines into the editor and be sure to adjust the THREE instances of “scott” to your username.
#!/bin/bash
# Load agent if it exists, otherwise start it and save to a file
SSH_AGENT_ENV=/home/scott/.ssh/agent_env
if [ -s "$SSH_AGENT_ENV" ]; then
    source "$SSH_AGENT_ENV" > /dev/null
else
    eval "$(ssh-agent -s)" > "$SSH_AGENT_ENV"
    ssh-add /home/scott/.ssh/id_rsa
fi
/usr/bin/rsync -a -e "ssh -i /home/scott/.ssh/id_rsa" ~/NPM scott@npm-backup:
Do a CTRL O and enter to save the file after making your changes and then CTRL X to exit the editor.
Set the script file to have execute privilege.
chmod +x replicate.sh
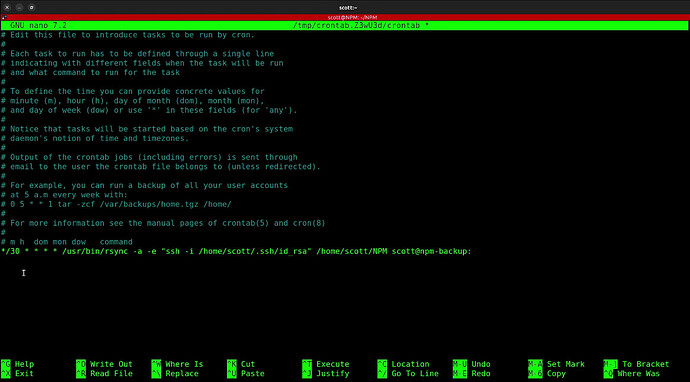
We want the replication to occur on a schedule so that any changes to the production NPM server will be replicated to npm-backup. To do this, we will create a cron job entry by editing the cron table. (Trivia: cron is short for chronos, the Greek word for time).
crontab -e
The entry will look like the following. Again be sure to change the name “scott” in the three locations:
*/30 * * * * /usr/bin/rsync -a -e "ssh -i /home/scott/.ssh/id_rsa" /home/scott/NPM scott@npm-backup:
In my example the “30” means to run the replication every 30 minutes. When you are done editing, do a CTRL O and enter to save the file and a CTRL X to exit the editor.
Now exit your NPM container and then ssh to the backup container.
exit
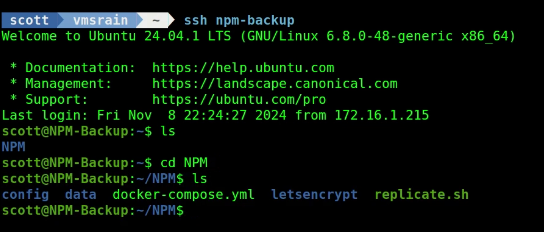
ssh npm-backup
You should now see that all the data is replicated into the NPM folder on this new backup server.
Move into the NPM container and start the NPM application. Note that although the data is replicated, we must initially start the application to pull the container overlays from the docker hub to create the docker container and start the application.
cd NPM
docker compose up -d
Also note that when NPM receives an updated version you will need to sign on to this container and update it.
cd NPM
docker compose pull
docker compose up -d
At this point, you should be able to head to your web browser at the address of the npm-backup container at port 81. Your credentials from your production NPM server will be the same on this server since it is an exact copy and when you log into it, you should see your proxy records.
Log off of the npm-backup server and log back into your NPM production server.
exit
ssh npm
Install Virtual Router Redundancy Protocol (VRRP).
sudo apt install keepalived
Edit the VRRP configuration file.
sudo nano /etc/keepalived/keepalived.conf
Insert the following data. Be sure to select a virtual_router_id that is different from the ID we used for the Pi-hole VRRP network. Also, change the virtual_ipaddress to be one on your network range, but on outside of your DHCP scope. For example 192.168.1.5/24 if that is an unused address on your network.
vrrp_instance NPM {
        state MASTER
        interface eth0
        virtual_router_id 6
        priority 255
        advert_int 1
        authentication {
              auth_type PASS
              auth_pass 54321
        }
        virtual_ipaddress {
              172.16.0.15/16
        }
}
Once you are done editing, save the file with a CTRL O and enter and a CTRL X to exit the nano editor.
Restart the service with the newly added configuration.
sudo systemctl restart keepalived
Log off of the NPM server and sign onto the npm-backup server.
exit
ssh npm-backup
Install the keepalived daemon for VRRP:
sudo apt install keepalived
Edit the VRRP configuration file.
sudo nano /etc/keepalived/keepalived.conf
Insert the following making sure to adjust the settings accordingly. Note that this will be a “backup” node.
vrrp_instance NPM {

        state BACKUP
        interface eth0
        virtual_router_id 6
        priority 254
        advert_int 1
        authentication {
              auth_type PASS
              auth_pass 54321
        }
        virtual_ipaddress {
              172.16.0.15/16
        }
}
After adjusting the settings, do a CTRL O and enter to save the file and a CTRL X to exit the nano editor.
Restart the service with the newly added configuration.
sudo systemctl restart keepalived
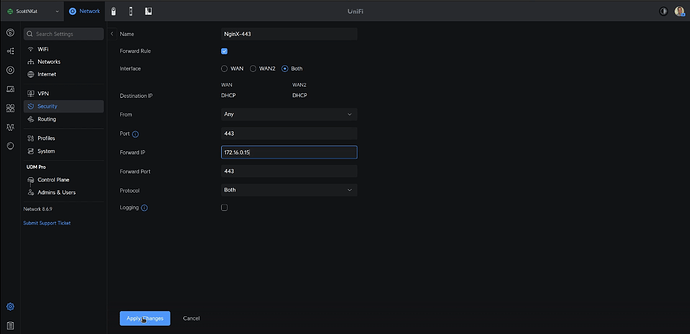
For this automatic fail-over to work properly, you will need to head over to your router and change the port forwarding for both ports 80 & 443 to point to the virtual address we configured in VRRP rather than the address of the primary NPM server address.
Here’s an example on my UDM Pro router/gateway.
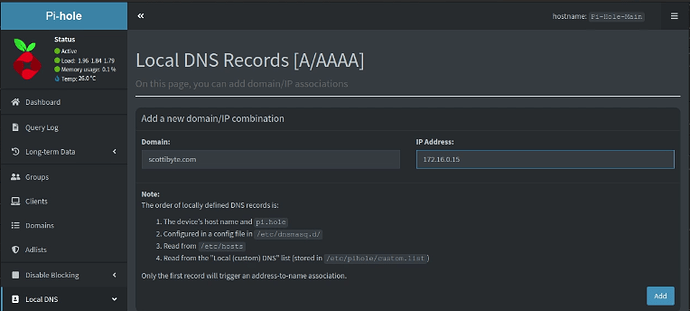
Now head over to your Pi-hole web interface and change/make an entry for your domain name to point to the VRRP address. By making this change, your subdomain named records will resolve locally. This has the benefit of speed and also your self-hosted web services will work locally even if your ISP connection is offline.
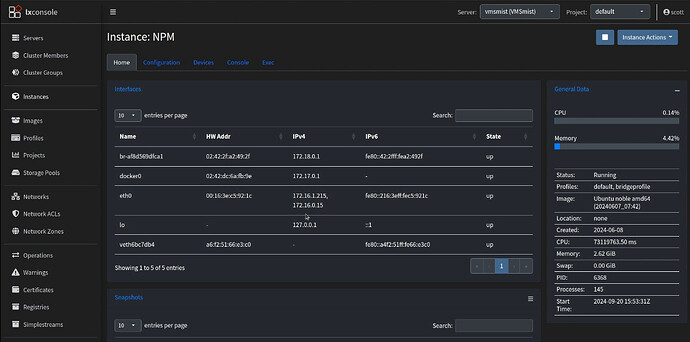
At this point, your MAIN NPM instance will have both its address and the VRRP address indicating that it is the one responding to NPM requests. I can see this in the address entries for eth0 in LXConsole.
If the MAIN NPM goes down, the VRRP address will automatically transition to npm-backup and it will begin to resolve reverse proxy lookups for your hosted services until the MAIN NPM instance comes back online and reverts the VRRP address back to the MAIN NPM container.
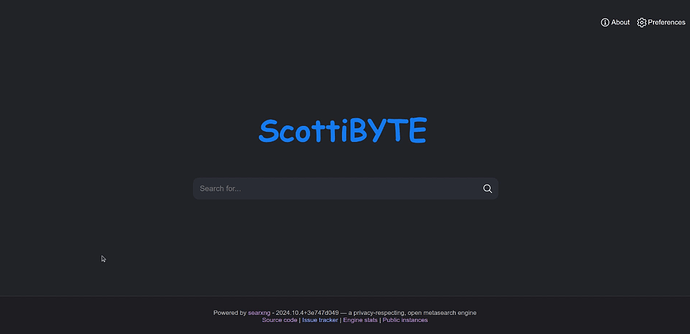
Having a failover server for NPM is fine, but the real power comes in having at least one of our services also having a fail-over configuration. For the purposes our demonstration, I chose my installation of SearXNG which I covered in SearXNG: Privacy Respecting Self Hosted Search.
SearXNG doesn’t have any user data and so it does not require any regular replication like NPM. Therefore, I simply copied the SearXNG container to another Incus server.
First, I stop my SearXNG container on my incus server vmsmist:
incus stop vmsmist:Searxng
In my notes from Manage Your Incus Server from Windows I showed how to create “trusts” to allow for the remote management of other incus servers.
My desktop “mondo” is trusted by both my vmsmist and vmsrain incus servers. Therefore, I can “copy” my instance of Searxng from vmsmist and make a new container named Seaxng-Backup on the vmsrain server with the following command:
incus cp vmsmist:Searxng vmsrain:Searxng-Backup --mode=relay
The “relay” option performs a very fast copy. The “cp” command assigns a new MAC address for the target Searxng-Backup container and so it will receive a new IP address from the DHCP server which is what we want.
Start both containers:
incus start vmsmist:Searxng
incus start vmsrain:Searxng-Backup
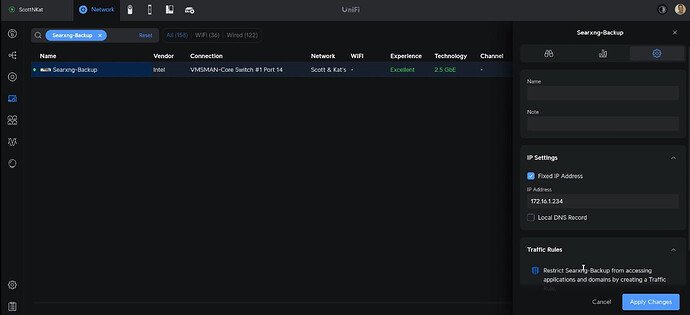
Head over to your router and define a DHCP address reservation for the new Searxng-Backup container instance.
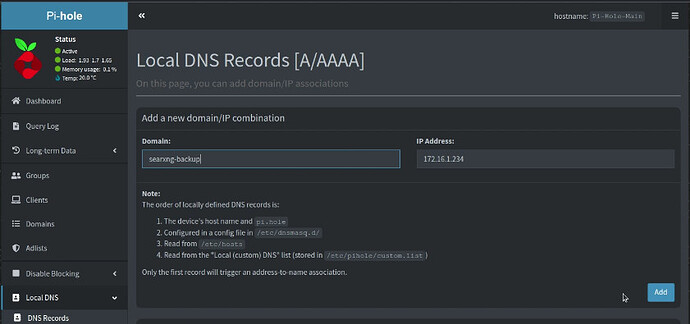
Head over to your main Pi-hole instance and create a DNS entry as well.
Connect to your original SearXNG container:
ssh searxng
Install the keepalived daemon:
sudo apt install keepalived
Edit the configuration file:
sudo nano /etc/keepalived/keepalived.conf
Enter the following into the file. Note that we need to choose a different virtual_router_id than we did for either the Pi-hole or NPM VRRP configurations and we need to choose a unique VRRP address as well.
vrrp_instance Searxng {
        state MASTER
        interface eth0
        virtual_router_id 8
        priority 255
        advert_int 1
        authentication {
              auth_type PASS
              auth_pass 54321
        }
        virtual_ipaddress {
              172.16.0.30/16
        }
}
Once you have made your edits to the configuration, do a CTRL O and enter to write the file out and a CTRL X to exit the editor.
Restart the service to make the configuration take effect.
sudo systemctl restart keepalived
Logoff this server and log on to the backup server:
exit
ssh searxng-backup
Install the keepalived daemon:
sudo apt install keepalived
Edit the configuration file:
sudo nano /etc/keepalived/keepalived.conf
Enter the following data for the backup server configuration making the appropriate adjustments.
vrrp_instance Searxng {

        state BACKUP
        interface eth0
        virtual_router_id 8
        priority 254
        advert_int 1
        authentication {
              auth_type PASS
              auth_pass 54321
        }
        virtual_ipaddress {
              172.16.0.30/16
        }
}
Do a CTRL O and enter to save the file and a CTRL X to exit the nano editor.
Restart the service to make the configuration take effect.
sudo systemctl restart keepalived
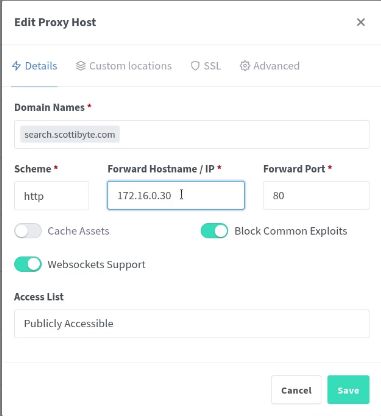
The final step is to head over to your NPM entry for your search service and to change the address from the primary Searxng server to the VRRP virtual address we defined for Searxng.
At this point we are done with the SearXNG VRRP fail-over configuration and if either SearXNG container is up and running, then the SearXNG search service is available. This is built upon our virtual configuration for both NPM and SearXNG and it means that if either my vmsmist or my vmsrain servers goes down, my self-hosted SearXNG search engine will continue functioning.
Any time there is an update for SearXNG, you would need to update it on both servers.
ssh searxng
cd /usr/local/searxng-docker
docker compose pull
docker compose up -d
exit
ssh searxng-backup
cd /usr/local/searxng-docker
docker compose pull
docker compose up -d
exit
It can be a lot of work and resources to determine how to make a particular service “fail-over ready”. However, my last few tutorials should put you on track.
