Apache Guacamole is a powerful clientless gateway for remote systems access and I have covered it in September of 2021. I want to revisit this great admin tool and this time I will focus on configuring Guacamole with Docker nested inside of a LXD container. In addition, we will configure two factor authentication (2fa) with a time based one time password (TOTP).
Create a LXD container bridged to your network (Bridging and LXD are covered in my LXD Containers 101 video):
lxc launch ubuntu:22.04 Guacamole --profile default --profile bridgeprofile -c security.nesting=true -c boot.autostart=true
Connect to the container console:
lxc exec Guacamole bash
Add a user:
adduser scott
usermod -aG sudo scott
Update the container OS:
apt update && apt upgrade -y
Install Docker from the script on the Docker website:
curl -sSL https://get.docker.com | sh
Install docker-compose:
apt install docker-compose
Put my user account in the docker group:
usermod -aG docker scott
Install the ssh server:
apt install openssh-server
Exit the console:
exit
Find the address of your LXD container with the following command:
lxc list
Connect to your new user account with ssh at the address from above:
ssh scott@172.16.1.152
Clone the installation procedure:
git clone "https://github.com/boschkundendienst/guacamole-docker-compose.git" guacamole
Move into the folder:
cd guacamole
Execute the “prepare” script:
./prepare.sh
Edit the docker-compose.yml file:
nano docker-compose.yml
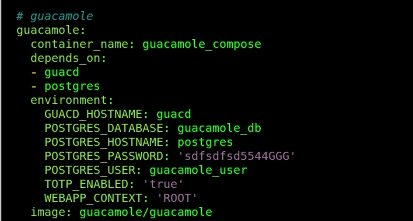
Change the POSTGRES_PASSWORD environment variable in both the postres and the guacamole section of the file to a strong password and make sure that they match.
Add the TOTP_ENABLED and the WEBAPP_CONTEXT environment variables to the guacamole section as in the following screenshot:
Set the ports section to uncomment the 8080:8080/tcp entry and to comment the 8080/tcp entry as in the following screenshot
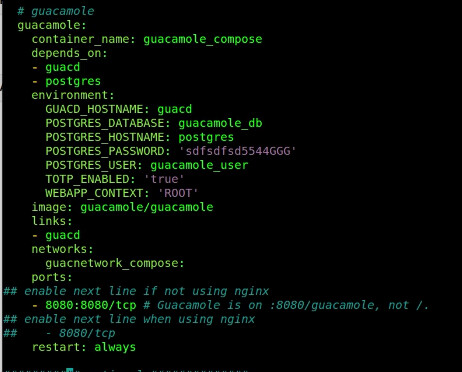
Remove the entire section from “optional” to the end which is a container for the NginX web server that we won’t need since we will use NginX Proxy Manager.
Write out the nano session with CTRL O and ENTER and CTRL X to exit the editor.
Start the application:
docker compose up -d
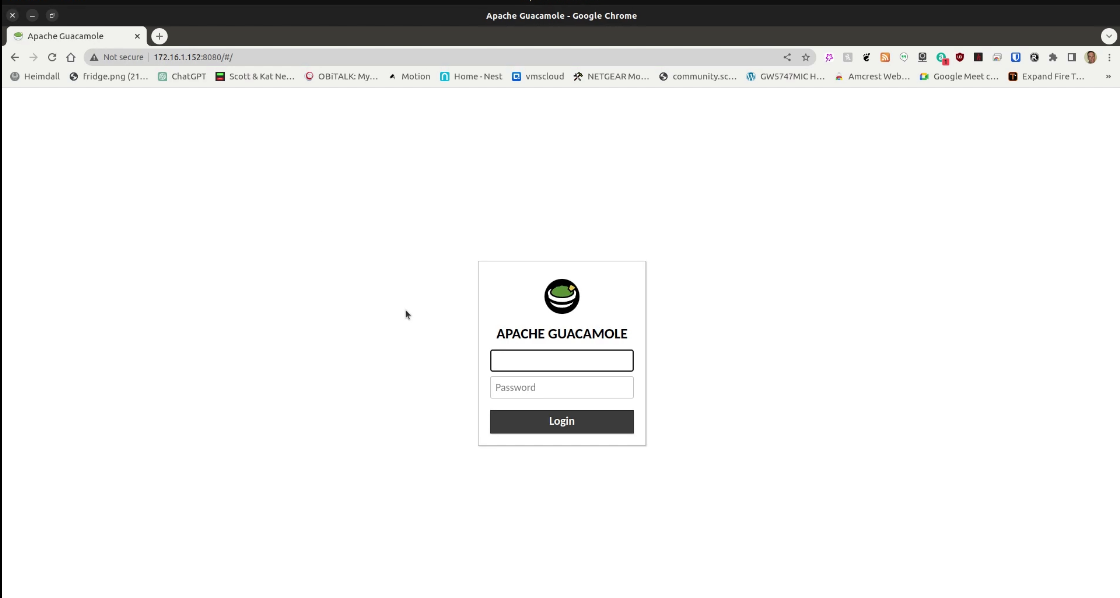
Go to your web browser and you should be able to enter the guacamole interface at the address of your LXD container at port 8080:
http://172.16.1.152:8080
The login credentials are:
Username: guacadmin
Password: guacadmin
When you provide the above credentials, you will be prompted to enter a TOTP 2FA key to set up 2FA on the guacadmin account. I used Bitwarden in the video, but Google or Microsoft authenticator also works:

I recommend creating a new administrator account once you are logged into Guacamole and deleting the original guacadmin account as shown in the tutorial.

For details on creating ssh and rdp client entries, watch the tutorial.
Next, you will want to have a subdomain name for your guacamole instance that you register at your DNS provider. I show in the video how to make the NginX Proxy Manager (NPM) entry for guacamole.
This adds SSL encryption to the embedded terminal/RDP sessions that Guacamole serves.
If you have local DNS configured on your network and you want to use DNS names for your servers in your Guacamole configuration, install resolvconf:
sudo apt install resolvconf
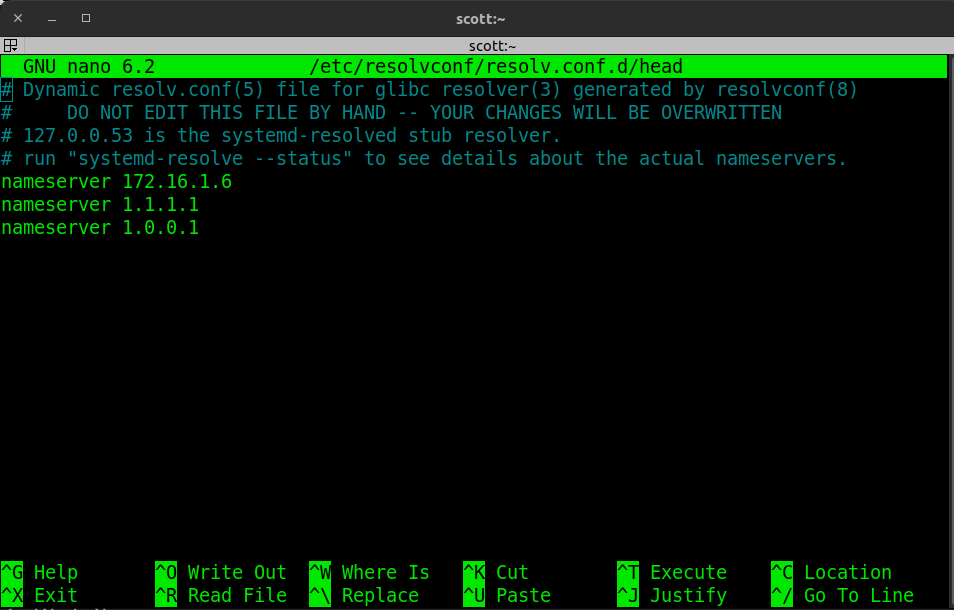
Edit the configuration file and include the local and remote nameservers you want to use:
sudo nano /etc/resolvconf/resolv.conf.d/head
The warning is not applicable as this is the correct location to edit. Here is an example file:
Save the File with a CTRL O and Enter and CTRL X to exit the editor.
Reboot your Guacamole container:
sudo reboot now
When the container restarts, your local DNS resolution should be working.