# ScottiBYTE Incus Backup Utility
**URL:** https://discussion.scottibyte.com/t/scottibyte-incus-backup-utility/1504
**Category:** Uncategorized
**Created:** [May 16, 2026, 6:42am UTC](https://discussion.scottibyte.com/t/scottibyte-incus-backup-utility/1504 "2026-05-16T06:42:06Z")
**Posts on this page:** 4
**Page:** 1
### Author:  [@scott](https://discussion.scottibyte.com/u/scott)
#### Post date: [May 16, 2026, 6:42am UTC](https://discussion.scottibyte.com/t/scottibyte-incus-backup-utility/1504/1 "2026-05-16T06:42:06Z")
This is a comprehensive web-based backup utility for Incus containers and incus VM’s that allows both importing and exporting backups to and from your Incus Servers.
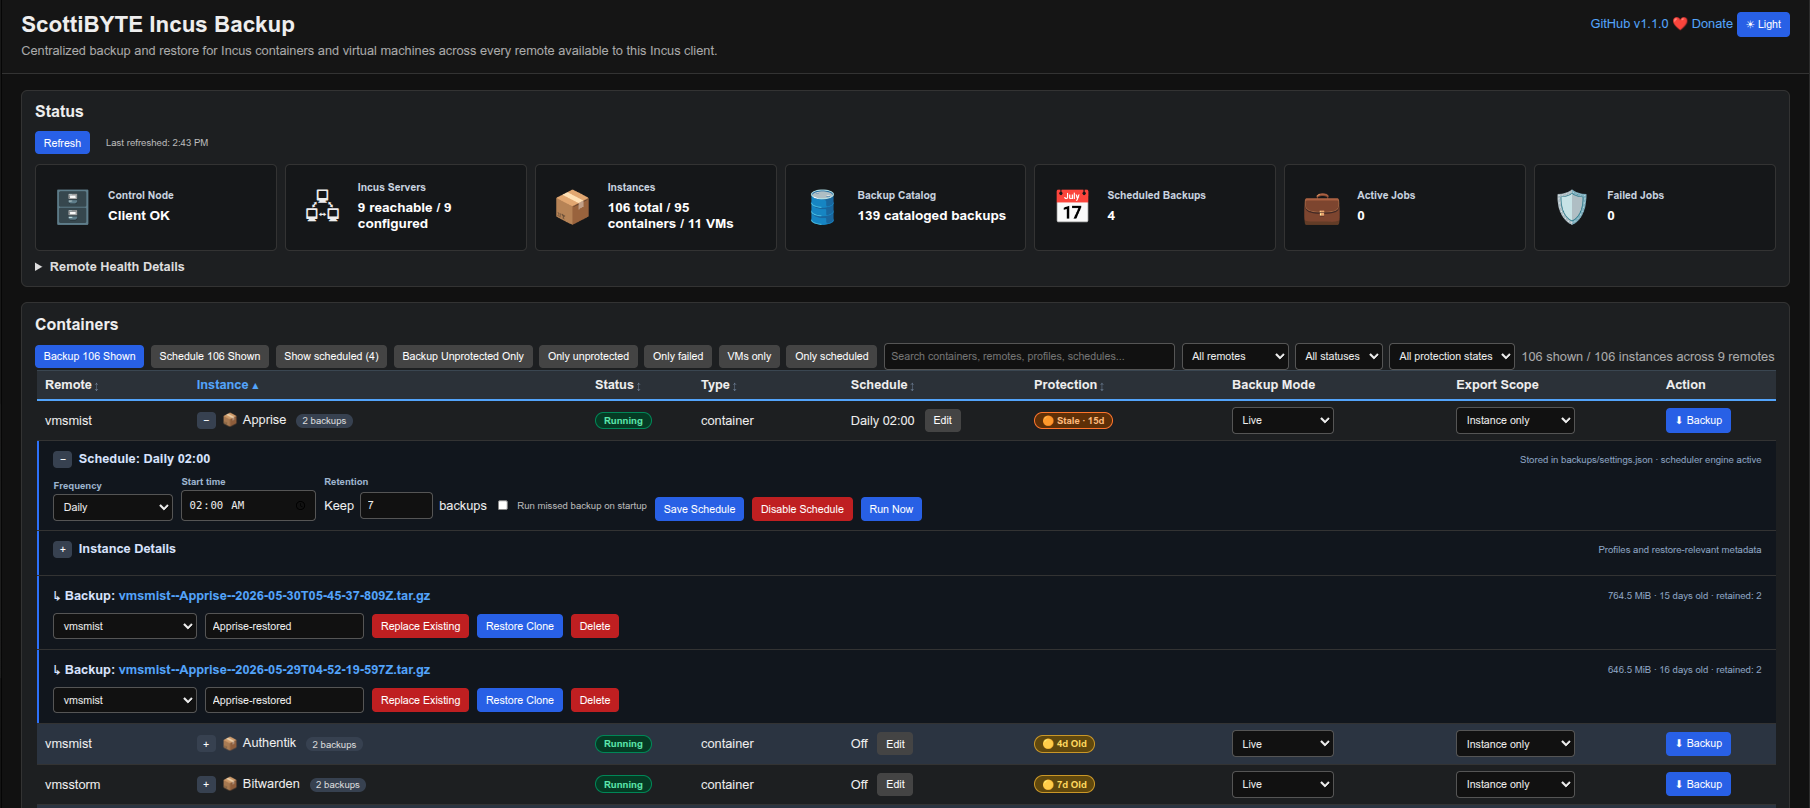
UPDATE: This project has had several enhancements since the video tutorial. You might want to read the release notes [here](https://github.com/ScottiBYTE/incusbackup/releases/). My docker repository is [here](https://hub.docker.com/r/scottibyte/incusbackup). My new features video is [here](https://www.youtube.com/watch?v=BdrBvWDgq-Q) and a screenshot of how it looks now is below. Notably, automated backup schedules are an important addition to this utility.
I created an Incus container to host the application. The required “bridgeprofile” is explained in my [Incus Containers Step by Step](https://www.youtube.com/watch?v=ULPuU9aKyoU) tutorial.
```auto
incus launch images:ubuntu/26.04 IncusBackup -p default -p bridgeprofile -c boot.autostart=true -c security.nesting=true
```
Move inside the new container.
```auto
incus shell IncusBackup
```
Accept the updates and modernize your repository lists.
```auto
apt update && apt upgrade -y
apt modernize-sources
```
Install the required dependencies.
```auto
apt install curl net-tools nano incus-client openssh-server -y
```
Install docker from the script at the docker website.
```auto
curl https://get.docker.com | sh
```
Create a user account and put it the sudo and docker groups.
```auto
adduser scott
usermod -aG sudo,docker scott
```
Log into the new account.
```auto
su - scott
```
Create the required folder structure.
```auto
mkdir -p incusbackup/{backups,uploads} && cd incusbackup
```
Edit the host file and make entries for one or more Incus servers.
```auto
sudo nano /etc/hosts
```
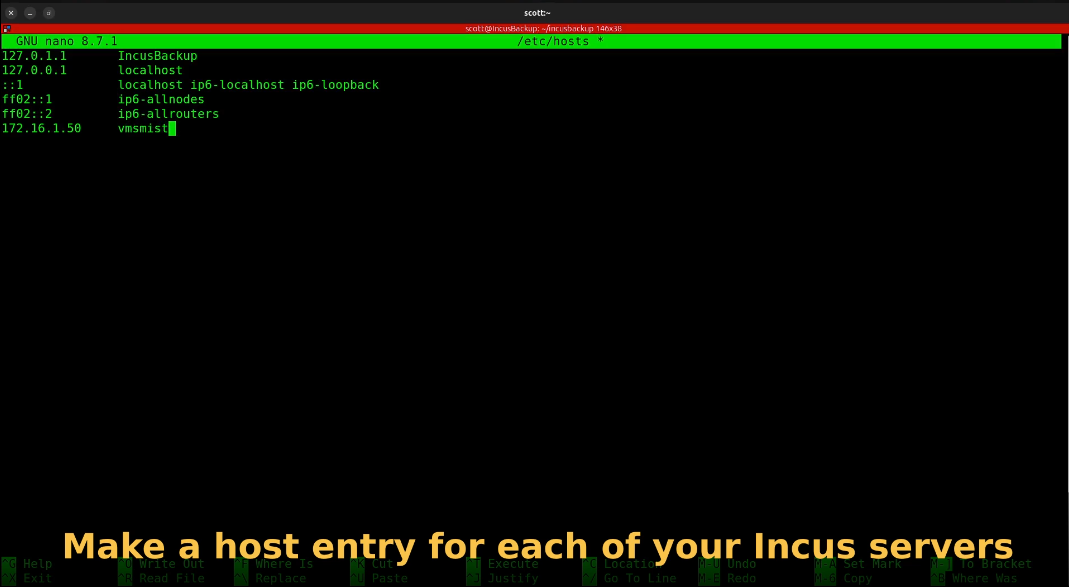
We need to create a trust for this incus container so that it is allowed to access the Incus server. I start by adding a trust on vmsmist via ssh. Your server name (vmsmist) will differ.
```auto
ssh vmsmist "incus config trust add IncusBackup"
```

I add the remote server using the certificate above. Be sure to change “vmsmist” to your Incus server name in both places in the following command.
```auto
incus remote add vmsmist https://vmsmist:8443 --accept-certificate
```

You can always see which servers with which you have trusts with the following command:
```auto
incus remote list
```
Follow the video to see me perform establishing a trust.
If you have more than one incus server you want to manage backups on, simply repeat the process for each above to establish the trusts.
Create a docker compose file.
```auto
nano compose.yml
```
Insert the following into the file.
```auto
services:
incusbackup:
image: scottibyte/incusbackup:latest
container_name: incusbackup
restart: unless-stopped
ports:
- "80:3030"
environment:
PORT: "3030"
INCUS_CONF: /incus-client
INCUS_BACKUP_DIR: /app/backups
INCUS_COMPLETED_JOB_TTL_MS: "180000"
volumes:
- ./backups:/app/backups
- ./uploads:/app/uploads
# Read-only host Incus trust mount
- ${HOME}/.config/incus:/incus-client:ro
security_opt:
- no-new-privileges:true
healthcheck:
test: ["CMD", "curl", "-f", "http://localhost:3030"]
interval: 30s
timeout: 10s
retries: 3
labels:
- "com.centurylinklabs.watchtower.enable=true"
```
Run the following command to download the container overlays from docker hub to create the container and start the application.
```auto
docker compose up -d
```

Check the status.
```auto
docker ps
```

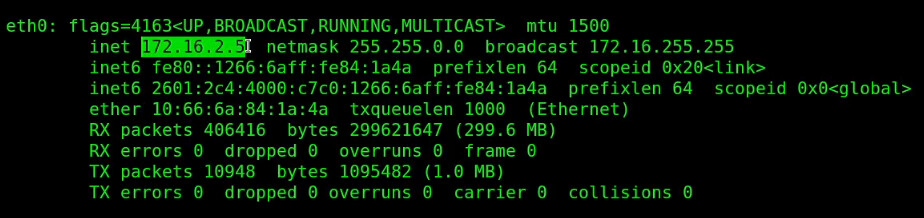
Find out the address of your container.
```auto
ifconfig
```
Look for the address of your eth0 device. Yours will differ.
Put that address into your web browser and you should be directed to the web interface.
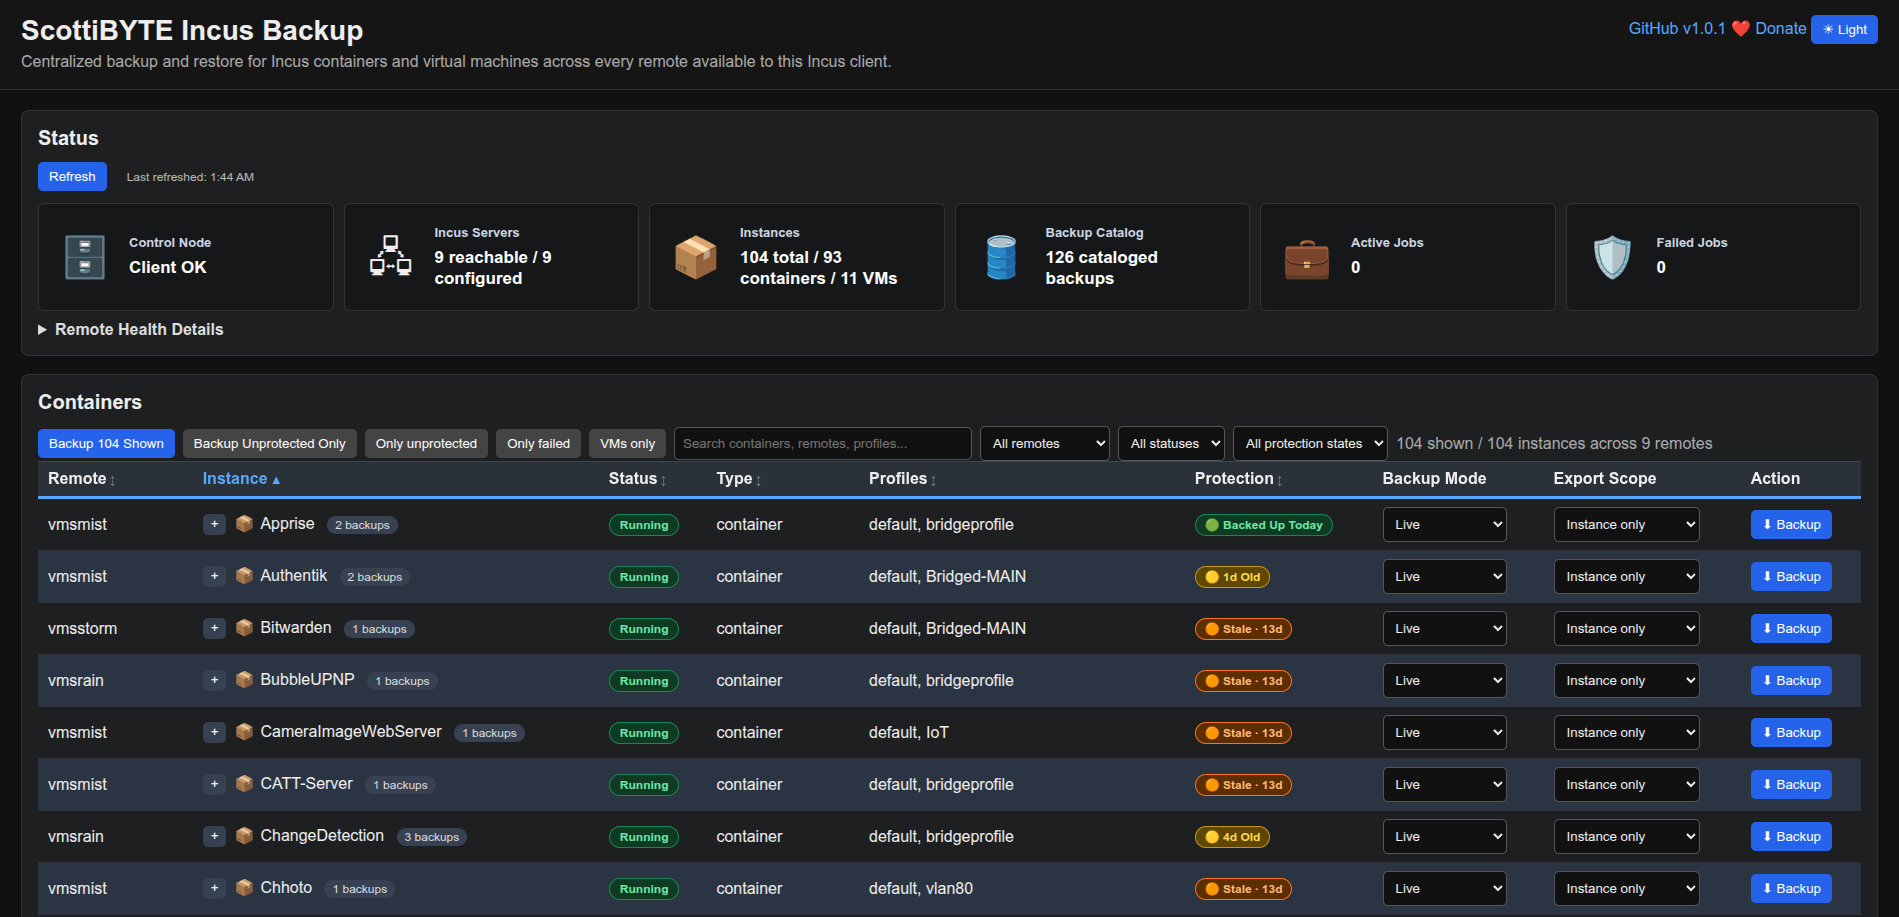
Realize that at this point each time you create a backup, it will go into the “backups” folder in the Incus Backup Utility container.
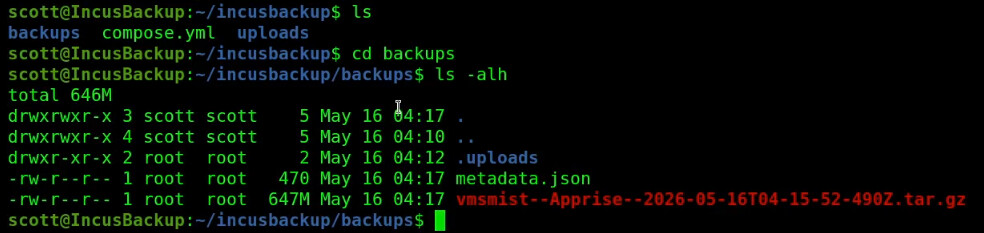
This is not ideal because you really want your backups to be stored outside of Incus for security and practical reasons. Realize that each backup will increase the size of the “incusbackup” container and the space comes out of your default storage pool.
To avoid this, log on to your incus server and create a folder in your home directory.
```auto
mkdir incusbackup
```
Incus lets you “map” a folder inside of an incus container back to the incus server on which it is hosted. As an example, the folder above is now “/home/scott/incusbackup”. We already know that the container has a folder named “/home/scott/incusbackup/backups”. So, the command to map them to each other is performed on your Incus server where the “IncusBackup” container is hosted.
```auto
incus config device add IncusBackup backup disk source=/home/scott/incusbackup path=/home/scott/incusbackup/backups
```
Realize that you need to change the “scott” username in the command above in both places to your username.
With this mapping, the incus server can store data on the container, but the container cannot store data back and our application needs to have write access. If you followed my “incus containers step by step” tutorial then your user ID on the server is 1000:1000 and the username you created on the container is 1001:1001.
The following two commands provide the privilege for the container to write files back to the incus host.
```auto
echo "root:1000:1" | sudo tee -a /etc/subuid /etc/subgid
incus config set IncusBackup raw.idmap="both 1000 1001"
```
The last thing we need to do is to restart the incus container to make this all work.
```auto
incus restart IncusBackup
```
Now when you do backups, they will be stored on the Incus host in the “incusbackup” folder inside your home folder.
If you want to take this a step farther, establish an NFS export on a NAS on your network. Then you can use the “incusbackup” folder on the Incus server as a mount point for your NFS service.
Creating the NFS export on your NAS is outside the scope of this tutorial. Assuming you know how to do that, you can then edit your file systems table on your Incus server to mount the NFS volume.
```auto
sudo nano /etc/fstab
```
Then you would insert a line somewhat like the following depending on your server.
```auto
172.16.1.58:/incusbackup /home/scott/incusbackup nfs vers=3,proto=tcp,hard,intr,nofail,_netdev 0 0
```
Assuming your have the above mapped to your NAS correctly, you can then see if it will mount,
```auto
sudo mount -a -t nfs
```
If it worked, then you will have to restart your incus container once again.
```auto
incus restart IncusBackup
```
Now, when you do backups in the ScottiBYTE Incus Backup Utility, the backup files would be stored on your NAS. That would be ideal.
I hope you enjoy this utility and it took me a long time to create.
---
### Author:  [@marti45](https://discussion.scottibyte.com/u/marti45)
#### Post date: [May 23, 2026, 3:15pm UTC](https://discussion.scottibyte.com/t/scottibyte-incus-backup-utility/1504/2 "2026-05-23T15:15:50Z")
Hello,
I’m testing incusbackup on my incus homelab.
I managed to install the tool under a LXD Nixos (I prefer to Ubuntu;-) for the reproducible side, in Rootless too).
I’m getting to the home page. However I have an error message: “Command failed. incus client version”.
I am in version 7.0.0 and it is incompatible with version 6.0.0 installed inside the docker.
Otherwise, does the tool help to save the configuration of the incus server?
Thank you for this work. I hope to use it soon. It is true that the safeguard with incus is not very complete. This tool is welcome
From France
---
### Author:  [@scott](https://discussion.scottibyte.com/u/scott)
#### Post date: [May 23, 2026, 3:22pm UTC](https://discussion.scottibyte.com/t/scottibyte-incus-backup-utility/1504/3 "2026-05-23T15:22:13Z")
As shown in the video, don’t install incusbackup on your incus server. Create a container to install incus backup. That can be an ubuntu container and that instance will be incus client version 6.0.5 which is a requirement for the docker container. The tool backs up incus containers and incus VMs. It does not back up the configuration of the server. Use Timeshift for that. Ask questions in the chat at [https://chat.scottibyte.com](https://chat.scottibyte.com) please.
---
### Author:  [@marti45](https://discussion.scottibyte.com/u/marti45)
#### Post date: [May 26, 2026, 12:17pm UTC](https://discussion.scottibyte.com/t/scottibyte-incus-backup-utility/1504/4 "2026-05-26T12:17:39Z")
Ok Thank you, finally I managed to make it work with an LXC under Nixos and with the incus-lts version 6.0.6 👍