# It's Always DNS in Containers or on Desktops for that Matter
**URL:** https://discussion.scottibyte.com/t/its-always-dns-in-containers-or-on-desktops-for-that-matter/627
**Category:** Uncategorized
**Created:** [May 14, 2025, 11:15pm UTC](https://discussion.scottibyte.com/t/its-always-dns-in-containers-or-on-desktops-for-that-matter/627 "2025-05-14T23:15:31Z")
**Posts on this page:** 2
**Page:** 1
### Author:  [@scott](https://discussion.scottibyte.com/u/scott)
#### Post date: [May 14, 2025, 11:15pm UTC](https://discussion.scottibyte.com/t/its-always-dns-in-containers-or-on-desktops-for-that-matter/627/1 "2025-05-14T23:15:31Z")
In this tutorial we learn how to make local DNS work properly on your incus/LXD containers or even on desktops.
Local DNS makes life easier in your Home Lab by not requiring you to memorize addresses for every one of your systems and containers. I like using Pi-hole and Pi-hole is much more than just an ad-blocker. Pi-hole is an easy-to-user powerful local DNS for your Home Lab.
If you haven’t already seen them, I have the following tutorials on using Pi-hole as your local network DNS:
[Pi-Hole In Incus](https://www.youtube.com/watch?v=p_I1E5F1Y00)
[Mirrored Pi-holes](https://www.youtube.com/watch?v=WkmL96mXfbw)
[NginX Proxy Manager and Local DNS](https://www.youtube.com/watch?v=26OF6_6i9bc)
[Windows DHCP & Local DNS](https://www.youtube.com/watch?v=wNq7J7Qs1w0)
[High Availability Pi-Hole & Local DNS](https://www.youtube.com/watch?v=B5bWkvZuYKQ)
[Add a New Pihole to the Homelab](https://www.youtube.com/watch?v=EY9rM1zGZOQ)
Let’s start by creating an Incus container and bridging it to our main LAN for an address on the main LAN. This assumes that you watched my [Incus Containers Step by Step](https://www.youtube.com/watch?v=ULPuU9aKyoU) tutorial.
```auto
incus launch images:ubuntu/24.04 Test -p default -p bridgeprofile -c boot.autostart=true
```
Move inside of the new container:
```auto
incus shell Test
```
We are running as the root user and so there is no need for sudo commands. The super-user in Linux is called the root user because root owns the entire file system from the root (/). In Linux everything is a file and if you own all files, you are all powerful.
When you install a new Linux OS or create a container, the first thing you should do is update all of your repositories and accept all of the pending updates:
```auto
apt update && apt upgrade -y
```
Let’s install some dependencies. The net-tools package provides some network utilities. The dnsutils package adds some of the commands we will need for this tutorial. The openssh-server package lets you use ssh to connect to this container from your network rather than having to use “incus shell”. Note that you will need to add a user account for ssh since ssh by default is not enabled for the root user. I also add the nano editor for convenience in editing files:
```auto
apt install net-tools dnsutils openssh-server nano -y
```
Most Linux operating systems use one of two DNS resolvers. Resolvconf is the older of the two mechanisms to resolve DNS names and the newer and more common method for DNS resolution is systemd-resolved.
You can check to see if systemd-resolved is running with:
```auto
sudo systemctl status systemd-resolved
```
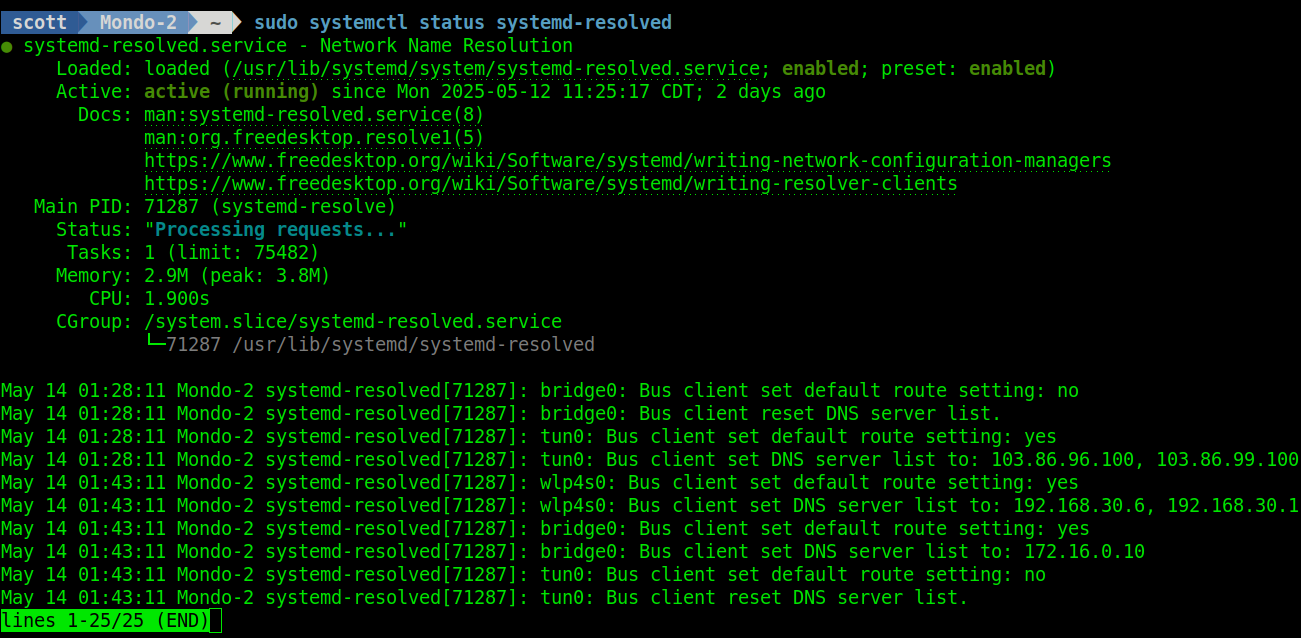
You can see if you are running resolvconf with:
```auto
sudo systemctl status resolvconf
```

Some systems “mask” resolvconf to make sure that it does not conflict with systemd-resolved.

For the purpose of this tutorial, we are using systemd-resolved.
A simple way to see the settings for your DNS resolution is the command:
```auto
resolvectl status
```
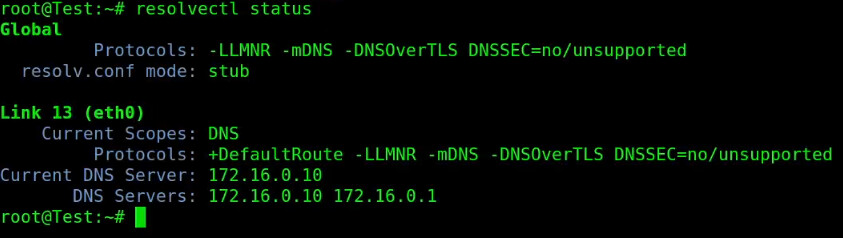
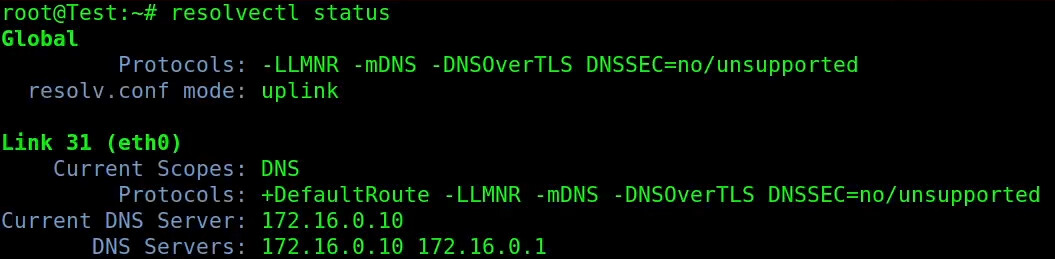
On my network, 172.16.0.10 is the address for my Pi-hole and this is where my local DNS records are defined. If that address is not available, 172.16.0.1 is the default gateway on my router and it can resolve DNS names, though not local DNS names.
The 172.16.0.10 and 172.16.0.1 addresses came from my DHCP server because my incus container receives DHCP addresses from my main LAN (my router).
You would think that with these values, that local DNS translation would be working. However, the resolv.conf mode of “stub” in the “resolveconf status” listing actually prevents local LAN DNS resolution.
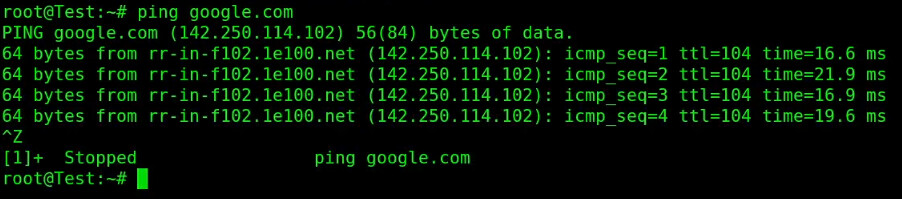
However, public internet DNS names are correctly translated:
You can also see that global addresses are translated with nslookup:
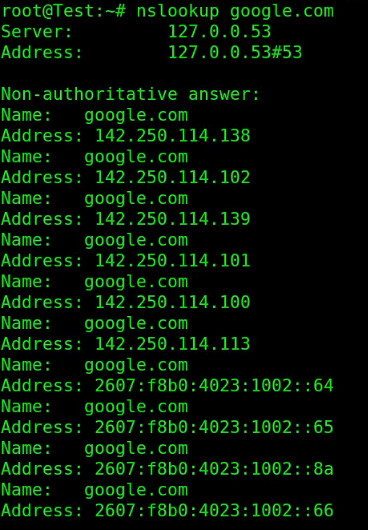
However, a local DNS lookup from the Pi-hole for vmsmist which is one of my incus servers that is defined on my Pi-hole is not working.
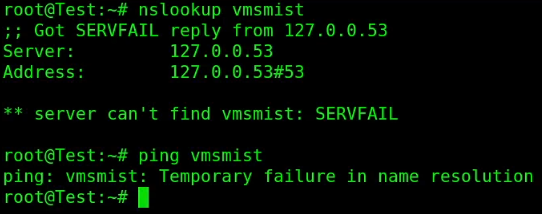
This is really because DHCP sets its DNS addresses using the legacy resolvconf files and systemd-resolved is not pointing to those.
Another way to test DNS translation is via a utilitiy called “dig” which is Domain Internet Groper.
```auto
dig vmsmist
```
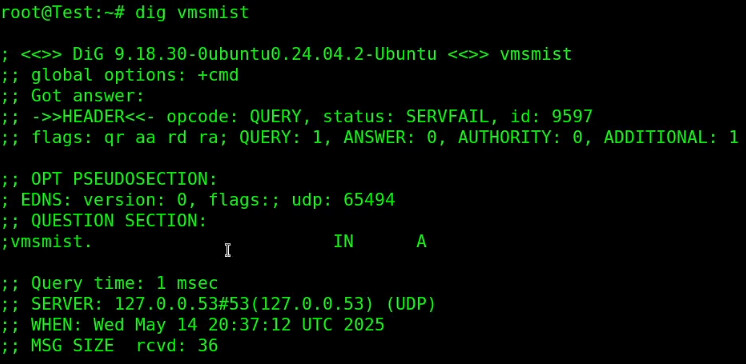
Note that “dig” still could not translate the local DNS name because systemd-resolved is not pointing the the proper DNS resolver configuration.
The “dig” utility has an awesome feature whereby I can ask my DNS server at the address 172.16.0.10 if it even has an address for vmsmist:
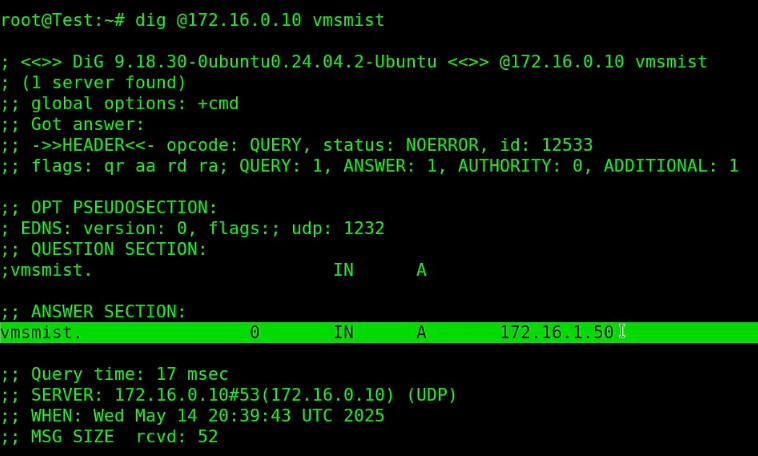
As you can see from the “dig” command above, the Pi-hole does know that vmsmist is at 172.16.1.50. Our problem is that systemd-resolved is operating in “stub” mode which means it is using the stub file for the DNS configuration. Note that the symbolic link for resolv.conf is pointing to the stub file and that file has no entries in it.
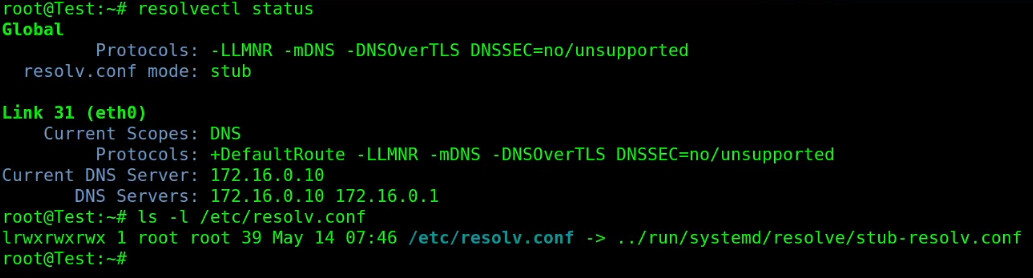
To fix this, we simply change the symbolic link to point to the file that DHCP is using.
```auto
ln -sf /run/systemd/resolve/resolv.conf /etc/resolv.conf
```

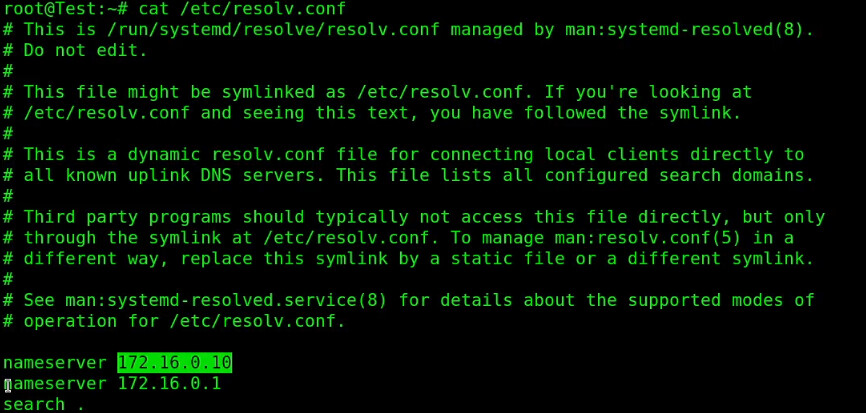
If you list the contents of the /etc/resolv.conf that we are now pointing to, you will see that it has the proper settings;
```auto
cat /etc/resolv.conf
```
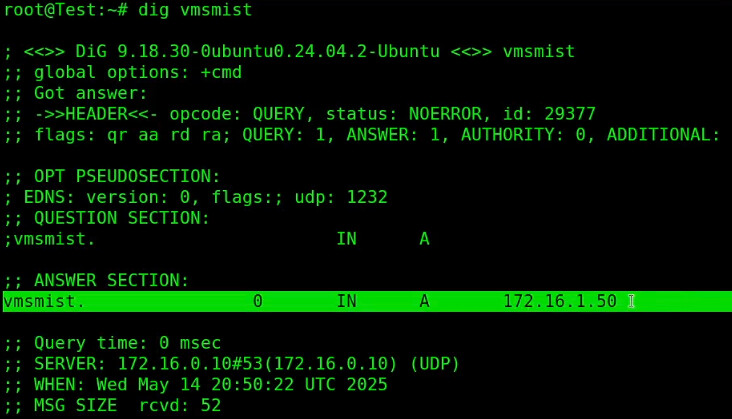
Now I can “dig” vmsmist and we get the proper A record for vmsmist.
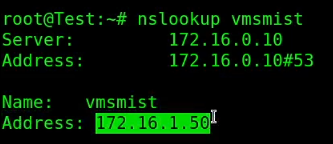
Nslookup also works now.
To restate, the values in /etc/resolv.conf are the ones coming from the DHCP server.
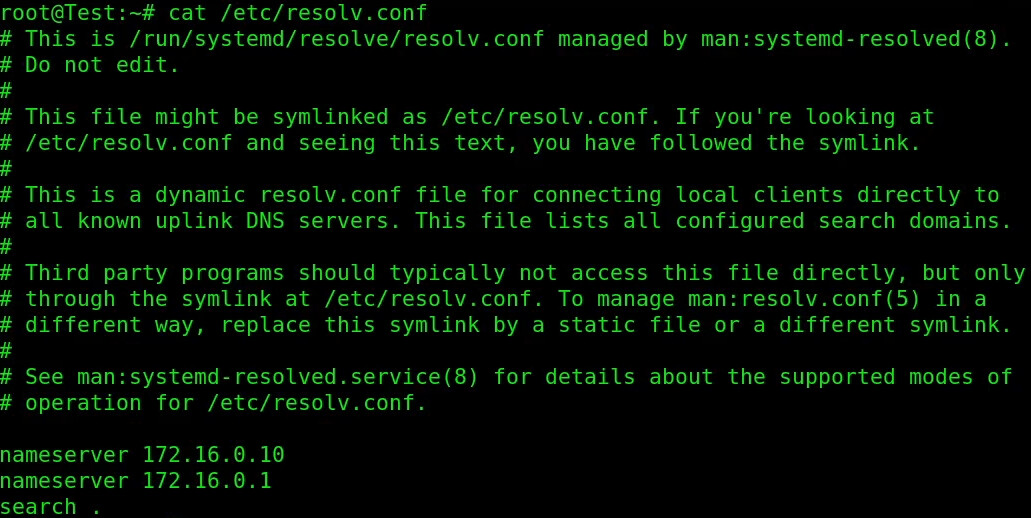
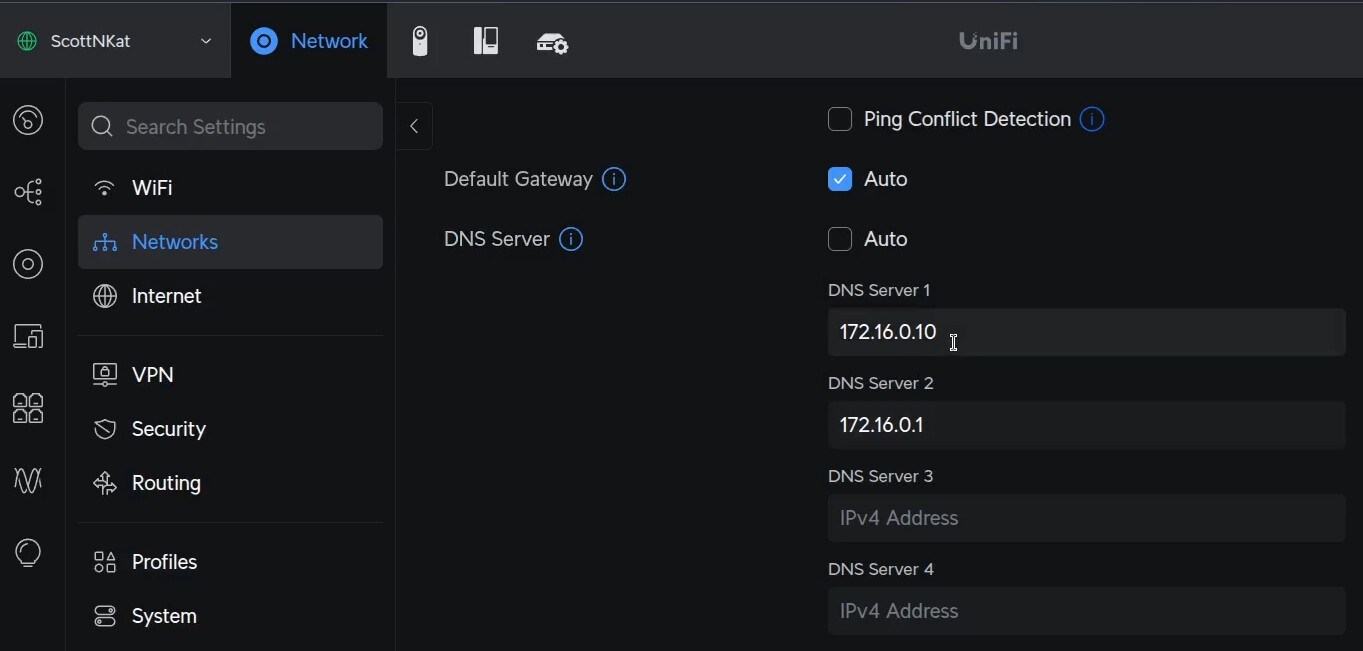
These values come from the DHCP settings from my router which is a Ubiquiti UDM Pro. All routers have similar settings. If you are using a Pi-hole, you would have set your first DNS server address to be the address of your Pi-hole.
If you do another “resolvectl status” you will see that the resolv.conf mode has been changed from “stub” mode to “uplink” mode. Changing the symbolic link is what made the change.
```auto
resolvectl status
```
Often having working DNS is the key to fixing network & system communication issues.
---
### Author:  [@snovotill](https://discussion.scottibyte.com/u/snovotill)
#### Post date: [October 11, 2025, 6:30am UTC](https://discussion.scottibyte.com/t/its-always-dns-in-containers-or-on-desktops-for-that-matter/627/2 "2025-10-11T06:30:56Z")
This works great on the host but I’m not having any luck with this inside OCI containers that use host networking. In that case what I want to do is to overwrite the /etc/resolv.conf file inside the container with the split DNS equivalent in the host like this:
```auto
$ incus config device add homeassistant resolvconf disk source=/run/systemd/resolve/stub-resolv.conf path=/etc/resolv.conf readonly=true
```
So that in the container I will then see:
```auto
$ cat /etc/resolv.conf
nameserver 127.0.0.53
options edns0 trust-ad
search incus private.lan
```
But the container somehow manages to overwrite the file even though it was imported Read Only.
That makes it impossible to easily use neighboring container hostnames from within the container. I’ve posted a more detailed description [here](https://discuss.linuxcontainers.org/t/possible-bug-mapping-ro-file-into-oci-container-incus-6-17/24960) prior to filing any bug reports.